- Published on ·
- Reading time 14 min read
Raise Money Easily With Raisely
Create a fundraising website with no code
Share this page

Introduction
As a charity, it can be a daunting task to create a website and raise funds through it, let alone the thousands of dollars you'd have to pay engineers to create and maintain the website, the amount of time and effort that'd go into it, all just to create one appeal page.
Raisely is an online fundraising platform for ambitious charities across the world. As a for-purpose social enterprise, they empower thousands of charities across the world to take control of their revenue and improve the well-being of people and our planet.
In this article, we'll take a look at setting up Raisely for your campaign so that you can raise money for your campaign with ease. At a high level, here's what we'll cover.
- Get started: We'll start by taking a look at how to sign up for Raisely and set up a campaign.
- Onboarding: Next, we'll take a look at the Raisely dashboard and how to navigate around it.
- Updating content: We'll use Raisely's editor to make content updates to our site.
- Branding: In this section, we'll look at how we could about updating the branding of our campaign website to match the branding of the organisation that's running the campaign.
- Accepting payments: Here, we'll set up a payment gateway provider so that you can start accepting payments for your campaign.
- Custom domain: By default, Raisely provides you with a unique website URL, but in this section, we can take a look at setting up a custom domain for your campaign website so that's easily memorable.
- Organisation-wide settings: Finally, we'll take a look at what organisation-wide settings are available for us to update.
Get started
Visit Raisely.com and click on the Sign up for free button to get started.

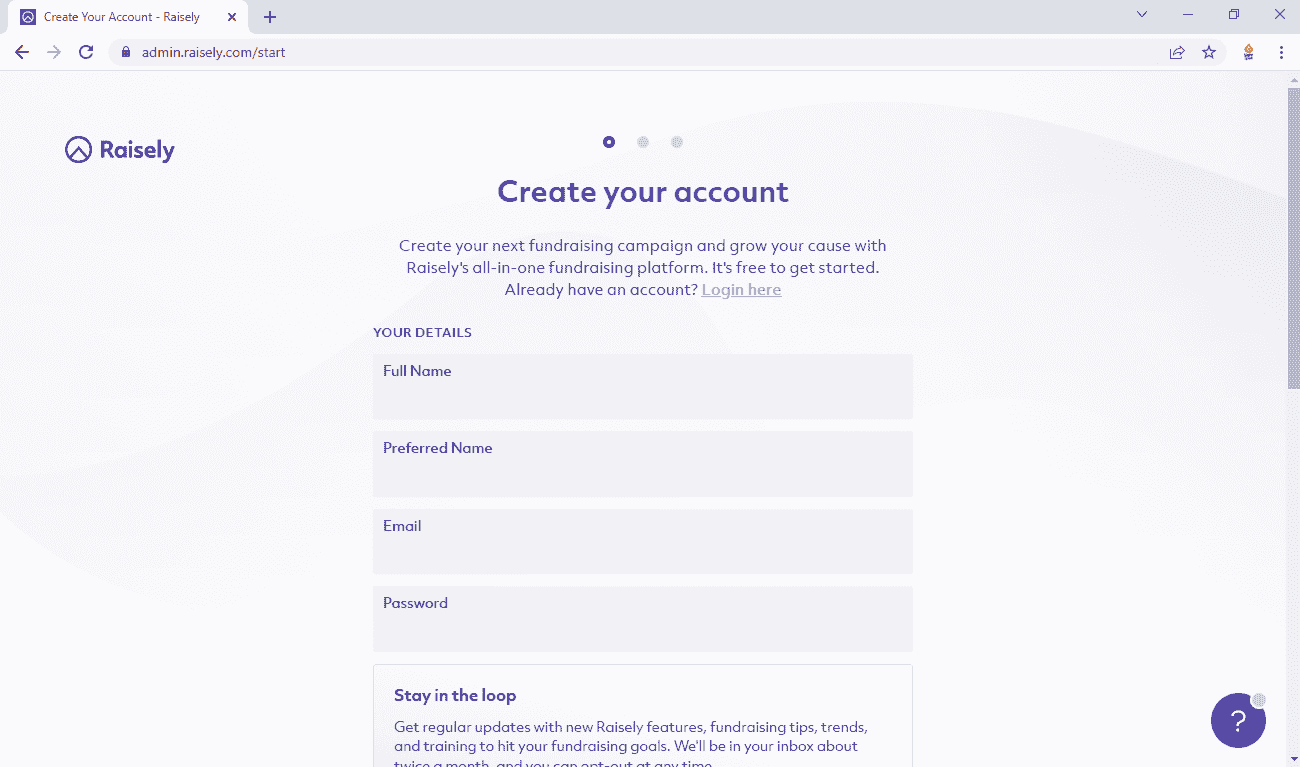
To create your account, you'll need to enter your details and your organisation details. As mentioned on this page, you'll need to be a charity, non-profit or community organisation.
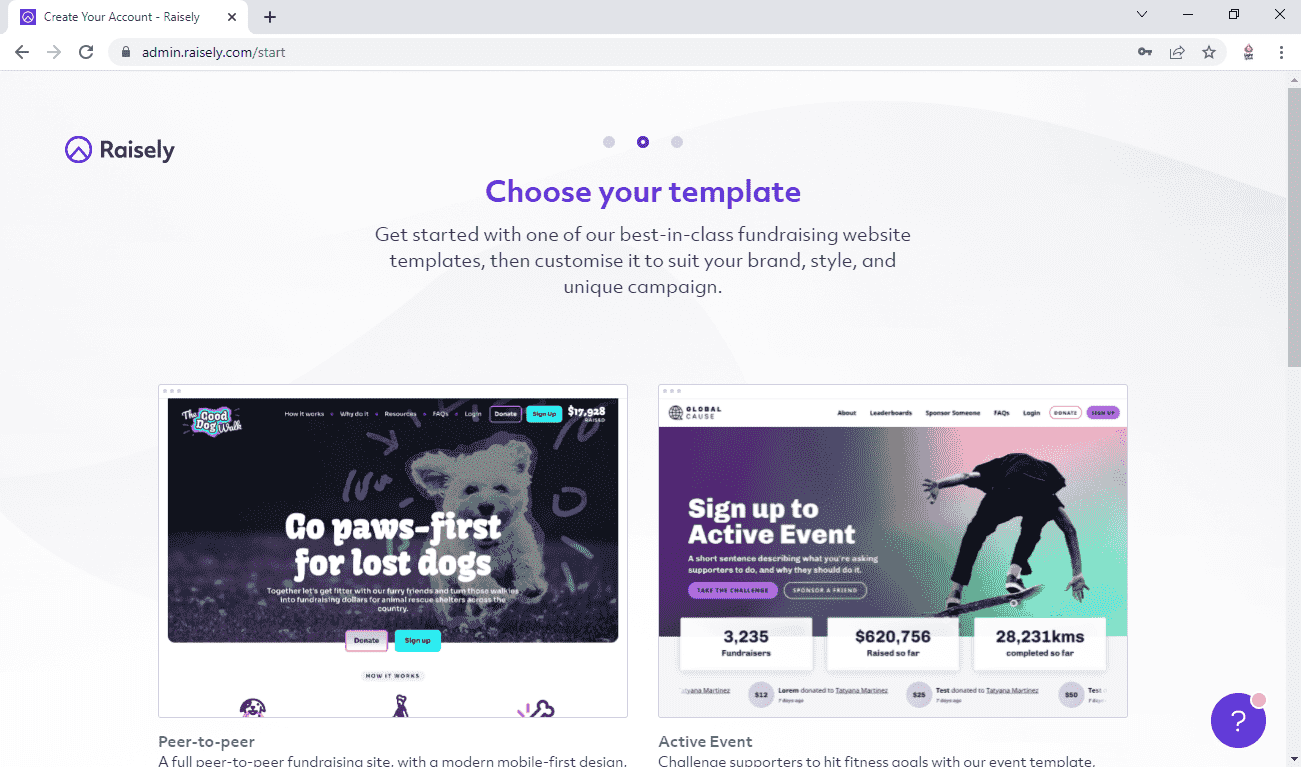
The next step is to select a template that suits your needs the most. Basing your site on a template gives you a headstart and all you might need to do is make some content updates. For this example, we'll select the peer-to-peer template.
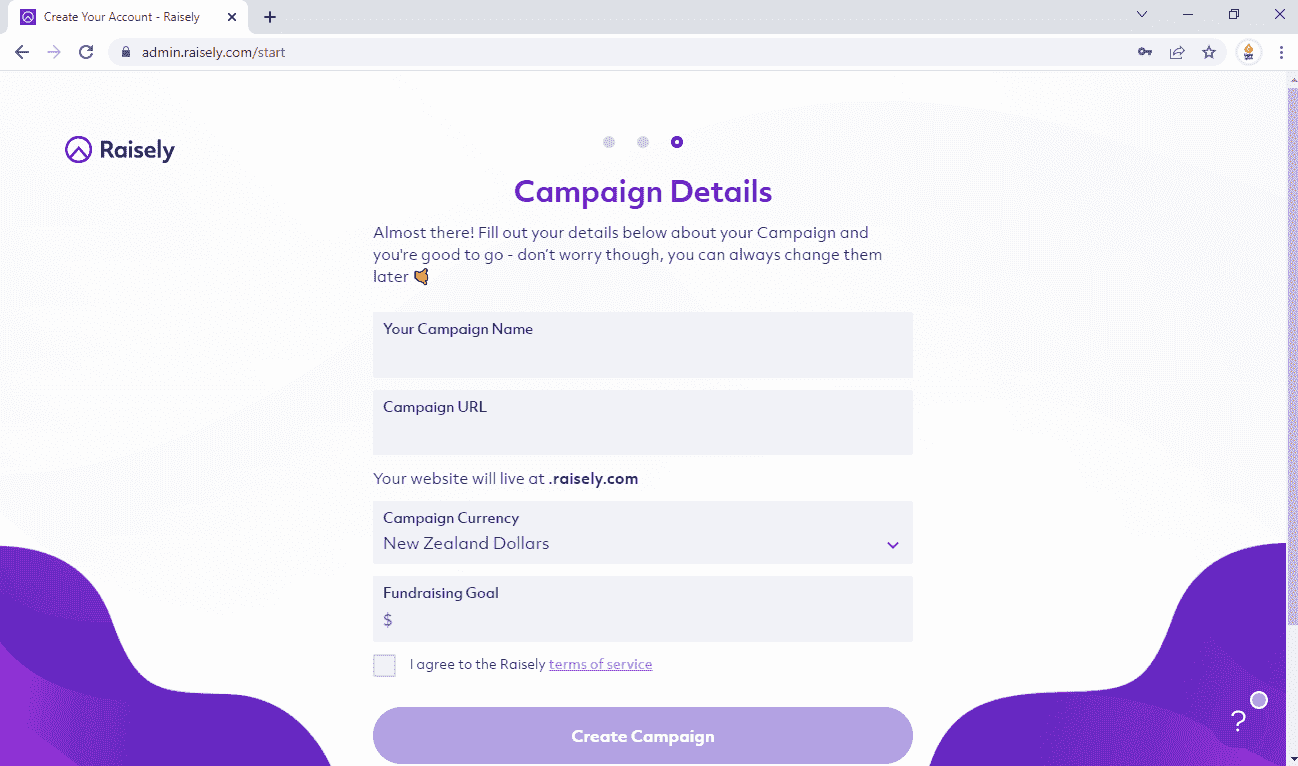
The third step here is to enter your campaign details. A campaign is a fundraising campaign where you set a goal and enter the campaign details. You'll also provide a unique URL where your campaign website will be available.
The way Raisely is structured is that each organisation can have multiple campaigns and each campaign sits in its own unique URL.
Once you've created your first campaign successfully, you can always create another one at any time in the future.
After clicking on the Create Campaign button, it will start the process of creating your website. You will also need to verify your email before proceeding further.
Onboarding

Section 1
- Dashboard: The dashboard gives you a quick insight into how your campaign is doing.
- Pages: This is where you'll go to update the content of your website and even add more pages to your website. In the next section, we'll get into how to go about updating this content.
- Blog: Similar to pages, but this section is dedicated specifically to blog posts. All blog posts can be rolled up into a single feed and can be displayed on any page on your website. Each blog post will get a unique URL too, so they can be viewed as a standalone page.
- Design: This is where you'll go to update the branding on the website, update fonts, and style buttons, and add some custom CSS.
- Messages: If you need to customize the messages that get sent out to your donors, then you'll be able to do so from this place.
- Profiles: See all the profiles created on your campaign website.
- Donations: See all donations made to your campaign on this page.
- Reports: Run various types of reports.
- Settings: Configure various other campaign-wide settings like the goal, connect a different payment gateway, add a custom domain name for the site, set up badges for fundraisers, and a lot more.
- Live Site (Test): To view what your site looks like, click on this link to open it in a new tab.
Section 2
Depending on what option you click on from the left sidebar, the configurable contents will be displayed in this section. For instance, if you click on Pages, this section will show all the pages
Section 3
- Under review: The account will usually be under review for at least 24 hours. You can only connect a sandbox payment gateway during this time.
- Organisation: Click on this link will open organisation-specific settings where you can update your organisation details, add team members, configure billing information, add media content, add custom components, and a lot more.
Updating content
Click on Pages from the left sidebar → Click any one of the tiles which are existing pages. We'll click on Home in this example → This should open up the home page in Raisely's page builder. This allows us to update the content right from this screen itself. For instance, if you need to update the banner text, click into the text area itself and it should become editable.
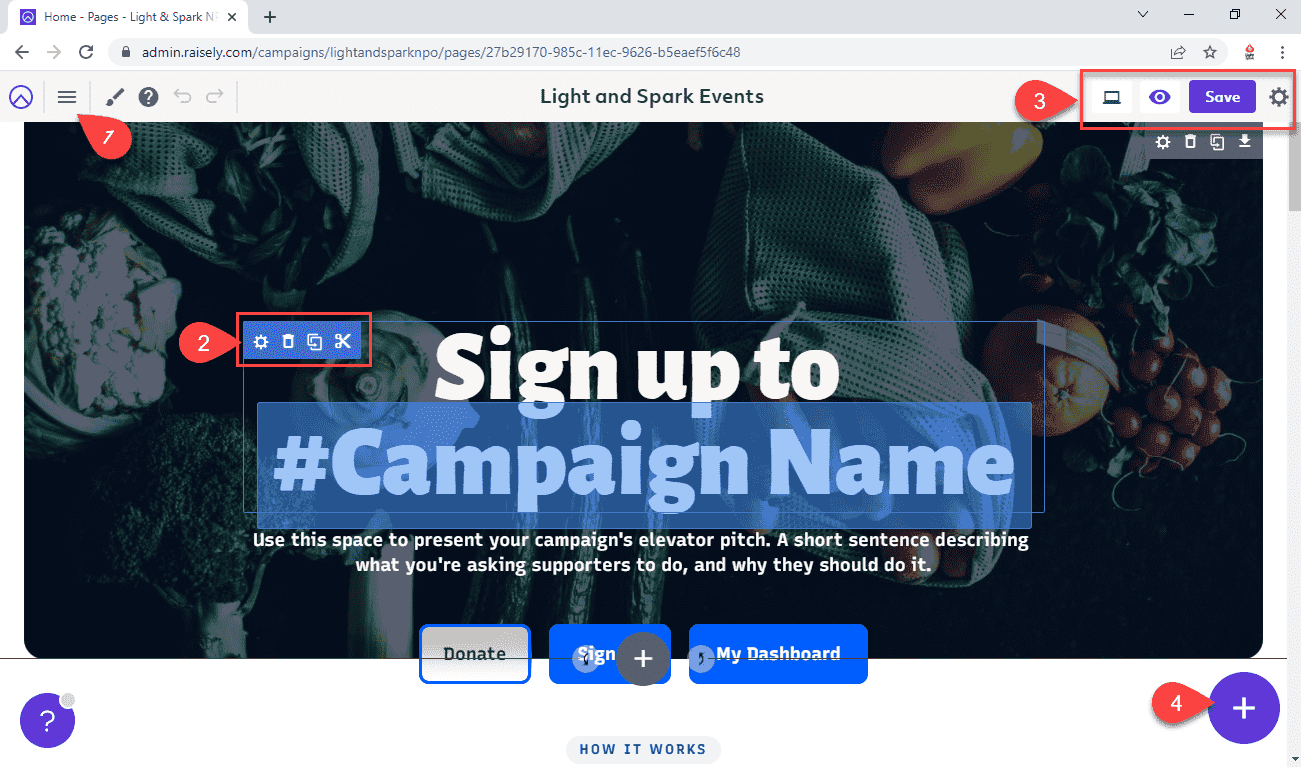
The page builder is divided into the following sections:
- Hamburger menu: This will open up a list of other pages to quickly navigate to.
- Toolbox: Clicking any content in the page builder will show you this toolbox. From this toolbox, you can configure the widget further, clone it, delete it, or cut it.
- Save and preview: Always hit the Save button after making any changes to the page. If you'd like to preview your changes without saving and publishing, click on the eye icon. Finally, click on the settings (i.e. gear) icon to update the site-level settings.
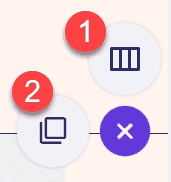
- Add: Clicking on the plus button icon from the bottom right opens up two more options: one to add a new block and the other to add a new template column. We'll get into this later in this article.
Configure a widget
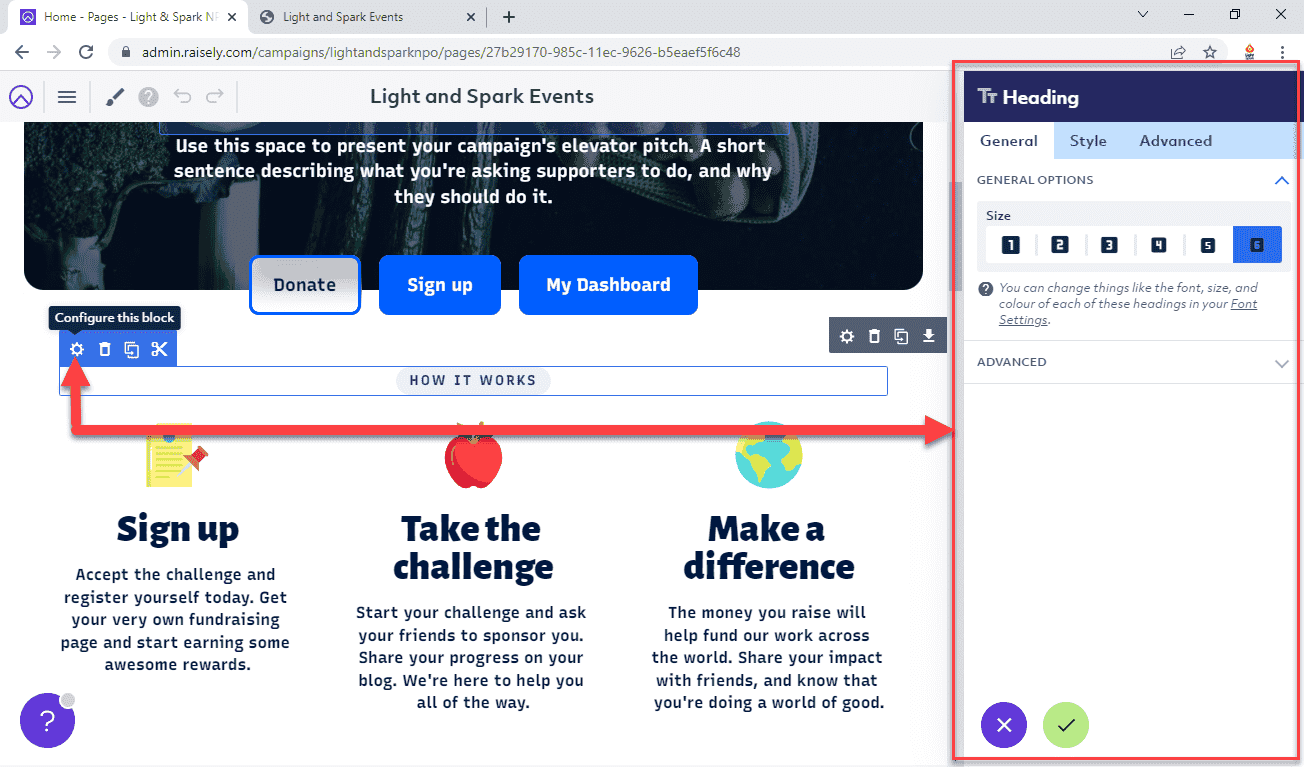
Clicking on each widget opens up a toolbar that has the option to configure the widget. Every widget type will have a different set of configurable items. For instance, as shown in the screenshot below, clicking on the configure button on a text widget should open up the Heading widget. This allows you to update the style of the text to different styles. You can click on the save (tick icon) or cancel (cross icon) button at the bottom of the section.
Hashtags
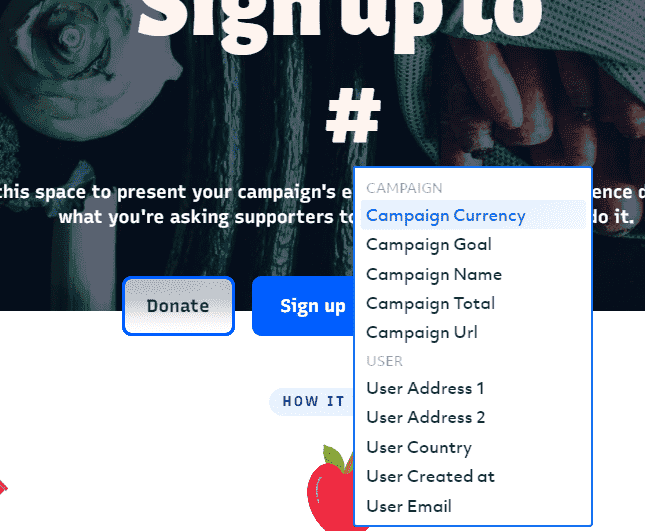
You can use the hash symbol to open up a list of reserved words that will get replaced by its value at runtime supplied by Raisely. For instance, entering #Campaign Name in the page builder will result in the campaign's name being printed out when you view the live version of the web page in a browser.
Adding new rows
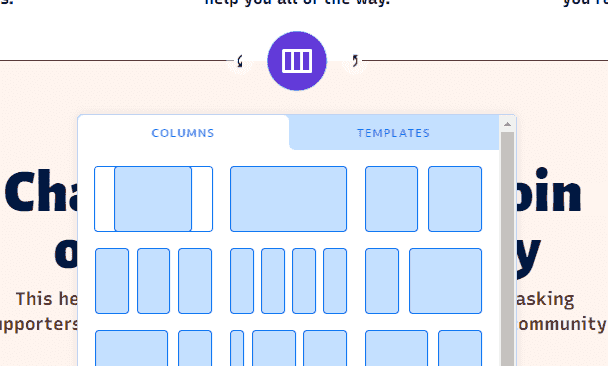
When you scroll down a page, you should see a big plus icon button pop in at different places throughout the page. That's the button you'd want to click if you need to add a new row to your page. If you click on that, it will present you with a quick modal to choose the structure of your new row. These are predefined columns that come built-in. Once added, you can then fill some content inside these columns.
You can also save your oww row configuration as a template and then click on Templates from this modal to quickly add your custom ones.
Adding new blocks
Once you've added a row, you'd want to add some blocks or widgets to it. That's when you'd need to click on the plus icon on the bottom right of the screen and then select:
- Templates: You can create pre-built content blocks and save them for future use. These are called Templates. This is great if you're reusing this on multiple pages and don't have to recreate it every time.
- Blocks: To add a new block or widget to the page.
Let's click on Blocks and that should bring up a modal that looks something like the screenshot below. As evident, there are heaps of pre-built blocks or widgets that perform certain functionality. We'll search for HTML in this example.
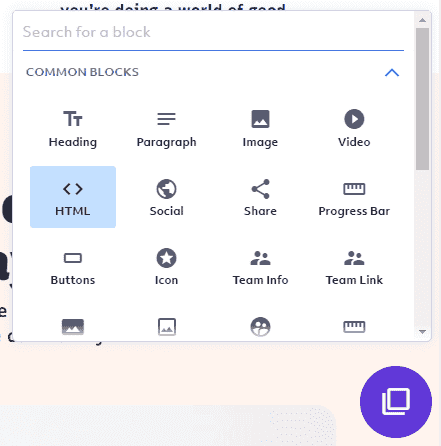
This will filter the results and we can now click on HTML.
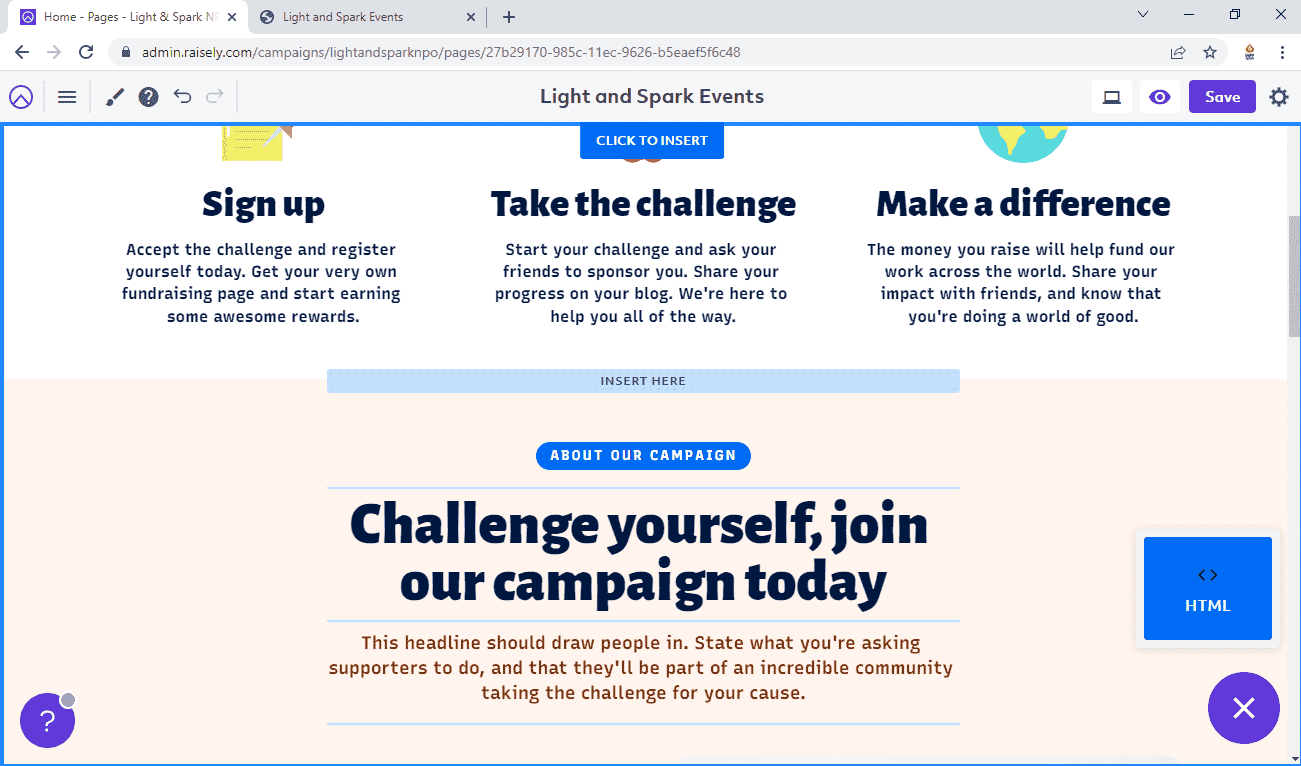
This should insert an HTML block into the page as shown in the screenshot below. Clicking on the configure option from the toolbar will slide open the block's configuration panel where we can further customize our block.
Branding
Now that we're done with adding content, it's time to update the branding of this campaign website to match our organisation. Click on your campaign → Then click on Design.
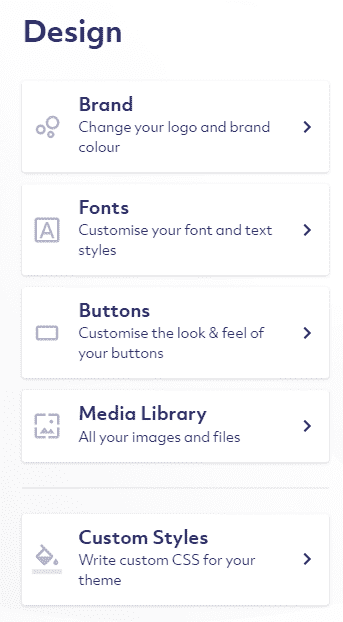
We'll start with general brand settings. So, we'll click on Brand from the list of Design settings.
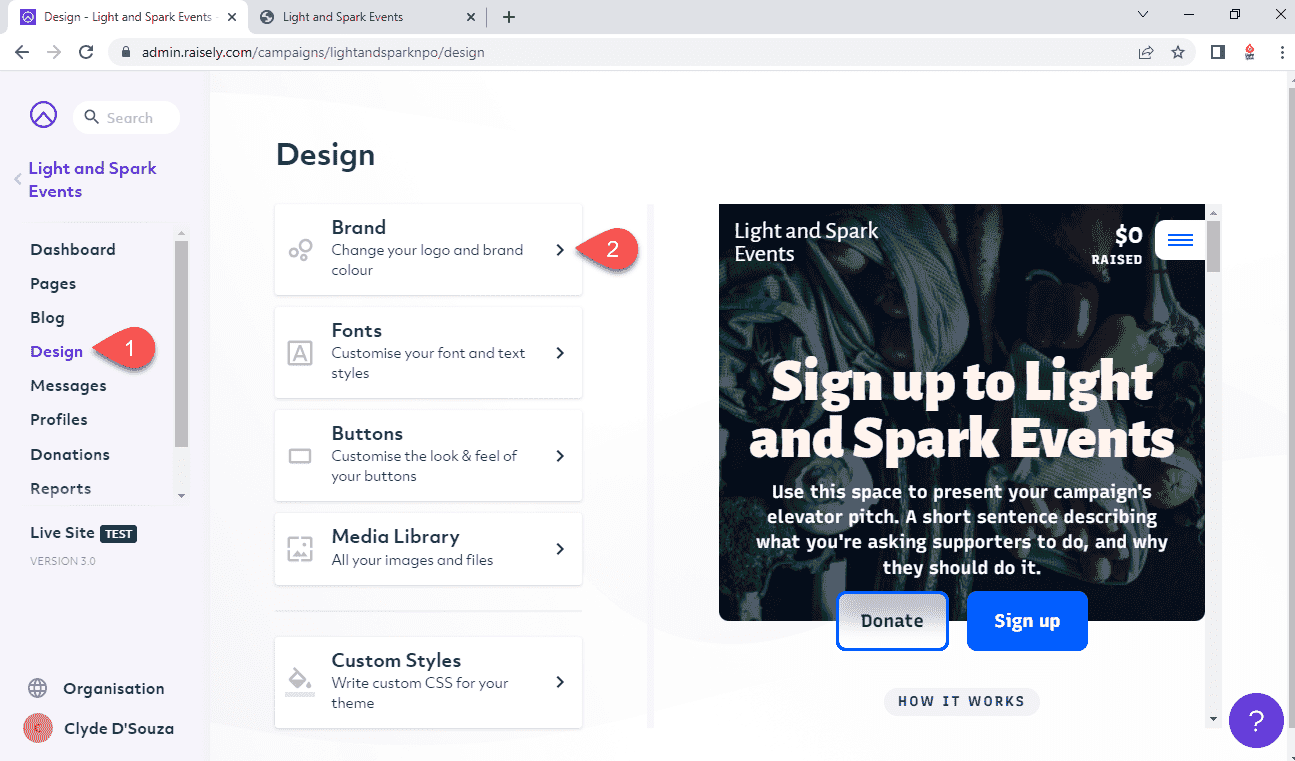
As shown in the GIF below, clicking on Design will open up more settings to configure.
- Logo: Your brand logo will be displayed on the top left of the website.
- Brand colour and a secondary colour: Your brand guidelines might come with a primary and secondary colour which you can enter here.
- Favicon: This is usually the tiny image that appears in the browser tab.
- Campaign image: This is the cover image appearing on the website.
- Default profile image: This will be the default avatar profile image applied to users of your website.
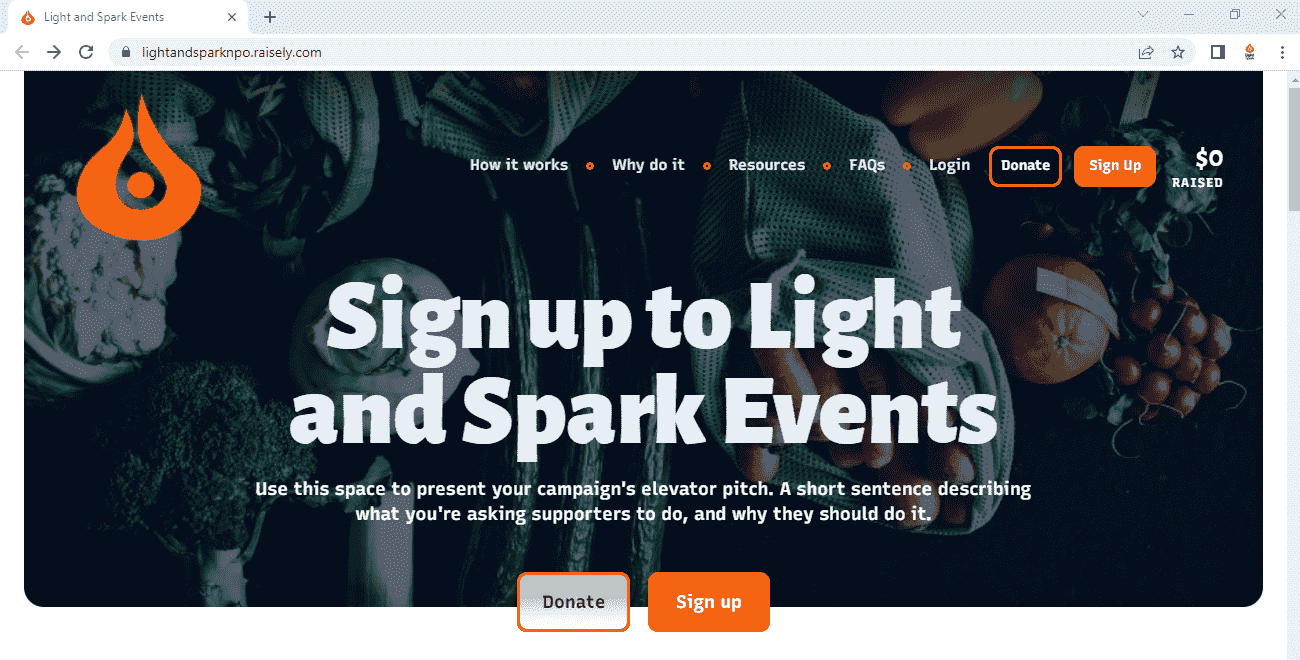
You might need to play around with these settings to determine what are the right values for you. After updating the above and saving the changes, my website now looks like this.
Once you're happy with this section, click back to the main Design menu. From this menu, you might want to go through each item from the list and ensure you have everything configured as well. For the brevity of this article, I won't be writing about every single item in this menu, but if you have any questions, feel free to shoot them in the comments below.
Accepting payments
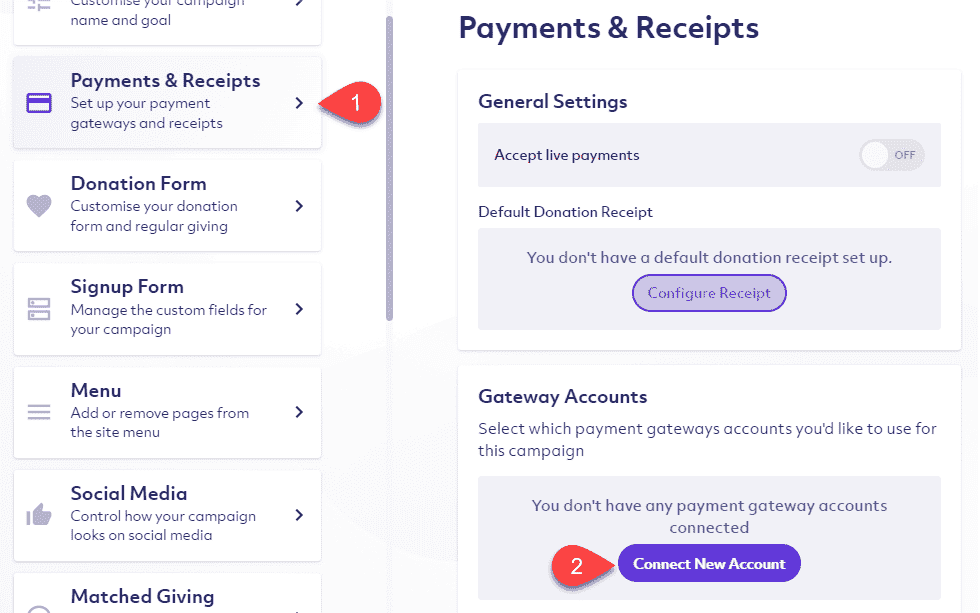
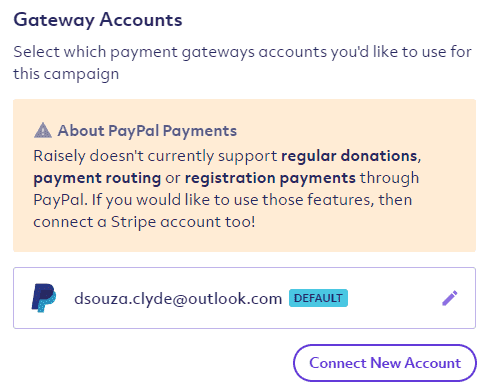
To start accepting payments, you'll need to connect a payment gateway account with your Raisely campaign site. Click on Settings → Then click on Payments & Receipts → Then scroll down to Gateway Account and click on the Connect New Account button.
PayPal
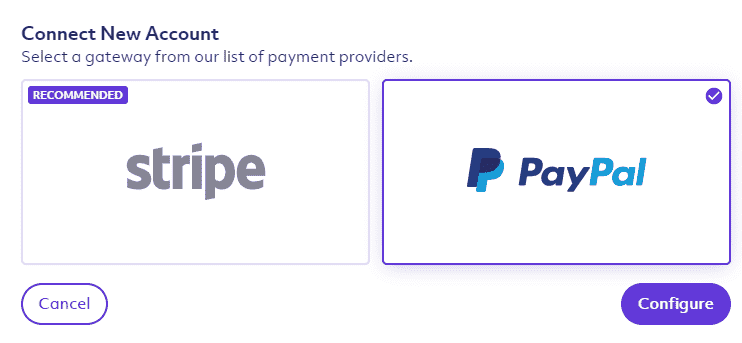
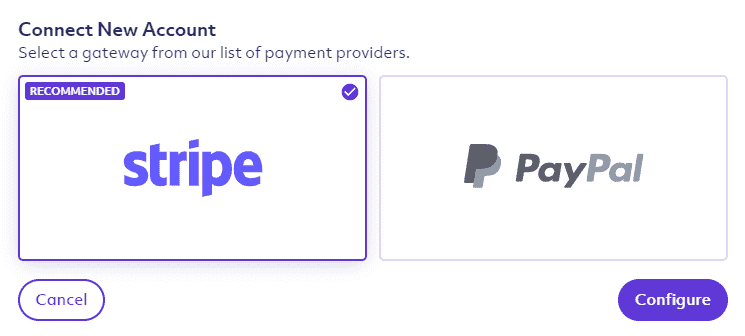
First, we'll look at setting up PayPal. To connect PayPal as the payment gateway, we'll select PayPal and click on the Configure button
You'll notice that you have to type in a lot of configuration values.
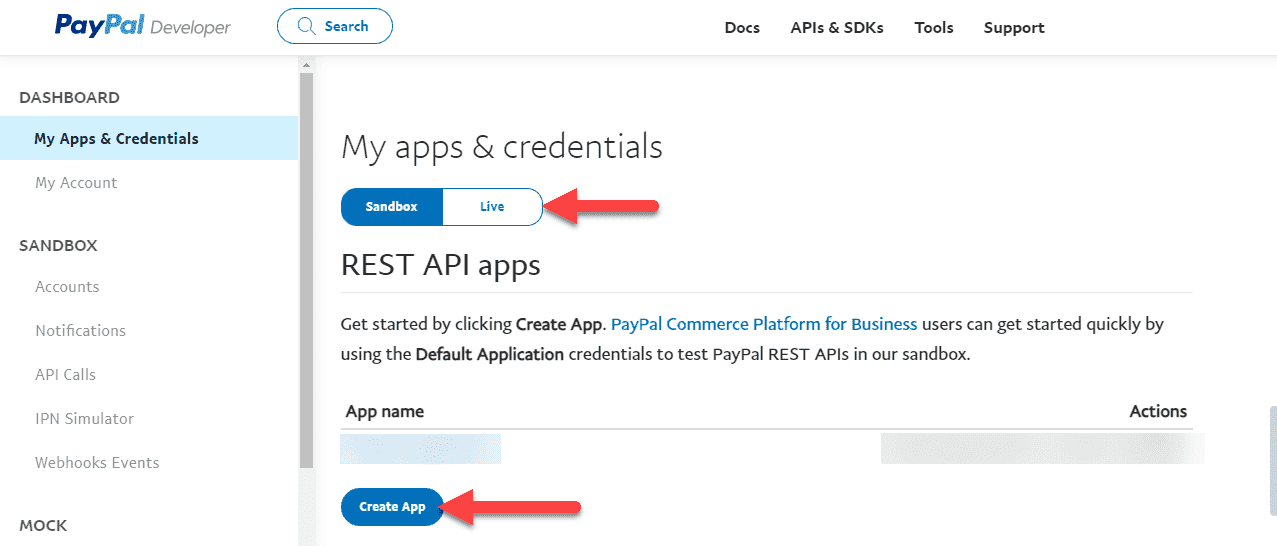
Once you log in to the PayPal developers page, from the My Apps & Credentials page, we'll have to create an App in the sandbox environment and in the live environment. To do so, first, click on Sandbox and then click on the Create App button.
From the next screen, enter a suitable App Name, and then click on the Merchant radio button from the App Type section. An option should already be pre-selected in the Business Account dropdown. Finally, click on the Create App button to create an app.
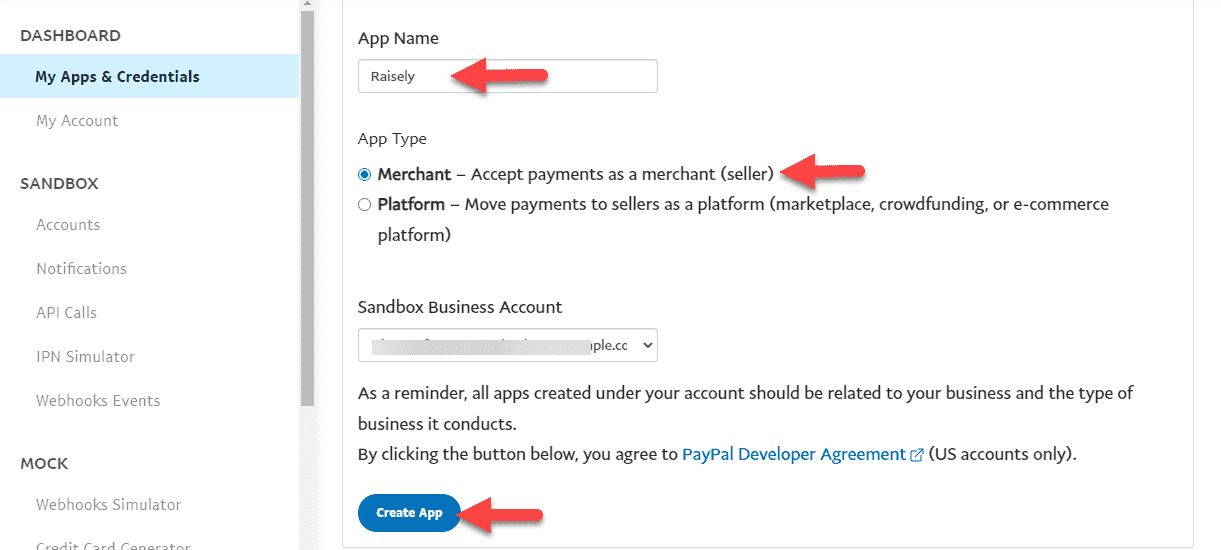
Once you've created, copy the client id and secret from this screen. Now, repeat the same steps above but instead of Sandbox, select the Live toggle option. Once again, copy the client if and secret from this screen.
Both pairs of client IDs and secrets need to be entered in Raisely where you'll see a modal that might look something like the below. Along with that, you'll also need to enter your PayPal email address in the Account Email field. Finally, click on the Save Account button.

Depending on your setup, you might need to add your billing information if you haven't already.
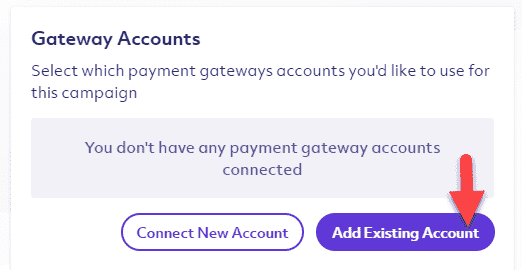
Once you navigate back to the screen, you'll notice that PayPal hasn't already been automatically added. To add it, click on the Add Existing Account button.
Then, select the PayPal email address from the dropdown and then click on the Connect button.
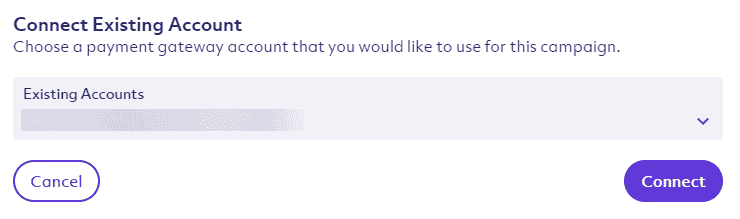
This will then successfully add PayPal as your payment gateway.
Stripe
Next up, we'll take a quick look at what might be involved with connecting a Stripe account.
Select Stripe from the Connect New Account modal and click on the Configure button.
You'll now be redirected to Stripe Connect where you'll need to either log in or create an account. You might need details about your organisation (tax numbers and your registered name), ID documents and bank account details for where your donations will be deposited.
Follow the prompts within Stripe to set up your account. Once completed you'll be redirected back to Raisely. You will now see your new Stripe account listed under Connected Accounts. Select Save Changes to save this account to your campaign.
Custom domain
Each campaign is a new site. All under one organisation.
Click on the campaign → Then click on Settings → From the list of settings, find and click on Domains. This will update the right side of the screen with settings related to domains.
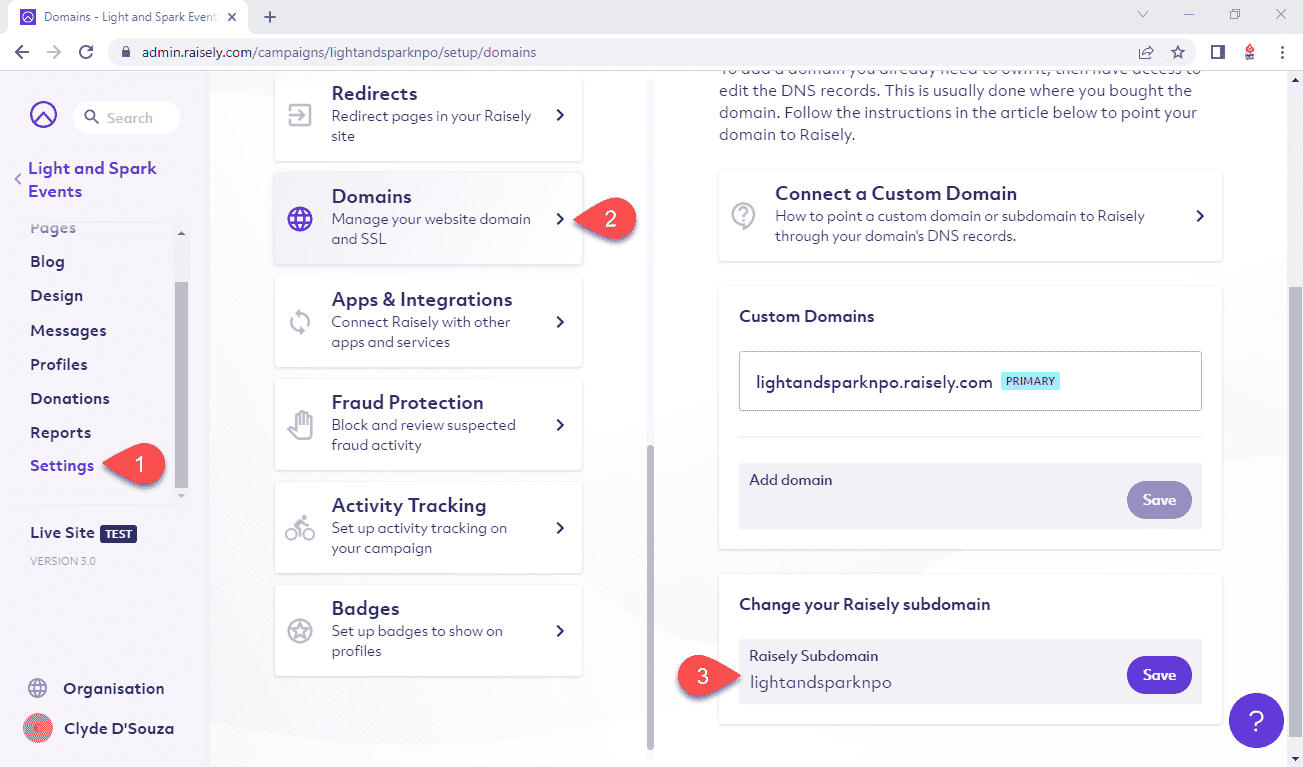
By default, your site will be accessible using a free Raisely subdomain (in other words, a URL that's suffixed by raisely.com like yoursite.raisely.com) which you would've originally set. You could update this anytime by typing in a new value in the Change your Raisely subdomain section and hitting the Save button.
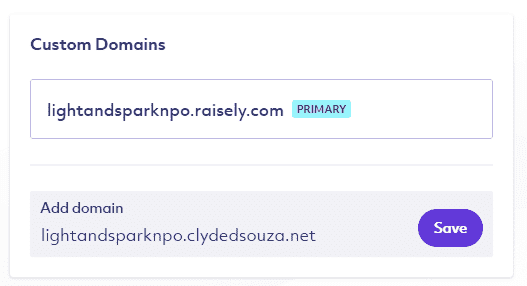
In this article, we'll set a custom domain for our Raisely campaign site. To do so, we'll add our custom (sub) domain in the Custom Domains section and hit on the Save button.
This will open up a modal with instructions on how to set it up. Once you've followed the instructions, you might need to come back to this modal and hit the Check now button.
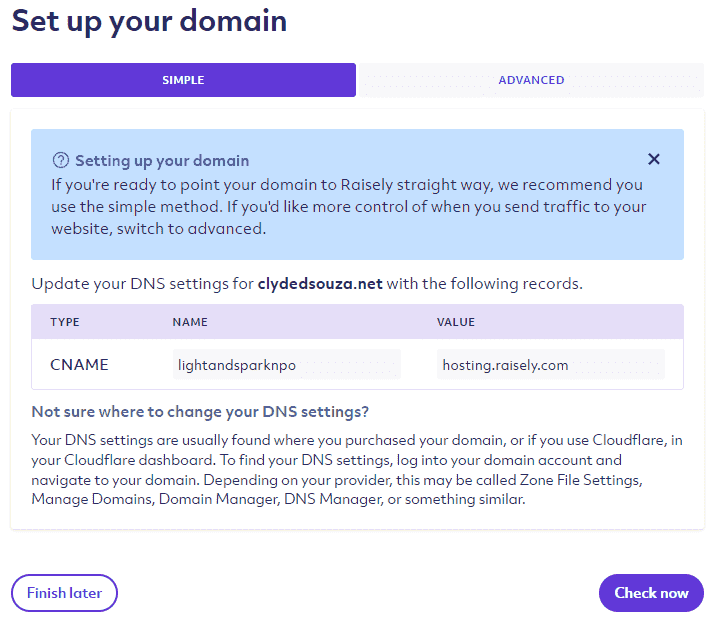
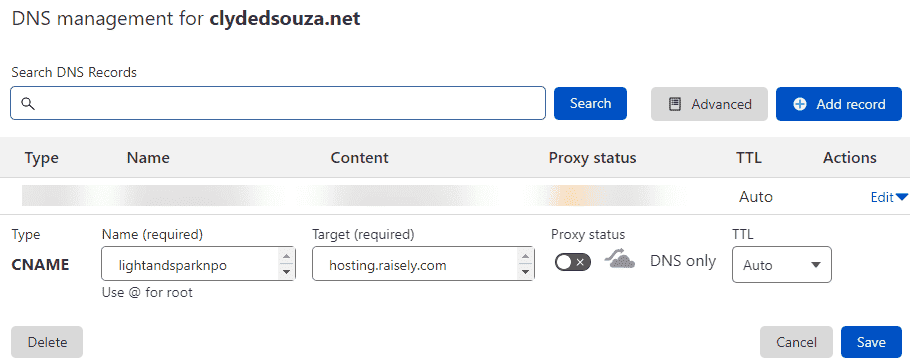
I'll head over to Cloudflare to update my DNS records for my website. I'll create a CNAME record with the Name as lightandsparknpo and Value/Content as hosting.raisely.com. I'll need to ensure that the Proxy status is set to DNS only. I'll click on the Save button to let these changes take effect.
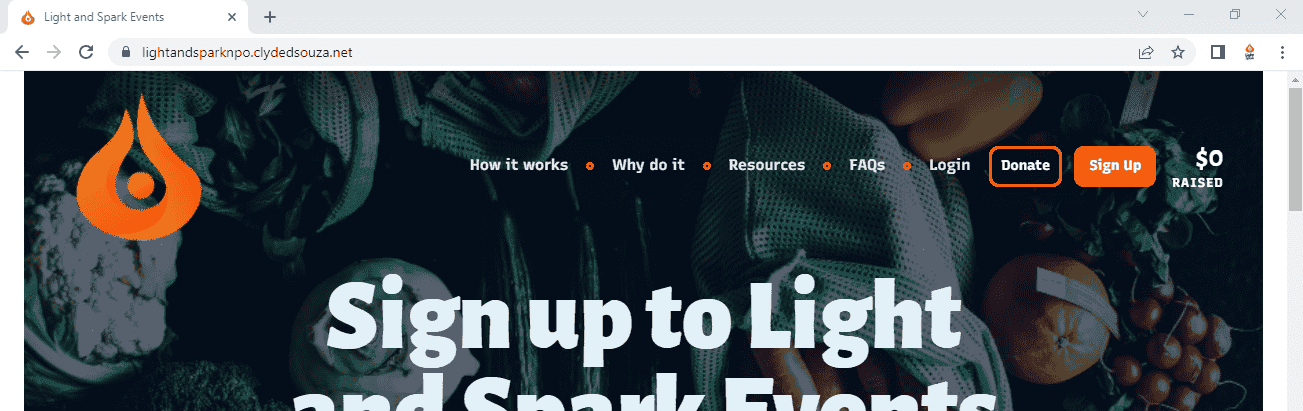
After waiting for a few minutes, I clicked on the Check now button which then succeeded. The Raisely campaign website is now available on my custom domain.
If you want to set up a custom domain for your Raisely campaign site using a root URL (like yoursite.com), you might need to add more DNS records. Head over to this page for more information.
Organisation-wide settings
The left sidebar has a few menu items, of which, we've been on the Campaigns page up till now. The other options (1) are People, Reports and Messages. People allow you to see the users registered on your campaign site. Reports allow you to run various reports like who are the regular donors, a list of receipts, etc. You can even run custom reports from this page. Messages allow you to configure email and SMS messages that could get triggered automatically.
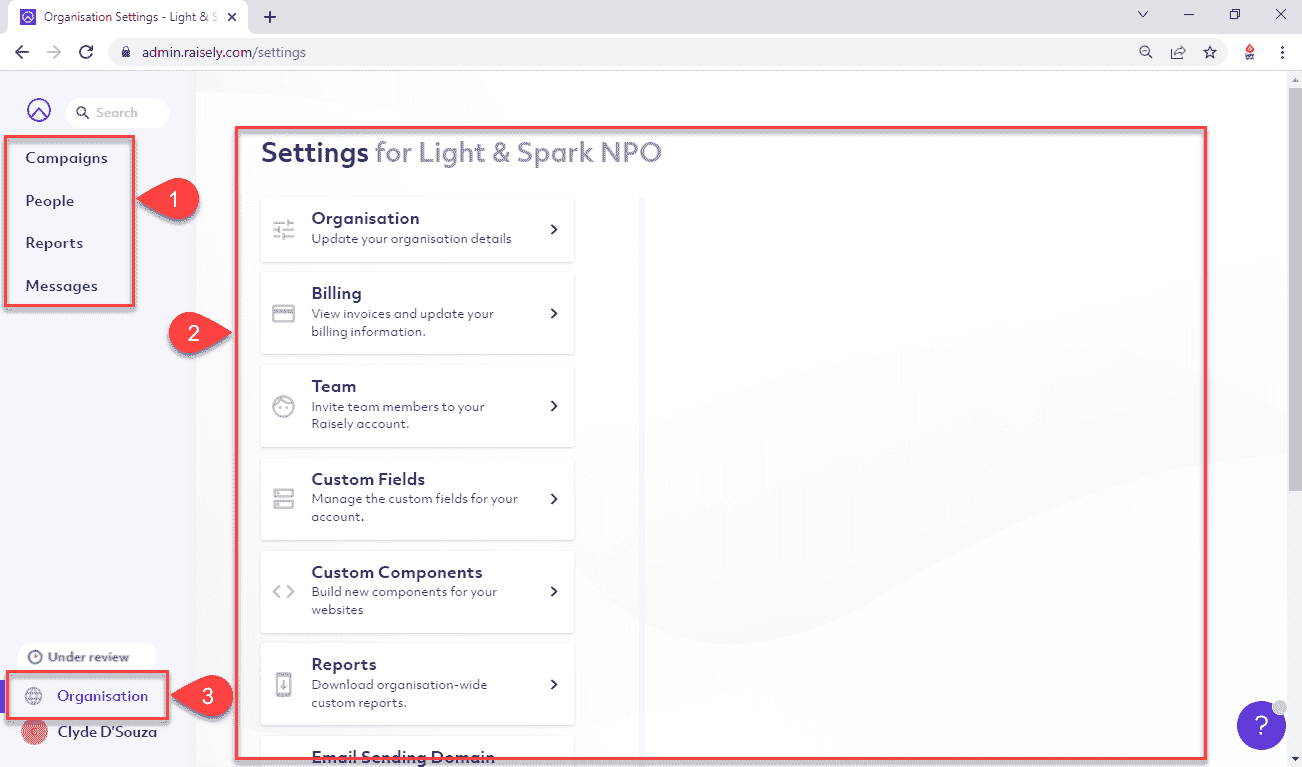
Depending on what menu item you click from the left sidebar, the contents in the primary panel (2) change.
If you click on the Organisation menu item (3) from the bottom left of the screen, you should see a list of organisation-wide settings. These include:
- Organisation details to update general organisation information.
- Billing information to update your card details if you're on a paid plan.
- Team page where you can add your team members.
- Custom fields can be used in the campaign forms.
- Custom components where you add custom React components.
- Reports to view organisation-wide reports (also briefly mentioned above).
- Email sending domain if you'd like to send emails from your custom email address instead of Raisely's default email.
- Interactions to record all your customer's interactions (think: CRM).
- Tags are like simple labels to help identify and segment records.
- Segments are a slightly more complex way to segment users so specific user groups can be targeted easily.
- Media library is a site-wide space to store images and files.
That's it! Thanks for reading.