- Published on ·
- Reading time 10 min read
Make Every Demo Count With Demo Monkey
Customizing a generic demo application for your audience
Share this page

What is Demo Monkey?
Demo Monkey allows you to customize your web application into a perfectly tailored demo according to your customers. You can provide replacement values as required and Demo Monkey will take your generic demo application and make it a personalised experience for your audience.
For instance, you could create a very generic e-commerce website and with the help of Demo Monkey, you could convert this generic e-commerce website into a nice e-commerce website based on the target audience you're demoing to.
This helps save a lot of time because now you don't have to recreate and deploy the site every time you need a new demo. Instead, all you have to do is customize the required variables and just repurpose the same site with slight variations.
Installation and setup
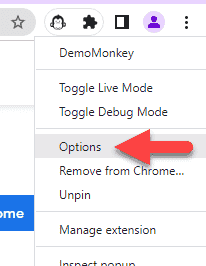
Install Demo Monkey from the Chrome Web Store. Right-click the extension's icon and click on Options to open the Demo Monkey portal.
You might need to enable access to all sites for Demo Monkey's extension to work. From this page, click on Click here from the banner to enable. Then, from the pop-up, click on Allow.

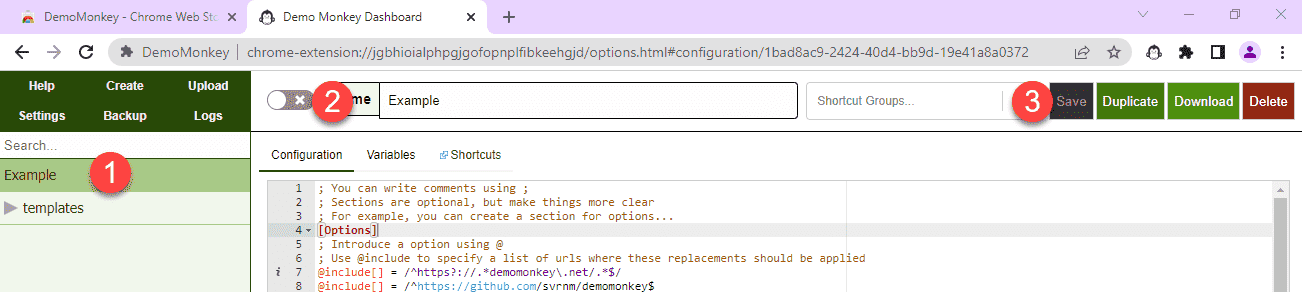
Find and click on the Example script (1) from the portal. You can rename this file and clean up its contents from the Configuration tab to suit your needs and/or follow along with this article. This script is disabled by default and for it to work, you'd need to toggle it on (2). Every time you make changes, you'd need to hit the Save button (3) for your changes to take effect.
Structure
A file can optionally contain section tags which help make your script a bit more readable. You can name these section tags as per your requirement. An example of this in use might look something like the snippet below. Here, we've used [Options] to indicate this section will contain options and [Application] to indicate this section will contain the required scripts to update the application and throughout this article, we'll be using this convention.
[Options]
...
[Application]
...
The complete usage guide is available here. The intention of this article, however, is to simplify a few commonly used items from this usage document.
Site configuration
To begin with, you may want to include your website URL in the include array so Demo Monkey can be enabled on it. Your Demo Monkey script won't work if you don't include your website URL here.
[Options]
@include[] = /^https?://clydedz.github.io/demomonkey-demosite.*$/
Text updates
To simply update the displayed text on your site, write the original text on the left followed by an equal symbol and then on the right side, enter the text you'd like to be displayed instead. You can use this same format to replace an email address, too.
[Application]
demo@example.com=noreply@example.com
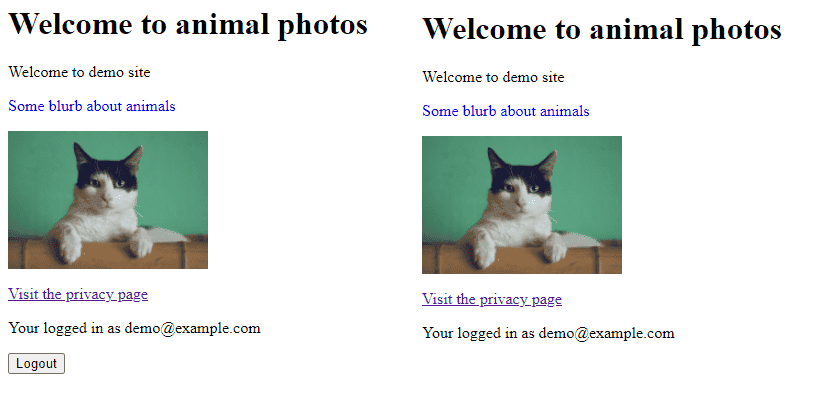
Welcome to animal photos=Welcome to animal site
The screenshot below shows the before and after versions of the website.
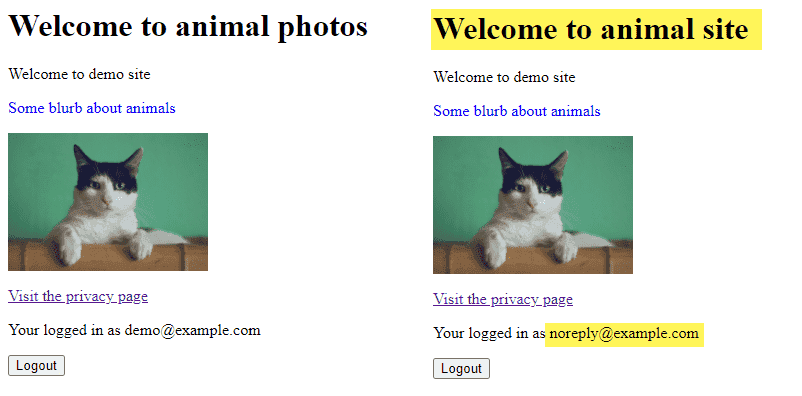
Before (left) and after (right)
While the above snippet is a blanket solution, if you'd like to be more specific, you could use the replace function. The first value in this function is the original text that's displayed on the site, the second value is the website URL, and the third value is the class name of the element that wraps the original text. The right side of the function is the new content that you want to be displayed on the site instead.
[Application]
!replace(Developer content, api.html, .developers) = Monkey content
You'll notice that every function is prefixed with an exclamation mark.
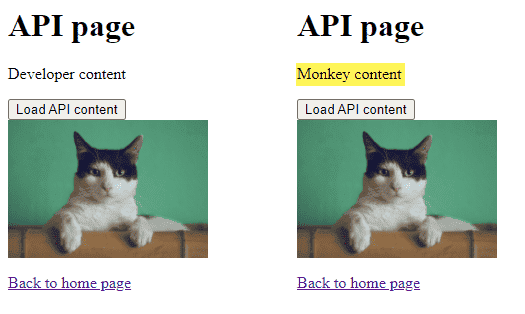
Before (left) and after (right)
We can take this a little step further and instead of replacing a simple text for another plain text, you can also replace it with some custom HTML. We'll use the overwriteHTML function for this where we specify the site page as the first value followed by the class name which has our previous content. On the right side of the equal symbol, you can specify the new HTML content to be rendered.
[Application]
$html=<b><u>Most welcome</u></b>
!overwriteHTML(index.html, .welcome) = $html
Instead of directly entering the values, we've used a variable called $html. This is quite handy if you need to replace multiple places with the same value, in which case, you could define your variables right at the top and then use that variable across the script. The above snippet could also be written like this.
[Application]
!overwriteHTML(index.html, .welcome) = <b><u>Most welcome</u></b>
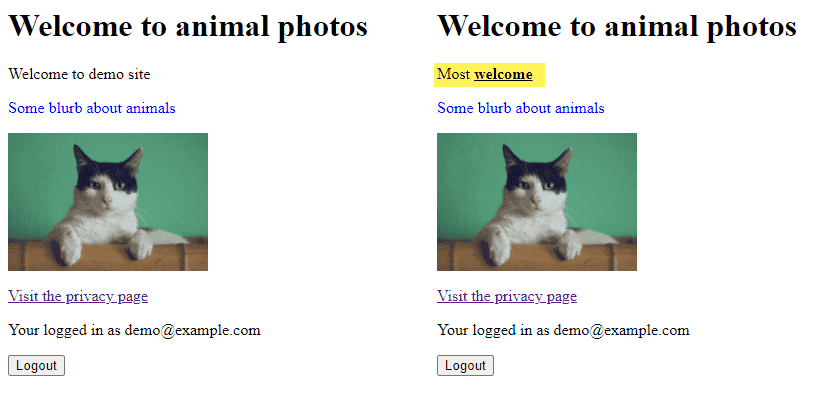
Before (left) and after (right)
We can also update the style of a block of text. To do so, we'll use the style function. For the first value, we'll specify the text that needs to be stylised and for the second value, we'll specify what style we need to update. The right side of the equal symbol is the new style value. In the snippet below, we're colouring the text “Privacy page” red.
[Application]
!style(Privacy page, color) = red
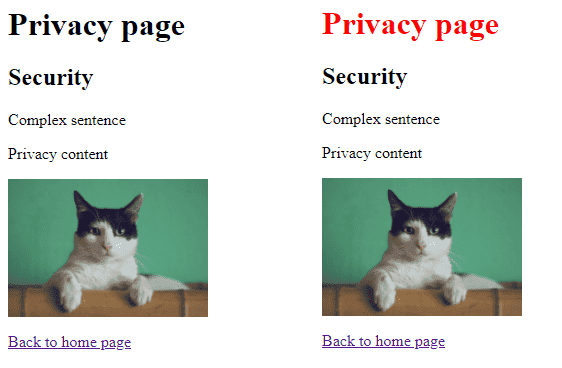
Before (left) and after (right)
Images
We can replace an image with another one by using the replaceImage function. The first value of the function is the source URL of the existing image that you want to be replaced and on the right side of the equal symbol, specify the source URL of the new image.
[Application]
!replaceImage(https://clydedz.github.io/demomonkey-demosite/img/cat.jpg) = https://clydedz.github.io/demomonkey-demosite/img/dog.jpg
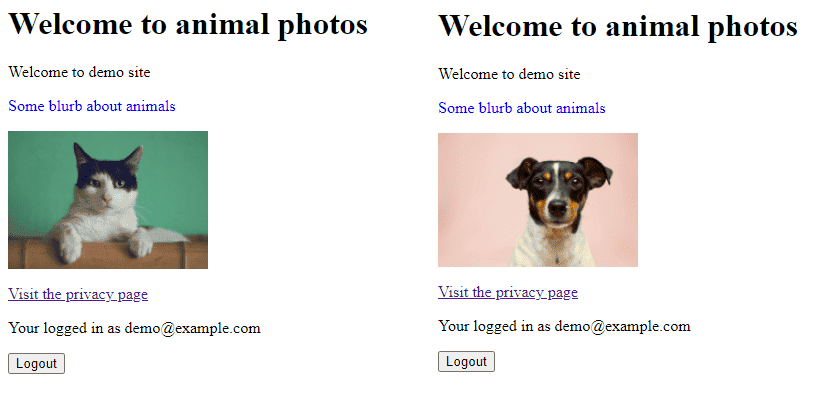
Before (left) and after (right)
You can also recolour the existing image by using the recolorImage function. The first value is the source URL of the existing image and on the right side of the equal symbol is the RGB value you want to be applied.
[Application]
!recolorImage(https://clydedz.github.io/demomonkey-demosite/img/dog.jpg) = rgb(255,0,0)
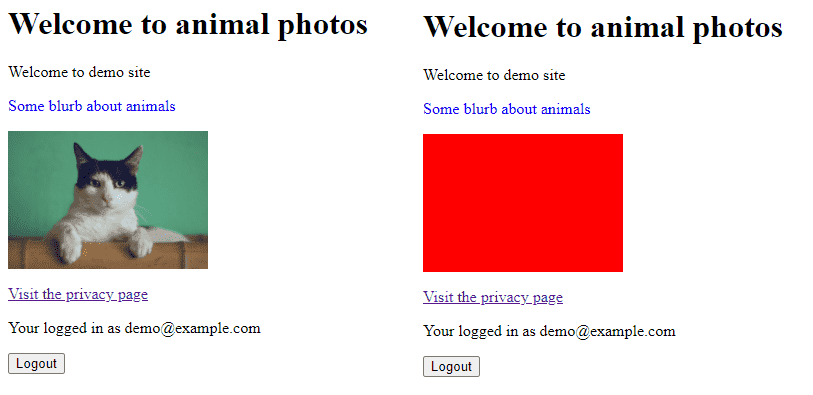
Before (left) and after (right)
Links
We can also replace an attribute of an HTML tag using the replaceAttribute function. The first value of the function is the webpage that you need this change applied. The second value is the attribute that you want to update. The right side of the equal symbol is the new value you want to assign to the attribute.
[Application]
!replaceAttribute(index.html, href) = api.html
Apologies if it's not clear in the screenshot below, but on the left, I've highlighted the bit in the URL which originally has index.html and then on the right, after applying the script, I can see the bit in the URL has been updated to api.html.

Before (left) and after (right)
Full content updates
Overwrite an existing page
You can also replace the entire contents of the webpage with the contents of another webpage. We'll do that using the overwritePage function. We specify the webpage as the first value to the function, we could specify the CSS selector as the second value of the function similar to the overwriteHTML function but for this function, we'll leave this empty, and to the right side of the equal symbol, we'll specify the URL of the webpage we want to show here instead.
[Application]
!overwritePage(index.html, '') = api.html
In the screenshot below, you can see that we've replaced the original contents (left) of the index.html page with the contents from the API page.
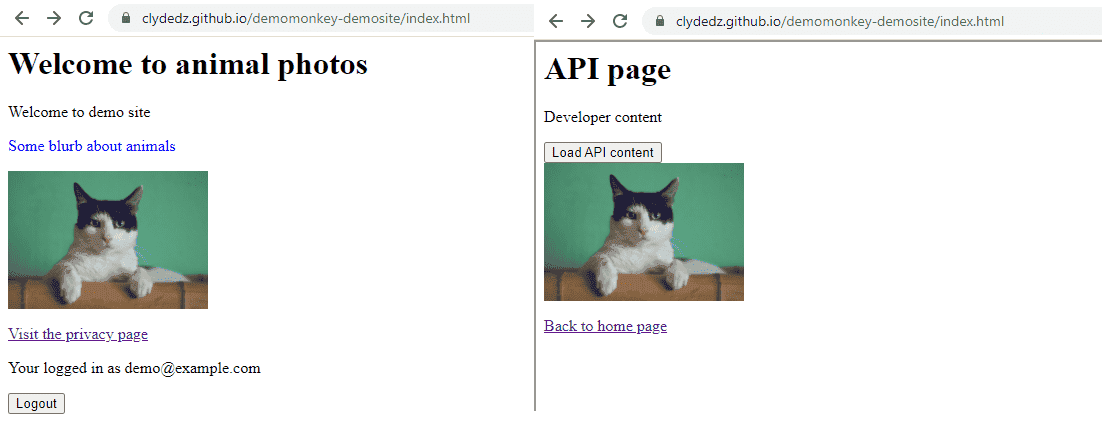
Before (left) and after (right)
Redirect to another page
We can use the redirectUrl function to automatically redirect one webpage to another webpage. The value we need to pass to the function is the webpage we need to apply the redirect on. The right side of the equal symbol is the destination URL we need to redirect the user to.
!redirectUrl(https://clydedz.github.io/demomonkey-demosite/privacy.html) = https://www.bing.com
The GIF below shows what it looks like in working.
GIF showing this change in action
Manipulating URLs
If there's a need, we can block specific URLs or requests (like an API call) from happening. This would mean that when the application tries to make this request, it will fail and hopefully the application will gracefully handle it.
So, what does this look like in our script? In my demo application, clicking on the Load API content button on this page makes a call to an external API endpoint and loads a joke on the screen. We'll manipulate requests to this API endpoint.
First, we need to include this API URL in the [Options] section. Next, under the [Application] section, we'll use the blockUrl function where the value to the function is the API URL that you want to block.
[Options]
@include[] = /^https?://clydedz.github.io/demomonkey-demosite.*$/
@include[] = /^https?://api.icndb.com/jokes/random.*$/

[Application]
!blockUrl(https://api.icndb.com/jokes/random)
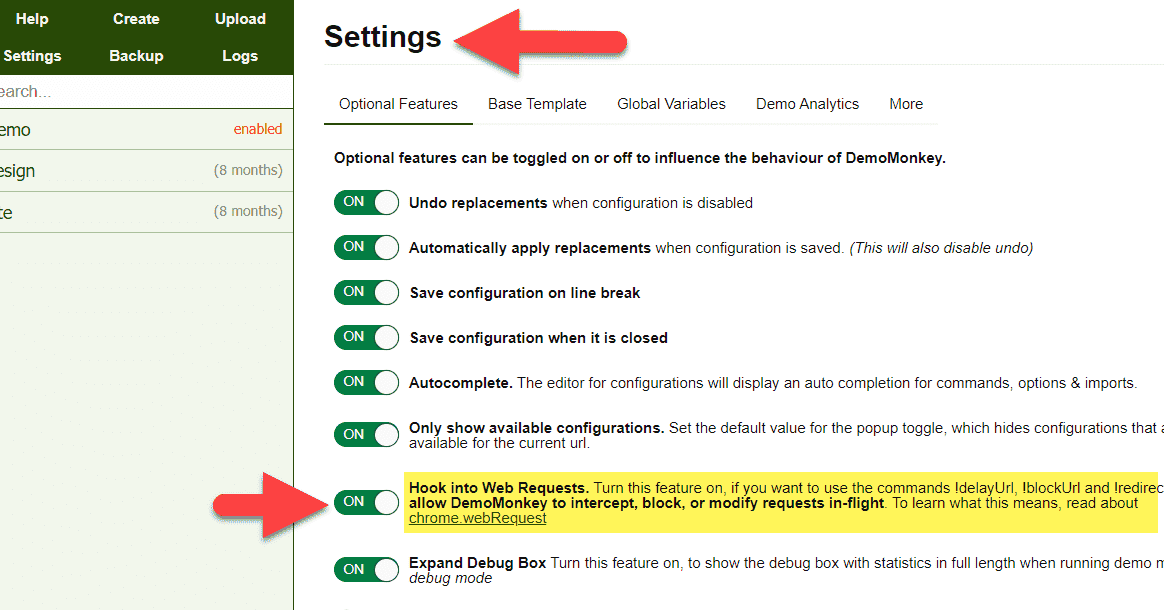
The first time you try to use this in your script, you should see a warning symbol beside it. What this means is that you need to enable a flag in the Demo Monkey settings.

While still in the Demo Monkey portal, click on Settings and turn the Hook into Web Requests flag on.
Now you can come back to your script, make the required updates and hit save. Then when you visit the webpage, you should see this in action.
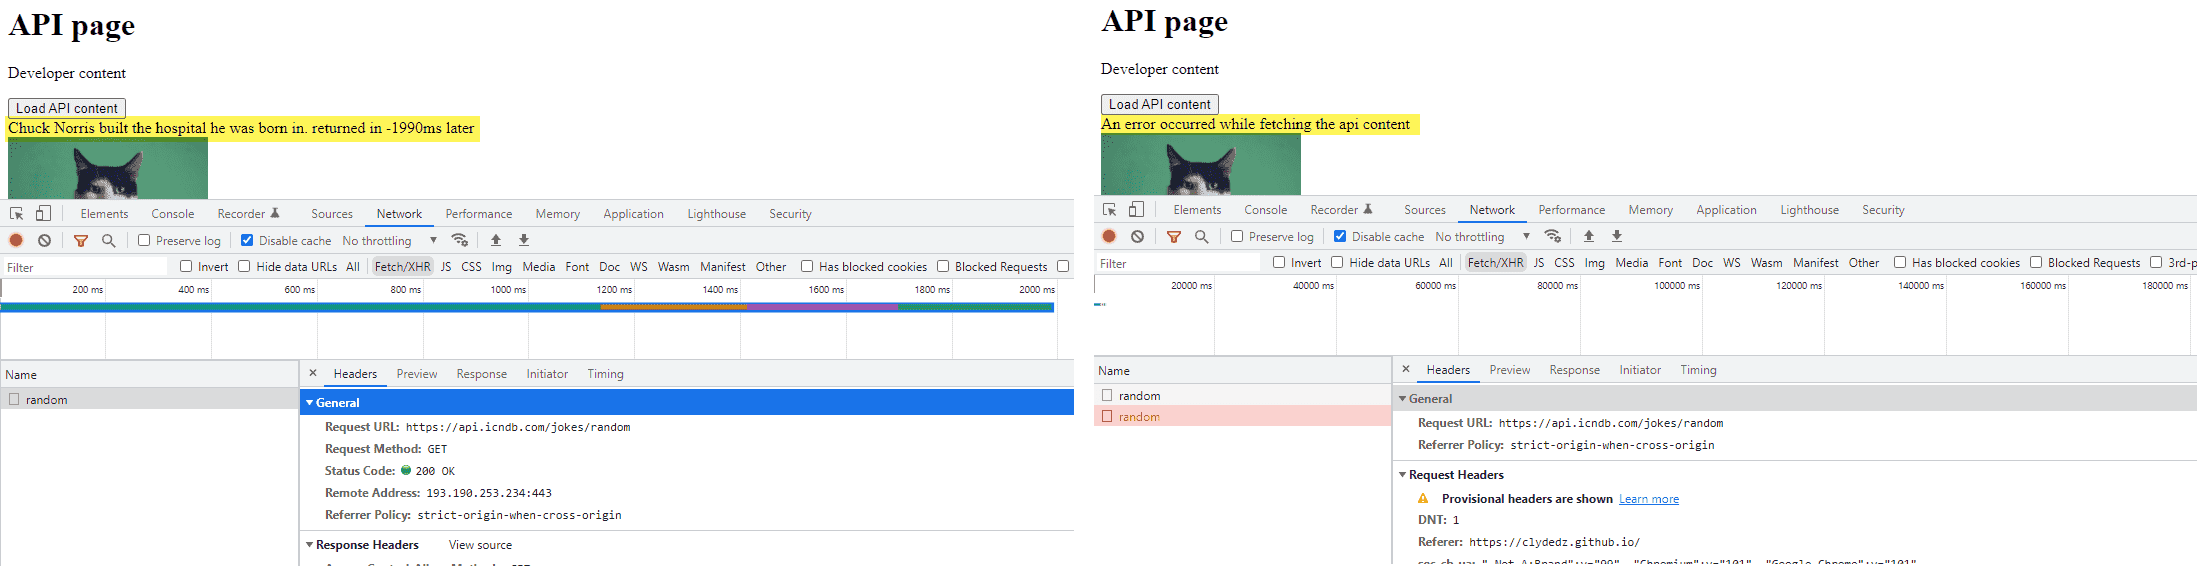
Before (left) and after (right)
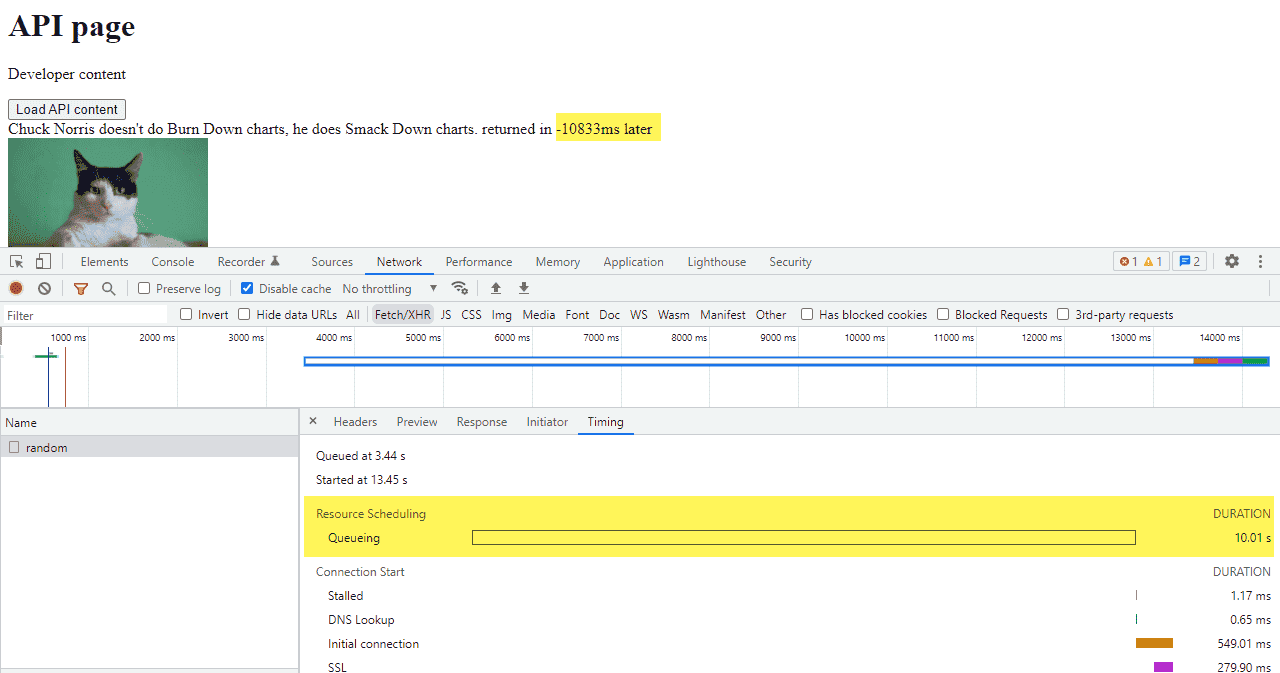
Similar to block URL, we can use delayUrl function to add some delay to the response of the API. The value of the function is the URL of the API you want to add some delay to and on the right side of the equal symbol is the delay amount in seconds.
!delayUrl(https://api.icndb.com/jokes/random) = 10
If you reload the page and see the network traffic, you should see the request being queued for that delay amount.
Miscellaneous
Hide an element
You can also hide elements from your screen. In this example, we'll remove the logout button using the hide function. The first value is the text on screen, the second value is the number of parent elements in the DOM, the third value is the CSS class name and the final value is the webpage.
[Application]
!hide(Logout, 0, logout-button, index.html)
Before (left) and after (right)
Adding JavaScript
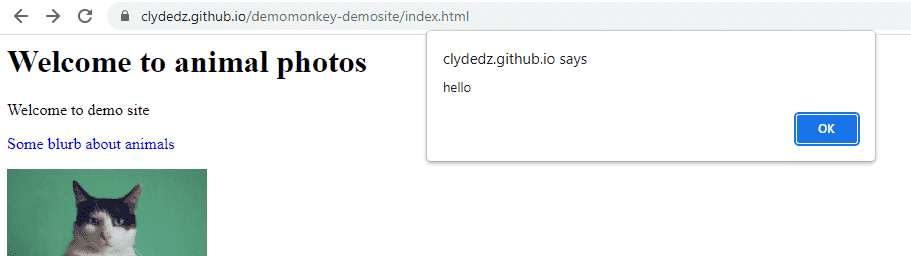
We can also inject JavaScript into your webpage using the addScript function. To the right side of the equal symbol, we can supply some JavaScript. In the example below, we've inserted code to show a popup alert.
!addScript() = alert('hello')
Comments
You can add inline comments using either a hash symbol # or a semicolon ;.
# This is a comment.
; This is also a comment.
Source code
The demo website used in this article and the complete Demo Monkey script are available in this GitHub repository. If you've made use of Demo Monkey, I'd love to hear from you in the comments. If you've found this article helpful, also drop a comment.
That's it! Thanks for reading.