- Published on ·
- Reading time 5 min read
How Do I Transfer My Registrar to Cloudflare?
A step-by-step guide to saving some bucks
Share this page
Introduction
Cloudflare has introduced a registrar service that aims at bringing domain purchases, renewals and transfers at no-markup pricing. All the prices for domains are provided at wholesale prices and include features like WHOIS management, registrar locking, native DNS, CDN, SSL services and a lot more.
To transfer your domain to Cloudflare, they've put together this useful documentation page. This article covers the steps of transferring the domain specifically from Register4Less to Cloudflare.
Prerequisite
Before getting started with this article, first, create an account in Cloudflare. Next, you'd have to create a site in Cloudflare and change your DNS servers to Cloudflare from your current registrar. For most instances, a free account would be perfectly fine.
I had already completed this step years ago as I was using Cloudflare for my authoritative DNS nameservers and Cloudflare provided SSL so I didn't need to do this step now.
DNSSEC
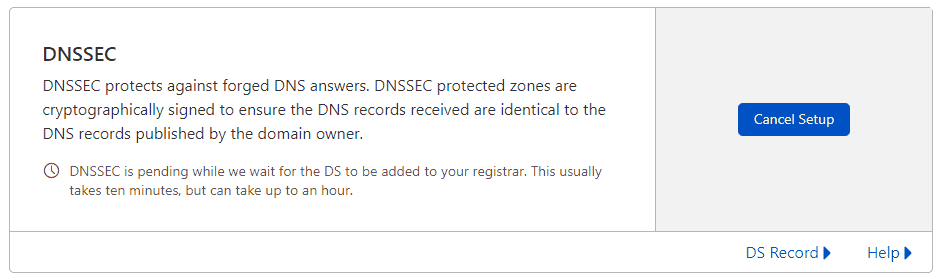
DNSSEC is a security protocol that adds a layer of trust on top of DNS protecting it against cyberattacks. The first step is to either cancel or disable the existing DNSSEC setup. Log in to the Cloudflare dashboard and select the account and domain you want to configure. Next, navigate to DNS. Then scroll down to DNSSEC and click the Cancel Setup button.
Unlock your domain
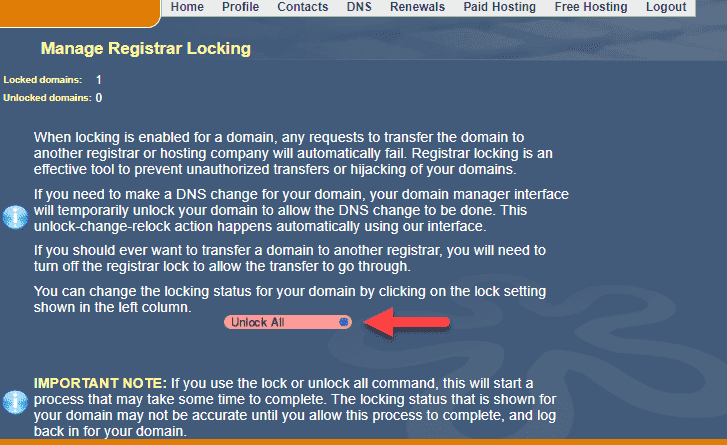
Next, you'd need to unlock your domain from your current registrar. A domain is locked to prevent unauthorized transfers.
From the Register4Less dashboard, click on Profile from the menu and then select Registrar locking. From this page, click on the Unlock All button and confirm your action.
Disable Whois privacy
As per Cloudflare's documentation, it is advised to disable the Whois privacy service for your domain. Note, during this interim period, if you try a Whois lookup on your domain, your details will be visible.
From the Register4Less dashboard, click on Profile and then click on Privacy. From this page, click on Disable All.

Authorization code
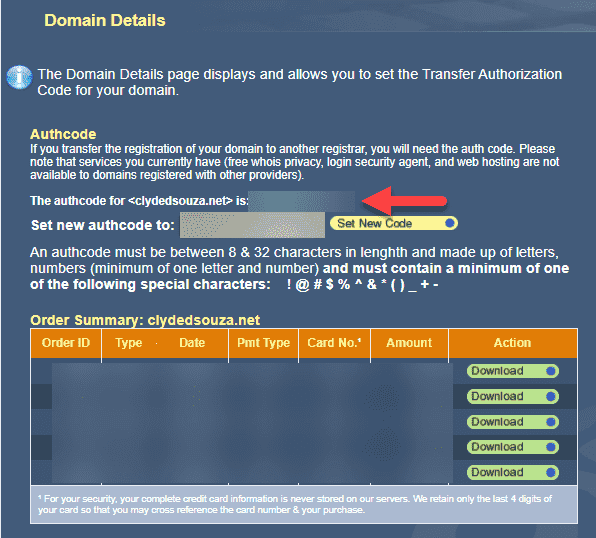
An authorization code is a code created by a registrar to help identify the domain name holder of a domain. For a transfer to work, you'd need to get the auth code value from your current registrar.
From the Register4Less dashboard, click on Profile and then click on Domain details. This page should show you the current auth code for your domain. Copy this value and store it securely because we'll need this soon.
Initiate the transfer
Step 1 is to initiate the transfer process. Head over to Cloudflare and click on Buy Domains from the left sidebar. Then click on Transfer. You should see your domain listed in the table pre-selected. Then click on the Confirm domain button.

Sidenote: I needed to add a payment method to Cloudflare before proceeding ahead. If you haven't added a payment method, Cloudflare will let you know on this page and once you click on that link, you should be able to enter your card details.
Authorization code (again)
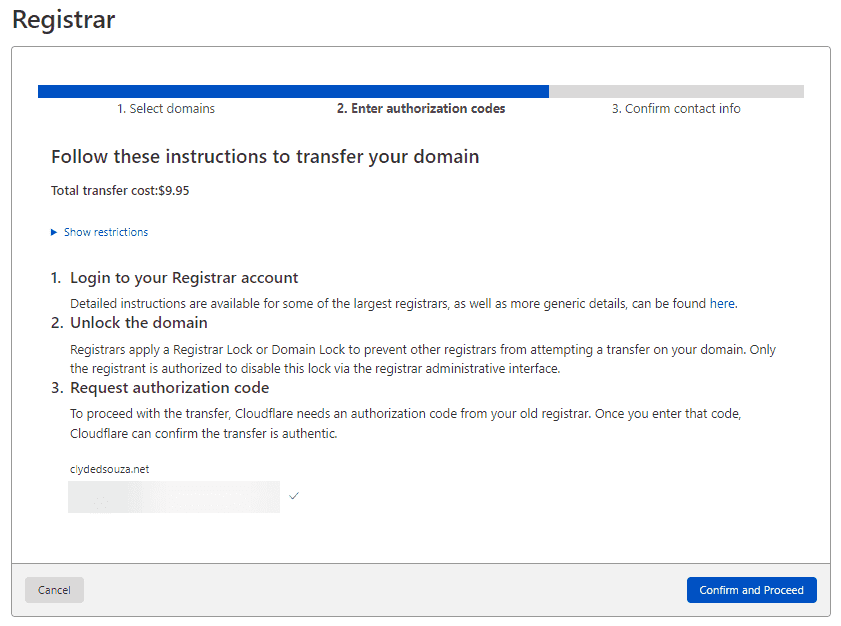
Step 2 is to enter the authorization code that you copied earlier. After entering it in the text box, you should see a green tick. Now, click on the Confirm and Proceed button.
Contact information
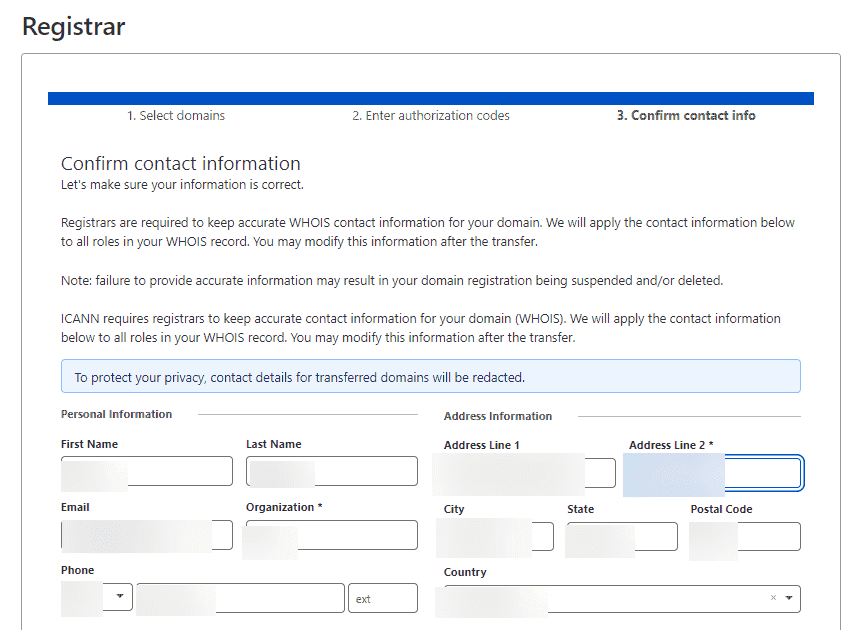
Step 3 is to confirm your contact information — simply add your personal information and address. Don't worry, this information won't be displayed when you perform a Whois lookup.
Finally, click on the Confirm and finalize transfer button and if everything has gone well, you should see a message notifying you that the transfer is underway.
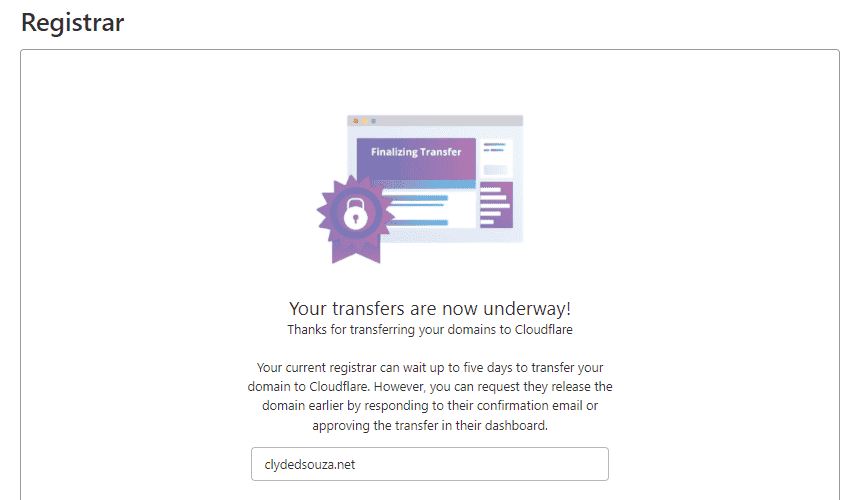
At this stage, your current registrar will receive a request and should have a workflow in place to process the transfer. You might also get an email to approve or cancel this transfer, depending on what your current registrar has in place. Either way, it's usually time to wait for the process to kick in.
Post-wait
After about an hour I got an email from Register4Less with a link to cancel the transfer otherwise by default the transfer will get completed automatically. Depending on your current registrar, the processing time might vary and the process might vary, too.
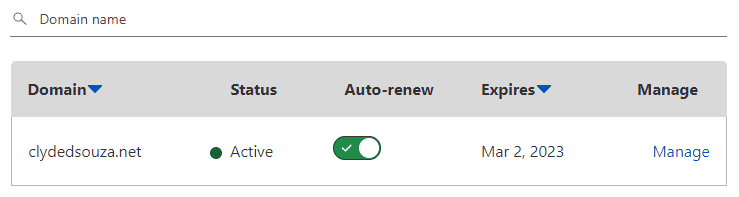
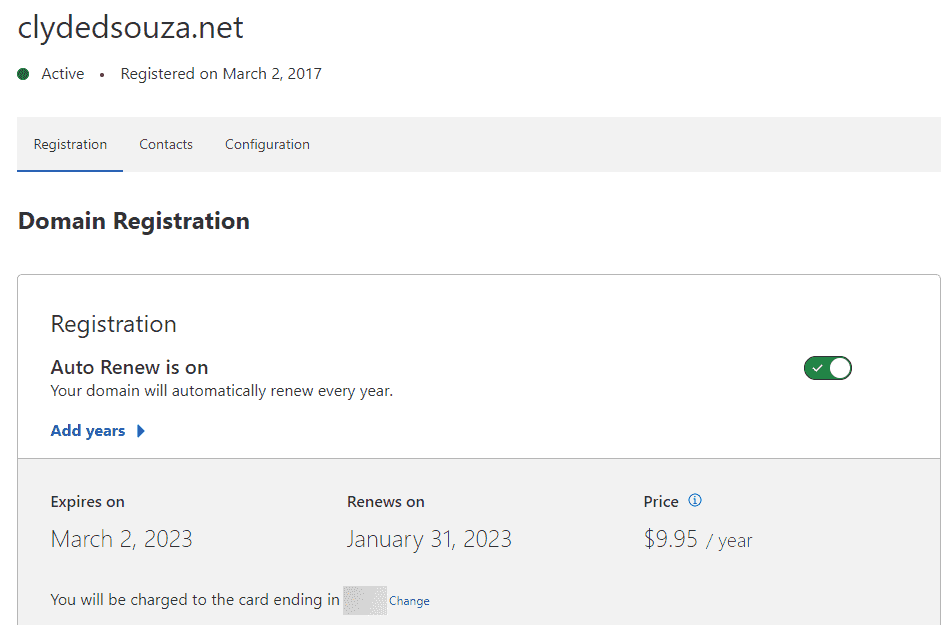
I then logged into Cloudflare and clicked on domains. I can now see my domain on the screen with the status as Active.
If I click on the Manage link, I'm directed to a page that provides more details about my domain. Feel free to click on the Configuration tab and toggle DNSSEC back on.
This process might take a while, but once it's enabled, you should see a success message.

How to validate this process?
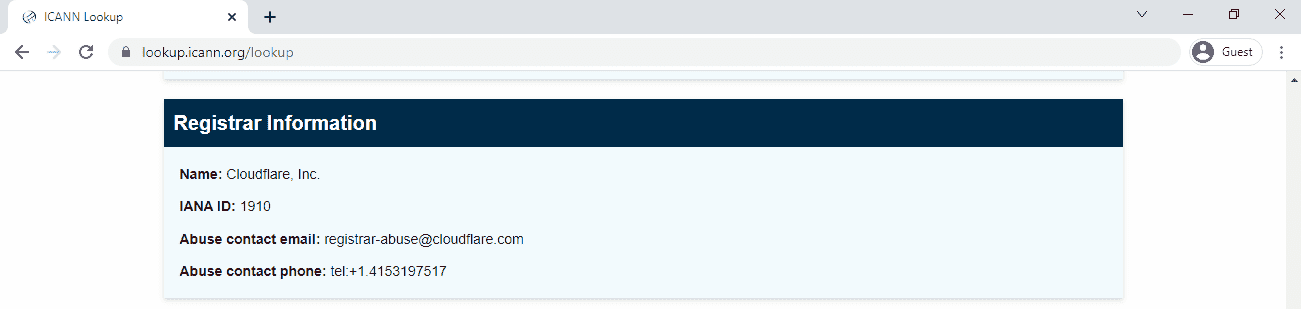
To confirm if the domain has been transferred to the new registrar correctly visit this lookup utility by ICANN. After you enter your domain and perform a search, scroll down that page to a section called Registrar Information. This should tell you the current registrar's name, which, in this case, should be Cloudflare Inc.
That's it. Thanks for reading.