- Published on ·
- Reading time 12 min read
How To Run TeamCity Server on Your Computer
Docker to the rescue!
Share this page

Introduction
If you're learning TeamCity (like me), you might find the free trial period too short to experiment with to your heart's content. Luckily, the folks at JetBrains have a solution for you — host TeamCity yourself. Even better is the fact that the installation is not dreadful at all, as you might've imagined. I've recently set it up on my personal device and this article aims at walking you through this process.
Setting up a TeamCity server
We'll be setting up a TeamCity server locally using Docker. So, first, let's go ahead and install Docker. Once it's installed, in a command prompt window type the following command to pull TeamCity's image from Docker Hub.
docker pull jetbrains/teamcity-server
We'll then run the following command to run an instance of the downloaded TeamCity server image on a localhost port. Replace <DATA_DIRECTORY_PATH> with the path to a local folder where you can store the data files. Replace <LOGS_DIRECTORY_PATH> with a path to a local folder where you can store the log files. Finally, replace <PORT> with a local port that's currently available on your host machine.
docker run -it --name teamcity-server-instance -v <DATA_DIRECTORY_PATH>:/data/teamcity_server/datadir -v <LOGS_DIRECTORY_PATH>:/opt/teamcity/logs -p <PORT>:8111 jetbrains/teamcity-server
Once you hit enter, a whole bunch of configurations will begin and at the very end, you should see a message asking you to open the web page in the browser.
Important: Do not close this command prompt just yet. If you close it, it will stop the TeamCity server instance. This is only a requirement for the first time. The next time you want to run TeamCity, you can run it directly from Docker Hub.
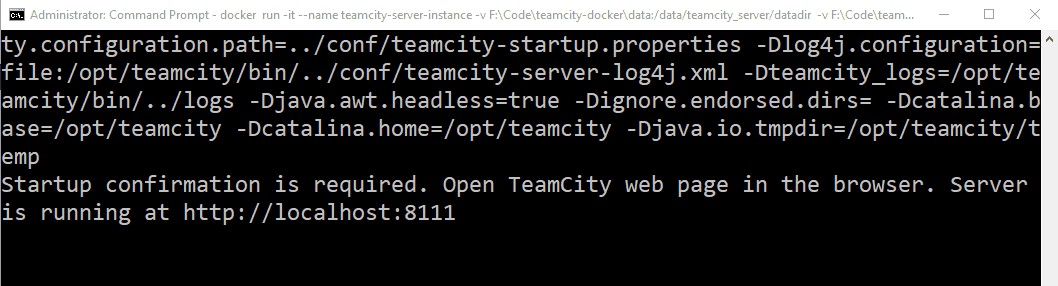
The command prompt will show you the internal port number for TeamCity. However, if you recall in the command above, you would've mapped an available port on your host machine with 8111. I installed TeamCity on port 1111, so I'll head over to http://localhost:1111 to access TeamCity.
The first screen will inform us of the location of the data directory. You don't need to do anything at this stage except click the Proceed button to continue.
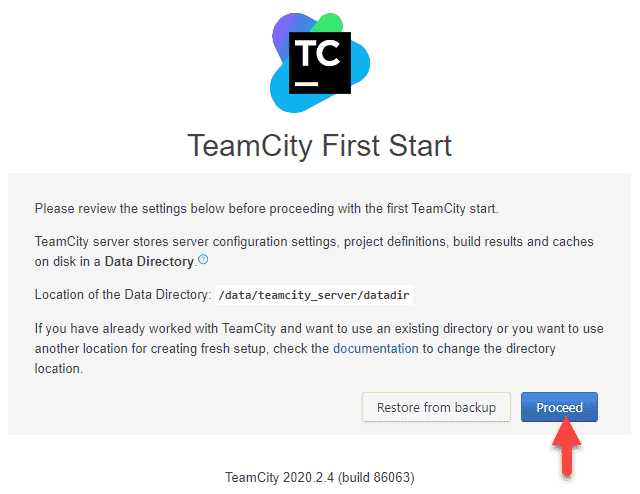
TeamCity will now initialize the data directory and will reload the page automatically.

The Database connection setup page is used to configure a database source which TeamCity will use to store user data and build history information. From the database type dropdown, select Internal (HSQLDB) and click on the Proceed button.
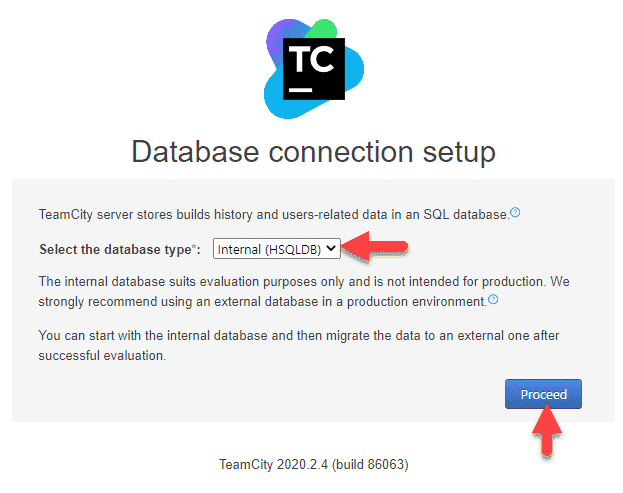
As the message states, if you're setting up TeamCity in a production environment, you should select a different type of database from the dropdown list instead of the internal one.
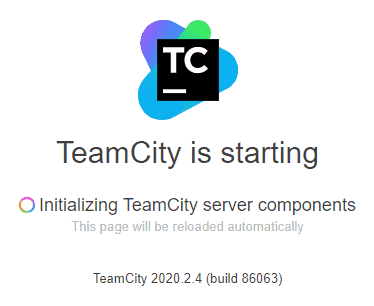
You'll now see a 'TeamCity is starting' message on your screen. This initial setup may take some time. Once that is done, you should see a license agreement appear on your screen.
Review the agreement and check the Accept license agreement checkbox. Optionally, uncheck the Send anonymous usage statistics… checkbox. Click on the Continue button to proceed ahead.
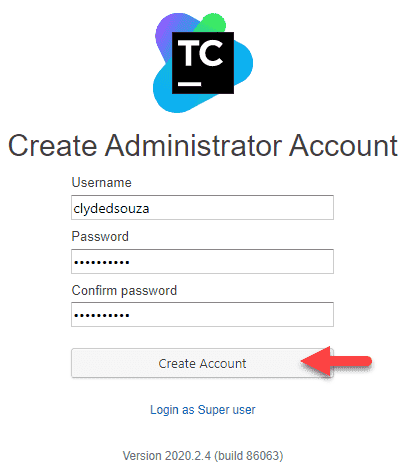
Let's now create an administrator account — set a username and a strong password — then click on the Create Account button. Remember to save these credentials.
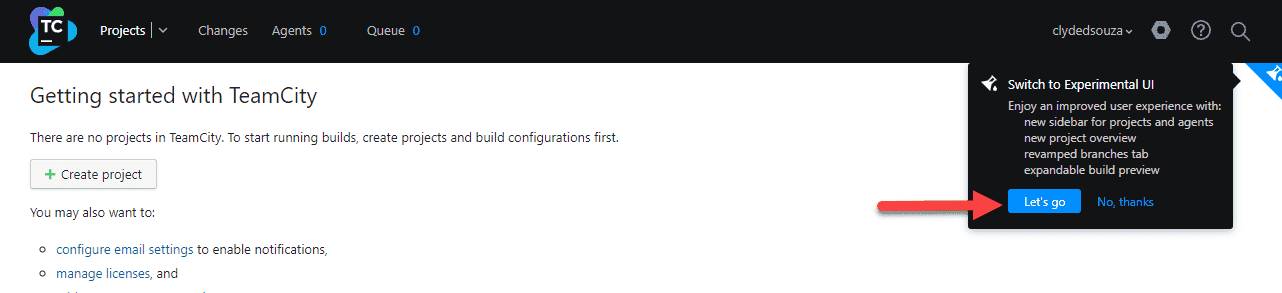
You should now be redirected to the TeamCity server UI. Congratulations on setting up a TeamCity server!
Click on the Let's go button from the pop-up on your screen to enable the experimental UI in TeamCity since the rest of the guide is based on the experimental UI.
Setting up a TeamCity build agent
So far, we've only set up a TeamCity server but that doesn't include the build agent program that TeamCity offloads its work onto every time a build is triggered. This build agent needs to be set up separately.
Let's click on the Agents tab from the header navigation menu. Then from the Overview tab, let's click on the Install agent dropdown and select Windows installer.
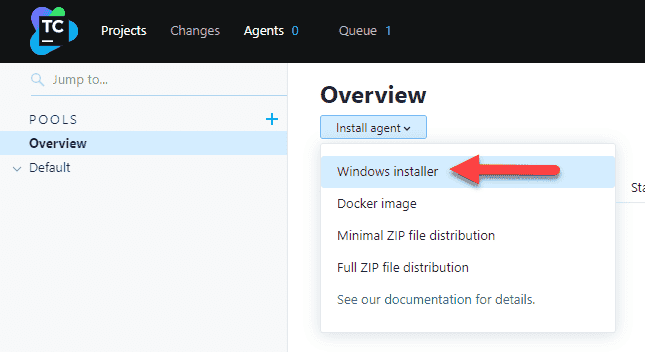
We're selecting the Windows installer option because we'll be installing the build agent software on the host machine. After you download the build agent software, click the executable file to run the installation. Mostly, we'll be sticking to the default installation presets, however, when you are presented with the Configure Build Agent Properties dialogue, take a moment to fill it up before proceeding ahead.
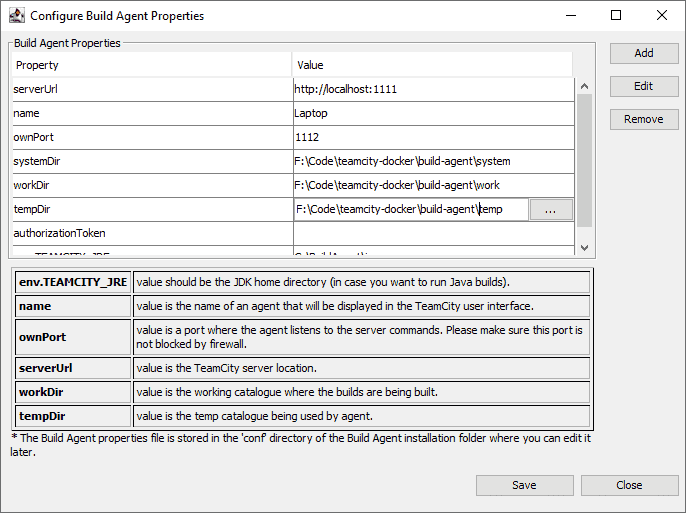
The serverUrl will be the same localhost and port number combination you previously configured for your TeamCity server. For the build agent itself, assign another available port number in the ownPort field and give it a suitable name in the name field since this name will show up in the TeamCity server UI.
For the systemDir, workDir and tempDir, I provided a base directory path of F:\Code\teamcity-docker\build-agent\. This is an empty directory and TeamCity will create the required folders inside it. Now click on Save to proceed ahead.
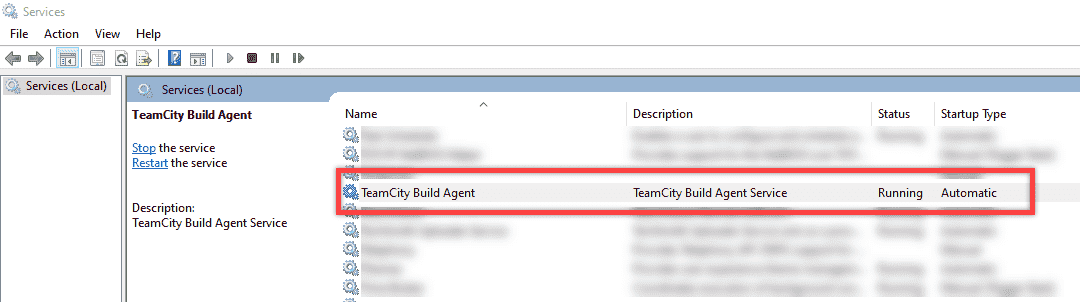
In the next step, when asked what account would you like this build agent to run as, select Run TeamCity Agent under the SYSTEM account. In a production setup, you probably would end up creating a user specifically for this build agent with the required permissions and then specifying that user's credentials here. Proceed ahead to complete the installation. Your build agent should now be running.
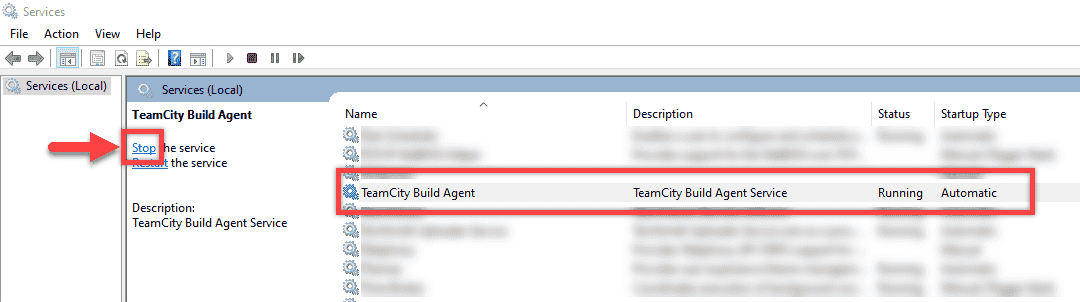
To confirm this, search for Services in Windows and open the app. This app shows a list of all the Windows services that are installed on the computer. You should find the TeamCity Build Agent service in this list with the status of running.
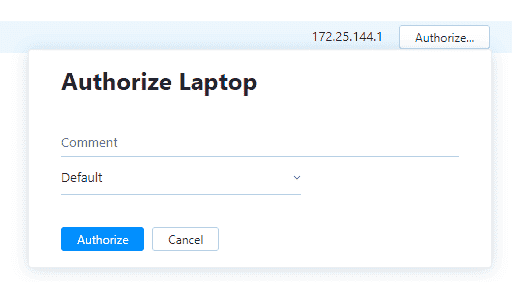
Back in the TeamCity server UI, if you refresh the page and click on the All Agents tab, you should see the build agent you just created pop up. You would first need to click on the Authorize button to confirm this agent has been set up by you.

During the authorization process, you'll be asked to optionally add a comment, which is useful for auditing purposes and also associate this build agent with a pool, which we'll link up with the default pool. Click the Authorize button once again.
The build agent connection should turn green if everything has gone well. If it still shows as disconnected, try restarting the TeamCity Build Agent Windows service. If that still doesn't work, try removing it from the UI by clicking the Remove button, restarting the TeamCity Build Agent Windows Service, and finally refreshing the UI. The build agent should appear again in the TeamCity server UI and might need to be authorized once more.
Note: I tried configuring the build agent using a Docker image but I ran into issues. It appears that when setting the server URL field as localhost:1111, the build agent refers to localhost inside it's own container rather than the localhost site on the host machine.
GitHub repository and token
Create a GitHub repository and add a license file and a readme file by checking the respective checkboxes. At this stage, we don't require any more files in this repository.
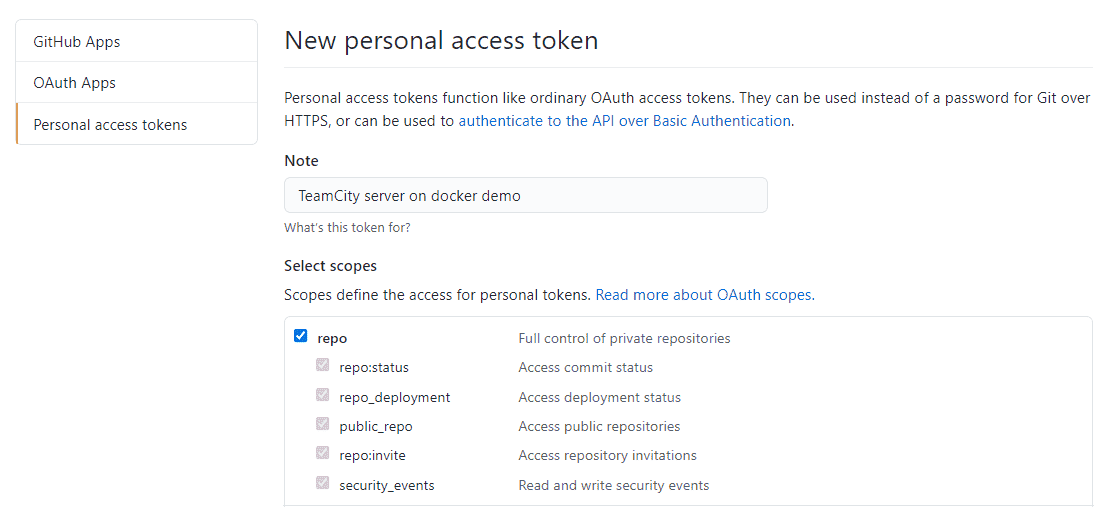
Head over to GitHub token settings page and create a personal access token with just the repo checkbox checked and create the token. Remember to save this token. This token will allow TeamCity to access GitHub without giving away your password.
Creating a project in TeamCity
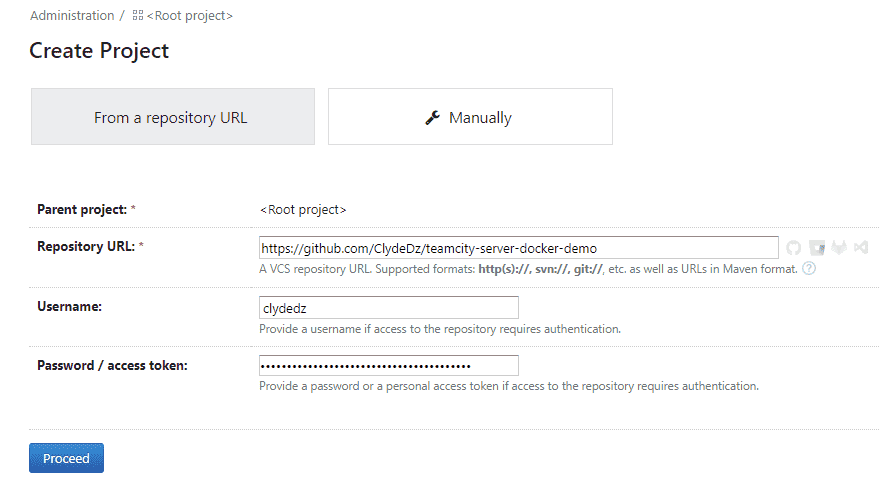
Let's head back to TeamCity and click on the Create project button.
Keep the From a repository URL tab selected and fill up the required values on this page. Paste the token you saved earlier in the Password / access token field.
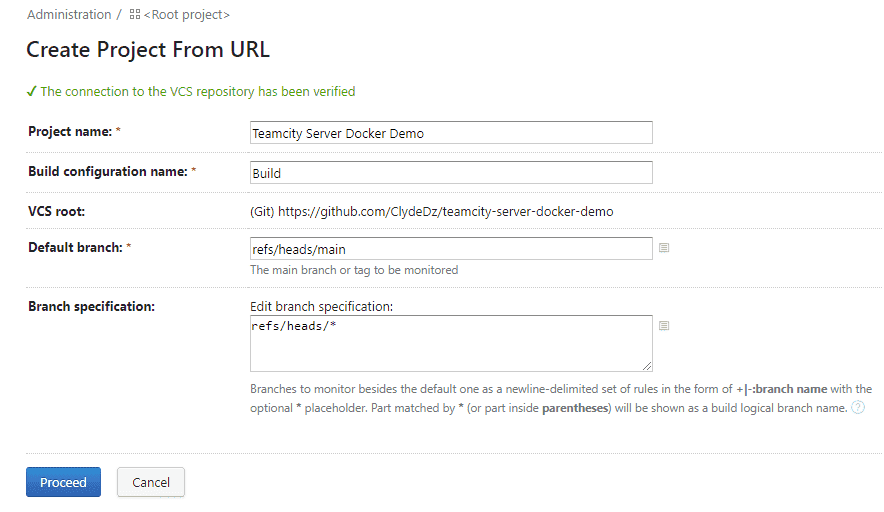
Click on the Proceed button. This will validate the connection and create a VCS root — a VCS root defines a connection to the version control system. TeamCity will show you the next screen to configure the details of the project. We'll keep the default values as-is for now and we can always come back and update these settings later if necessary. Click on the Proceed button to continue.
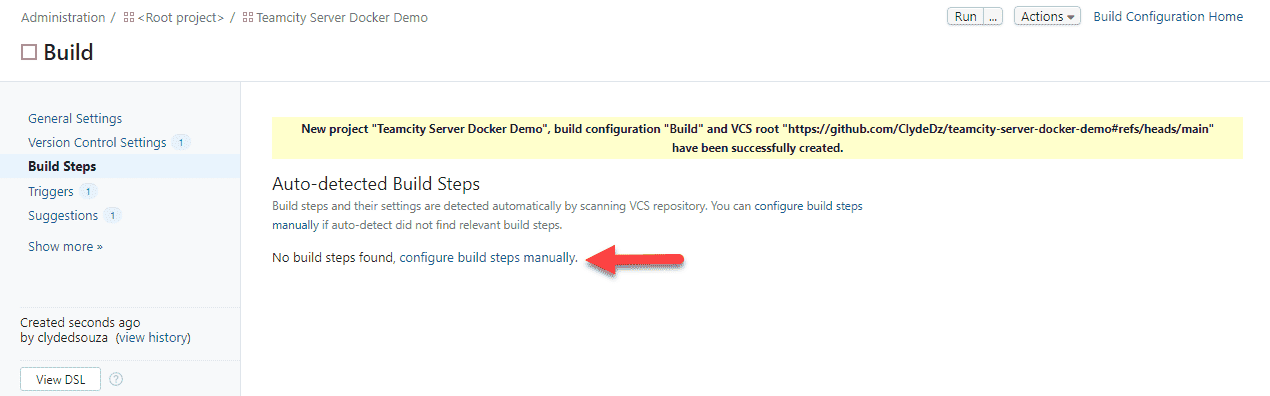
TeamCity should create a project and a build configuration under the project named Build. We'll now need to add build steps under this build configuration. To do so, click on the configure build steps manually link.
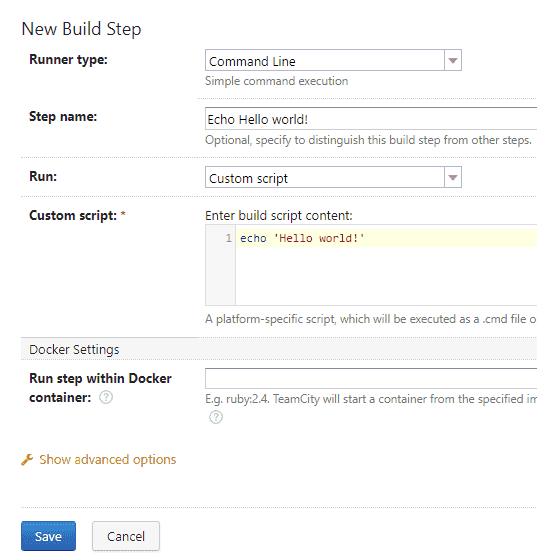
From the Runner type dropdown, select Command Line. Give it a suitable Step name, and in the Custom script field, enter echo 'Hello world!'. Click on the Save button to save this step.
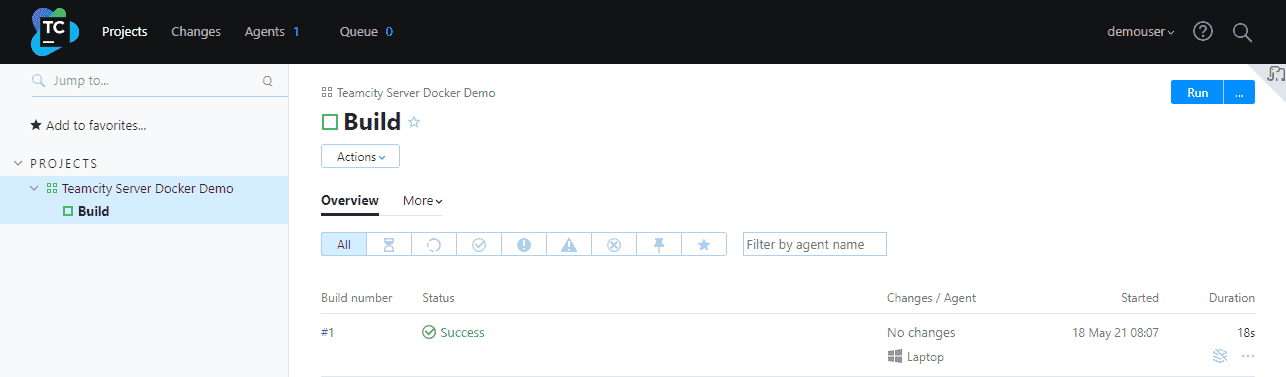
We're expecting the build to print a 'Hello world!' message. Click on the Run button to trigger a build and test this theory.
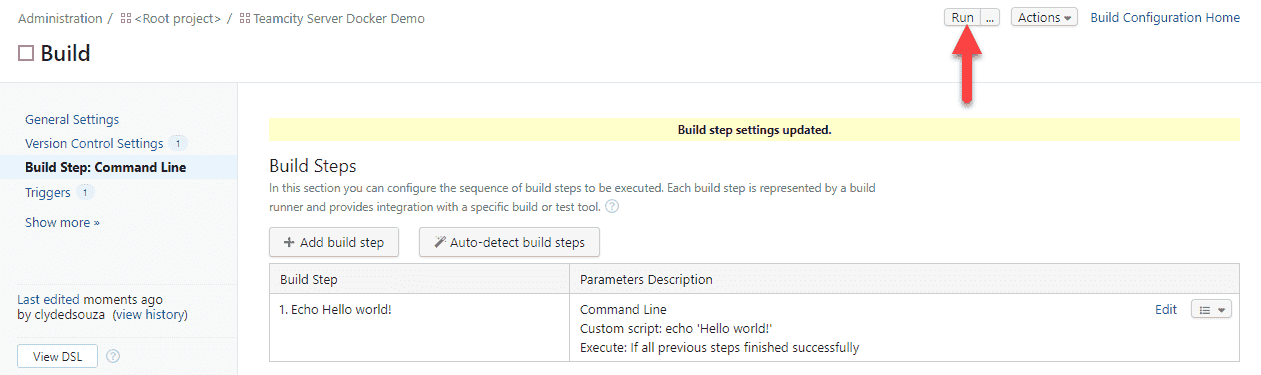
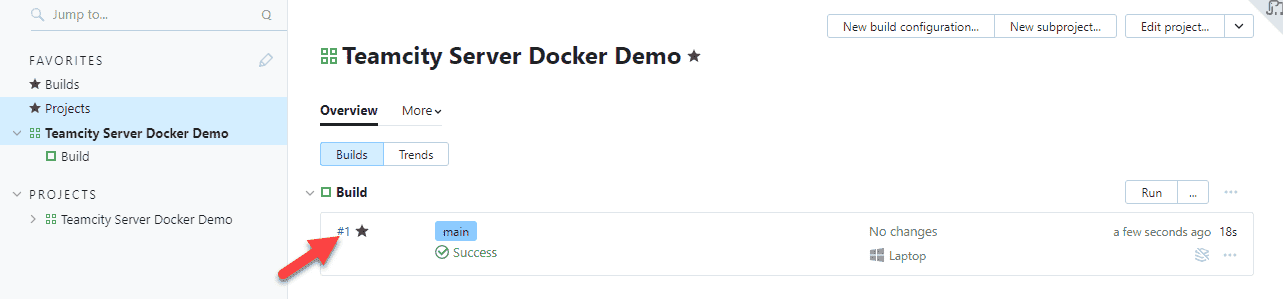
A build would've been queued in the background which our local build agent will gladly process, and if you head back to the Projects tab, you should see the progress in the UI. Once a build is successful, click on the build number to see the details of this specific build.
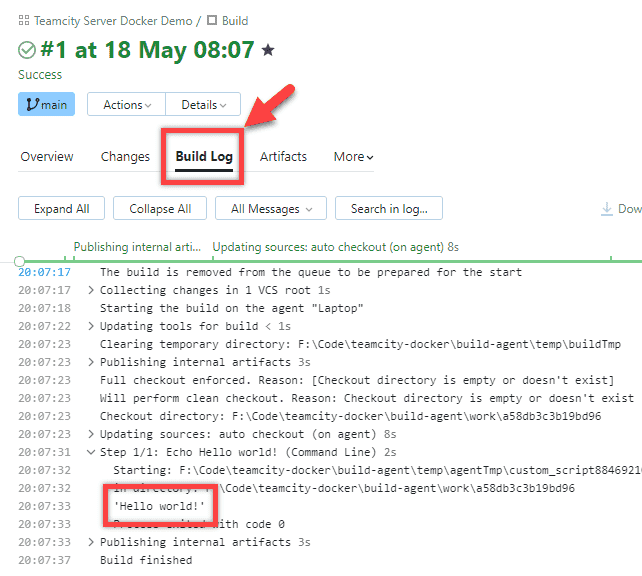
From the build details page, click the Build Log tab to see the details. If you scroll down and expand a few sections, you should see a 'Hello world!' message printed out.
For the brevity and scope of this article, we won't go into creating the full build pipeline right now. I might write another article explaining that process, but in the meantime, this official blog article might help you if you're looking for more details on how to create a pipeline itself. You can also create your build configuration from code using Kotlin DSL, so you might also want to check that out at some stage.
Bonus: Create additional users
We've only created an administrator user so far. In the real world, you shouldn't be using the administrator's credentials to log in, instead, you would want to create additional user's with limited access. Let's take a look at how we might go about creating one.
Click on the gear icon located at the top-right of the screen. Then, click on Users from the User Management section in the left sidebar. From the central screen, click on the Create user account button to open up a form to add the new user's details.
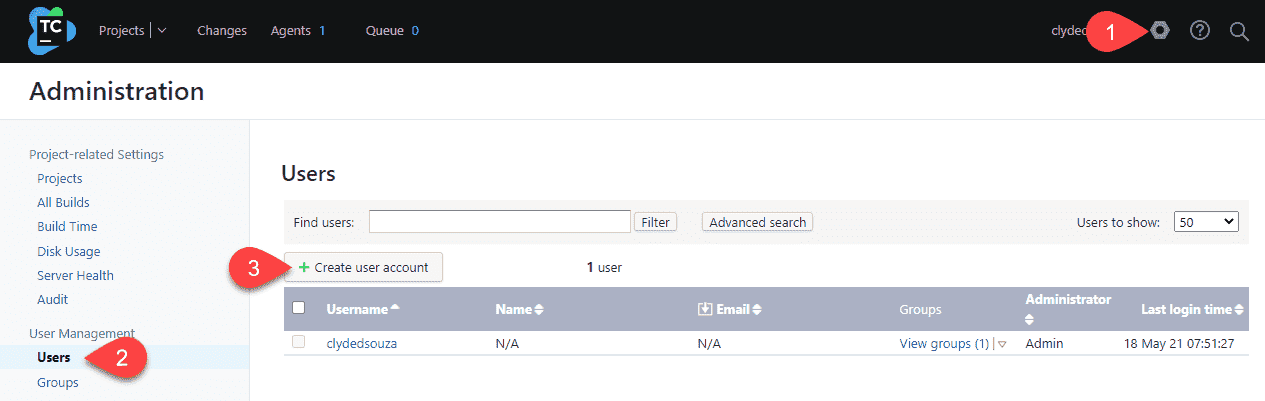
Enter a username and a strong password for this user in the Create a New User Account screen. Optionally, check the Give this user administrative privileges checkbox. Finally, click on the Create User button.

Now that we've created this new user, let's log in using this account to confirm we have access.
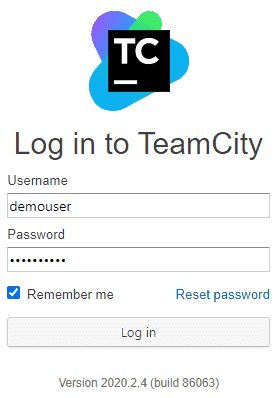
Voila! You should now have access to the TeamCity server using the newly created account.
Stop and restart
If you close the command prompt that you had opened up earlier, or if you end up shutting down your computer, you won't lose your TeamCity settings. You can always open up Docker Hub and click on the play icon button to start the TeamCity server image at any time. The same applies to when you want to sign off for the day and resume work the next day.

Clean up
If you were following along for testing or learning purposes, you might want to clean up all the resources you've just created. Let's do this step-by-step.
TeamCity server
Open up the Docker Desktop app and stop the TeamCity server instance that's currently running. Then, click on the bin/trash icon to delete this container and all of its data. Also, check the directory that you created earlier to store TeamCity data and logs, and delete the folders if it's not already cleared out.

Next, click the Images tab in the Docker Desktop app and delete the TeamCity server image as well.
TeamCity build agent
Open up Windows Services and stop the currently running TeamCity Build Agent service.
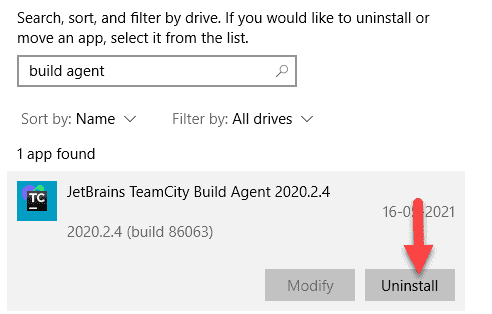
Then, search for Add or remove programs in Windows and from this UI, search for the installed build agent and click on the Uninstall button to remove this program from your computer.
Similarly, find and uninstall Docker Desktop.
That's it! Thanks for reading.