- Published on ·
- Reading time 7 min read
How To Inject CSS Code Into an HTML Page?
A step-by-step guide to solving a problem
Share this page
Introduction
I originally came across this StackOverflow question and it got me thinking — how would I automatically inject the CSS contents of a CSS file into an HTML page? After some research, I found a solution and this article aims at walking you through it.
Problem
Let's revisit the problem before we dive into the solution. We want to replace the link tag in the HTML file with the CSS contents of the file that the link tag refers to. So, for instance, if the HTML contained the following line of code:
<link rel="stylesheet" href="style.css" />
It should be replaced with this:
<style>
  <!-- minified contents of the style.css file here -->
</style>
When is this helpful?
You might ask, “What's the point of this?”
Good question! This is useful if you have a single web page that needs to load real quick. Because the web page is not requesting any additional files, it's able to render the page faster. I've personally seen a single web page being used as an offline/maintenance page or as a stand-in page (e.g. Azure Application Gateway/AWS CloudFront) when the main website is unreachable due to something unexpected.
Expanding the problem a bit
Okay, back to the problem statement. Why not take this a step further? Instead of assuming we have CSS files, let's assume we're writing CSS using Sass and that needs to be compiled into CSS before placing it into the HTML.
Next, instead of manually adding link tags to reference the CSS file like this:
<link rel="stylesheet" href="style.css" />
Why not make it a bit more dynamic? How about we only add CSS placeholders, i.e., tell it where to place the CSS contents but not what to place in there. For instance, the placeholders could look something like this:
<!-- inject:css -->
<!-- endinject -->
Let's take a look at how we might achieve this.
Solution
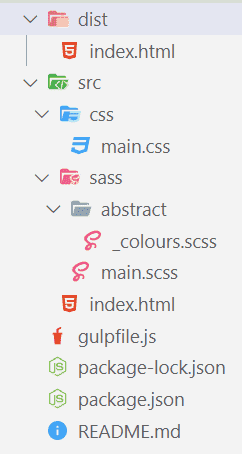
First, let's start with what files I have at the moment.
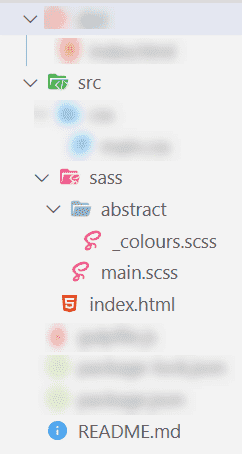
The src (source) folder has a simple ‘Hello World' index.html file. I'm using Sass to add some styling to the page. Don't worry about the blurred out files, we'll reveal them as and when we implement our solution.
We'll be using an npm based solution, so let's install the following npm packages.
npm i gulp gulp-sass gulp-inject gulp-replace --save-dev
Here's a quick summary of what these packages are and how we'll be using them:
- gulp is a toolkit that helps you automate painful or time-consuming tasks in your development workflow. We'll be using a few gulp plugins to solve our problem, so before that, we'd require to install the main gulp package.
- gulp-sass is a Sass plugin for gulp that compiles Sass/SCSS files into CSS.
- gulp-inject is a plugin to inject stylesheets and javascript references into the HTML file. This will allow us to add a placeholder in the HTML and then automatically inject the link tags that reference the CSS files into it.
- gulp-replace is a string replace plugin for gulp. This will enable us to replace the dynamically added link tag with its minified CSS contents.

GIF source
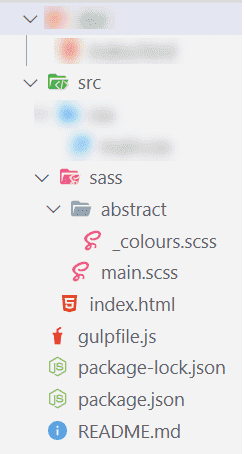
The entry point: A gulp file
To execute tasks using Gulp, you need to define them in a file named gulpfile.js. Let's create a file in the root directory and in the following sections of this guide, we'll look at what needs to be added to this file and why.
Compiling Sass to CSS: gulp-sass
Now, to compile Sass files into CSS, let's add the following into the gulpfile.js.
var gulp = require('gulp')
var sass = require('gulp-sass')

gulp.task('compile-sass', function () {
  return gulp
    .src('./src/sass/*.scss')
    .pipe(sass({ outputStyle: 'compressed' }))
    .pipe(gulp.dest('./src/css'))
})
If you need to compare, the complete gulpfile.js can be found here.
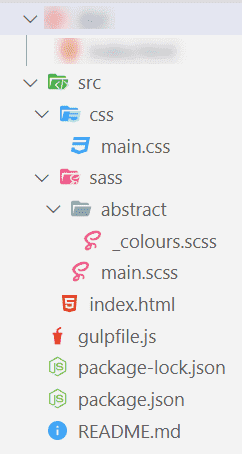
We've named this task compile-sass and given it the source folder where all Sass/SCSS files exist. We've then invoked the Sass function to compile the files in a compressed, i.e. minified format, and finally specified the destination folder where the CSS files will be dropped into. Run the command gulp compile-sass to execute this task.
Now, your solution should look something like this.
Inserting a link tag: gulp-inject
To dynamically link the CSS file in the HTML file, we'll be using gulp-inject. First, we need to add placeholders into the HTML file.
<head>
  <title>Hello</title>
  <!-- inject:css -->
  <!-- endinject -->
</head>
Let's introduce gulp-inject into the gulpfile.js file. We'll add another require statement at the top, and a new task at the bottom.
var gulp = require('gulp')
var inject = require('gulp-inject')

gulp.task('add-styles', function () {
  var target = gulp.src('./src/index.html')
  var sources = gulp.src(['./src/css/*.css'], {})
  return target.pipe(inject(sources)).pipe(gulp.dest('./dist'))
})
If you need to compare, the complete gulpfile.js can be found here.
We'll name this task add-styles, give it the HTML file that needs to be updated, give it the folder where the CSS files exist, then inject the HTML file with the source file(s), and finally provide the destination folder where the modified index.html needs to be placed.
Run the command gulp add-styles to see the magic happen. You would now see a dist folder and inside that, an index.html file.
The index.html file might look something like this.
<head>
  <title>Hello</title>
  <!-- inject:css -->
  <link rel="stylesheet" href="/src/css/main.css" />
  <!-- endinject -->
</head>
Note: If there were two CSS files in the CSS folder, then you would have two link tags referencing two CSS files.
Replacing the link tag with its CSS: gulp-replace
Now that we have the link tags added, we can read the contents of this file and inject the contents into the HTML file replacing the link tag. Let's add the below snippet into the gulpfile.js file.
var gulp = require('gulp')
var replace = require('gulp-replace')
var fs = require('fs')

function getCSSFilename(linkTag) {
  var hrefValue = /href\=\"([A-Za-z0-9/._]*)\"/g
  var cssFilename = linkTag.match(hrefValue)
  cssFilename = cssFilename[0].replace('href="', '').replace('"', '')
  return cssFilename
}

gulp.task('inject-styles', function () {
  return gulp
    .src('./dist/index.html')
    .pipe(
      replace(/<link rel="stylesheet" href="[^"]*"*>/g, function (linkTag) {
        var style = fs.readFileSync(`.${getCSSFilename(linkTag)}`, 'utf8')
        return '<style>\n' + style + '\t</style>'
      })
    )
    .pipe(gulp.dest('./dist'))
})
If you need to compare, the complete gulpfile.js can be found here.
We're creating a third gulp task called inject-styles that takes the HTML file as the input. It then finds the entire link tag from the HTML file and replaces it with the contents of the CSS file that the link tag referenced. These contents are placed inside a style tag. The function getCSSFilename() is used to extract the CSS filename from the link tag. We're dropping the modified HTML file back into the dist folder at the end of it all.
Run the command gulp inject-styles and witness the action. The final HTML file in the dist folder would look something like this.
<!DOCTYPE html>
<html>
  <head>
    <title>Hello</title>
    <!-- inject:css -->
    <style>
      body {
        color: blue;
      }
    </style>
    <!-- endinject -->
  </head>
  <body>
    Hello World
  </body>
</html>
Optional: Running all tasks with a single command
Instead of running three commands to execute three different gulp tasks, why not execute it sequentially using a single command? Append the following line into the gulpfile.js file.
gulp.task('build', gulp.series('compile-sass', 'add-styles', 'inject-styles'))
You can then run a single command gulp build and it will execute all three tasks.
Demo code
The source code for this guide can be found in my GitHub repository.
That's it! Thanks for reading.