- Published on ·
- Reading time 11 min read
Deploy a React App to an Azure Blob Storage Using GitHub Actions
Seamlessly developing and deploying single-page applications
Share this page

Introduction
I've been fascinated with GitHub Actions as I really like the idea of having the build and deployment configuration closely knit with the repository itself. I also like the use of YAML to define the entire workflow. I recently covered how to deploy an app to GitHub Pages itself, but then I thought to myself how would I deploy an app externally, let's say to an Azure storage account, for example? This article aims at answering this question.
At a high level, we'll cover the following in this article:
- The starting point: We'll create a sample React app and push these changes to a GitHub repository so that we have something to experiment with.
- Build pipeline: Since we have a boilerplate React app checked in already, we can very quickly create a build pipeline using GitHub Actions and package the built app as a build artefact.
- Creating Azure blob storage: Next up, it's time to create some resources in Azure. We won't deploy anything to these resources yet, though.
- Service principal account and credentials: Since we're not deploying our code directly via the Azure portal, but instead, via the command line, we'll need to create a service principal account so that we can use its credentials to log in via the Azure CLI and upload our code to the storage account.
- Deploy pipeline: Similar to the build pipeline created earlier, in this step, we'll create a new workflow file to deploy the build artefacts to our Azure storage account.
- Test it out: We'll look at the different ways we can test this process end-to-end and confirm that our code has been successfully deployed to the storage account.
#1 The starting point
Let's start with a common base. We'll begin by creating a React app using the Create React App utility and also add the code to a GitHub repository. I've used the following command to generate a sample React app.
npx create-react-app <project directory> --template typescript
I haven't added or modified anything — these are the files and folders that get generated out-of-the-box when we run the npx command stated above. I just made sure it works locally by running the command npm run start and that's about it.
I've pushed these changes to my GitHub repository and if you're following along, you can do the same, too. This is what my repository looked like at this stage if you want to compare.
#2 Build pipeline
The next step is to build our React app using GitHub Actions. In the .github/workflow folder, create a build-site.yml file and copy the contents from the following YAML file.
name: Build site

on:
  push:
    branches:
      - main
  pull_request:
    branches:
      - main

jobs:
  build:
    name: Build
    runs-on: ubuntu-latest

    steps:
      - name: Checkout code
        uses: actions/checkout@v2

      - name: Install Node.js
        uses: actions/setup-node@v1
        with:
          node-version: 14.x

      - name: Install NPM packages
        run: npm ci

      - name: Build project
        run: npm run build

      - name: Run unit tests
        run: npm run test

      - name: Upload production-ready build files
        uses: actions/upload-artifact@v2
        with:
          name: production-files
          path: ./build
This YAML file is generally divided into three sections. We start off by setting a friendly name in the name keyword. In this case, it's set to Build site. This name appears in the GitHub Actions UI so it's a good practice to give this a descriptive name especially if you're going to have multiple workflow files in your repository.
The on keyword and its code block describe how this workflow is triggered. In the example above, we're setting the workflow to be triggered when code is pushed to the main branch or a pull request is created with the main branch as the target branch.
The jobs keyword and its code block list the steps to be performed when this workflow is triggered. We're essentially running multiple commands to install Node, install the required npm packages, build the site and run the unit tests. The final step uses a GitHub Action from the marketplace to upload the generated site files from the build folder into a ZIP file called production-files.
#3 Creating an Azure blob storage
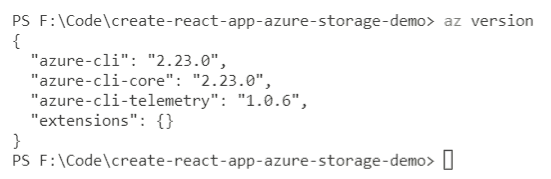
We'll be using Azure's command-line tool to create a storage account. First, if you haven't already, please sign up to Azure. Next, let's download the Azure CLI from this page. Then, run the az version command to verify the tool is installed.
Tip: You can now write your Azure command-line snippets into a
.azclifile. If you're using VS Code, I would highly recommend you to use the Azure CLI Tools extension. This extension combined with the.azclifile provides IntelliSense for commands and their arguments, support to highlight a command from the.azclifile and run it in the terminal, and heaps of other features. Have a look at my.azclifile here.
For us to interact with Azure, we'll need to first log in to Azure via the CLI. Run the command az login to log in to your account. This will open the authentication page in the browser where you can enter your username and password. After successfully logging in, you should see a confirmation message that you can close the browser. This command will also print a list of subscriptions you have access to. Copy the subscription id from this JSON output — we'll need this value later.

Optionally, running the command
az account listwill also print a list of subscriptions you have access to.
Let's now create a resource group in this subscription. A resource group is a container for logically related Azure resources. Run the following command to create a resource group.
az group create -l westus -n <RESOURCE GROUP NAME> --subscription <ID>
Replace <RESOURCE GROUP NAME> with a suitable name and <ID> with the subscription ID that you saved earlier. This will print a JSON output in the console confirming that a resource has been created.

Now, we'll create an Azure storage account by running the following command. Replace <STORAGE ACCOUNT NAME> with a globally unique storage account name, and <RESOURCE GROUP NAME> with the resource group name you just created before.
az storage account create -n <STORAGE ACCOUNT NAME> -g <RESOURCE GROUP NAME> -l westus --sku Standard_LRS
This command will also print a JSON output confirming the resource creation.

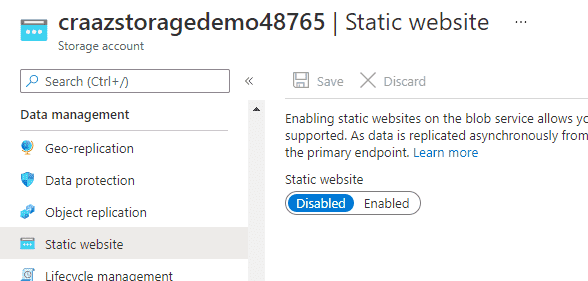
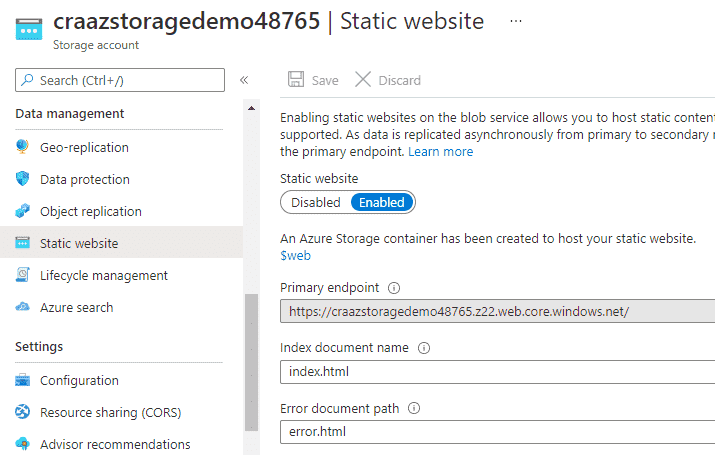
While the storage account has been created, it would not support a static website out of the box — we'll need to manually enable this. Head over to the Azure portal, click the storage account you just created, then click on the Static website menu item, then from the screen, click the Enabled toggle and save your changes. Optionally, you can also do this via a command line.
If you do opt for the command line, run the following command to enable a static site on the storage account.
az storage blob service-properties update --account-name <STORAGE ACCOUNT NAME> --static-website true --404-document error.html --index-document index.html
Either way, you should see the static website is enabled and a primary endpoint, A.K.A, the URL for the website available.
#4 Service principal account and credentials
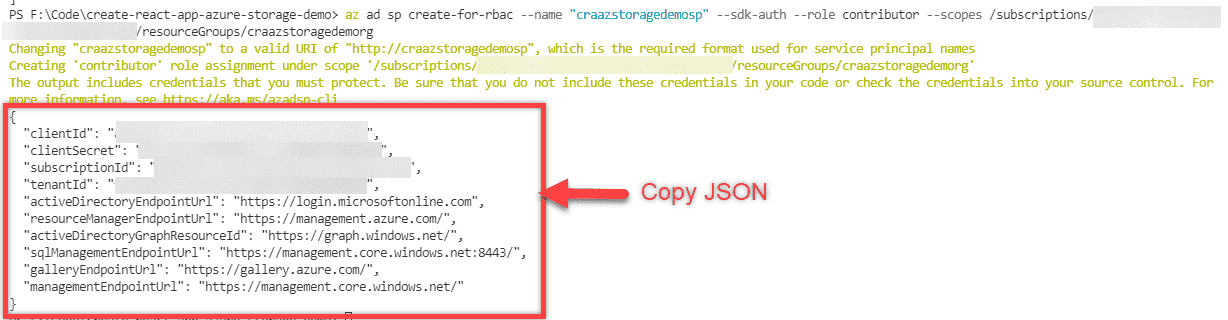
We'll now need to create a service principal in Azure so that we can log in via the command line to deploy our React app to the storage account. Run the following command to create a log in.
az ad sp create-for-rbac --name "<UNIQUE NAME>" --sdk-auth --role contributor --scopes /subscriptions/<SUBSCRIPTION ID>/resourceGroups/<RESOURCE GROUP NAME>
Replace <UNIQUE NAME> with a suitable name for the service principal account, and <SUBSCRIPTION ID> and <RESOURCE GROUP NAME> as appropriate. Copy the JSON output that would've been printed on your console after you run the above command — we'll need these details in the next step.
Adding these credentials to GitHub
We'll need to add the JSON credentials you copied above to our GitHub repository in order for us to use the Azure login command in the GitHub workflow file. Click on Settings, then click on Secrets from the left sidebar menu and then click on the New repository secret button.
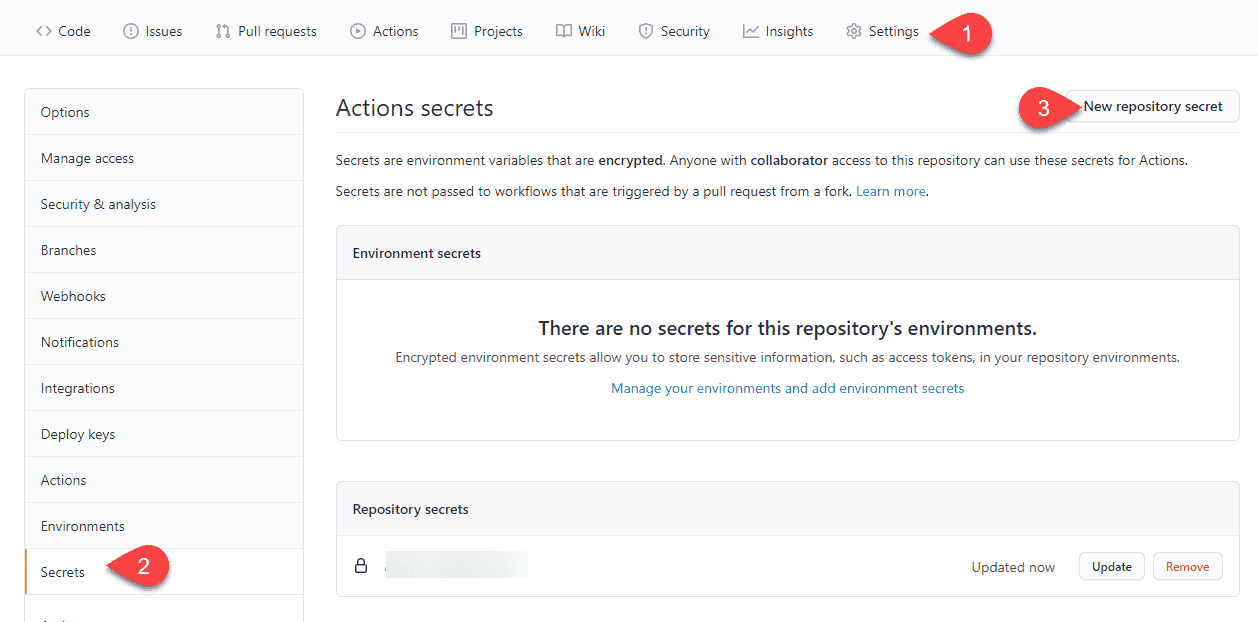
Enter AZURE_CREDENTIALS in the Name field. You can rename this as long as you remember to rename the reference while using this secret in the workflow file. In the Value field, copy the JSON you copied earlier. Finally, click the Add secret button.
#5 Deploy pipeline
Now that we've got the resources created in Azure and have got a login ready, it's time to deploy our code to the storage account.
Let's create a file named deploy-site.yml in the .github/workflows directory and copy the contents from the YAML file below.
name: Deploy site

on:
  workflow_run:
    workflows: ['Build site']
    branches: [main]
    types: [completed]

jobs:
  deploy:
    name: Deploy
    runs-on: ubuntu-latest
    if: ${{ github.event.workflow_run.conclusion == 'success' }}

    steps:
      - name: Download artifact
        uses: dawidd6/action-download-artifact@v2
        with:
          workflow: build-site.yml
          workflow_conclusion: success

      - name: Azure login
        uses: azure/login@v1
        with:
          creds: ${{ secrets.AZURE_CREDENTIALS }}

      - name: Upload to Azure blob storage
        uses: azure/CLI@v1
        with:
          azcliversion: 2.0.72
          inlineScript: |
            az storage blob upload-batch --account-name craazstoragedemo48765 -d '$web' -s ./production-files

      - name: Azure logout
        run: |
          az logout
This workflow file is divided into three sections. The name keyword sets a friendly name for this workflow.
The on keyword and its code block define how this workflow is triggered. In this case, we're wanting to trigger this workflow when a workflow named Build site is complete and only if the Build site workflow was triggered on the main branch.
The jobs keyword and its code block define the steps that need to run as part of this workflow. We have a single job named Deploy. The if condition states that this job should only run if the dependent workflow was successful. We use the Azure CLI commands to log in to the Azure account using the service principal credentials created earlier. We're then uploading the artefacts to the $web folder of the blob storage account and finally, we're logging out of Azure.
#6 Test it out
Make an update to your site content and push your changes to GitHub. This will trigger the build workflow and once that is successful, it will trigger the deploy workflow.
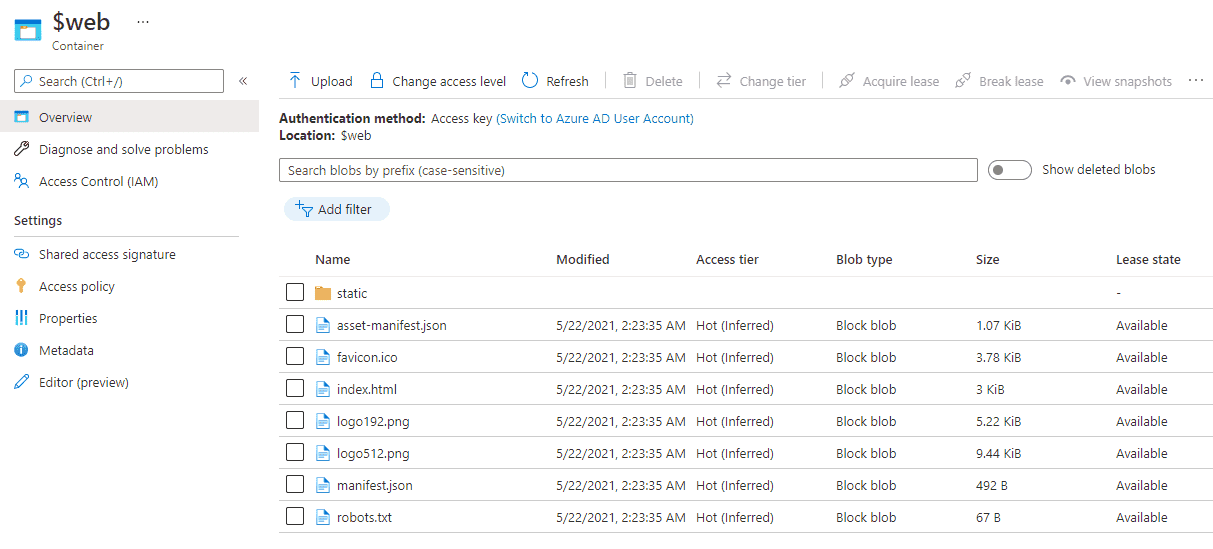
If you head over to Azure and click on the storage account you created, then click on Containers from the left menu and then click on the $web folder, you should see your React files in there.
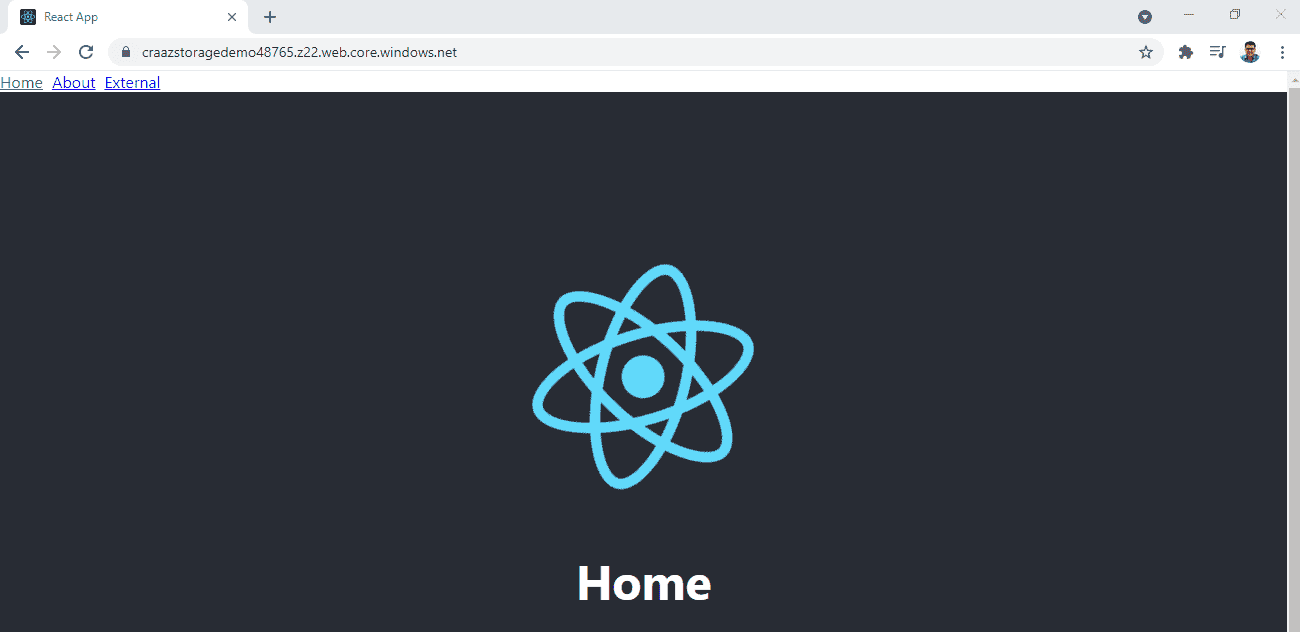
Open up the URL of your static site in the browser to confirm your React app has loaded. You should've got this URL when you enabled the static site on the storage account. It should be of the format <storage account name>.z22.web.core.windows.net.
If you create a new branch, make some more code changes and then create a pull request to merge the changes back to the main branch, you'll notice that the build workflow would've run but not the deploy workflow. Once you merge your changes into the main branch, both the build and deploy workflows will run and an updated version of your app will be deployed to the storage account.
Resources
That's it! Thanks for reading.