- Published on ·
- Reading time 20 min read
Formatting Your eBook Using Kindle Create
Demystifying the process of making your eBook readable on various device types
Share this page

The road to self-publishing can be overwhelming especially when there are so many different aspects to look at. One major chunk of work involves formatting your manuscript so that it's readable on different devices. Not knowing where to start or how to join all the dots can be frustrating, so to make your life easier, I've put together a simple guide that explains this process and I also provide some insight based on the experience of going through this process myself.
Preface
This guide is catered toward formatting your eBook only. For paperback options, different steps might be involved. This guide is written on a Windows device, so the instructions might be Windows-specific in some cases, otherwise, most of the steps should be transferable.
This guide is structured in the following format:
- Section 1 focuses on formatting your manuscript using Microsoft Word, explaining what bits are required and what is recommended.
- Section 2 focuses on the standalone software called Kindle Create and how you would go about formatting your manuscript using this software.
- Section 3 helps connect the dots to give you an end-to-end view of the process. This section outlines the steps performed in Kindle Direct Publishing and how the output from the previous sections feeds into this.
- We wrap this guide up with alternatives to using Kindle Create and then quickly recap everything.
Section 1: Formatting your manuscript using Word
Before we jump into Kindle Create, let's ensure that the manuscript in Microsoft Word is well-formatted. This KDP article provides a fair bit of guidelines around formatting your eBook. In addition to that, here are some additional details and some recommendations based on my experience of going through the process myself.
General formatting advise
Formatting applied in Kindle Create is what will show up in Kindle, so, while you don't need to format your manuscript in Word (exception: indentation), I'd recommend you do if you're planning to create a PDF or an EPUB file using the same Word document to publish your eBook on other platforms.
Throughout the document, you would want to stick to only one font. A simple font like Arial or Times New Roman works great. The font size for your manuscript text can be set at 12px and chapter titles can be set at 16px.
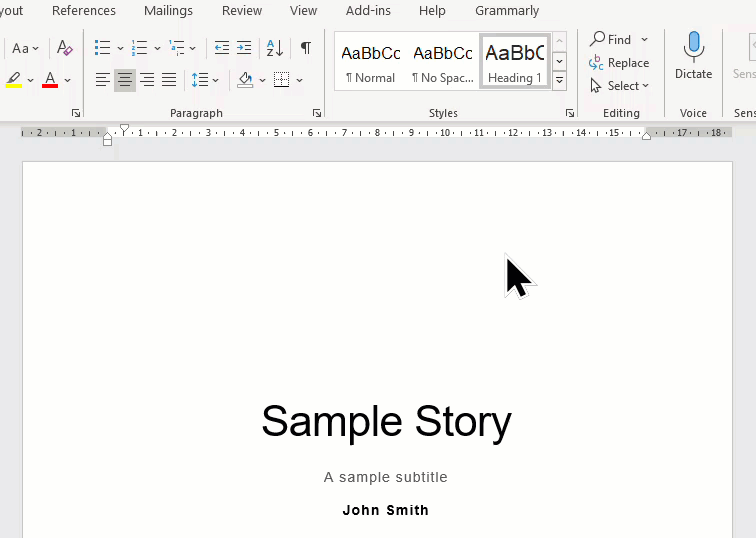
Book title, subtitle and author's name
The first page of your manuscript should have the book title, subtitle (if one exists) and the author's full name (or pen name), each element on separate lines.

Image courtesy of the author
Microsoft Word has quite a few built-in styles that you can use. This should be located in the Styles section of the Home tab in the ribbon. I'd recommend familiarizing yourself with what's available.
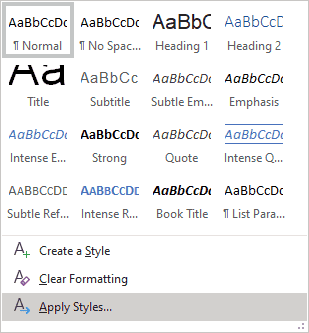
Image courtesy of the author
For the book title, select the Title style, for the subtitle, select the Subtitle style and for the author name, you can also select the Subtitle style and potentially format the text to bold. Leave the font sizes as-is for this page.
Page breaks
When placing content on a new page, do not hit the Enter key until the cursor is finally on the next page. This only adds whitespaces and eventually, when your eBook will be viewed on a different device type, this content may not be on a new page anymore.
The correct approach is to use Word's page break option. Place your cursor at the start of the text you want on the next page. Click on Insert from the ribbon, and then click on Page Break. This will move the text to the next page. The GIF below shows these steps in action.
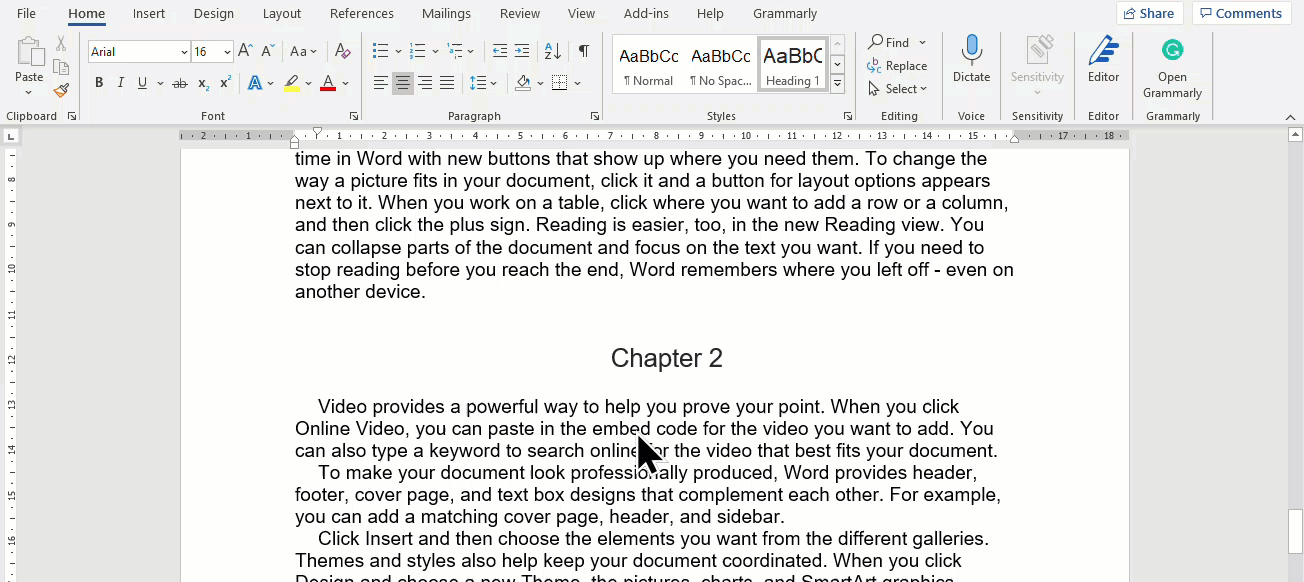
GIF courtesy of the author
Copyright text
The copyright text block should be the second page of your manuscript. While this format — © 2021 John Smith. All rights reserved. — is enough, you might want an extended version of the copyrights text block. Have a look at this article for more examples.
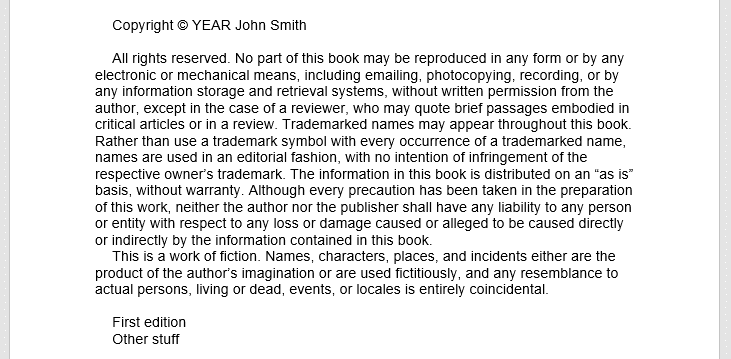
Image courtesy of the author
Apply the Normal style for the entire copyright text block, if not automatically applied.
Chapter titles
For all chapter titles, you would use the Heading 1 style. However, by default, the Heading 1 style isn't centre aligned.
As the KDP article suggests, it's easier to modify the existing Heading 1 style in Word, set the alignment to centre, and then apply it to all chapter titles. While you're at it, it might be best to also update the font, font size and font colour. The GIF below shows how to find the Modify Style window.
GIF courtesy of the author
Manuscript body
Just like we did for Heading 1, let's right-click the Normal style and modify it.
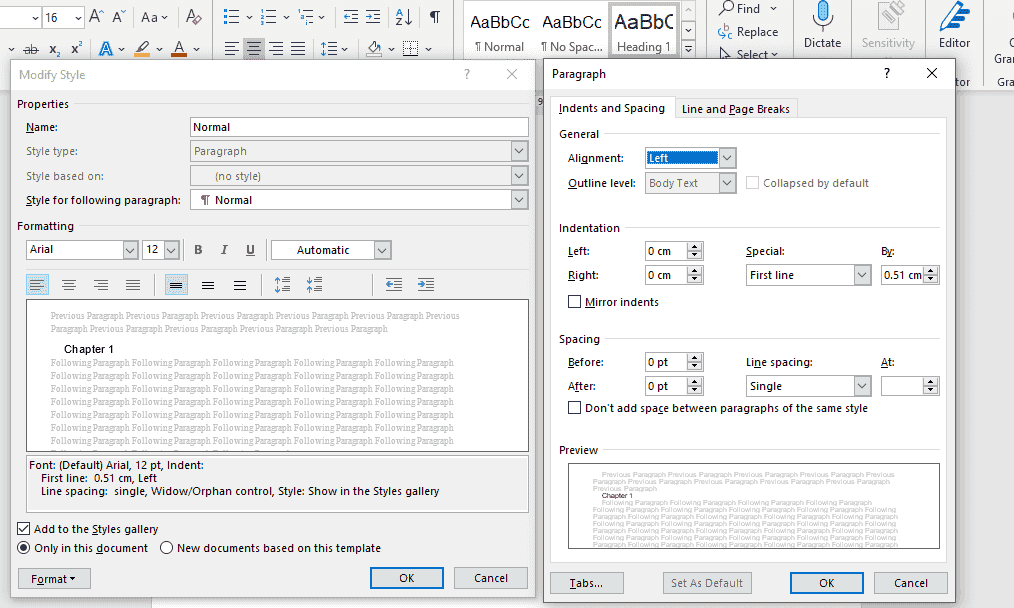
Image courtesy of the author
From the Format dropdown button at the bottom-left of the pop-up window, select Paragraph. In the Paragraph pop-up window, here are a few things you'd need to configure:
- In the General section, set Alignment to Left.
- In the Indentation section, select First Line from the Special dropdown and set the value of 0.51cm in the By dropdown. The values for the Left and Right dropdowns are set to 0cm.
- In the Spacing section, the values for the Before and After dropdowns are set to 0pt. The Line spacing dropdown is set to Single.
Important: While most of the formatting will be taken care of by Kindle Create, it doesn't automatically add an indentation on the first line. So, it's important that this piece is done in Word instead.
Table of contents
I would recommend creating the table of contents using Word instead of Kindle Create for two reasons:
- Creating a table of contents using Kindle Create adds the book title to the table and you cannot edit the table and remove the item from the table. In Word, you can manually edit the items in the table of contents.
- If you're converting this Word document to EPUB or PDF, you would want a table of contents in the Word file.
Follow these steps to add a table of contents page to your manuscript. This goes after your copyright page and before the first chapter.
- On a new page, type in 'Contents' and apply a style of Heading 1.
- Bring your cursor to a new line, click on the References tab from the ribbon, and then click on the Table of Contents dropdown. From the dropdown, select Custom Table of Contents.
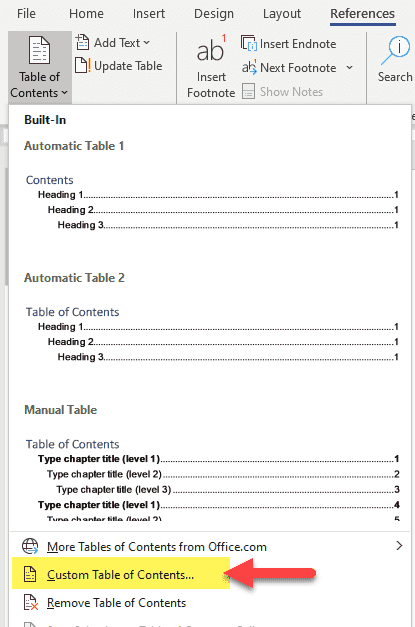
Image courtesy of the author
- From the Table of Contents pop-up window, uncheck the Show page numbers checkbox since the page number will vary depending on the device the book is read on. In the General section, select Classic from the Formats dropdown. Leave the rest of the settings as-is. Click OK to place the auto-generated table of contents on your page.
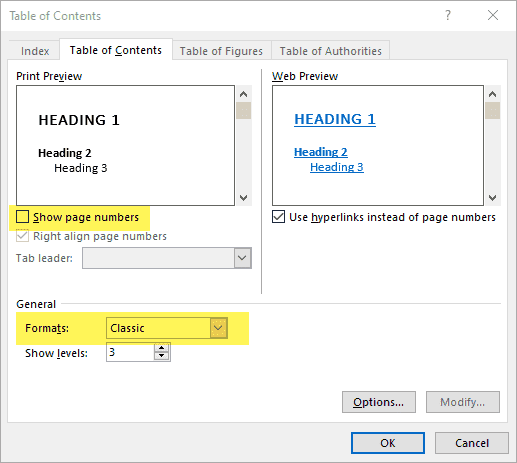
Image courtesy of the author
If you add a new chapter or move things around, click on the Update Table button located in the References tab. This will regenerate the table of contents for you.
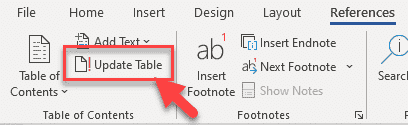
Image courtesy of the author
If you don't want 'Contents' itself to appear in the table of contents, select that block of text and hit the delete button so that your first chapter is the first item in the table of contents.
Note: Every time you update the table of contents, you'll need to remove Contents from the table of contents.
In a similar fashion, complete the formatting for the rest of the document and confirm it looks good before proceeding ahead.
Section 2: Kindle Create
Kindle Create is a standalone software provided by Amazon to help you format your eBook manuscript. Not only does it come with built-in themes that you choose from depending on the genre of your eBook, but it also comes with a previewer so you can view how your eBook would look on various device types.
Installing the software
The first step is to download the software from this page and install it on your computer. Once installed, search for Kindle Create and click on it to open it up.

Image courtesy of the author
Creating a project
Click on the New Project From File button from this screen to create a new project.
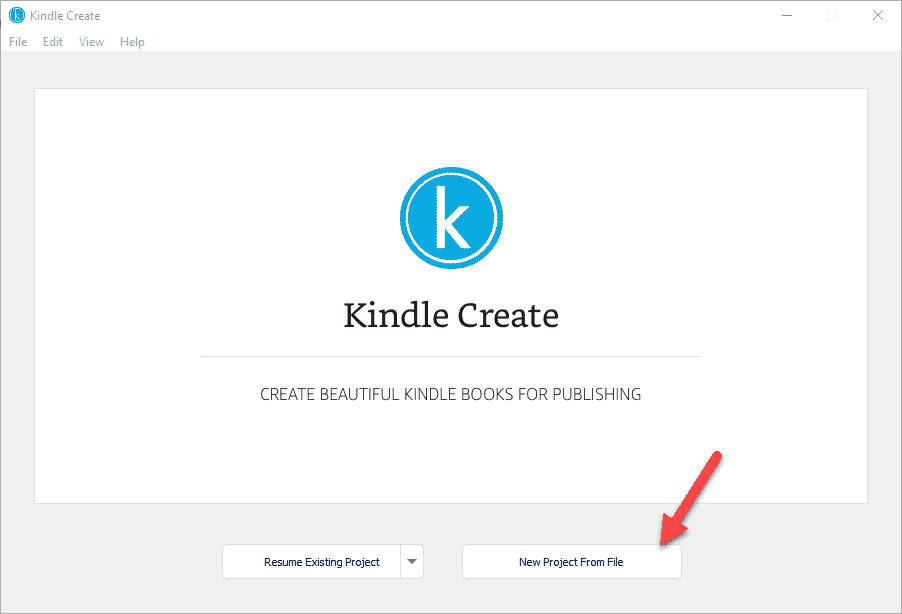
Image courtesy of the author
For this guide, we'll assume the first option as our book type and then click on the Choose File button to upload the Word document we've been editing.
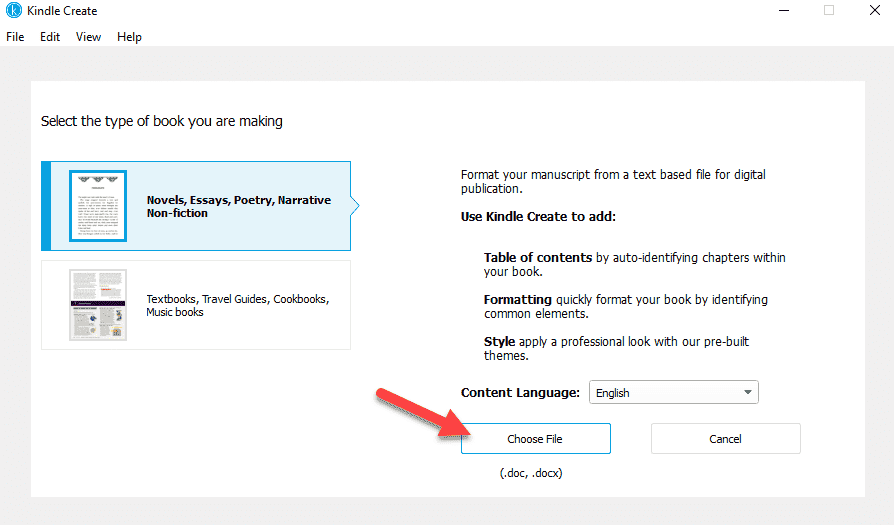
Image courtesy of the author
Depending on the size of the Word document, it may take a few moments for the import process to complete.
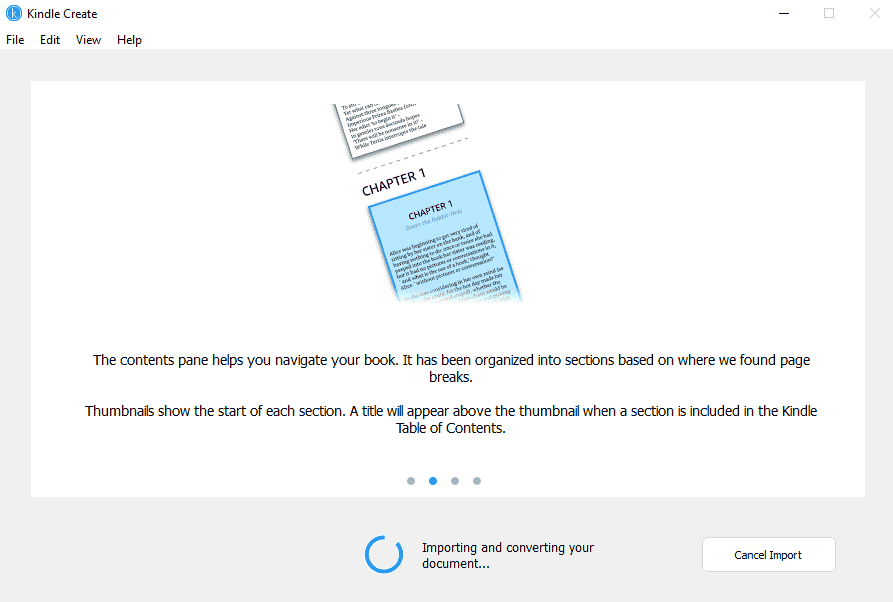
Image courtesy of the author
Once the Word document is successfully imported, click on Continue to proceed ahead.
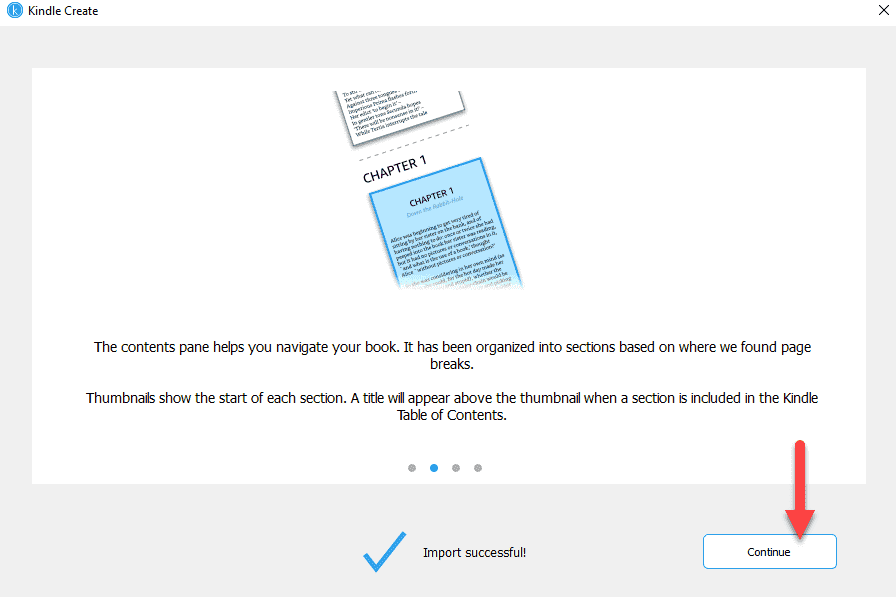
Image courtesy of the author
Assuming you've applied the heading styles to all chapter titles, Kindle Create will try and automatically curate chapter titles for you. Don't worry if any chapter isn't on this list yet as this isn't the final structure of your eBook. For now, select what you want to keep and then click on the Accept Selected button.
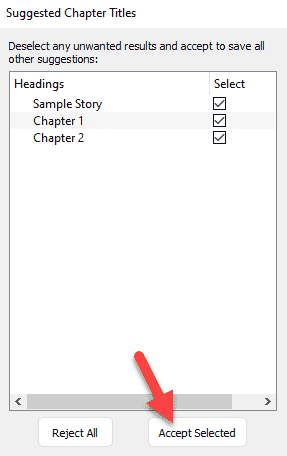
Image courtesy of the author
Hooray! You've successfully imported your manuscript into Kindle Create.
Navigating around
Let's take a quick tour of Kindle Create before we jump into the formatting specifics.
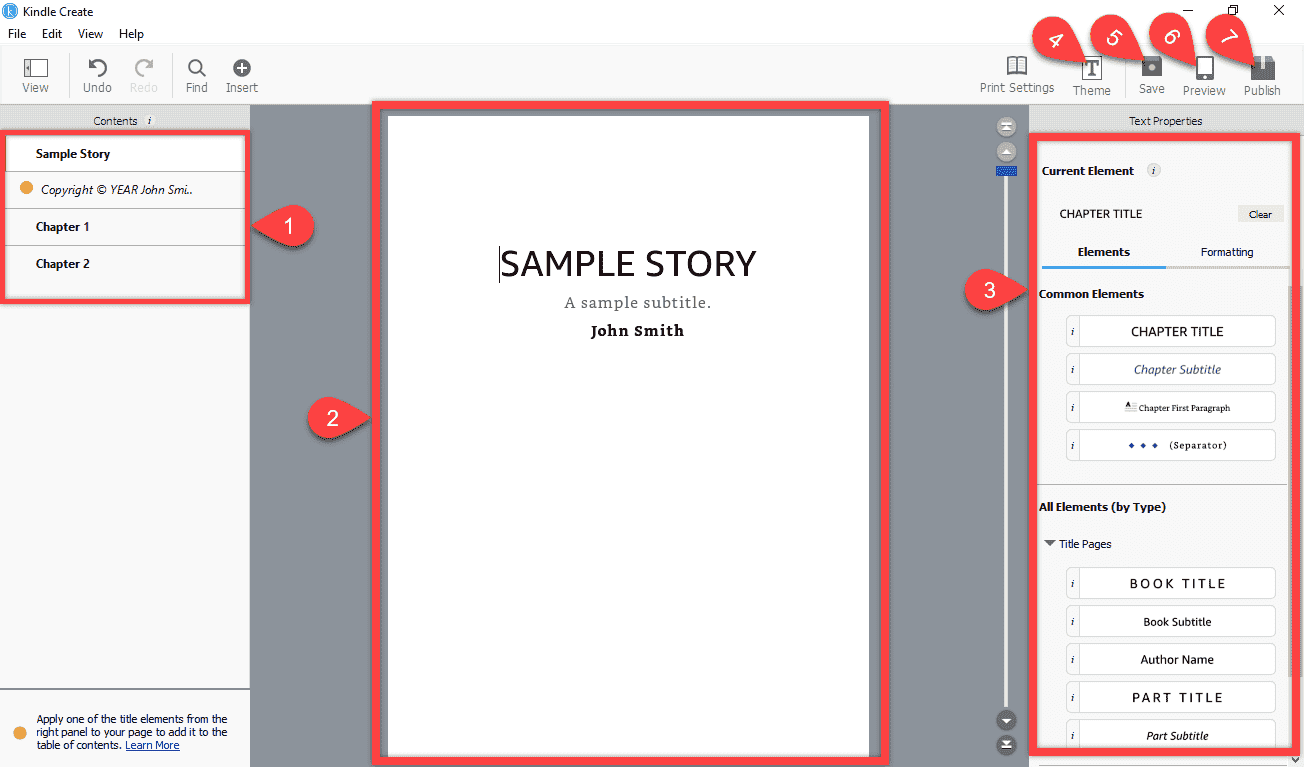
Image courtesy of the author
- Contents: Kindle Create scans your manuscript and presents all chapters and other important sections of your book in the Contents panel. You can click each element to view that page. A yellow dot appearing beside an element indicates that an action is required to perform on your end. We'll look at this action in detail below.
- Manuscript page preview: You can preview any page from your manuscript in this panel and also select any text and update its formatting.
- Text Properties: Kindle Create comes loaded with some built-in styles for various themes. You would be selecting text from the Manuscript page preview panel and then applying one of the available styles.
- Theme: Kindle Create has a few themes available for you to use. You may want to change this depending on the genre of your book. By default, the Modern theme is selected. I encourage you to click on Theme and explore the different styles available before formatting your manuscript.
- Save: You would want to regularly click this button to save your changes or hit the keyboard shortcut CTRL+S.
- Preview: Clicking this button will open up the previewer. The previewer enables you to view your manuscript on various Kindle devices and when various font styles, sizes and alignments are selected on that particular device.
- Publish: Finally, once you're happy with the formatting applied, you would click on the Publish button to create a .kpf file which you can then use to upload to Amazon's Kindle Direct Publishing.
Formatting the first page
Let's take a look at how we might go about formatting the first page of our manuscript using Kindle Create.
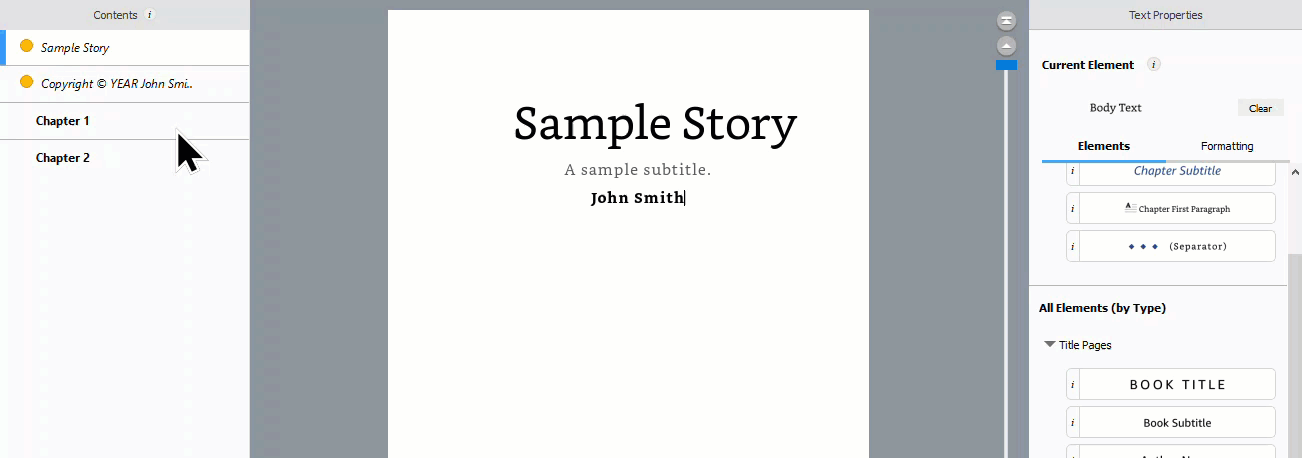
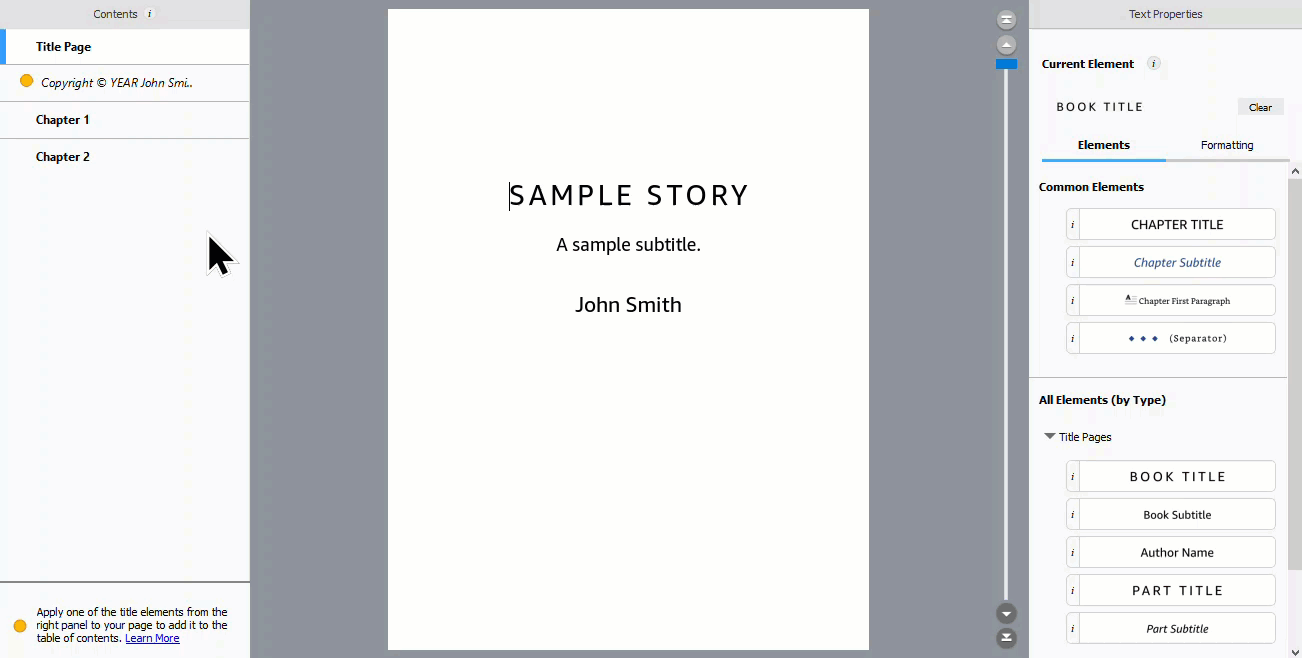
- Select the first element from the Contents panel. In this example, I would select the Sample Story element.
- Using your cursor, select the book title text in the Manuscript page preview panel.
- Now, click the Book Title button from the Text Properties panel to apply the Book Title style to the selected text. You'll immediately see that the style for the selected text has changed.
The GIF below shows these steps in action.
GIF courtesy of the author
Congratulations, you've formatted your very first element in Kindle Create!
Repeat the steps above for the subtitle and the author's full name. For the subtitle, select the Book Subtitle style and for the author's full name, select the Author Name style.
Formatting the copyrights page
Now, let's follow similar steps to format the copyrights page.
- Click on the Copyright element from the Contents panel.
- Then select the entire copyrights text content.
- From the Text Properties panel, scroll down and open up the Book Start and End Pages section and click on the Copyright Text style button to apply this style to the selected text.
- Note, you can hover your mouse over the ‘i' icon to view what this style is useful for and what it might look like.
- The yellow dot from the copyrights element in the Contents panel has also gone away as we've now assigned a style to the page.
The GIF below shows these steps in action.
GIF courtesy of the author
Formatting the rest of the manuscript
Fortunately, you don't have to select the contents of your entire manuscript and apply a general Body Text style — this is already done for you by default. Even the chapter titles should have the Chapter Title style applied already. How amazing is that?
If you need the first paragraph of every chapter to have a drop cap style, for example, then you would need to manually make this update. In this case, select the first paragraph and then click on the Chapter First Paragraph style.
Important: If you don't like the style applied to the chapter contents, there is NO built-in style button to apply the Body Text style easily. Your only two options are to 1) Click on the Undo button located in the top-left section of the software (or keyboard shortcut CTRL+Z), or 2) Click on the Clear button to clear the applied style and revert back to Body Text.
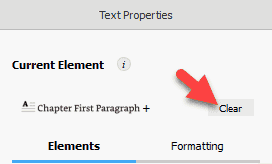
Image courtesy of the author
The problem with hitting the Undo button is that it's only effective if you immediately change your mind. However, if you change your mind at the very end of formatting, hitting the Undo button will start to undo all changes made.
The problem with hitting the Clear button is that while it reverts the selected text back to Body Text, it also reverts additional formatting like indentation and margins, which you would have to then manually apply by clicking the Formatting tab in the Text Properties panel.
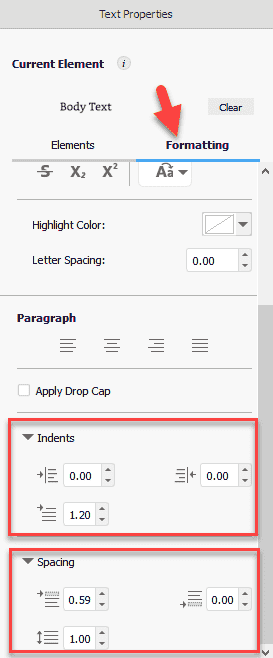
Image courtesy of the author
Depending on your manuscript, you might also find other styles useful. Feel free to explore around a bit before finalizing the formatting of your eBook.
Remember to always save your changes
You're putting all that hard work in and you definitely do not want to lose your unsaved changes. Click the Save button (or keyboard shortcut CTRL+S) to save your changes. The first time you save, Kindle Create will create a folder in the desired location with all of the resources that Kindle Create needs. In that folder, you will find a file with the extension .kcb which stands for Kindle Create Book.
Previewing your eBook
Kindle Create comes with a built-in previewer. This allows you to see what your book will look like on different Kindle devices.
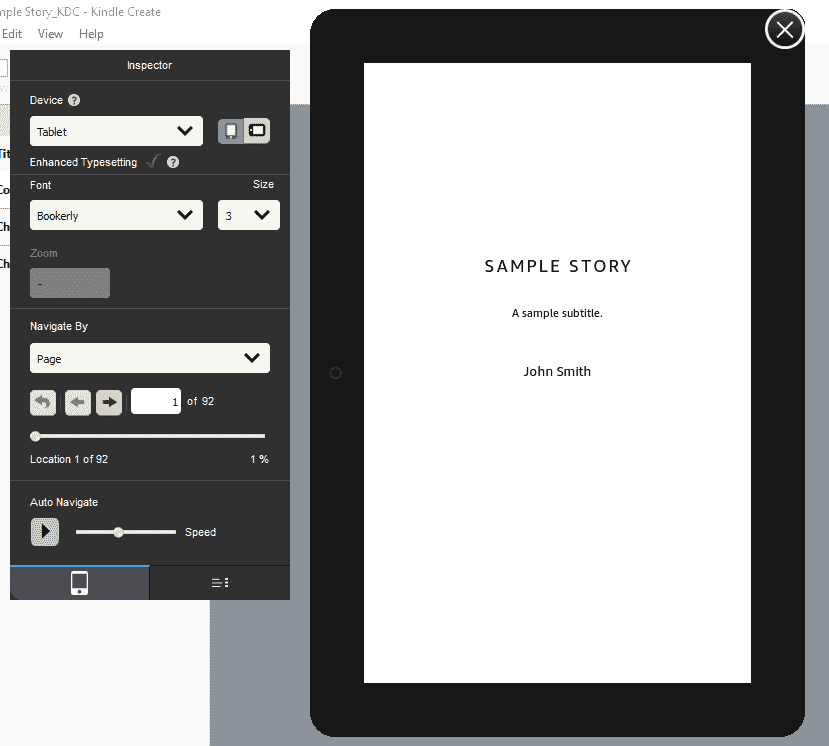
Image courtesy of the author
Clicking on the Preview button will open an Inspector window and a virtual device beside it with your eBook loaded in. Feel free to change the device type, device orientation, font style and size from the Inspector window to see how it would look like in the virtual device.
Note: If you're using Kindle Create you don't need to download the standalone software Kindle Previewer since a previewer comes built-in with Kindle Create.
The Inspector window is loaded by default, but you'll also notice an additional tab at the bottom. Clicking on that tab will open up the Table of Contents window which will allow you to click and navigate to any location in your eBook.
Image courtesy of the author
Once you're satisfied, click on the huge cross icon on the top-right of the virtual device to close the previewer.
Publish
Assuming everything above looks good, it's now time to create a publishable file which we will then use to upload to Kindle Direct Publishing. Click on the Publish button on the top-right of the Kindle Create screen and choose a destination directory where this file will be placed.
Note: Clicking on the Publish button will not publish your eBook to Amazon directly.
Once the processing is complete, you should see a pop-up confirmation similar to the screenshot below. Click on the Show .kpf folder to view the file. Here, .kpf stands for Kindle Create Publishable File.
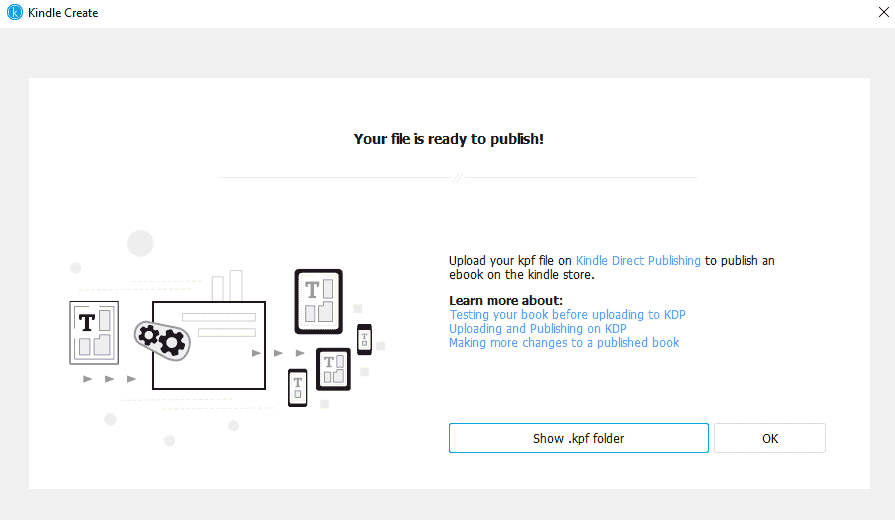
Image courtesy of the author
This folder should have a file with a box icon similar to the screenshot below. Your entire formatted eBook is condensed into this single file.
Image courtesy of the author
Congratulations! You have learnt how to upload your Word document to Kindle Create, format your manuscript using Kindle Create, preview the eBook on various devices and also created a publishable file.
Section 3: Kindle Direct Publishing
I'd like to also outline the steps in Kindle Direct Publishing around uploading this .kpf file so you get an end-to-end view of the process.
You would start by clicking on the + Kindle eBook button from the Bookshelf page to create a new eBook.
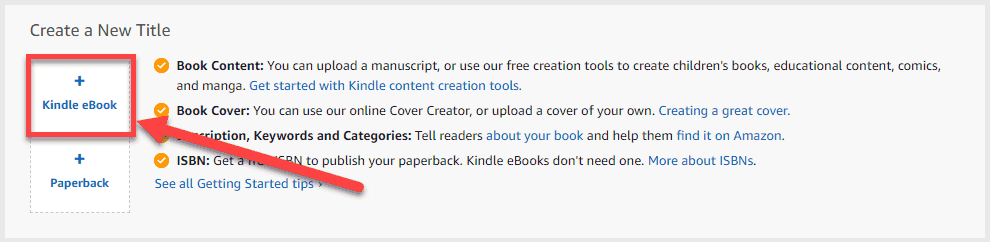
Image courtesy of the author
Next, you would fill up the details about your eBook as required. For the scope of this article, I'm not adding those steps here. Step two of this process is uploading the eBook content. In the Manuscript section, you should see an Upload eBook manuscript button, similar to the screenshot below.
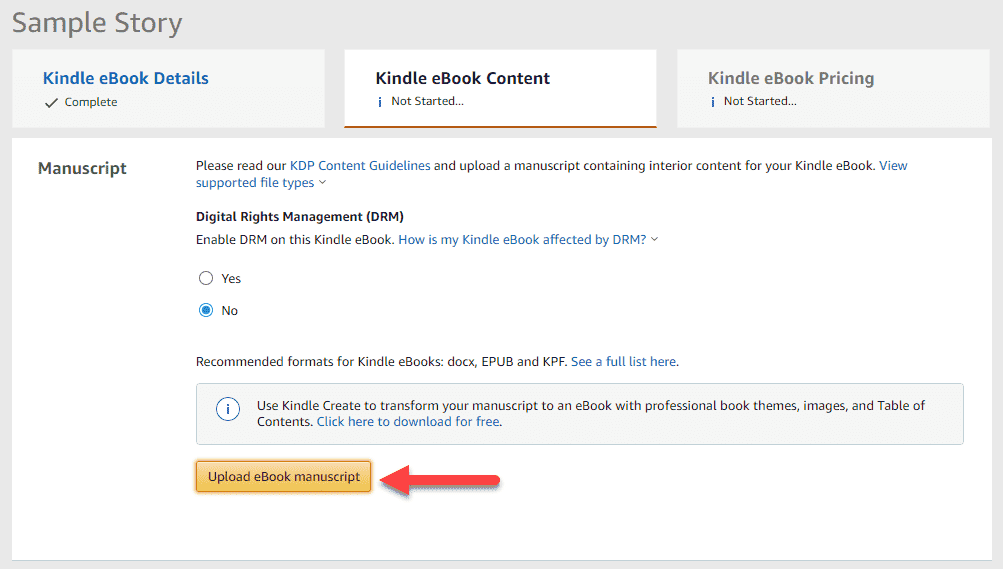
Image courtesy of the author
After clicking that button, you will be able to upload the .kpf file that you created earlier. Depending on the size of your manuscript, it may take a few minutes to process.
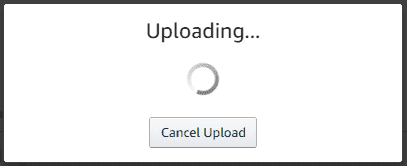
Image courtesy of the author
Once your manuscript has been uploaded and processed, you should see a success message below the Upload eBook manuscript button.

Image courtesy of the author
At this stage, you have another shot at previewing what your eBook would look like on various devices. Scroll down to the Kindle eBook Preview section and click on the Launch Previewer button.

Image courtesy of the author
This will open up a web version of the previewer. The options on this screen and general functionality are similar to what you've looked at previously. Browse through and confirm that everything looks good.
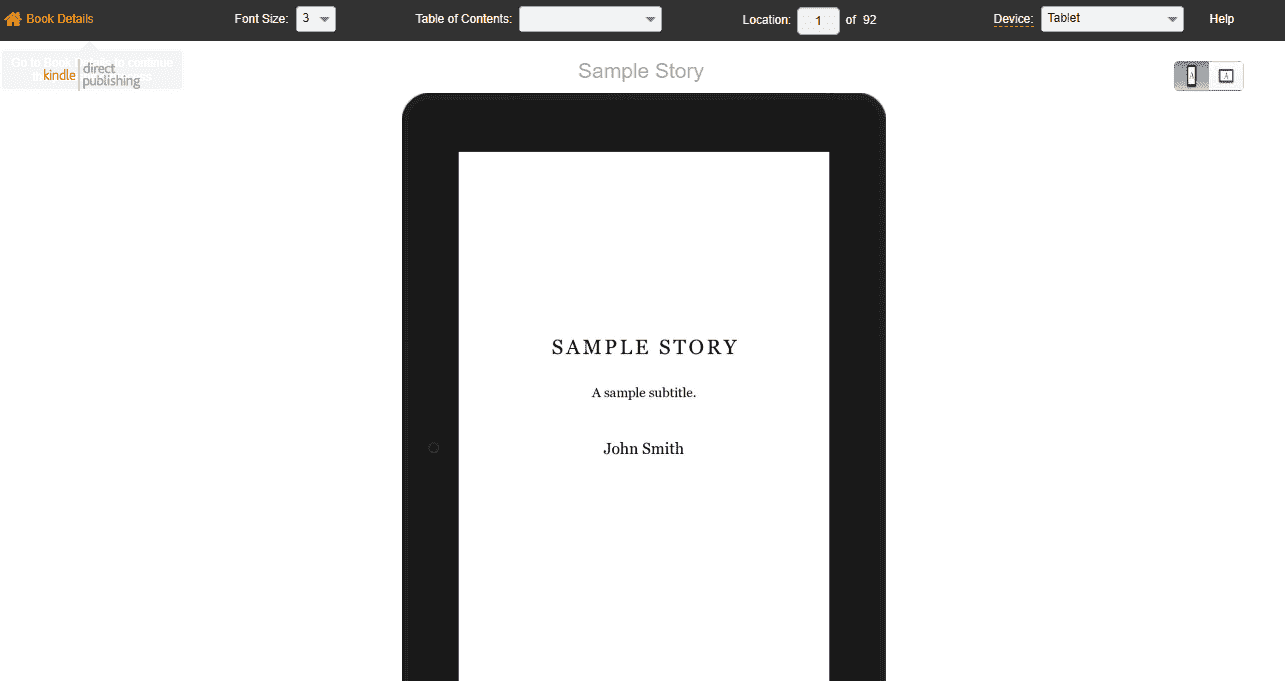
Image courtesy of the author
A quick note on the Table of Contents dropdown: Clicking on Beginning takes you to the first page of the eBook and clicking on NCX View opens up the table of contents pop-up where you can navigate to other locations of the eBook. NCX View stands for Navigation Control file for XML View.
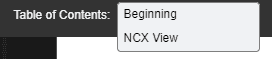
Image courtesy of the author
Click on Book Details on the top-left of the screen to go back to the Kindle Direct Publishing steps.
Alternatives to Kindle Create
You don't have to use Kindle Create although it's recommended if you're publishing for Kindle devices. Amazon does support a few other eBook formats as well, as outlined here.
My thoughts on the alternative route would be to format solely using Microsoft Word deliberately avoiding the use of any complex Word-specific formatting. Then, using a file conversion software like Calibre, convert your Word file to EPUB. Most platforms accept your manuscript in EPUB file format, so you should be sweet. You can then upload this EPUB file into the standalone Kindle Previewer software to see how your eBook would look on various device types.
On another note, if you're creating a manga, there's something called Kindle Comic Creator. If you're creating an illustrated children's book, there's Kindle Kid's Book Creator. I have not used these last two tools myself but I'm sure the user guides on the linked pages provide sufficient instructions. You might find this flowchart handy if you're deciding on which tool to use for formatting your eBook.
Conclusion
Wow, that was a lot to take in, wasn't it? Hope you found that useful, though? Here's a quick summary of what we just looked at —
- We looked at how to format our manuscript using Microsoft Word. We noted that not all of the formatting is required but is recommended if you're converting this manuscript to another format.
- Next, we looked at Kindle Create and how this standalone software provided by Amazon makes it super easy to format your eBook manuscript. We also looked at previewing your eBook using Kindle Create and then creating a publishable .kpf file once we were happy with the formatting.
- Towards the end, we looked at how to upload this publishable .kpf file to Amazon's Kindle Direct Publishing platform. We also looked at how to preview our book using the online previewer.
- Finally, we looked at what are the other alternatives to Kindle Create and what else you would need to consider if you were heading in that direction.
That's it! Thanks for reading.