- Published on ·
- Reading time 6 min read
Learn Sass With Scout-App
An easy-to-digest four-part article to help you get started with Sass
Share this page

Introduction
Broken down into four easy-to-digest parts, this article aims at getting your feet wet with Sass. Once you're comfortable with how everything fits together, you can move onto more complex concepts. To aid our learning process and compile Sass files, we'll be using Scout-App.

Made using Canva
Part 1: Introduction to Sass
Sass (Syntactically Awesome Style Sheets) is a stylesheet language that's compiled to CSS. It is a CSS pre-processor which means that a valid CSS file is a valid SCSS file too.
So, let's assume you have an existing CSS file referenced in your HTML like the following:
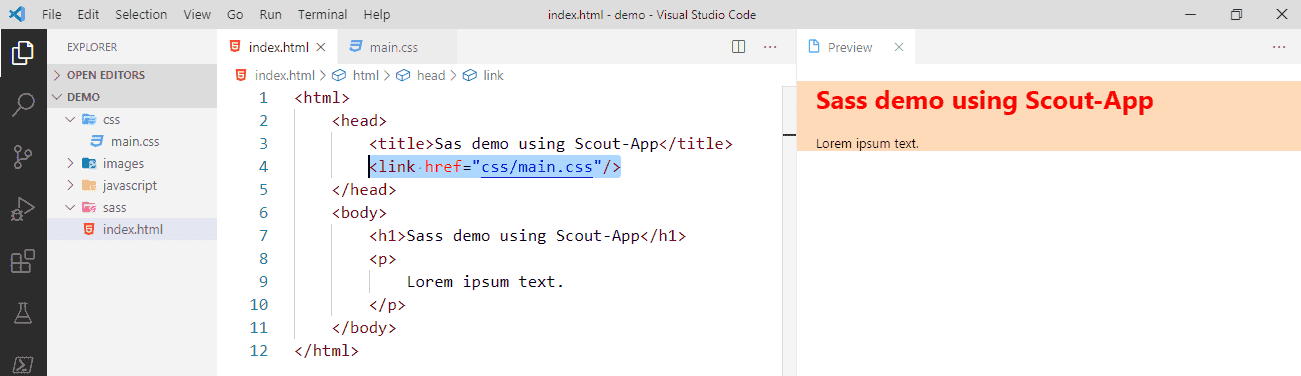
You can rename the file from main.css to main.scss and it'll be absolutely valid. This is the quickest way to start using Sass and then gradually refactor existing CSS code to make use of Sass features.
The file extension
.scssstands for Sassy CSS which is now commonly used. The older syntax has the file extension.sass.
Having said that, you'll notice that after renaming the file, the styling in the HTML output has disappeared. This is because your HTML file still references main.css and the renamed main.scss hasn't compiled to its CSS output yet. Don't worry — we'll take a look at that in part 2.
Why you might want to use Sass?
- A simpler and elegant syntax for CSS, especially since CSS files can get large and complex.
- Has useful features for creating manageable stylesheets, like splitting CSS code into multiple files, for example.
- Allows you to write DRY code that'll be faster and more efficient.
Why you might not want to use Sass?
- Overkill for simple projects that perhaps only require a single CSS file.
- You don't have a lot of time allocated to plan how you'd like to structure Sass code.
- In the end, it's another programming language that the team needs to upskill on, and you might not always have the budget, time and resources for this process.
Part 2: Compiling Sass
Alright, I mentioned we'll be compiling a .scss file to CSS in part 1. There are many ways you would go about achieving this, but for demonstration and learning, I prefer using a simple tool so the entire process doesn't seem too overwhelming. Let's take a look at one such tool called Scout-App.
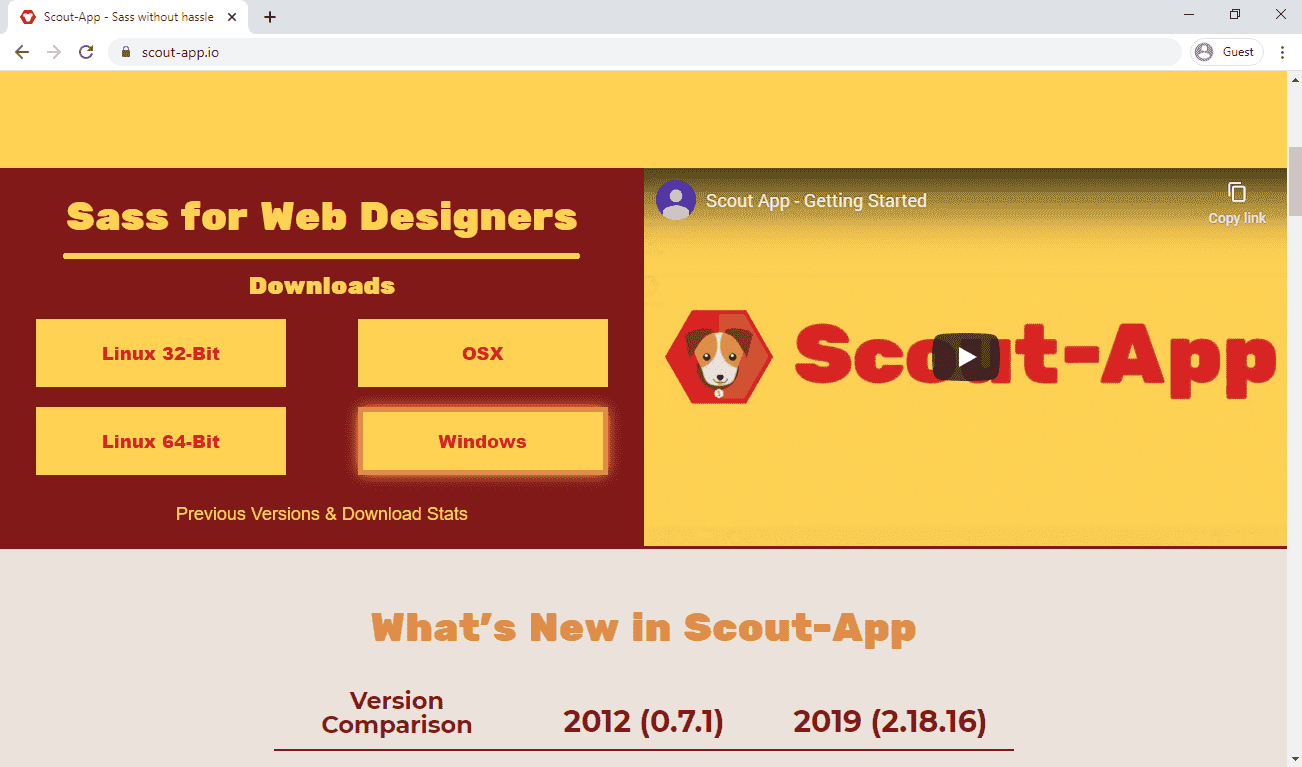
First, head over to Scout-App and download their portable Sass compiler.
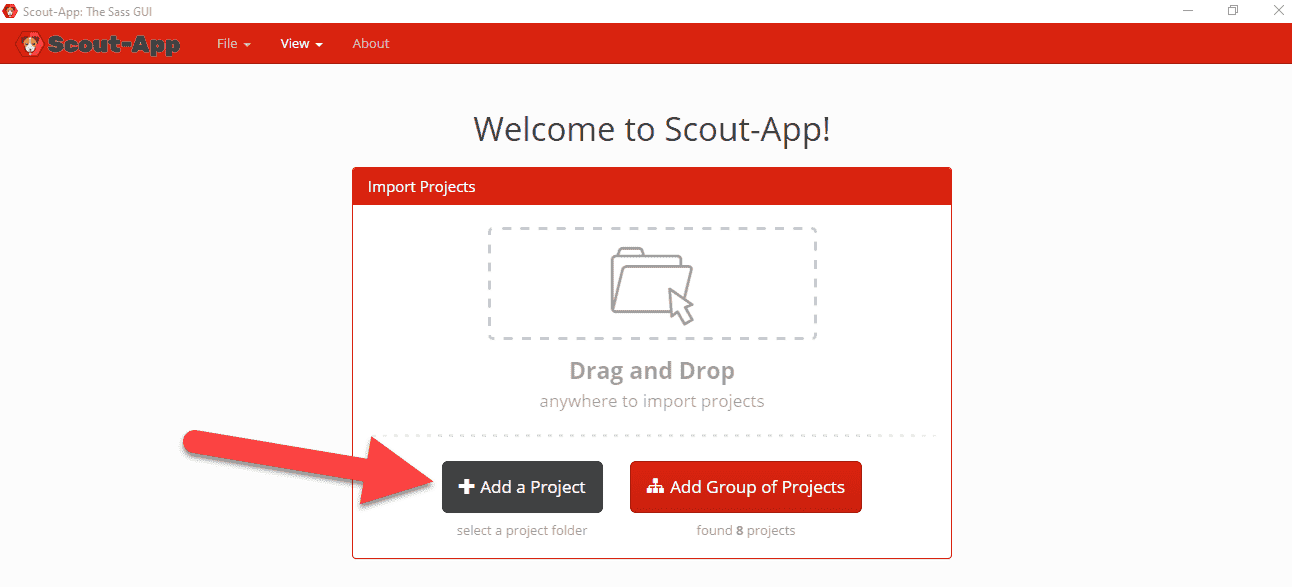
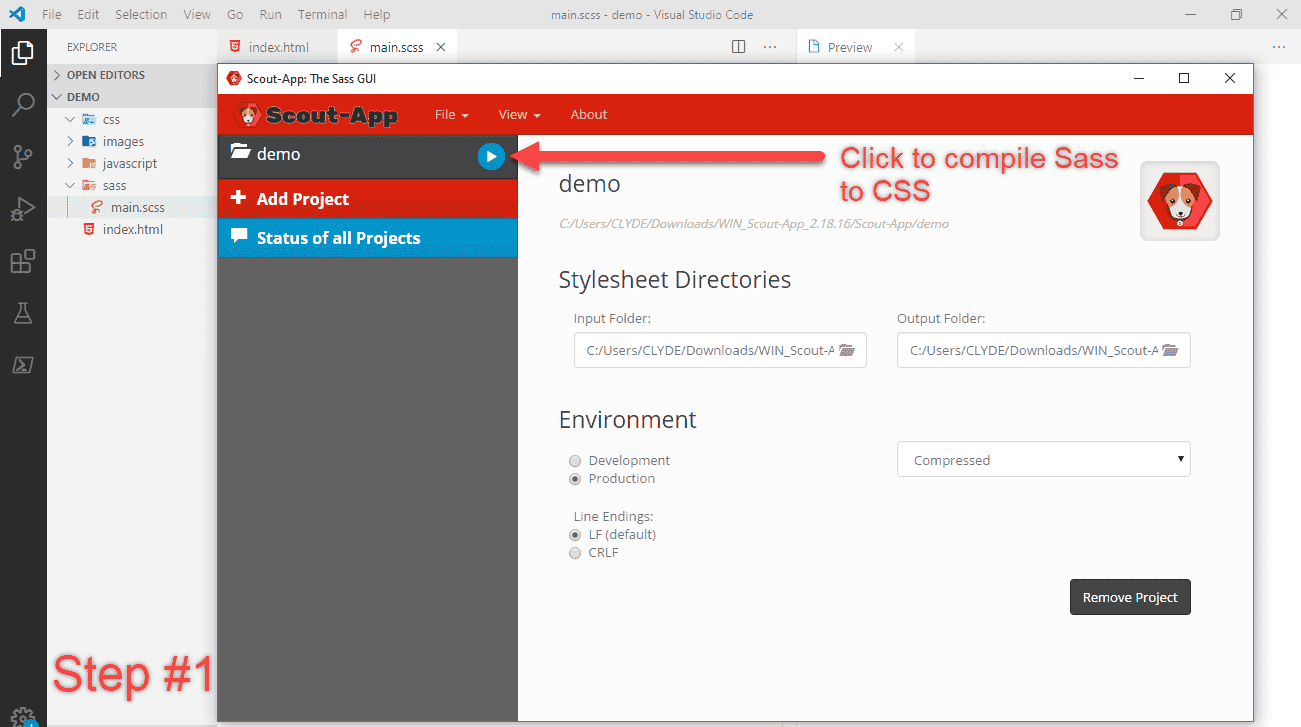
Extract the ZIP file and open the Scout-App application that sits inside the folder. This is a portable software which means that you don't have to install it on your system. After opening the application, you should see a screen similar to the picture below. Click on Add a Project to add your website folder to the Scout-App workspace.
Then, type in the Input Folder, which is the folder that contains the .scss files and also the Output Folder, which should contain the compiled .css files. You can leave the remaining settings to the default for now — feel free to explore adjusting them once you're comfortable.

Click the play icon next to the website project folder, as pictured below. This will initiate the compiling process.
After a successful message in the Scout-App screen and possibly even a pop notification sound, you will see the compiled file main.css in the CSS folder.
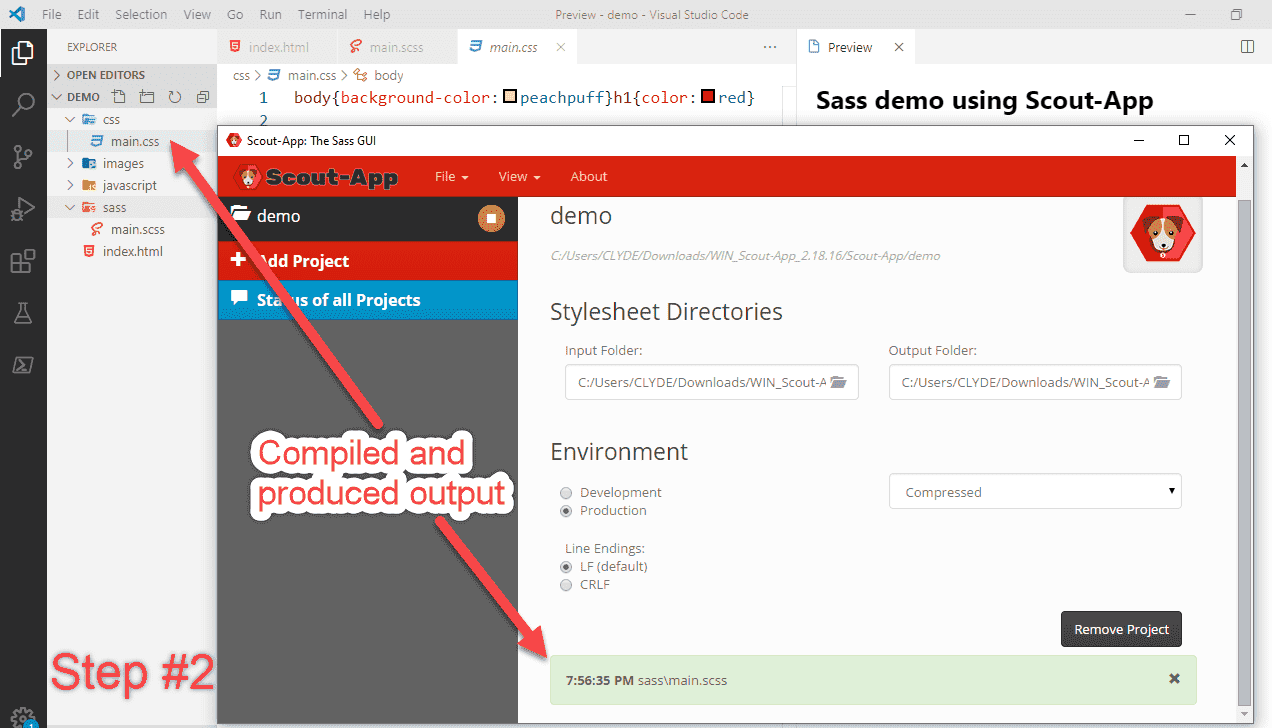
Give the page a quick refresh, and you should see the styles back in the HTML output. That was easy, wasn't it?
Part 3: Using variables
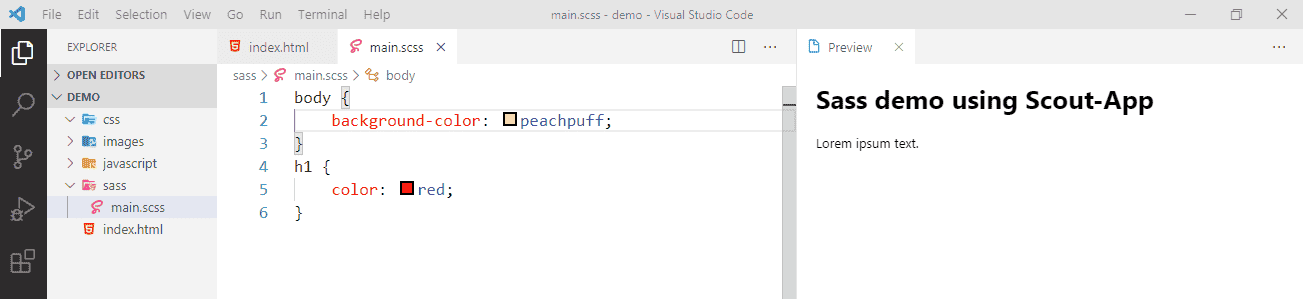
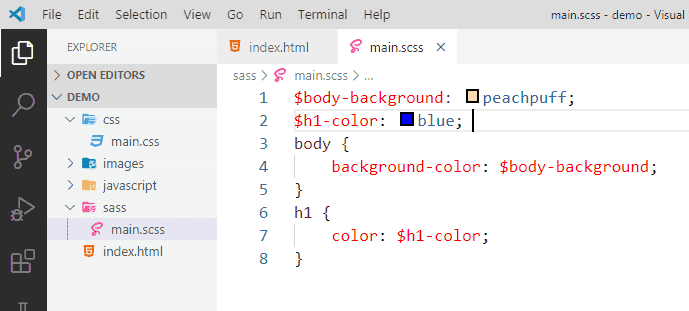
Now that we're using Sass, why not start making use of its cool features? As you can see in the screenshot below, instead of using the colours directly for the CSS properties, I've used variables. All variables are prefixed with a dollar $ symbol followed by a colon : and then the value you want to store in the variable.
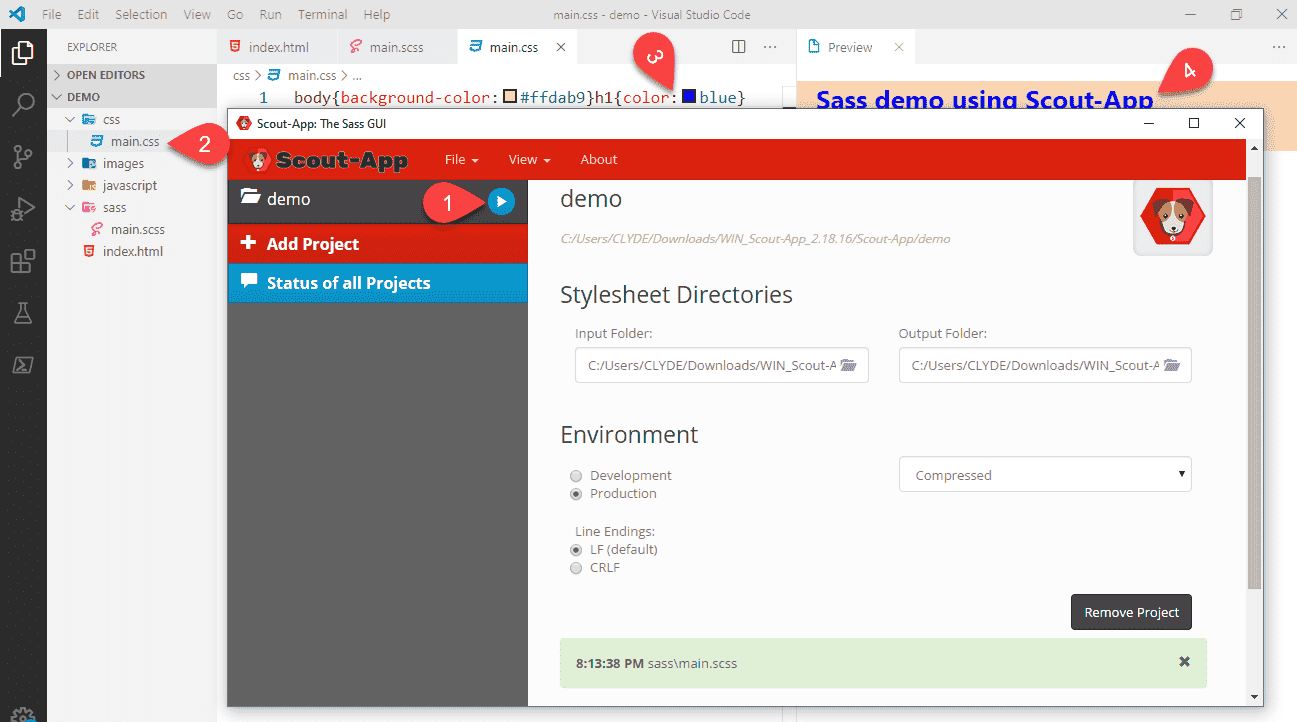
Now that we've updated our main.scss file, it's time to compile it again. Click on the play icon as you did previously, watch the main.css file get updated, have a look at the main.css file to confirm your change exists and see the HTML output change.
Note: When you click on the play button, not only are you compiling the Sass files but also putting Scout-App on watch mode — which means, when you update the Sass file and hit save, Scout-App should auto-compile to CSS. However, at the time of writing this article, I've had to click on the stop button and then click on the play button to compile the Sass files again. Not a biggie, but just letting you know in case you experience the same.
Part 4: Partial files
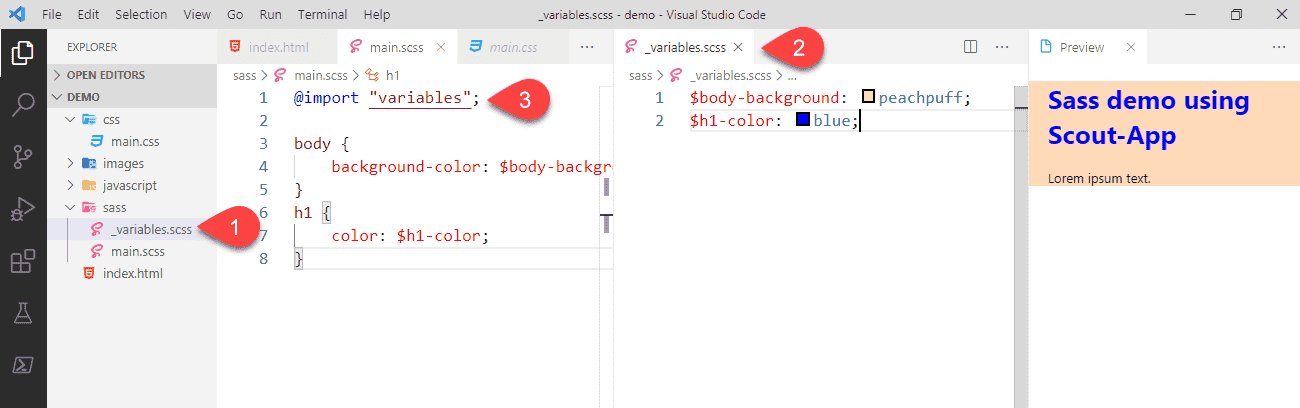
Let's take our Sass concepts a step further by introducing partial files. These filenames are prefixed with an underscore _ and are not compiled individually by the Sass compiler. Partial files need to be included in non-partial Sass files for them to be compiled. For instance, this is great when you're creating a partial Sass file for each component and then including all of them into a primary non-partial Sass file which then gets compiled into a single CSS file.
In the case of our example, I've created a partial Sass file called _variables.scss and have moved my variables into that file. Next, I've included an import statement @import "variables"; at the start of the main.scss file to let the compiler know to import all the variables from the partial file. Save the changes, compile and see the output — in this case, all styles applied should remain unchanged.
GitHub
The website's code demonstrated above is available on GitHub.
Summary
Alright, it's time for a quick recap —
- In part 1, we started off with an introduction to Sass and when you might want to and not want to use it.
- In part 2, using Scout-App, we looked at compiling our website's Sass files into CSS.
- In part 3, we used variables in our Sass file instead of directly setting the background colour and font colour CSS properties.
- Finally, in part 4, building on top of what we learned so far, we moved the variables code block into its own partial file. We then imported this partial file into the main Sass file, compiled it and seen what the output looks like.
That's it! Thanks for reading.