- Published on ·
- Reading time 27 min read
Creating a Slack Bot Using Netlify Functions
Written in TypeScript, using Bolt JS framework and sprinkled with developer tips along the way
Share this page
Introduction
Netlify Functions are Netlify's version of serverless functions — a single-purpose script deployed to a managed hosting provider, in this case, Netlify, that scales on-demand. Bolt JS is a framework to build Slack apps using JavaScript. I was curious about combining these two together, and with no guidance on how to do so, I ended up researching this subject quite a bit and eventually, figuring it out. This how-to guide aims at explaining how to create a TypeScript-based Slack app using Bolt JS and run it as a serverless function using Netlify Functions.
I understand that this a lengthy how-to guide, so let me give you a quick rundown of what we'll cover for a bird's eye view of this piece.
- Step #1: We'll look at using an existing template to create our first TypeScript-based Netlify Function. In this step, we'll cover how to build and run a function locally, and how to deploy it to Netlify. This step forms the foundations of this guide.
- Step #2: Now that we're comfortable with Netlify functions, we'll start integrating Slack by creating a Slack app, grabbing the credentials for our app and integrating it into our function so that the function can securely communicate with our Slack app.
- Step #3: In this step, we'll integrate Slack's Bolt JS framework into our function. We'll also take a look at getting Slack to verify our functions URL and getting the Slack app to subscribe to an event.
- Step #4: Now that we've subscribed to an event, we'll be able to receive a message from Slack when a user posts a message in a channel. We'll also look at getting our Slack app to respond back every time this happens.
- Step #5: In this step, we'll learn how to use Slack's slash command with Netlify Functions to cover a slightly different implementation scenario.
- Tidy up and conclusion: Finally, we'll look at how to take our demo source code and tidy it up further with some tips on how to make it production-ready.
High-level design
To give you a high-level overview of how all the components fit together and interact with each other, here is a high-level design diagram.
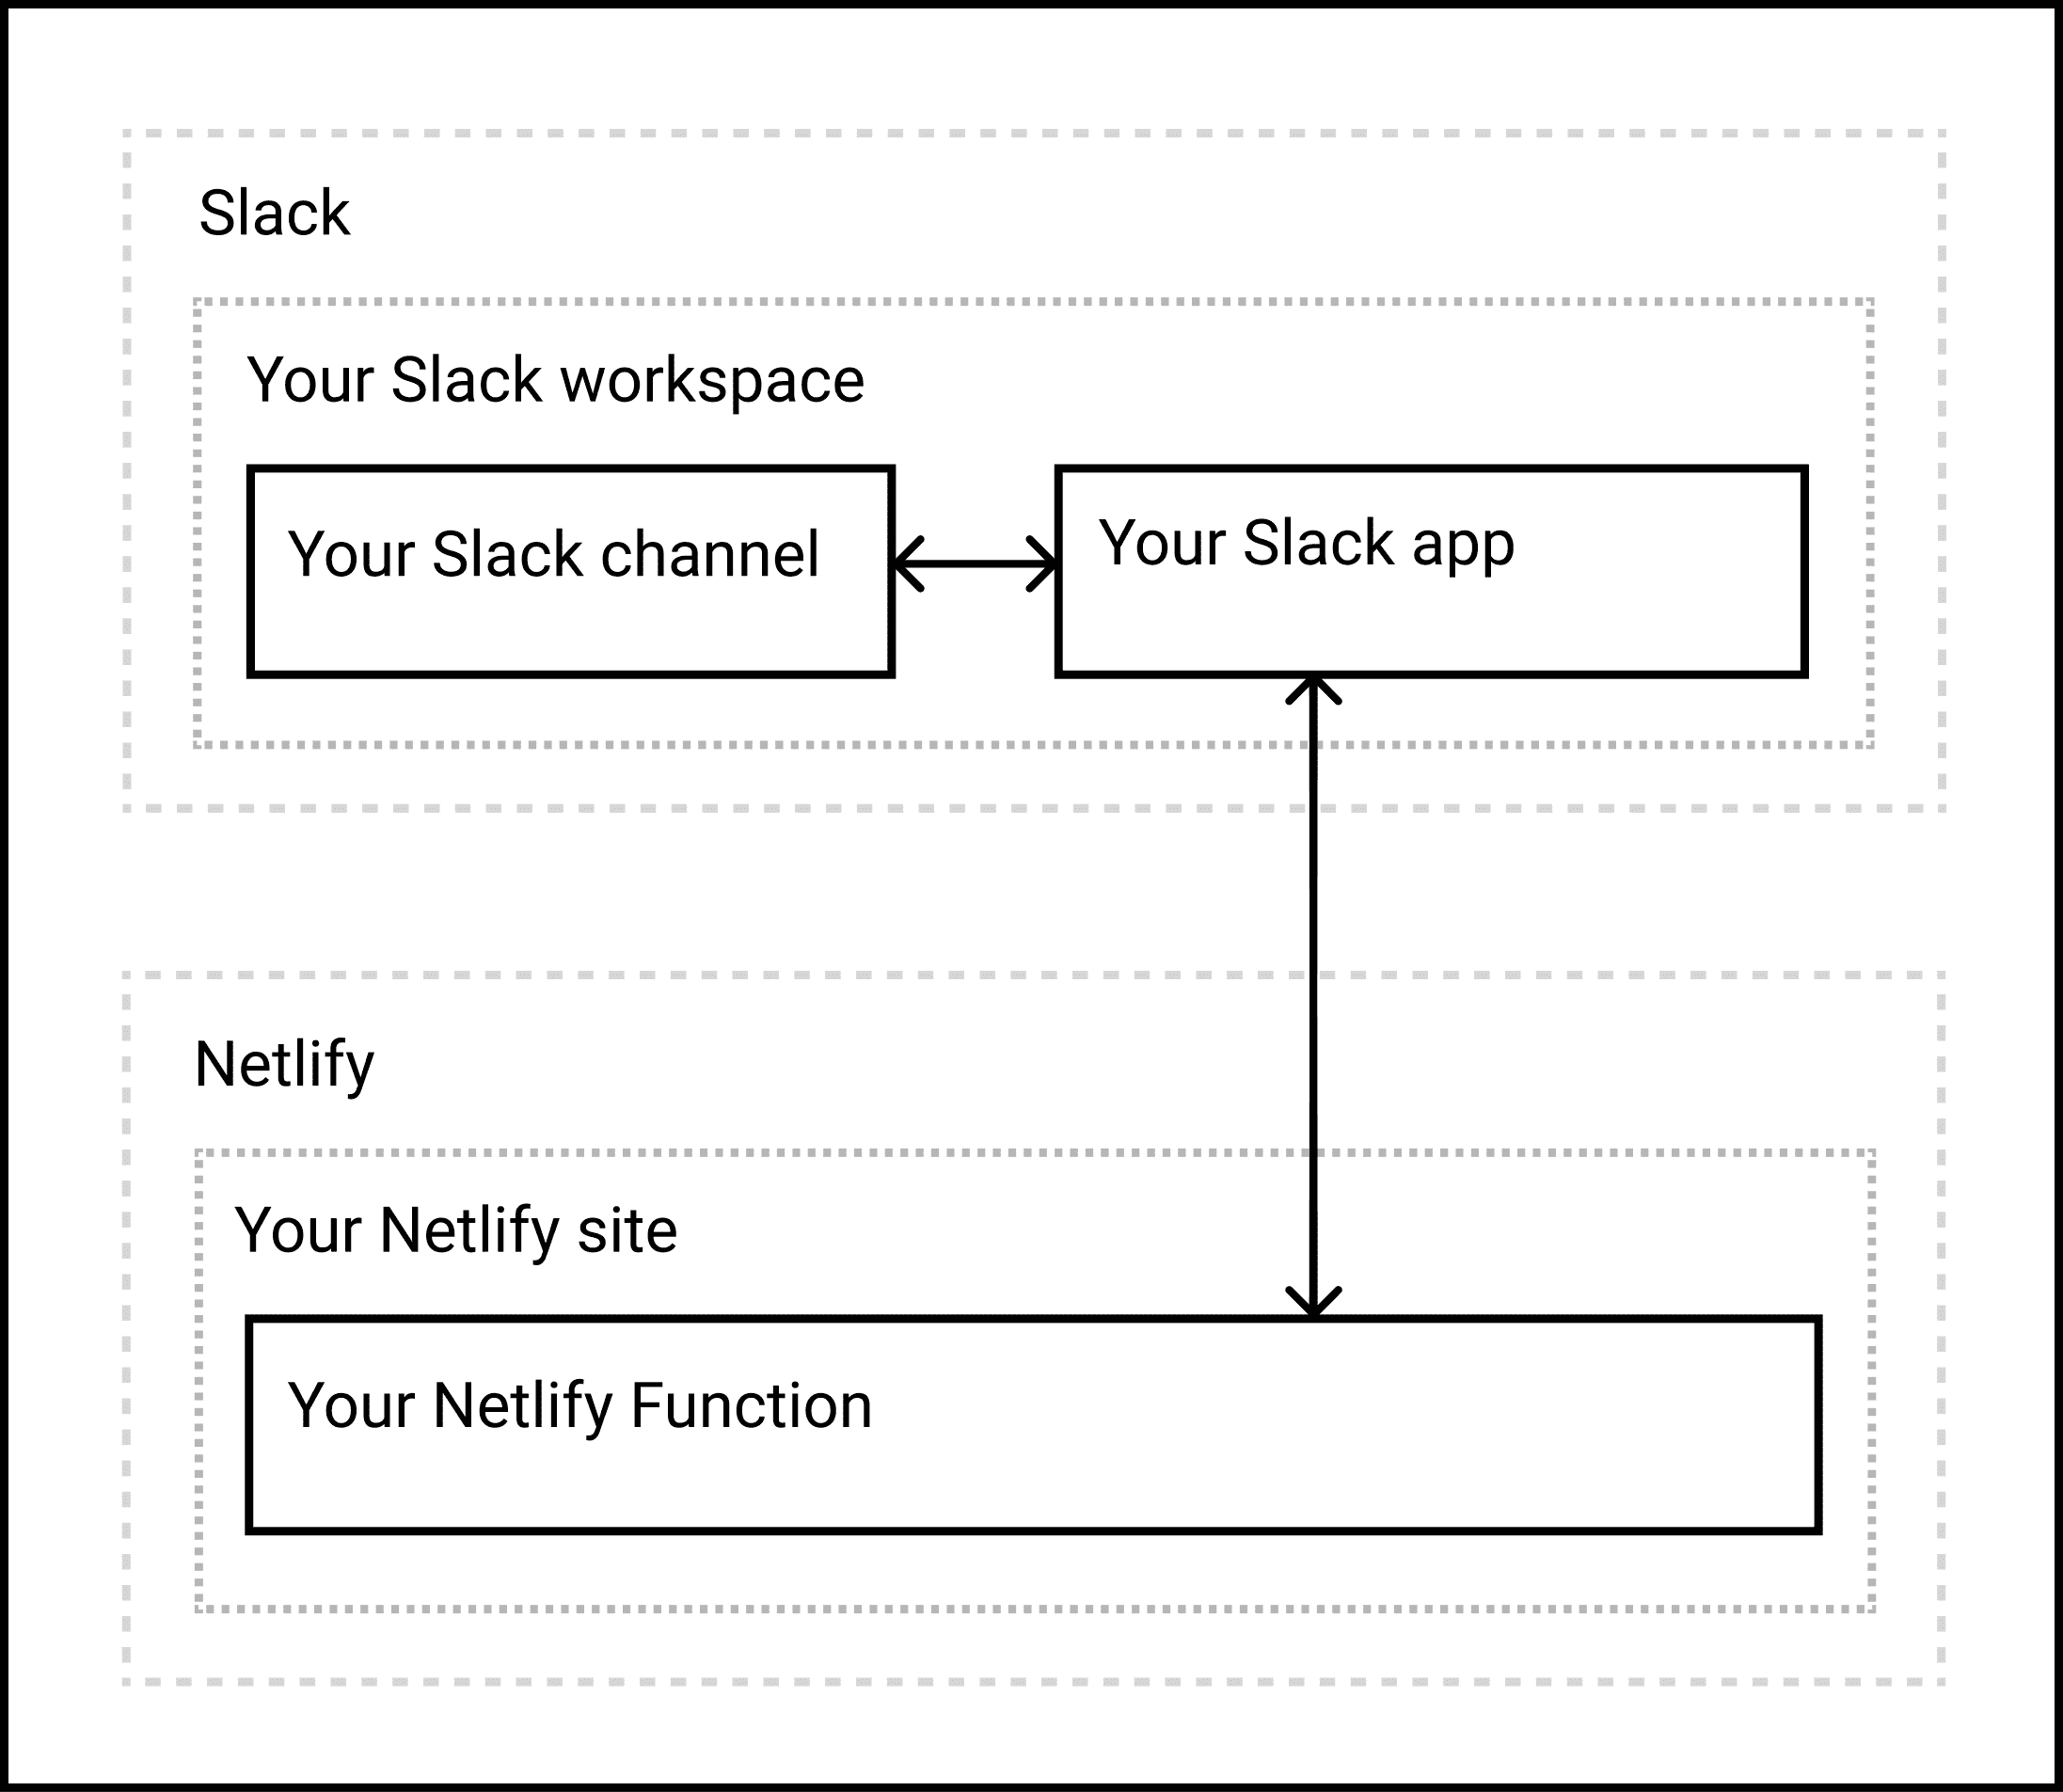
Image courtesy of the author
Step #1: Creating a hello world Netlify function
Boilerplate code
Let's start by creating a simple TypeScript-based hello world Netlify Function. To speed things up for you, I've created this template repository on GitHub — please fork this repository and clone it locally on your computer.
Let me explain what this does. I've created a file index.ts that will be the entry point of the function we're writing. Since Netlify Functions are deployed to AWS's serverless Lambda functions under the hood, we need to export a handler() method. Since we're using TypeScript, we need to strongly type the input parameters and since these are going to be deployed on AWS Lambda functions, the event parameter is going to receive an object of the type APIGatewayEvent and context will receive of type Context. The content in the body property in the returned object will be printed in the browser.
import { APIGatewayEvent, Context } from 'aws-lambda'

export async function handler(event: APIGatewayEvent, context: Context) {
  return {
    statusCode: 200,
    body: 'Hello, World',
  }
}
The netlify.toml file contains a build command that will run when we build the project later. Essentially, Netlify build will run the command npm run build which will eventually run tsc. The tsconfig.json file tells the TypeScript compiler (i.e, tsc) where to place the compiled JavaScript files. In this case, we're placing the JavaScript files in the .netlify/functions directory which is also the default directory Netlify will look at while serving functions.
Execute the command npm install to install all node dependencies. Don't worry about running the function locally right now, we need to get a few more things in order before we can do so.
Sign up with Netlify
Next, we'll sign up with Netlify and create a new site from a Git repo. Once you've created your team, head over to the team dashboard and click the button New site from Git.
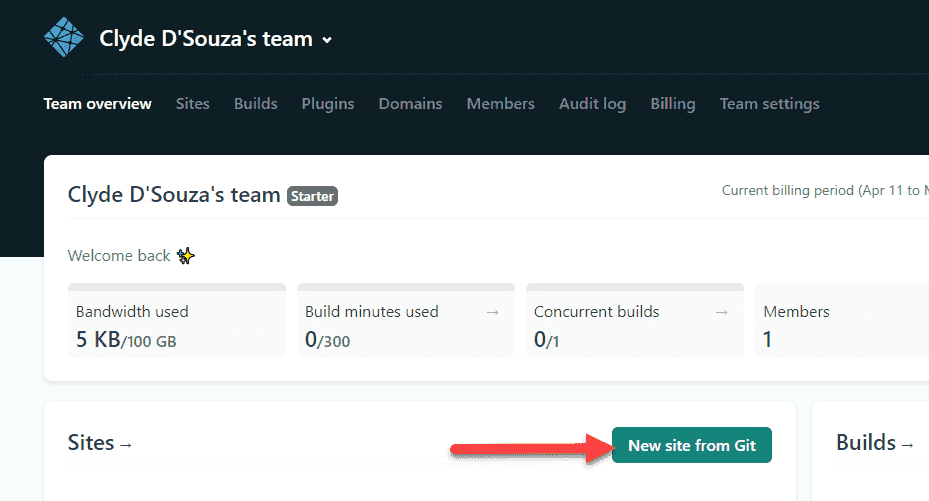
Image courtesy of the author
This will show you a three-step wizard to creating a site. Step one is to connect Netlify with your GitHub repository, i.e, the repository you created earlier after forking the template. Netlify will automatically build and deploy your site contents when you commit changes to the main branch of this repo.
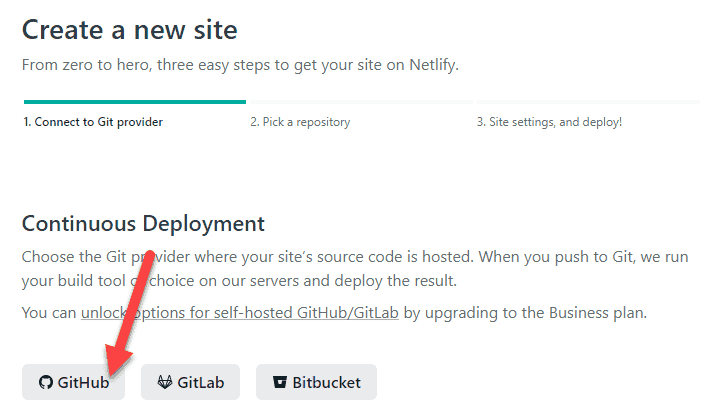
Image courtesy of the author
If this pops up a GitHub login page, enter your username and password to proceed. You should now see an Install Netlify screen along with your GitHub username.
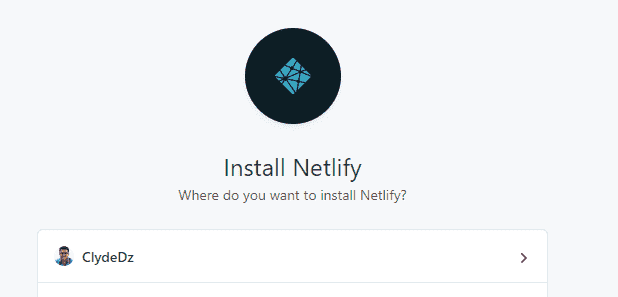
Image courtesy of the author
If you select that, you should get the next screen which allows you to either give Netlify access to all repositories or you could manually grant access to only certain repositories. Either way, ensure that your forked repository has access. For this article, I'm going to select All repositories and then click on the Install button to install Netlify.
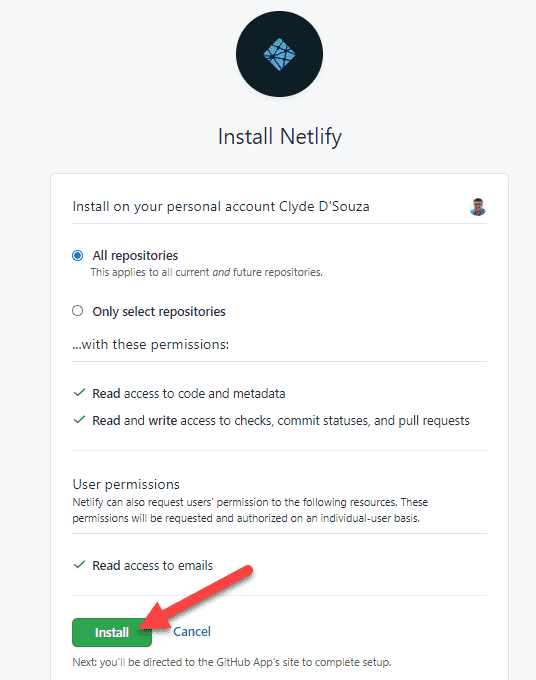
Image courtesy of the author
You'll now be redirected back to Netlify where you can pick the repository that you want to create a site from. I'm going to select my demo repository ClydeDz/netlify-functions-slack-demo.
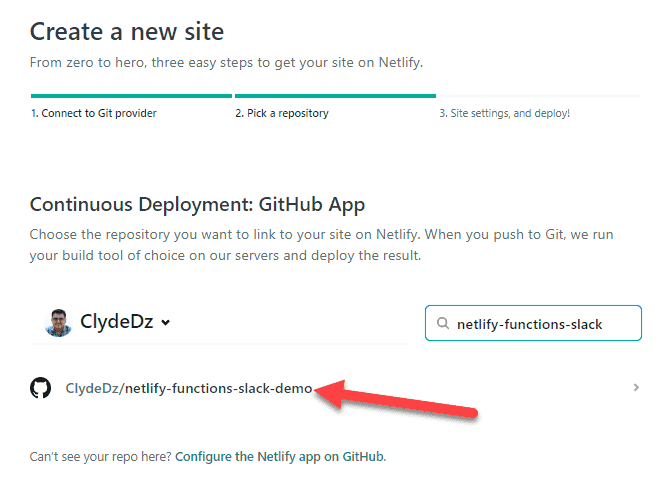
Image courtesy of the author
Leave all the settings in step three as-is and then click on the Deploy site button to proceed. Netlify will create a site and trigger the first build and deployment.
Updating the site name
By default, Netlify will create a random site name for you in order to make it unique. This means, that your functions URL would contain this name too. We'll be using this function in the background so users will never see the URL, therefore, this name shouldn't matter. In fact, my personal recommendation would be to let this URL be as random as possible so it's difficult for someone to guess it and make random requests to it.
However, if you do want to rename this, head over to Site settings in Netlify and from the Site details section, click on the Change site name button.
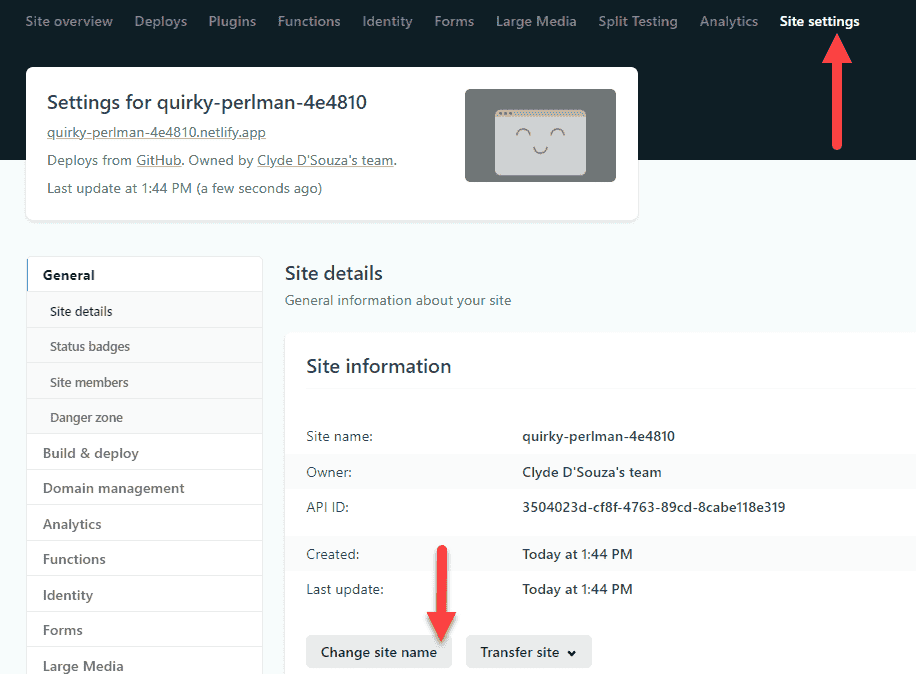
Image courtesy of the author
Enter your new site name in the pop-up and click on the Save button.
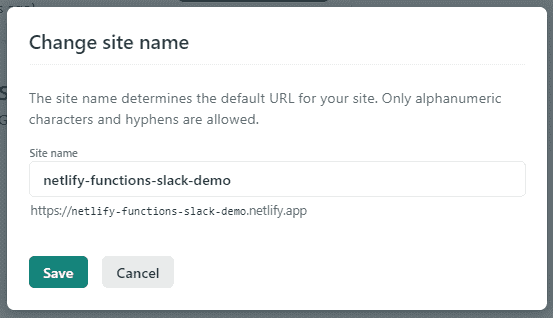
Image courtesy of the author
While you're in the Site details screen, please grab the API ID as well.
Install Netlify Dev CLI
The Netlify Dev CLI is a command-line tool to run all Netlify products locally. We'll be using this to test our function locally. To install the CLI, run the command npm i netlify-cli -g. You can use the command netlify --version at any time to check what version of the CLI you're running. The complete list of available commands can be found on their documentation site.
Netlify link
The next step you need to do is to link the code sitting on your local device with the Netlify site you just created. To do this, type in the command netlify link. This will start an interactive session in the terminal and you'll be presented with a choice on how you'd like to create this link. The simplest way is to select Use current git remote origin. Since you've already pulled your code repository down to your local machine, and since Netlify already is already connected to this repository's remote origin, Netlify will easily establish the link for you. In simple words, if A=B and B=C, then A=C.
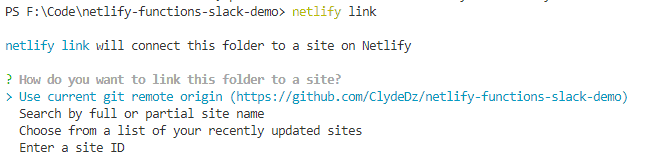
Image courtesy of the author
In the background, Netlify will create a hidden folder called .netlify and in this folder, it will place a file called state.json with your site id in it. This folder should also be automatically added to .gitignore file, so we don't need to worry about this getting checked in — this is not sensitive information, it's just not required to be checked in.
Code changes
At this stage, I only want you to update the filename of index.ts to slackbot.ts.
Comparing code changes
If you'd like to compare your code changes for this step, head over to this diff page on GitHub.
Time to shine!
Let's see what our hello world function looks like locally. Run the command netlify build to compile your code and generate JavaScript files in the .netlify/functions folder.
Once the build successfully completes, run the command netlify dev to start a local development server. Netlify assigned port 8888 to my application, so I'll head over to http://localhost:8888/.netlify/functions/slackbot to view the output. You should see Hello, World printed in the browser.

Image courtesy of the author
Tip: Executing the command
netlify dev --livewill run the function locally but this time, Netlify will expose this function publicly using a public URL. You'd want to use this approach while testing your function with Slack as this eliminates the use of a tool like ngrok.
Build and deploy
Congratulations on running your first Netlify Function locally! Let's commit this change and push it to GitHub. Within moments, you should see Netlify building your code and also publishing this to your Netlify site.

Image courtesy of the author
Now, instead of localhost:8888, use the Netlify site URL to view your function in the browser. You can grab your Netlify site URL from the Site overview tab in Netlify. Once again, you should see Hello, World printed in the browser.

Image courtesy of the author
Developer tip
I'd highly recommend using VS Code for your development. With VS Code, you can make use of multiple terminals to make your development experience seamless. One terminal can be used to execute a command like netlify dev --live to run a local version of the function, and the second, to execute a command like netlify build after making code changes to your application. You'll notice that after your build your function again using the second terminal, the live function app will reload automatically in the first terminal. This is great because this way your development URL stays the same.
Step #2: Creating a Slack app
Sign up
If you haven't already, sign up with Slack for free, create a workspace and create a channel. We'll be testing a few things in this channel, so don't go ahead and add your mates to this channel yet.
Creating an app
Head over to https://api.slack.com/apps and click on the Create an App button.
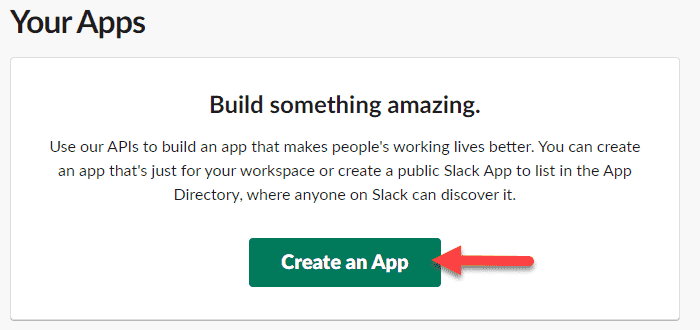
Image courtesy of the author
When deploying this app to production, you would want to update the channel icon, description and other aspects of the app. For now, since we're only building a demo app, we'll leave those details out.
Adding scopes
By default, a Slack app cannot perform any read or write functionality. To add capability, we need to add scopes to the app. From the left sidebar, select OAuth & Permissions and then scroll down to the Scopes section.
From this section, click on the Add an OAuth Scope button and from the list of scopes, select chat:write. We can always come back and add more scopes, so let's start small for now. Your changes will get saved automatically.
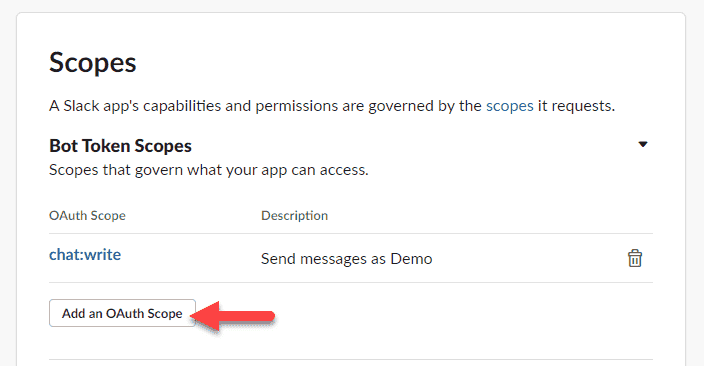
Image courtesy of the author
Now, let's scroll back up to the OAuth Tokens for Your Workspace section and click on the Install to Workspace button. You might need to accept the permissions you're being asked to grant and proceed to the next screen.
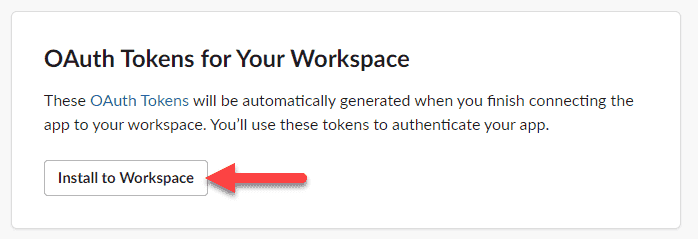
Image courtesy of the author
You'll now get a Bot User OAuth Token after installing this app. Please copy that value as we'll need it soon.
Fetching the signing secret
Click on the Basic Information tab from the left sidebar menu and scroll down to the Signing Secret field. Click on the Show button and then copy and save this value.
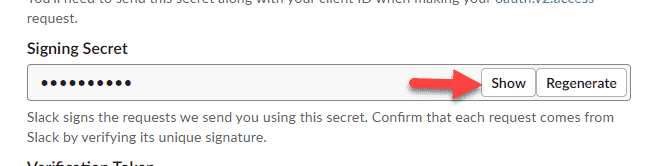
Image courtesy of the author
Injecting these values into your app
Head over to your code and create a .env file in the root directory. This file should already be added to the .gitignore file so don't worry about committing this change.
In this file, add the signing secret and bot token using the format key=value. You can name the key whatever you like but if you're following along, name it as per the screenshot below.

Image courtesy of the author
Run the command npm i dotenv @types/node --save-dev to install these npm packages. The dotenv npm package allows us to access the values in the .env file and the types/node npm package provides the type definitions for node.
// Import statements

import * as dotenv from 'dotenv'
dotenv.config()

export async function handler(event: APIGatewayEvent, context: Context) {
  // Code omitted for brevity
}
Like the code snippet above, import the dotenv package at the start of slackbot.ts and call the config method as early up in the file as possible. You should then be able to access the signing secret using process.env.SLACK_SIGNING_SECRET and the bot token using process.env.SLACK_BOT_TOKEN.
Environment variables in Netlify
Since the .env file isn't added to source control, we'll need to add the same environment variables to Netlify so that the function can access these values. In Netlify, head over to Site settings from the navigation menu, then select Build & deploy and then from the sub-menu, select Environment.
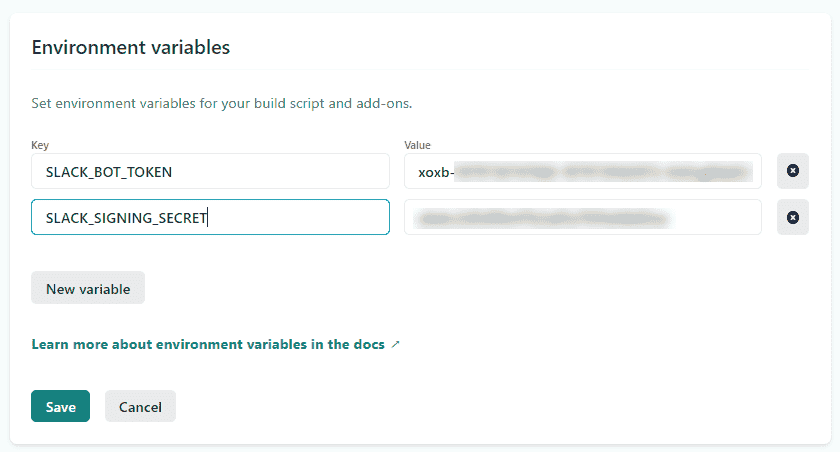
Image courtesy of the author
Click on the New variable button and add the same key and value pairs. Click on Save for the changes to take effect.
Step #3: Integrating Bolt JS framework
Installing Bolt
Bolt is a JavaScript framework to build Slack apps. Run the command npm install @slack/bolt --save-dev to install this framework and add the following code snippet at the beginning of the slackbot.ts file.
// Import statements

import { App, ExpressReceiver } from '@slack/bolt'
Along with importing App, which is Bolt's representation of a Slack App, we're importing ExpressReceiver because we need to integrate Bolt's event listeners with a Netlify Function.
Next, we'll add the following code snippet to slackbot.ts to initialize the ExpressReceiver with the signing secret we've copied earlier, and immediately after that, we'll initialize our App with the signing secret, bot token and the express receiver instance created before.
// Import statements

const expressReceiver = new ExpressReceiver({
  signingSecret: `${process.env.SLACK_SIGNING_SECRET}`,
  processBeforeResponse: true,
})

const app = new App({
  signingSecret: `${process.env.SLACK_SIGNING_SECRET}`,
  token: `${process.env.SLACK_BOT_TOKEN}`,
  receiver: expressReceiver,
})

// Code omitted for brevity
Inside the handler() method, let's add the following code.
// Code omitted for brevity

export async function handler(event: APIGatewayEvent, context: Context) {
  const payload = parseRequestBody(event.body)
  if (payload && payload.type && payload.type === 'url_verification') {
    return {
      statusCode: 200,
      body: payload.challenge,
    }
  }

  // Code omitted for brevity
}
We're passing the contents received in the event.body property to a utility method that will parse this string content into a JSON object. Next, we'll get our function to fulfil a small objective — to check if the payload we received from Slack is of type url_verification and then simply respond back with the challenge that it received. Slack sends this type of request to verify if you've entered the correct URL endpoint for a Slack app.
Don't forget to add this utility function that parses the received contents into a JSON object.
// Code omitted for brevity

function parseRequestBody(stringBody: string | null) {
  try {
    return JSON.parse(stringBody ?? '')
  } catch {
    return undefined
  }
}

export async function handler(event: APIGatewayEvent, context: Context) {
  // Code omitted for brevity
}
We'll also remove the text hello world from the function response since we no longer need that printed out.
In the tsconfig.json file, we'll add the property “esModuleInterop”: true in the compiler options section, because without this, our build will produce errors due to other dependent packages.
Build and deploy
Now, that we've made our code changes for this step, let's run the command netlify build locally to compile the TypeScript file and generate the JavaScript file inside the netlify/functions folder.
Assuming there are no errors, commit your changes to your GitHub repository. This will trigger a build at Netlify and an automatic deployment.
Comparing code changes
If you'd like to compare your code changes for this step, head over to this diff page on GitHub.
Completing Slack's challenge
Head over to the Slack API settings page for your app. Then, from the left sidebar menu, click on Event Subscriptions. All the different actions that can be performed in Slack are categorized into various events. Our app can subscribe to one or more of these events, so when they happen, Slack will send our app a POST request with the event details enabling our app to handle this.
Since this is your first time here, we'll need to enable events by flicking the toggle On and then in the Request URL field, enter the URL of your Netlify function. The URL of my Netlify function is
https://netlify-functions-slack-demo.netlify.app/.netlify/functions/slackbot which is what I've entered in the screenshot below.
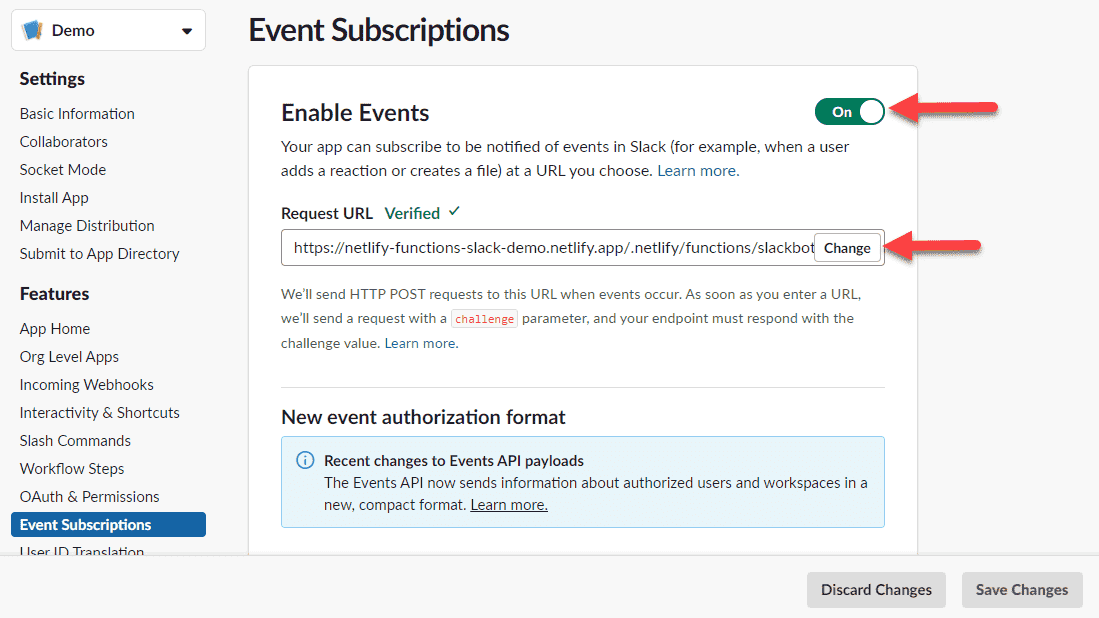
Image courtesy of the author
Immediately, when you enter this URL, Slack will send a url_verification payload to your Netlify Function and will expect your function to return the challenge. This is the scenario you made the code changes for earlier.
While we're here, let's subscribe to one event. Expand the Subscribe to bot events section and then click on the Add Bot User Event button to search for and then add message.channels.
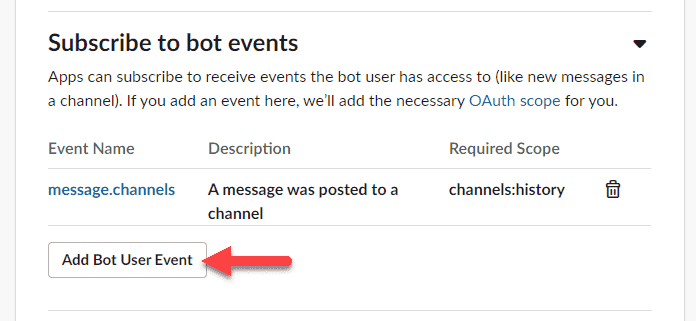
Image courtesy of the author
After hitting the Save Changes button to save your updates, you will be asked to reinstall the app in your workspace. Please do this before proceeding ahead.
Step #4: Receiving and sending your first message
Code changes
Now time for some fun stuff. Let's take a look at how your function would receive a message from Slack and reply back. In the slackbot.ts file, add the following snippet inside the handle() method. This snippet constructs a ReceiverEvent payload that consists of the parsed JSON body received and an ack() method that the function will respond with acknowledging the receipt of an event from Slack.
// Code omitted for brevity

export async function handler(event: APIGatewayEvent, context: Context) {
  // Code omitted for brevity

  const slackEvent: ReceiverEvent = {
    body: payload,
    ack: async (response) => {
      return new Promise<void>((resolve, reject) => {
        resolve()
        return {
          statusCode: 200,
          body: response ?? '',
        }
      })
    },
  }

  await app.processEvent(slackEvent)

  // Code omitted for brevity
}
We're then passing this ReceiverEvent object into Bolt's processEvent() method. The processEvent() method will detect the type of event received and will pass the control to the relevant method.
Next, let's add the message() method in the slackbot.ts file to process any incoming messages and reply with “Hi 👋”.
// Import statements

// Code omitted for brevity

app.message(async ({ say }) => {
  await say('Hi :wave:')
})

export async function handler(event: APIGatewayEvent, context: Context) {
  // Code omitted for brevity
}
Comparing your code
If you'd like to compare your code changes for this step, head over to this diff page on GitHub.
Build and deploy
Commit your changes and push them to GitHub so it gets automatically built and deployed.
Testing your changes in Slack
It's time to now test the functionality out in a Slack channel. Add the Demo app to your Slack channel. This is important because your app wouldn't have access to read the messages posted in a channel that the app isn't part of. Immediately after posting a message in the channel, your function should receive a payload from Slack and respond with a message.
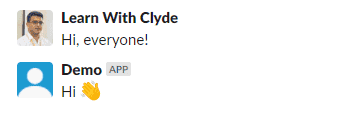
Image courtesy of the author
Replying to a thread and adding emoji reactions
For the sake of brevity, I won't go into the details of getting your Slack app to reply to a thread and adding an emoji reaction. Instead, I'll leave you with this diff page on GitHub to see the changes you need to make to get your Slack app to reply to a thread, and this diff page on GitHub to see the code changes required to get your Slack app to reply with an emoji. Note, for adding a reaction, you'll additionally need the reactions:write scope.
Step #5: Bolt with slash commands
Creating a slash command
Head over to the Slack API settings page for your app and select Slash Commands from the left sidebar menu. From the screen presented, click on the Create New Command button.
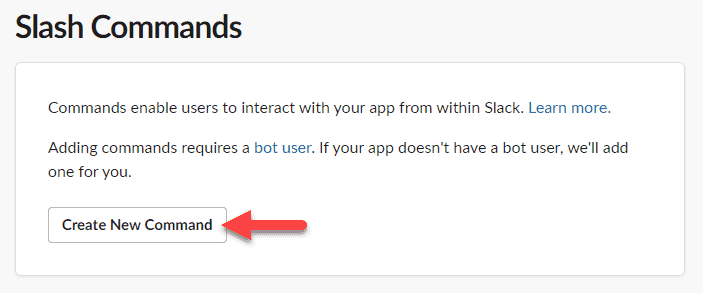
Image courtesy of the author
Slash commands, as the name suggests, are prefixed with a forward slash, followed by the command name and optionally, some arguments. So, for instance, you can have a slash command like /greet morning where you're expecting a morning themed greeting. You could also have a slash command without the argument, so something like /greet that sends you a random greeting. Remember, your command name must be unique across all apps and also preferably short — so choose wisely!
From the Create New Command screen, enter the command name which should be prefixed with the forward slash, enter the Netlify Function URL in the Request URL field, type in a short description so users have an idea of what this command does, and optionally, type in a parameter in the Usage Hint field if your slash command is expecting one.
We'll leave the Escape channels, users, and links sent to your app checkbox unchecked since our slash command doesn't need user ids and channel ids at this stage, so a plain text unescaped string is fine.

Image courtesy of the author
Save your changes and then reinstall the app in your workspace.
Code changes
Let's add another method to listen for this slash command and respond to it. In the code snippet below, the first parameter of the command() method is the slash command name, and in the second parameter, we're going to use object destructuring to accept only the body and the ack object. When responding to a slash command, our app must send an acknowledgement to Slack within three seconds before sending the actual message back. The ack object is the acknowledgement function.
// Import statements
// Code omitted for brevity

app.command('/greet', async ({ body, ack }) => {
  ack()
  await app.client.chat.postEphemeral({
    token: process.env.SLACK_BOT_TOKEN,
    channel: body.channel_id,
    text: 'Greetings, user!',
    user: body.user_id,
  })
})

export async function handler(event: APIGatewayEvent, context: Context) {
  // Code omitted for brevity
}
Next, we're calling the chat.postEphemeral() method to send a reply back to Slack. The reply sent using the postEphemeral() method can be seen only by the user who triggered this slash command, hence why we're passing the user id in the method. Of course, you can still continue using the regular say() or chat.postMessage() to reply back with a message that everyone can see.
Tip: The property
body.textwill contain the slack command name. So, if your command goes like/greet morning, thenbody.textwill containmorning. The propertybody.channel_namewill contain the valuedirectmessagewhen this slash command is triggered via a direct message to the app.
Commit, build and deployment
Commit your changes and push them up to GitHub. After a successful build and deployment at Netlify, we'll move on to testing our slash command.
Testing it out in Slack
In your Slack channel, use the lightning bolt icon to bring up a pop-up and then search for your command name. Once the command name is entered in the input box, hit enter.
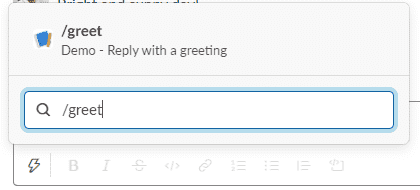
Image courtesy of the author
Unfortunately, this time you'd get an error.
Troubleshooting
The easiest thing to do is to add a console.log() statement in the handler() method to inspect the event object contents received. Of course, this time, you wouldn't want to push the changes to Netlify, but instead, you would want to troubleshoot this locally.
This means running the command netlify dev --live to get a local instance of the function app working which is publicly accessible and then updating the slash command's Request URL field to use this URL. Then trigger the slash command again and jump back into your terminal window to see the output.
You would observe that the event object contains a lot of data for this event but if you put a console.log() method after the parseRequestBody() method, you'll notice that the payload is undefined. Now, if you compare the contents in the event.body property of the slash command with the contents received in the event.body property of a message in the channel, you'll notice a major difference in the format.
The slash command's event.body property will contain a message in this format:
body: 'token=some_token&team_id=your_team_id&team_domain=your_workspace'
While the event.body property of a regular message in the channel will be of this format:
body: '{"token":"some_token","team_id":"your_team_id","api_app_id":"your_api_id"}',
The former is a query string format while the latter is a JSON string format. This means, that we'll need our parseRequestBody() method to handle both scenarios.
Fixes
Luckily, the event.headers[“content-type”] property contains a different value in both of the scenarios. For a regular message event, event.headers[“content-type”] is application/json while for a slash command event, event.headers[“content-type”] is application/x-www-form-urlencoded.
Let's update our parseRequestBody() method to accept this content type value as the second parameter and update the code inside this method to convert a string of the format query string to a JSON object.
// Import statements

// Code omitted for brevity

function parseRequestBody(stringBody: string | null, contentType: string | undefined) {
  try {
    let inputStringBody: string = stringBody ?? ''
    let result: any = {}

    if (contentType && contentType === 'application/x-www-form-urlencoded') {
      var keyValuePairs = inputStringBody.split('&')
      keyValuePairs.forEach(function (pair: string): void {
        let individualKeyValuePair: string[] = pair.split('=')
        result[individualKeyValuePair[0]] = decodeURIComponent(individualKeyValuePair[1] || '')
      })
      return JSON.parse(JSON.stringify(result))
    } else {
      return JSON.parse(inputStringBody)
    }
  } catch {
    return undefined
  }
}

export async function handler(event: APIGatewayEvent, context: Context) {
  // Code omitted for brevity
}
Many thanks to this source for the code snippet that converts query string to JSON.
Now, in the handler() method, let's update the parseRequestBody() method to pass the content type value as well.
// Code omitted for brevity

export async function handler(event: APIGatewayEvent, context: Context) {
  const payload = parseRequestBody(event.body, event.headers['content-type'])

  // Code omitted for brevity
}
Code changes for this step
If you'd like to compare your code changes for this step, head over to this diff page on GitHub.
Build and deploy
Commit all your changes and push them up to your GitHub repository. After a successful build and deployment, proceed to the next step.
Test it out in Slack
It's time to test the slash command once again. This time, you should get a reply back from the app and this message will only be visible to you.
Image courtesy of the author
Other Slack interactions and events
While I've covered two different events above in the form of general messaging and slash commands, there's still plenty of Slack events and interactions we could look at. However, you'll find that the remainder can be achieved by repeating the steps above in some shape or form. Hence, for the scope of this article, I'm not going to demo any more scenarios.
Tidying up your code and conclusion
While the above is just demo code, there's a lot of scope to tidy it up further. This is my version of what I'd like the production-ready source code to look like, but you're free to clean the code up based on your preference. Here are some highlights of what I updated:
Refactoring and unit testing
I've extracted out code into individual methods where possible and made use of multiple TypeScript files. I've then added unit tests for this code and updated the build command to run these unit tests before compiling the files. Note, you don't want to test Bolt's code since that would've already been tested by their team. You only want to test the code your adding.
Types
I've gone ahead and added types for variables, methods and method parameters. In some cases, I've created a custom type to simplify things a bit.
Exposing only the function you need
You would notice that I've moved the slackbot.ts file into a folder named functions while the other files are still under the src folder. I've also updated the output directory in the tsconfig.json file to place the compiled JavaScript files into the ./netlify directory, and since the TypeScript compiler will maintain the folder structure, it will automatically create the functions folder inside the netlify folder before placing the compiled slackbot.js file in there.
Since, by default, Netlify will serve functions only from the netlify/functions folder, it will now only expose slackbot.js keeping utils.js and constants.js under the hood. The diagram below visually illustrates this process.
Image courtesy of the author
In the demo version of this code, both utils.js and constants.js files were placed in the functions folder. This means when you try to access the utils file via the functions URL, it will throw an error.
Distributing your app
The demo app built in this how-to guide is used in a single workspace. If you'd like to use your app in multiple workspaces or distribute your app via the App Directory to a larger audience, then you may have to follow this article to see what changes you might need to make to your app.
That's it! Thanks for reading.