- Published on ·
- Reading time 18 min read
ChatGPT and AI: Creating Magical Bedtime Stories for Kids — Part 2
Part 2: A Step-by-Step Guide to Writing, Cover Designing, and Publishing a Children's Storybook with Artificial Intelligence on Your Side
Share this page
Introduction
I recently published a children's bedtime storybook titled AI, Tell Me a Story which was written with the help of OpenAI's ChatGPT. I've been curiously reading about the various ways in which ChatGPT has been enabling people to achieve wonderful things and I've always wanted to give it a try. And what better way to try, than to go into the deep end?
In part 1 of this article, we covered the chunkier bits of creating the manuscript and book cover using artificial intelligence, and in part 2, we shall cover the remaining steps of packaging it up and publishing the book on Amazon.
This is meant to be a continuation of the previous article, so if you haven't already checked out part 1, please do so. But in summary, here's what to expect from this comprehensive guide:
- Generating stories using ChatGPT (in part 1)
- Creating a manuscript (in part 1)
- Designing the book cover (in part 1)
- Formatting the manuscript
- Publishing using Kindle Direct Publishing
- Self-publishing the eBook
- Self-publishing the paperback
4. Formatting the manuscript
Since I last used Kindle Create for my previous book, a lot more features have been added to the software, so I was keen to try using it to format my manuscript.
Download Kindle Create and import the manuscript
Download Kindle Create from Amazon and once downloaded, install the software on your computer. When you open Kindle Create, you'd want to click on the Choose button to import your manuscript.
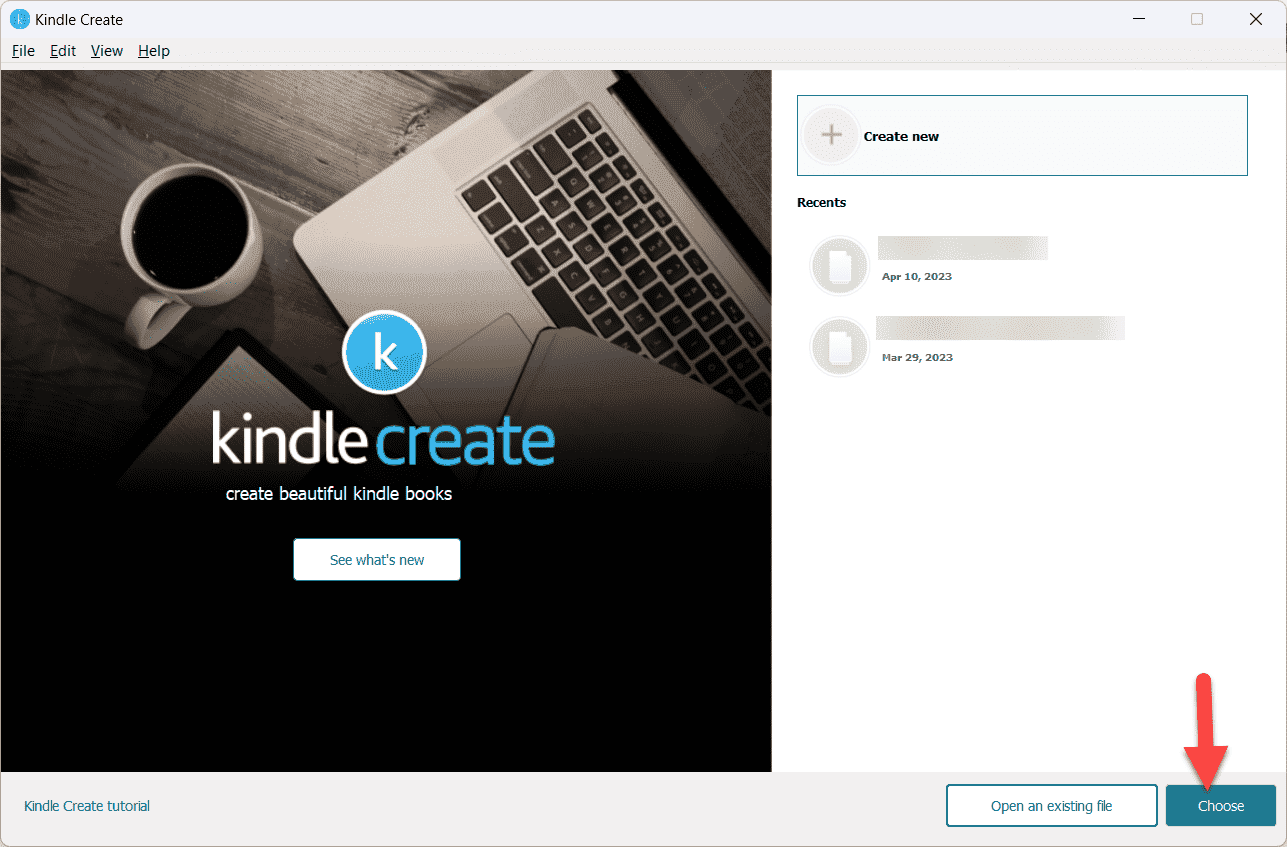
Image courtesy of the author
Click on the Choose File (.doc, .docx) button to open up a modal to select your Word document.
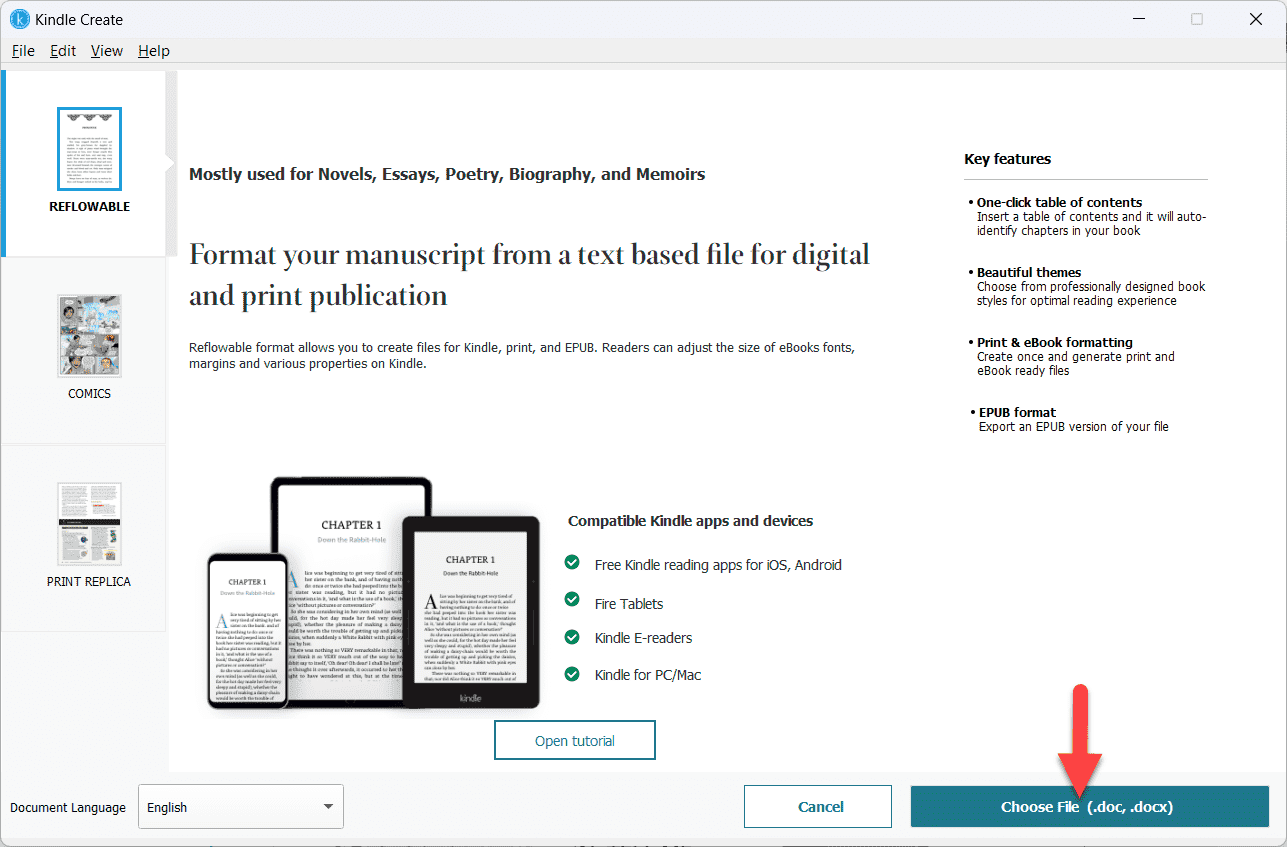
Image courtesy of the author
Import the document and accept the chapter titles that Kindle Create automatically detects.
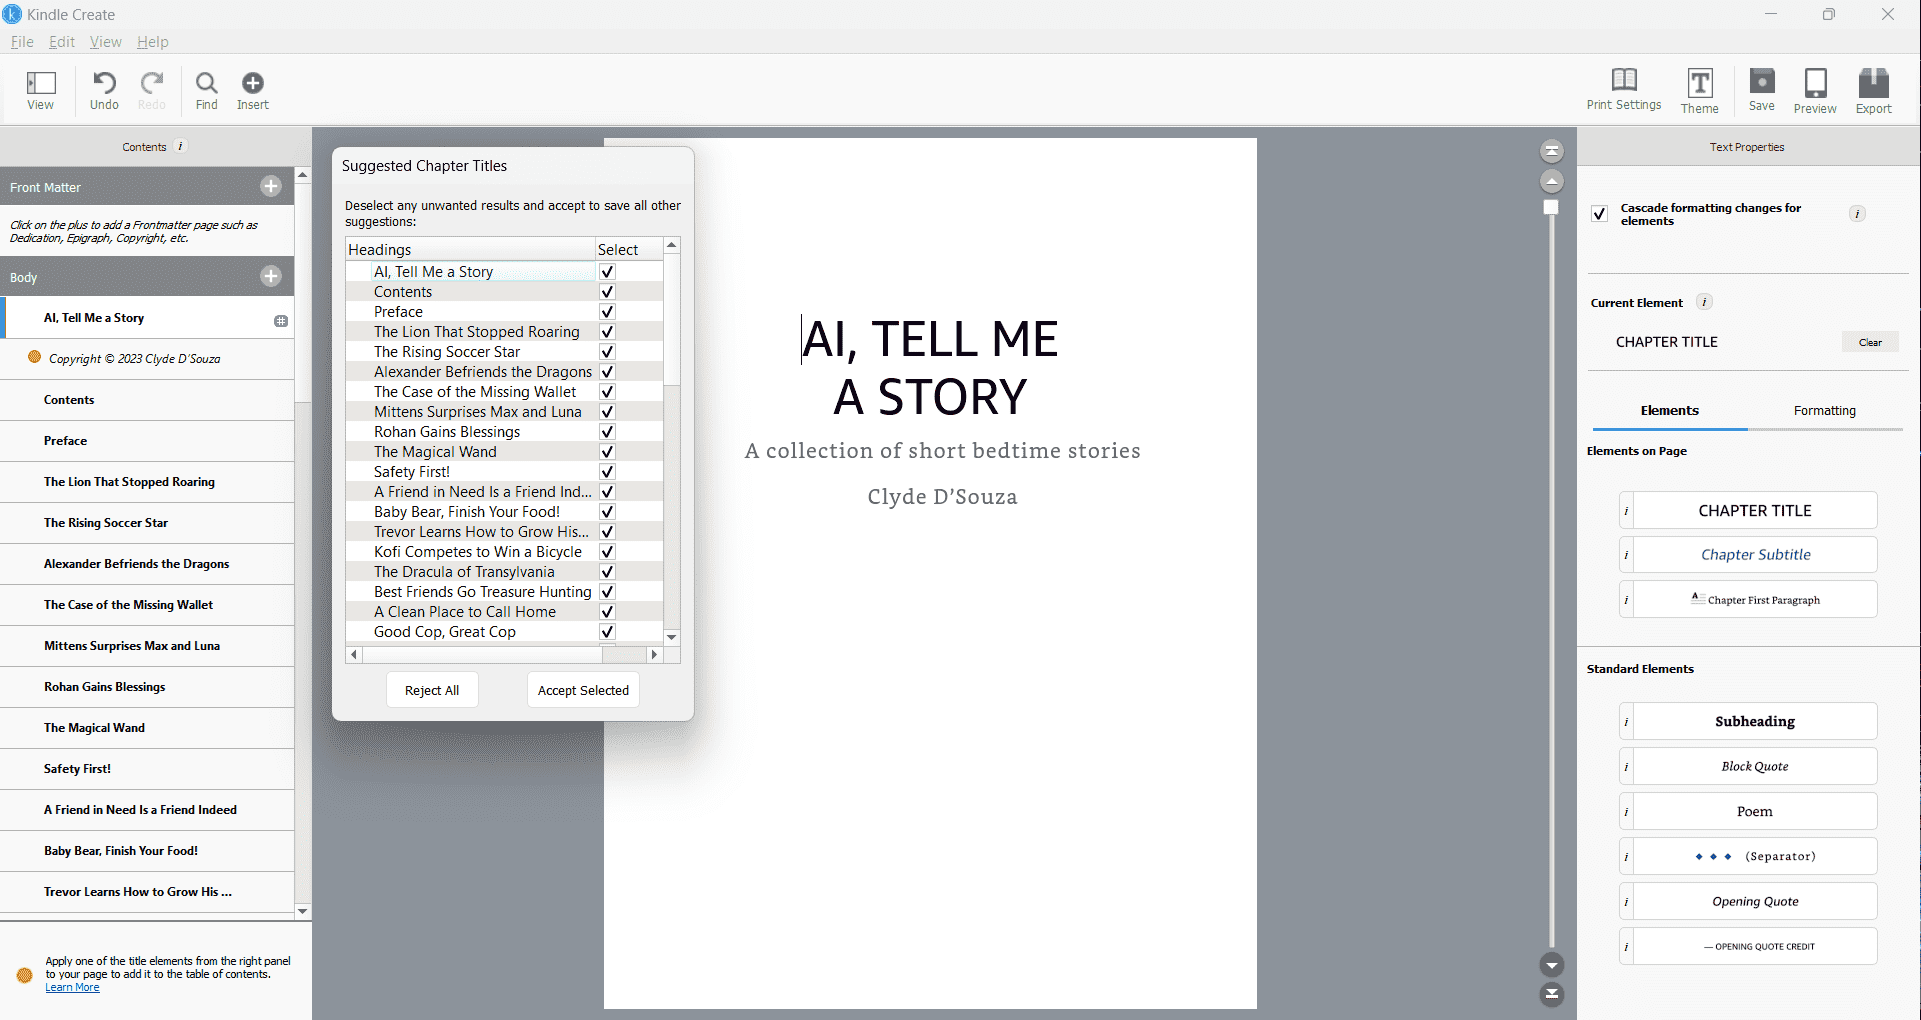
Image courtesy of the author
On the left panel, it will then populate all your chapter titles and the titles of the main pages from your manuscript.
Note: Updating the manuscript in Kindle Create doesn't update the underlying Word document file that you imported. Kindle Create maintains its own copy internally. So, for example, if you delete a section in Kindle Create, it doesn't delete it from the original manuscript. It will only persist in Kindle Create and in the exported file.
Adding front matter
We'll go ahead and use the new Kindle Create features to add front matter. We'll start with the title page. Click the plus button beside the Front Matter heading and click on Title Page.
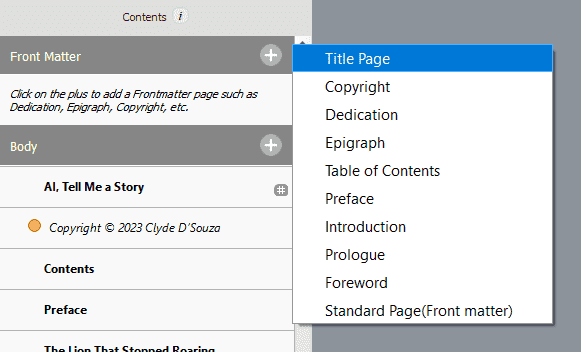
Image courtesy of the author
Enter the details into the dialog box as appropriate and then click on the Create Page button. This will generate a title page in the Front Matter section.
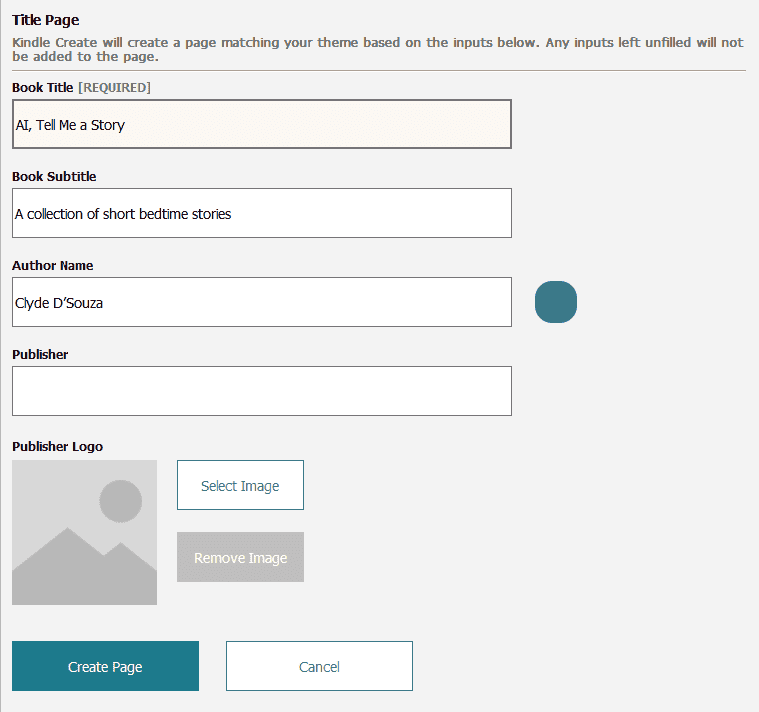
Image courtesy of the author
We can now safely delete the title page that was originally loaded from our manuscript. Right-click the title page, which should be in the Body section, and then click on the Delete Section option.
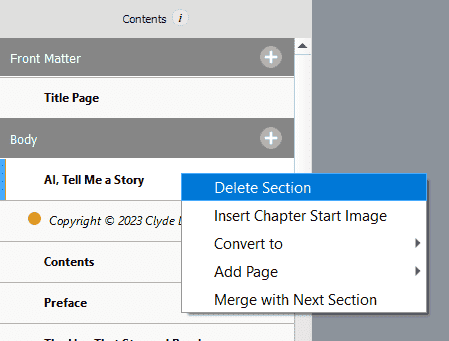
Image courtesy of the author
If you need to edit the title page, click on the Title Page from the left panel and then look for Page Properties in the right panel. There should be an Edit Page button which upon clicking, should open up the dialog box to edit the contents.
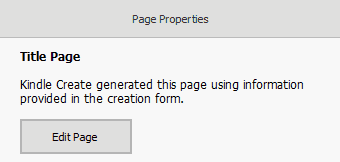
Image courtesy of the author
In a similar fashion, we'll add a copyright page. This is also available in the Front Matter section. Fill up the required copyright information in the dialog box and click on the Create Page button to add this page.
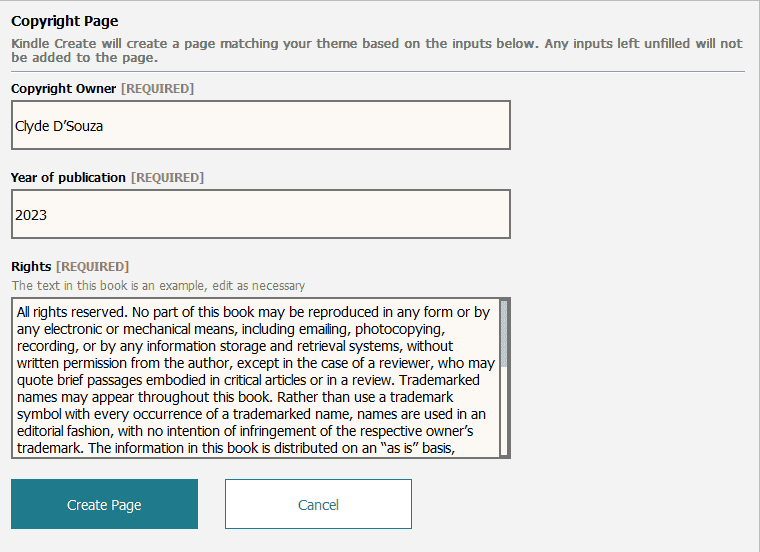
Image courtesy of the author
Then, delete the original copyright page from the Body section.
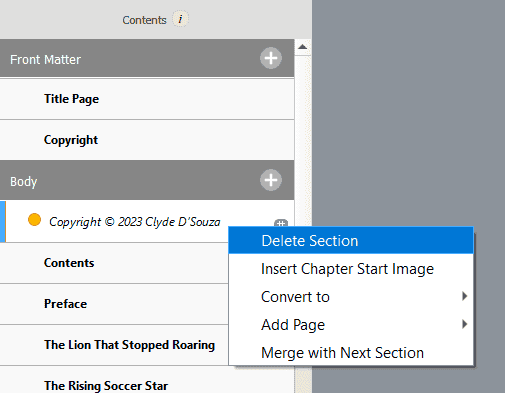
Image courtesy of the author
For the table of contents, we'll have to go ahead and delete the Contents section first because Kindle Create would detect an existing one and not allow us to proceed with adding a table of contents using Kindle Create.
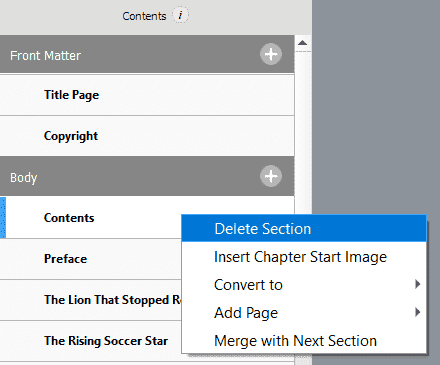
Image courtesy of the author
Next, from the Front Matter section, add Table of Contents.
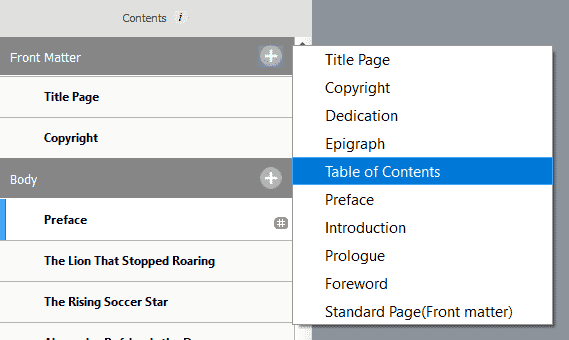
Image courtesy of the author
This will automatically add a page with all the sections hyperlinked. For an eBook, page numbers are not added, but as you'll note in the Page Properties panel, Kindle Create will automatically add the page numbers when exporting for print. When you add a new page in Kindle Create, it'll automatically update the table of contents, so there's nothing to worry about from here onward.
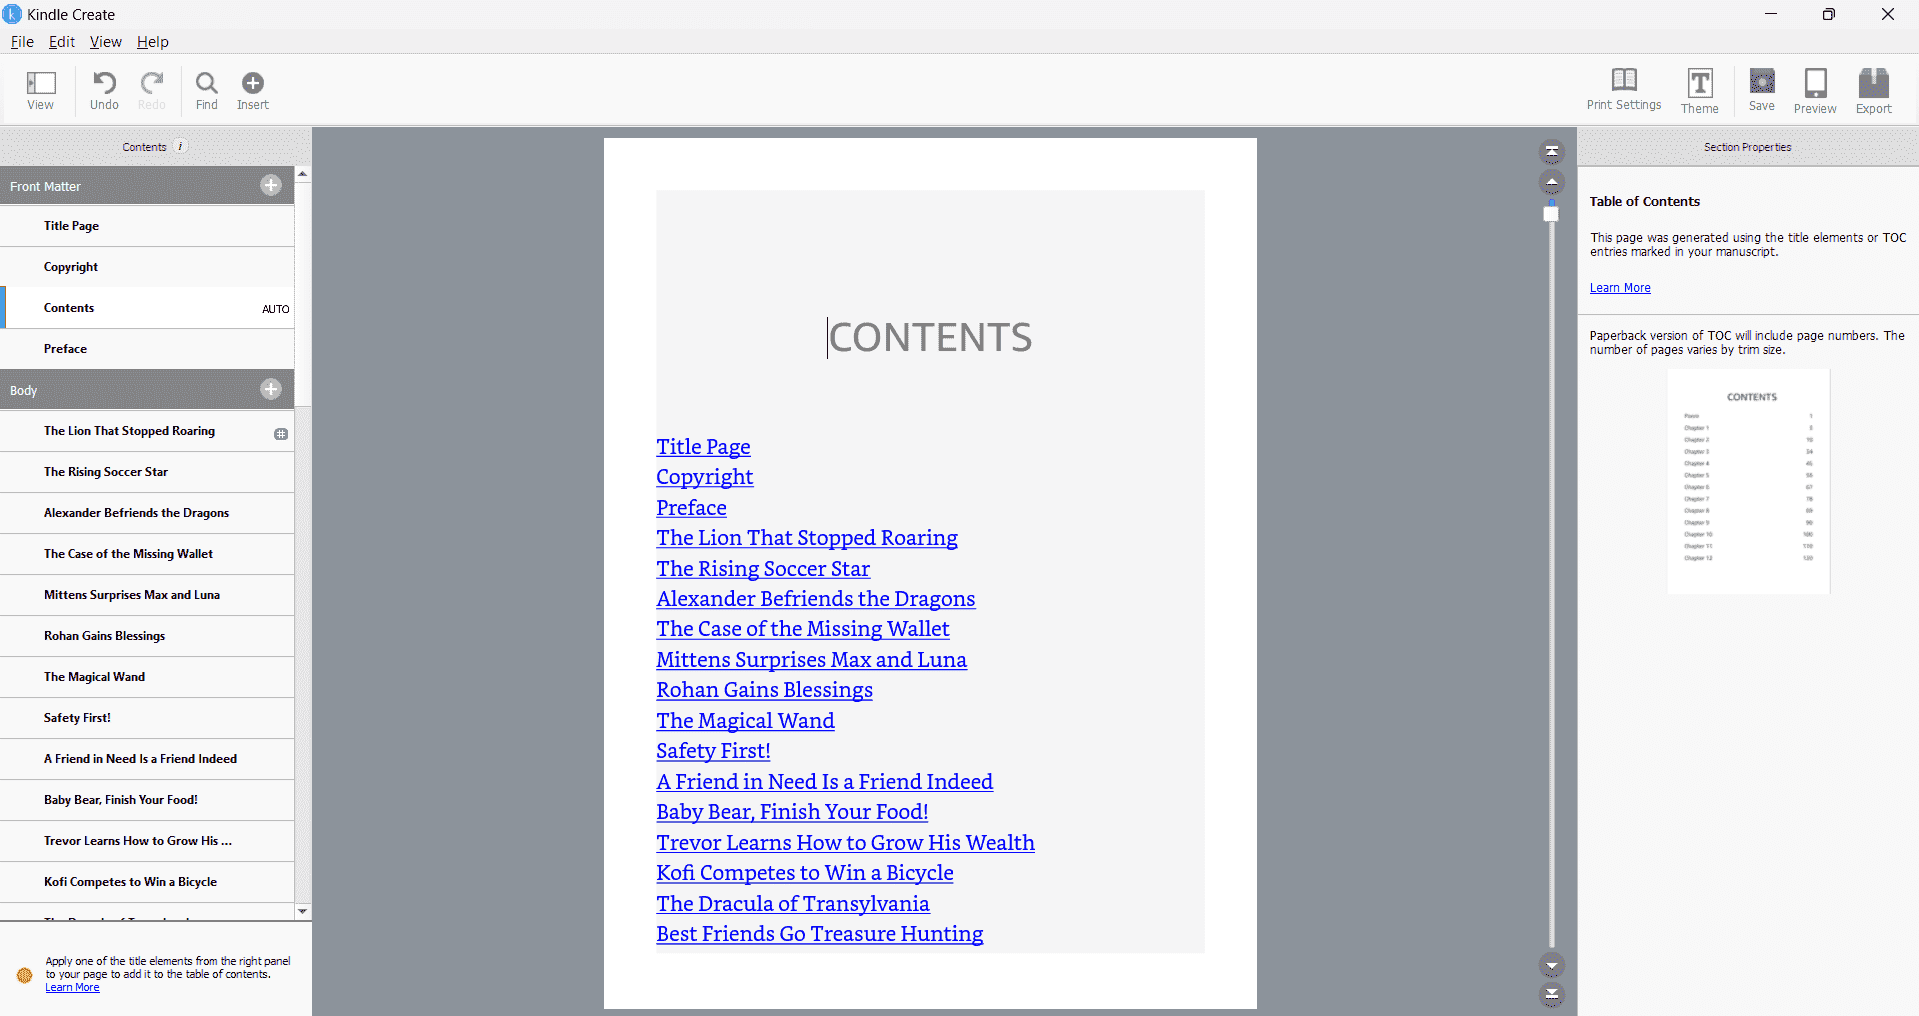
Image courtesy of the author
Finally, but optionally, add a Preface page into the Front Matter section. Steps to add are similar to what we've done above but to update the contents of the page, you've to update the text inline in Kindle Create.
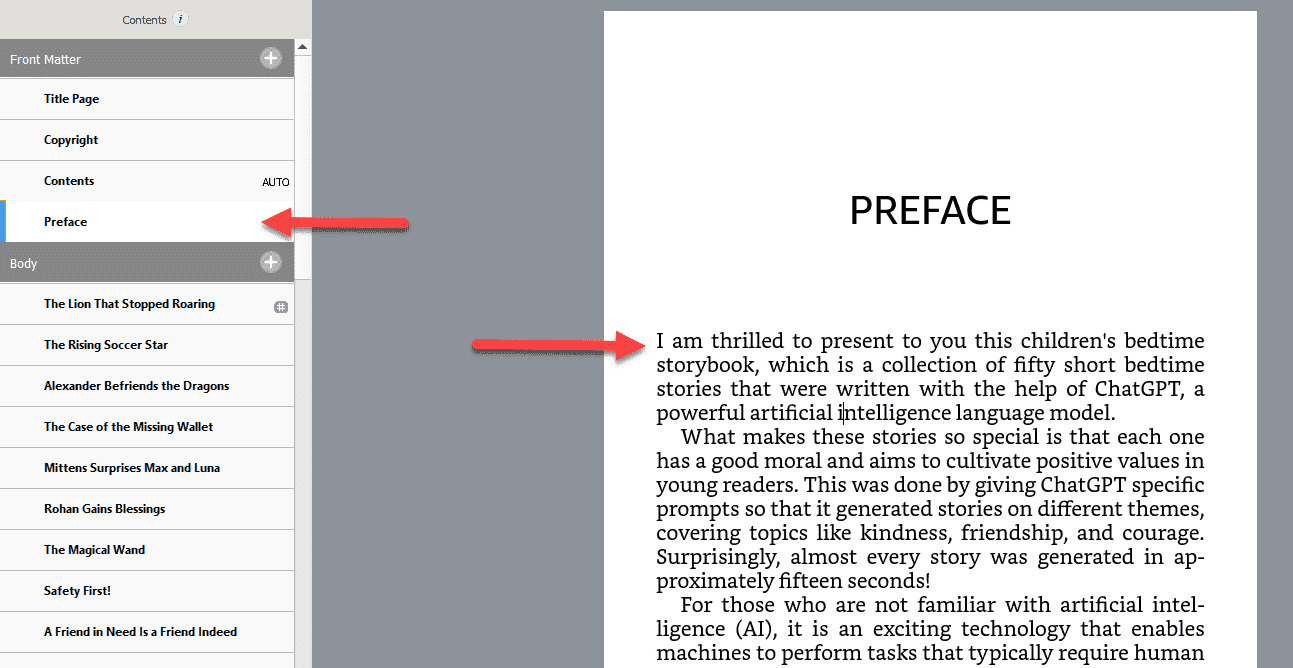
Image courtesy of the author
Formatting the content
By default, chapter and page titles and the body of the manuscript will be automatically picked up by Kindle Create and the correct styles will be applied. If you need to make some adjustments, you can absolutely do so.
I found that the vertical spacing between the chapter titles and the first line of the story was too less.

Image courtesy of the author
So, to fix this I clicked on the chapter title and then clicked on Formatting from the right panel. From the Spacing section, I found the vertical spacing field and increased the value to 0.75. This is an arbitrary number that worked for my formatting requirements, but you can experiment with other fields in this section and see what it does to your manuscript. Changing the formatting for a chapter title element will automatically apply the same style to all chapter titles in the manuscript saving you the time of having to do it manually.
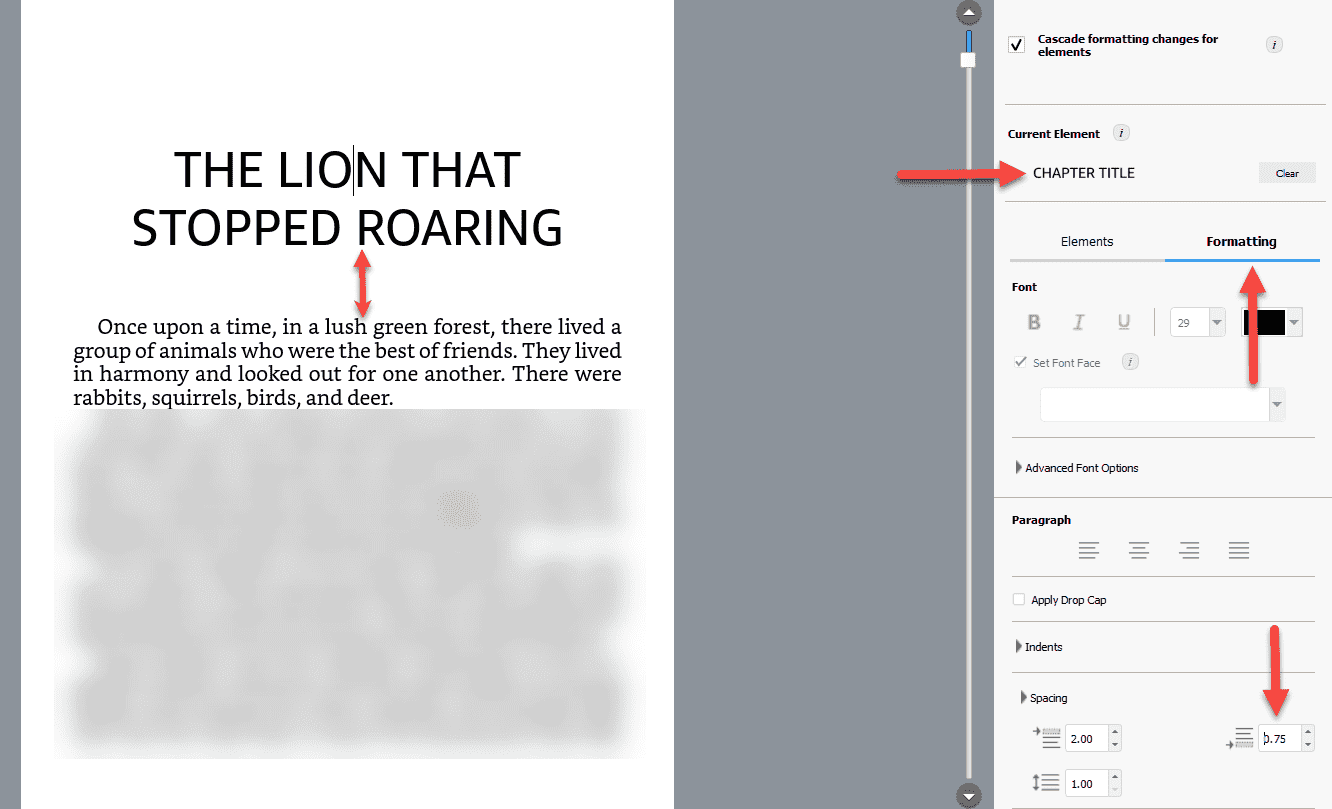
Image courtesy of the author
Adding back matter
Similar to what we did for the front matter, we can click the plus button and add back matter pages. We can start with About The Author.
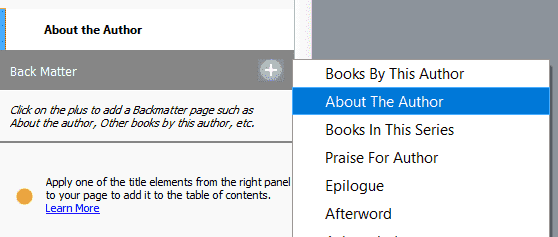
Image courtesy of the author
This will present a dialog box to add your content and saving this will create a page. I did the same for my book but found that it didn't capitalize the 'S' in my last name even though I entered it in uppercase. Unfortunately, this doesn't work for me, so I decided to retain the About the Author page from my original manuscript instead.
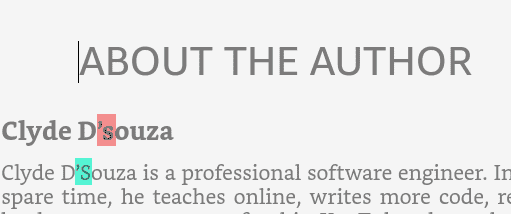
Image courtesy of the author
Next up, we can add a Books By This Author section if you have an existing book(s) published.
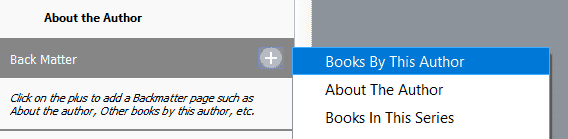
Image courtesy of the author
I filled up the details of my existing children's bedtime storybook Mama, Tell Me a Story, and created this page.
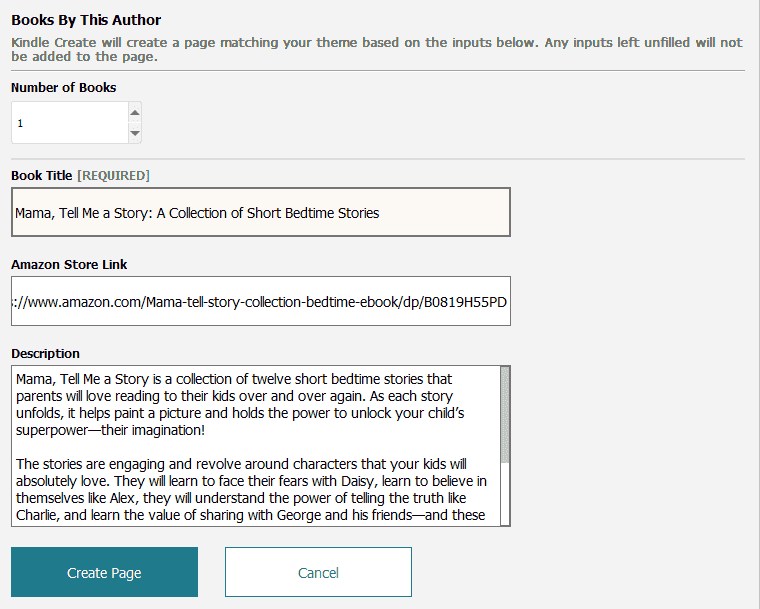
Image courtesy of the author
This adds the page at the end with a hyperlink that takes the reader to the Amazon page when clicked on.
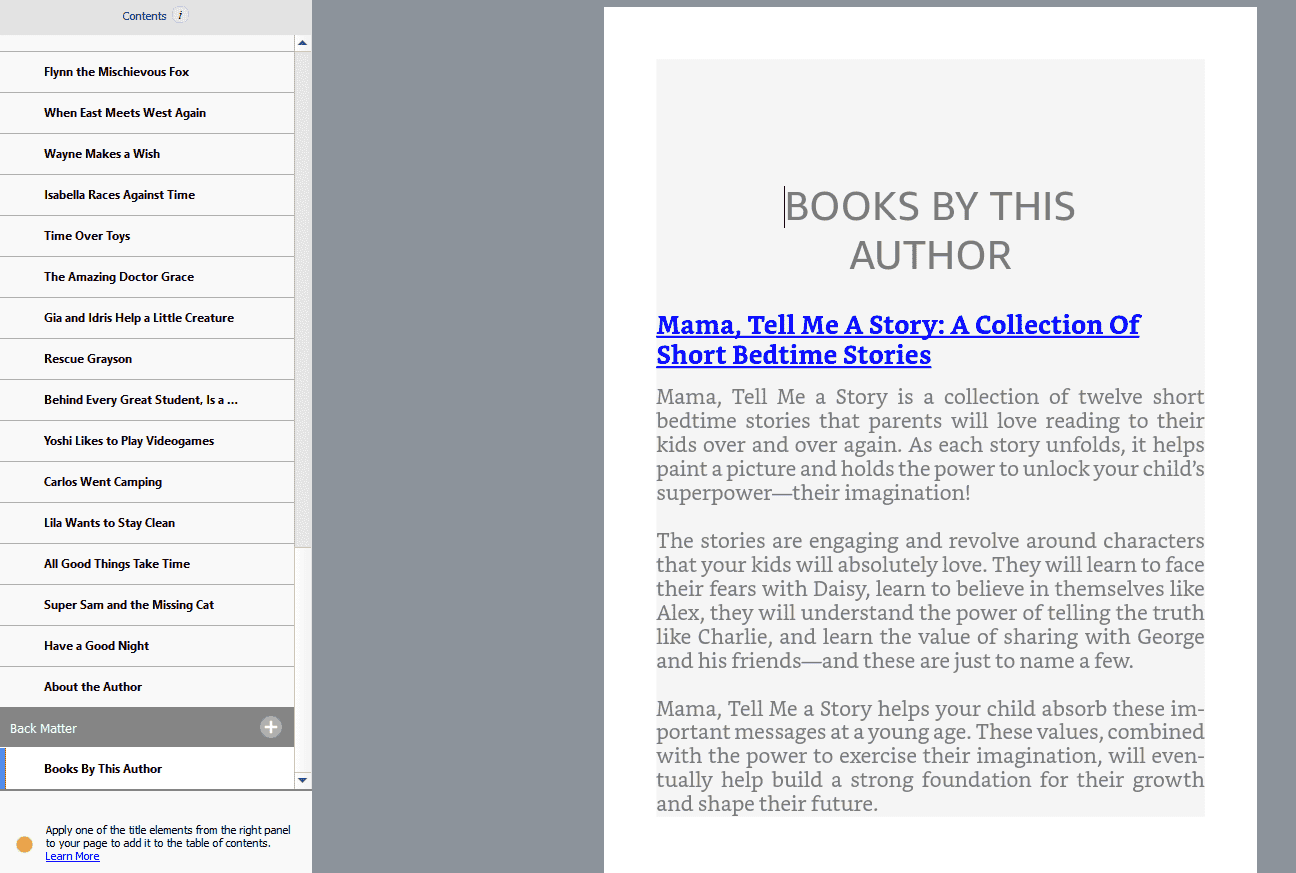
Image courtesy of the author
Toolbar
This toolbar located on the top-right of the software is pretty useful.
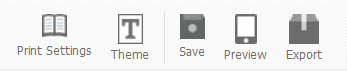
Image courtesy of the author
If you click on the Print Settings button, it will prompt you to select the style of how the headers and page numbers should appear in the print copy of your book. Select one that suits your needs.

Image courtesy of the author
If you click on the Theme button, it will open up a modal to select a theme for your book from a list of four themes currently available.
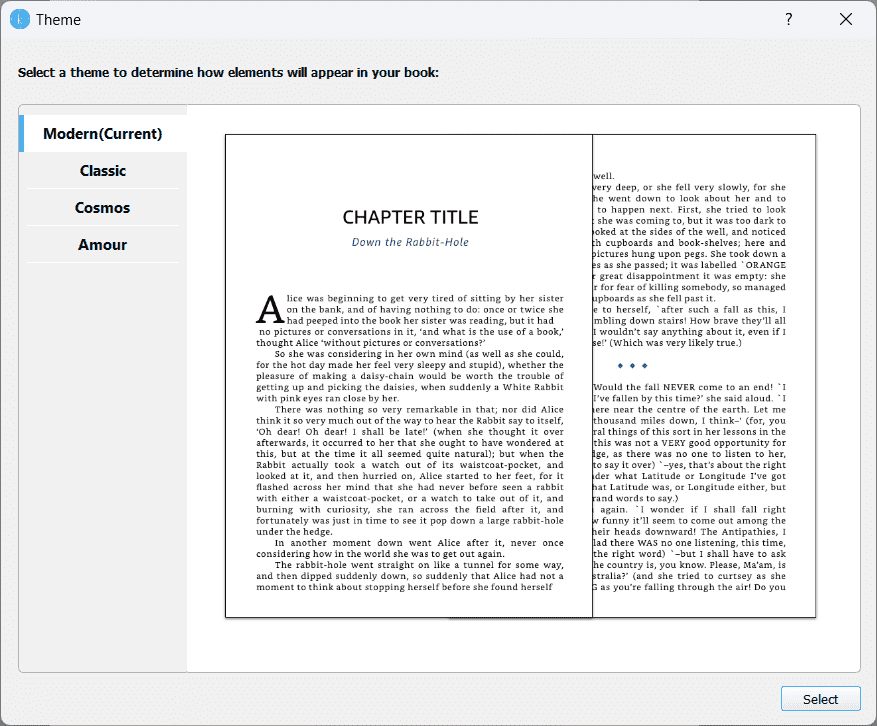
Image courtesy of the author
If you click on the Save button, it will save the changes you've been making in Kindle Create as a Kindle Create project. You'd definitely want to do this!
If you click on the Preview button, it will open up a previewer where you can view how your book will look on a tablet device and on a Kindle e-reader. This is useful to check if, after formatting, your content is still legible.
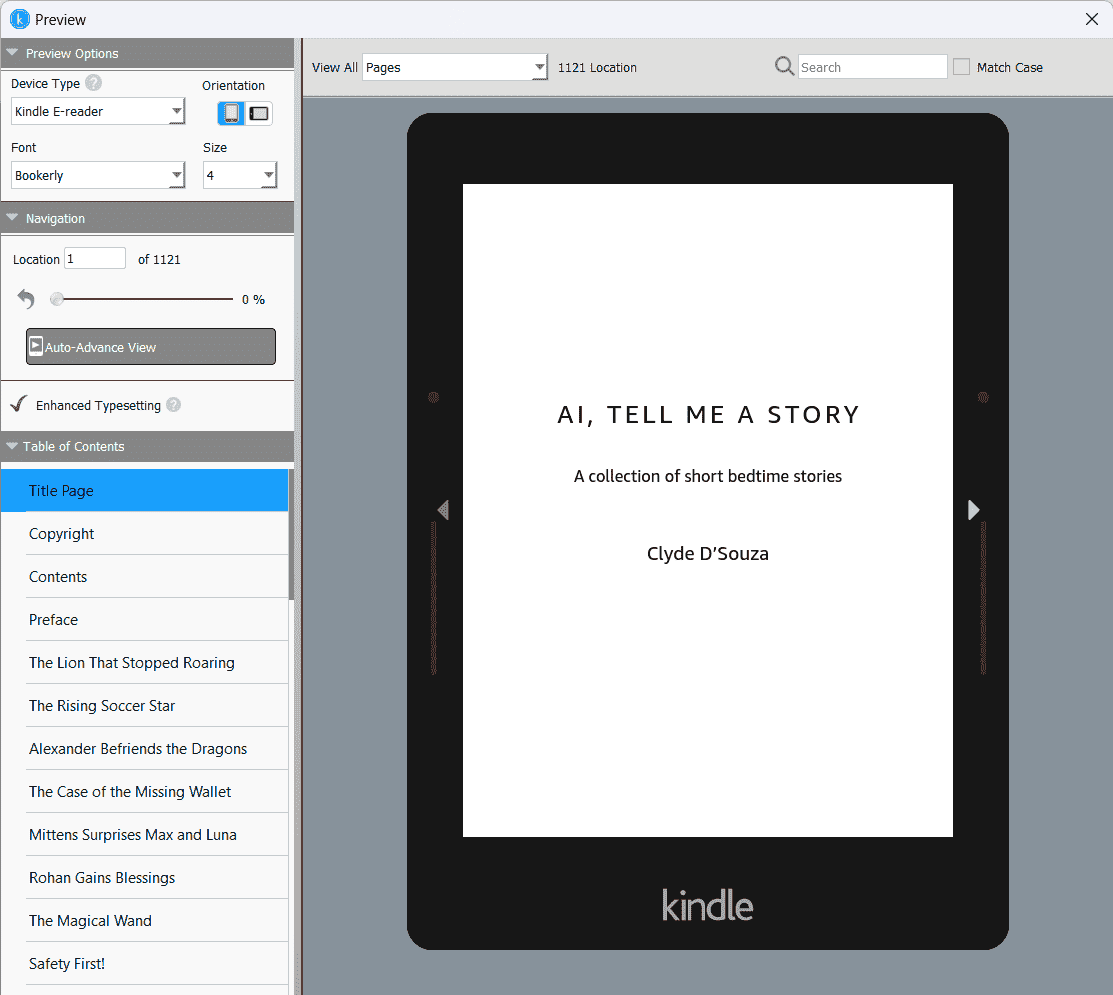
Image courtesy of the author
Finally, if you click on the Export button, it will present the options to export your file. Checking KPF (Kindle Packaging Format) will get Kindle Create to export the formatted manuscript as a KPF file which can then be uploaded to Kindle Direct Publishing website and use this same file to create an eBook as well as a paperback or hardcover.
EPUB is a popular file format for other platforms, so if you're publishing your book elsewhere, you might need this file, too.
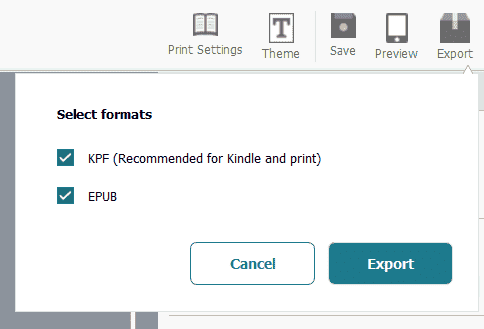
Image courtesy of the author
Once you click on the Export button, confirm the file location where you'd like these files to be generated.
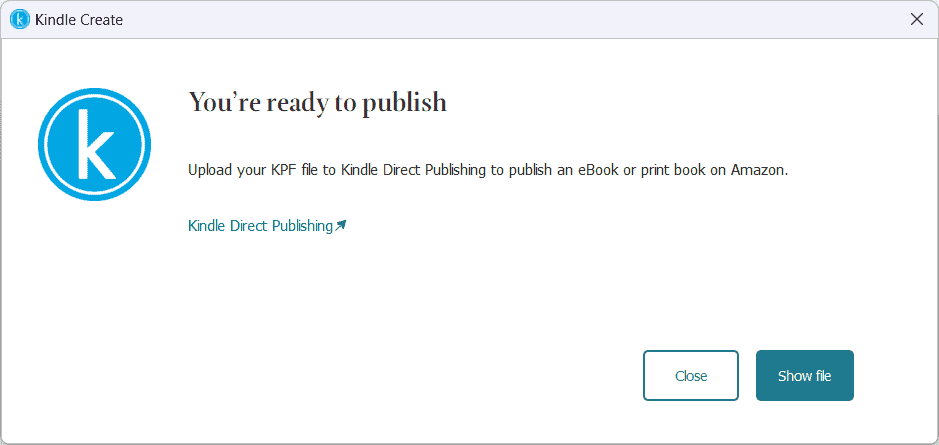
Image courtesy of the author
You're now ready for the next step.
Considerations
- You might not prefer binding yourself to a specific product, in this case, Kindle Create, and that's understandable. You don't necessarily need to use Kindle Create to format your manuscript. Microsoft Word is still a very acceptable choice and will get the job done.
- If you're using Microsoft Word, you'd have to additionally format the manuscript for print separately where you have to adjust the margins according to the template provided and also update the table of contents to include page numbers. Using Kindle Create now automatically does that for you.
- You would've noticed that adding front matter and back matter pages using Kindle Create is great but there's not much flexibility to format those pages using the current version of the software. This could mean that multiple books that've used Kindle Create to create these pages will all end up looking similar, formatting-wise. Using Microsoft Word allows you to update the formatting as you'd like.
- Similarly, since there are only four themes, books formatted using Kindle Create might end up looking the same.
- As noted above, a small quirk was found when adding my last name on the About the Author page. It seems to not capitalize the S after the single quote.
- I can't find the total number of pages in the print version of my book. The software is mostly eBook-first and the previewer also uses location rather than page numbers. This is a challenge especially when designing the book cover for print, which we'll see in the following section of this article.
5. Publishing using Kindle Direct Publishing
Head over to the Kindle Direct Publishing website and sign up using your Amazon account, if you haven't already created one. You can use this website to self-publish your books — not only fictional or non-fictional material but also no-content and low-content books.
6. Self-publishing the eBook
Now that you have formatted your manuscript, it's time to self-publish, starting with an eBook. Click on the + Create button to begin the process.
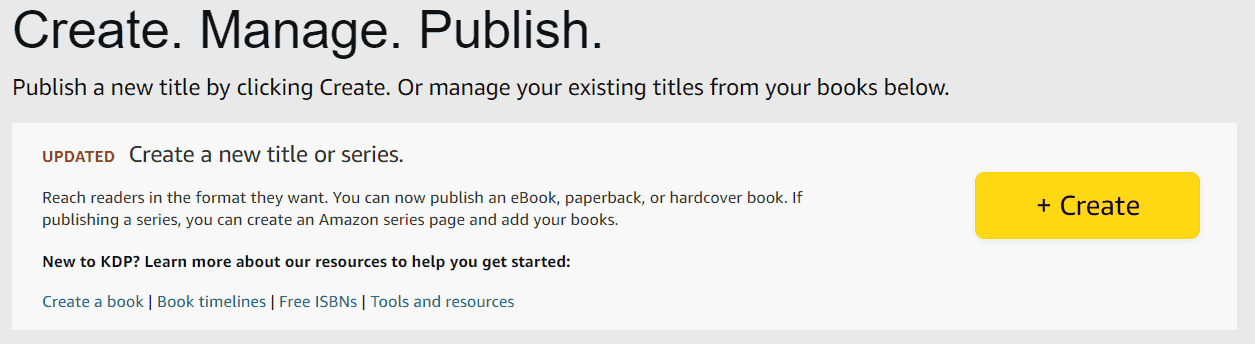
Image courtesy of the author
Next, click on the Create eBook button.
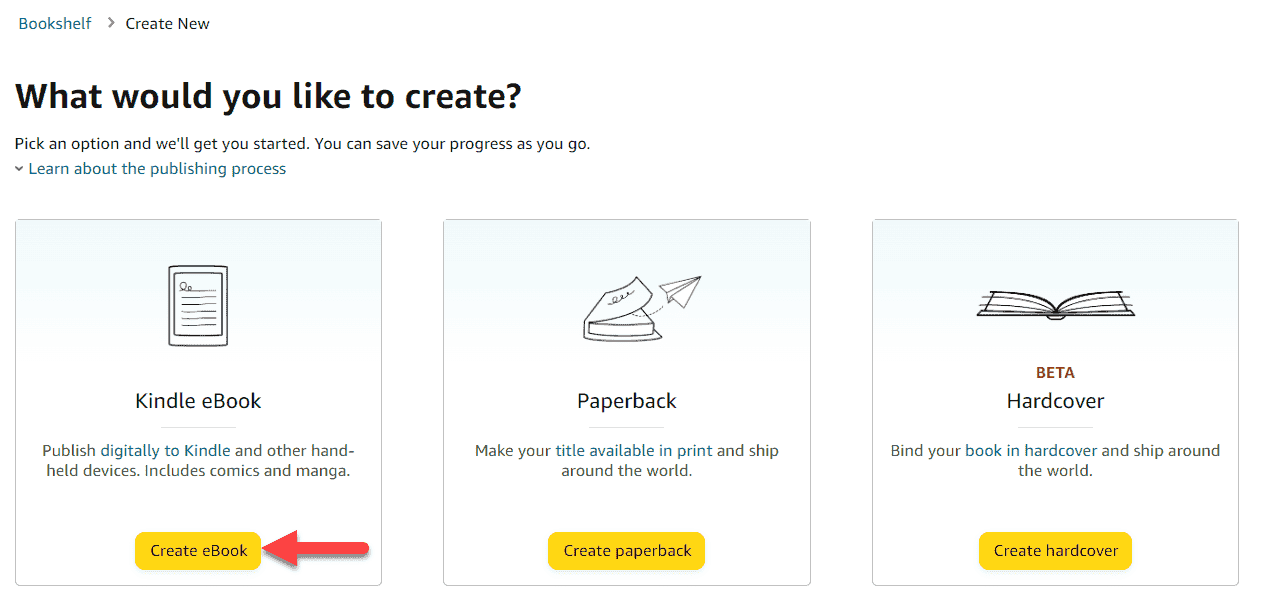
Image courtesy of the author
Kindle eBook details
Most fields in the Kindle eBook details section are quite self-explanatory and the details you enter on this page will reflect on the Amazon book page once published.
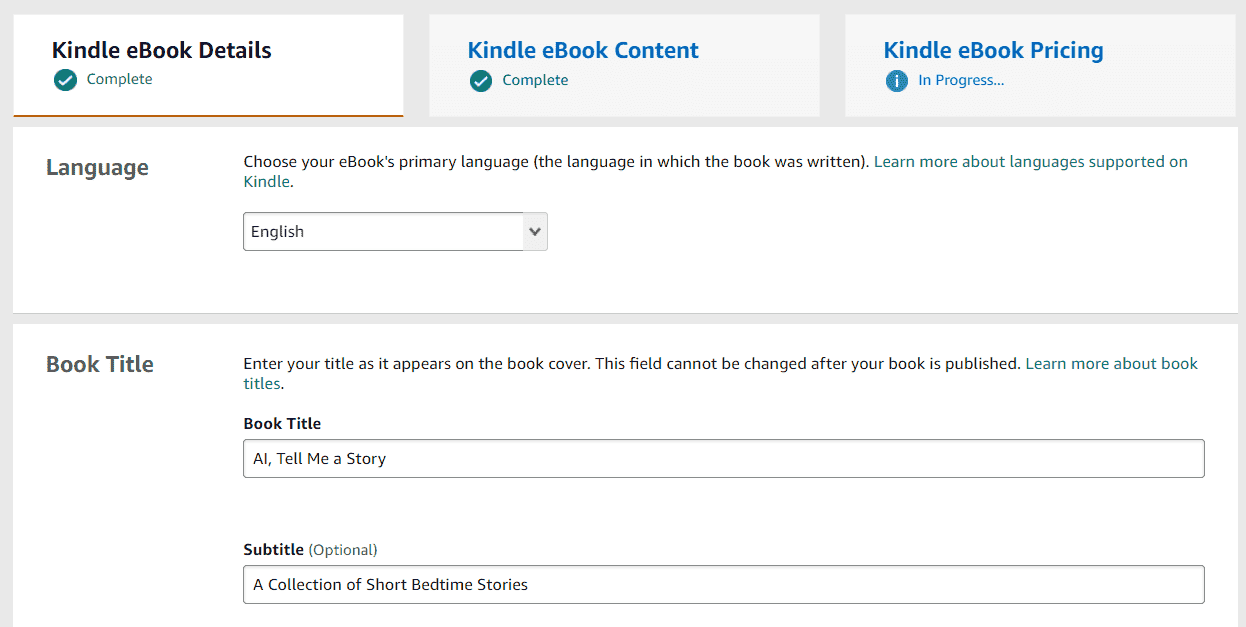
Image courtesy of the author
A lot of the metadata cannot be edited after your paperback has been published, as also outlined in this KDP article, so do spend a considerable amount of time deciding what goes in. Although, at the time of writing this article, the fields for my existing eBook were actually editable, which is contrary to what they've mentioned in the linked KDP article above. But either way, it's a good idea to be precautionary. There's also this additional resource on the best practices when writing up the metadata.
Also note, a semi-colon is automatically added between the title and subtitle on the Amazon book page.
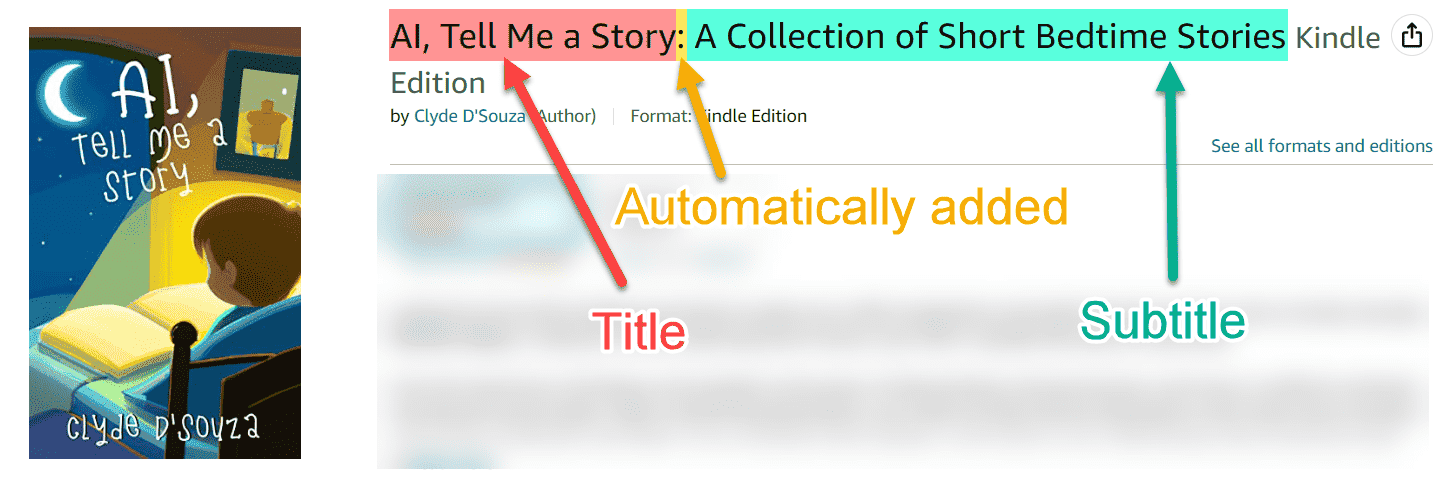
Image courtesy of the author
Amazon has made available the option for customers to pre-order the eBook. You could set a release date, submit the final version of the draft, and once approved, your eBook will be live and ready to pre-order. Customers will only get a copy of the book on the release date. Something to consider is that at the time of writing this article, Amazon defaults the pre-order date in the GMT timezone, so you'd have to work your promotional material according to this.
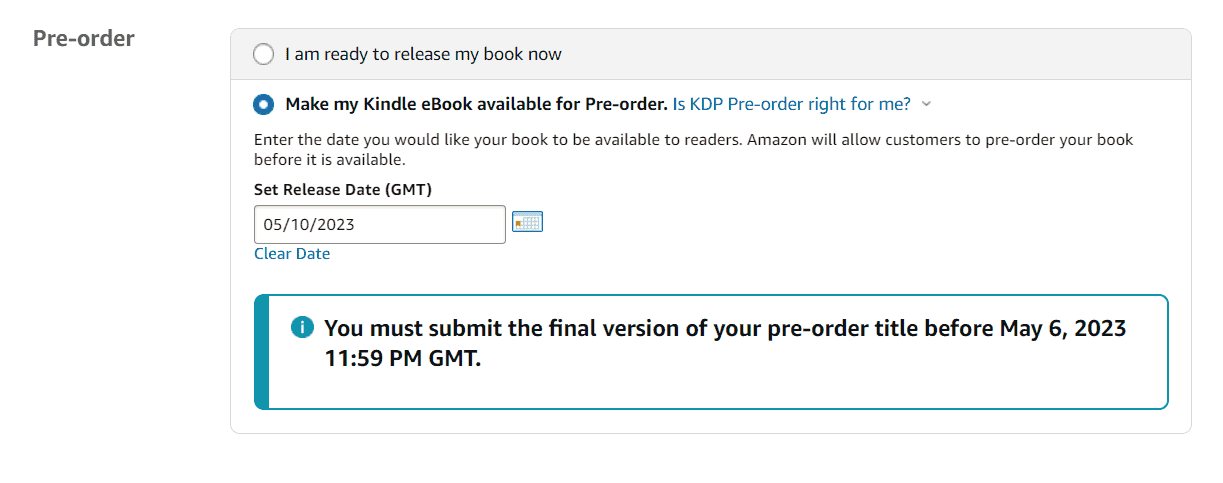
Image courtesy of the author
Click on the Save and Continue button to proceed ahead.
Kindle eBook Content
Here, you'll upload the previously exported KPF manuscript file. In a similar fashion, you'll also want to upload the eBook cover in JPG format. Once both files are successfully uploaded, you should be able to click on the Launch Previewer button to load an online eBook previewer where you could verify the contents and formatting of your eBook one more time. Click on Back to exit the previewer. Click on Save and Continue to proceed to the next section.

Image courtesy of the author
Kindle eBook Pricing
Kindle Unlimited is a subscription program for readers that allows them to read as many books as they want, like Netflix for books. When you enroll in KDP Select, your book will automatically be included in Kindle Unlimited, allowing you to earn a share of the royalties earned by KDP. You can enroll your book into the KDP Select program by checking this box.

Image courtesy of the author
Additional aspects to highlight are that your book will still be available to non-Kindle Unlimited users to purchase, and once enrolled in KDP Select, you'll have to exclusively make the digital copy of your book available in KDP and on no other platforms. The physical book can still be distributed elsewhere.
The remaining fields in the section are also quite self-explanatory unless your book comes with complex country-specific rights requirements in which case you might want to ponder around the Territories section a bit more.
Setting suitable pricing can be challenging so I'd highly recommend doing some research on similar books available on Amazon to see what's the price range of existing products. If you feel like being competitive and don't mind taking a cut on royalties and keeping a low margin, you could reduce the prices quite drastically. Although, you do have minimum and maximum price caps that are set by Amazon that you'd have to work within. Choosing between a 35% and 70% royalty can seem like a no-brainer but I'd highly recommend reading this page before making that call. The royalties and pricing can be changed even after going live, so don't stress about it.
Click on the Submit or Submit for Pre-order button at the bottom of the page to save your changes and eventually publish your eBook.
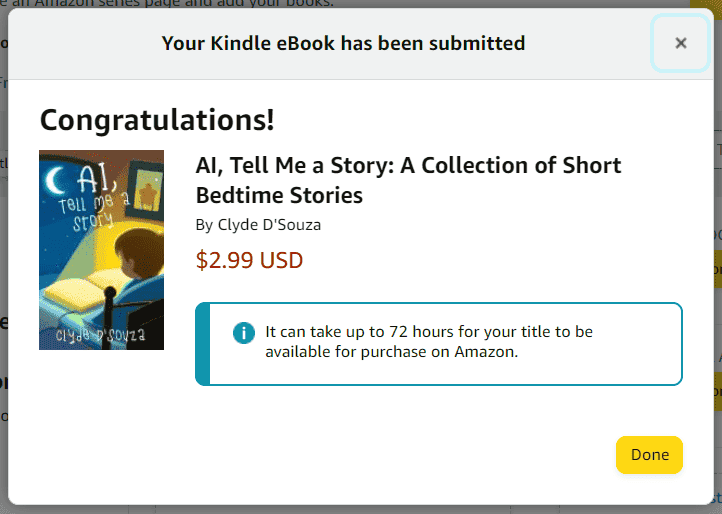
Image courtesy of the author
7. Self-publishing the paperback
Back on the Bookshelf page, you should now see your book listed. Click on the + Create paperback button to create the paperback version of the same book.
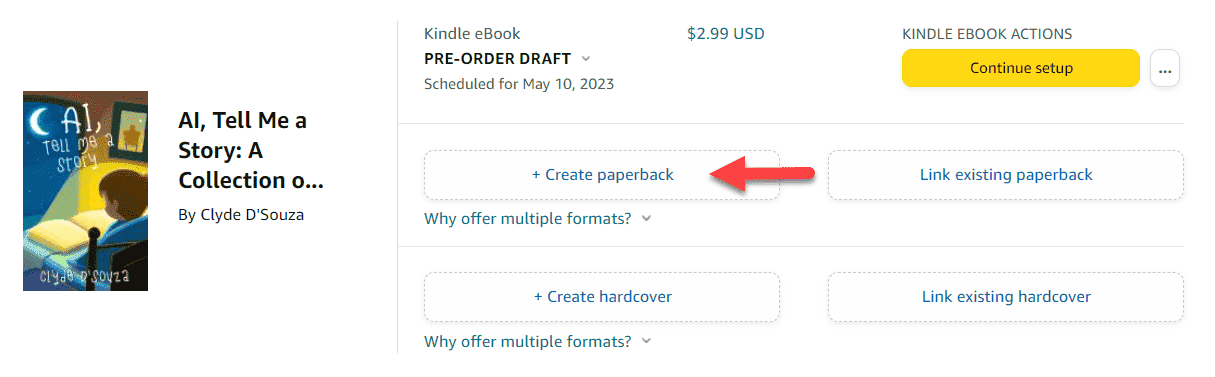
Image courtesy of the author
Paperback Details
Similar to the eBook details, the fields on this page are quite self-explanatory. Content added here will appear on your Amazon paperback book page, so take a moment to fill these up.
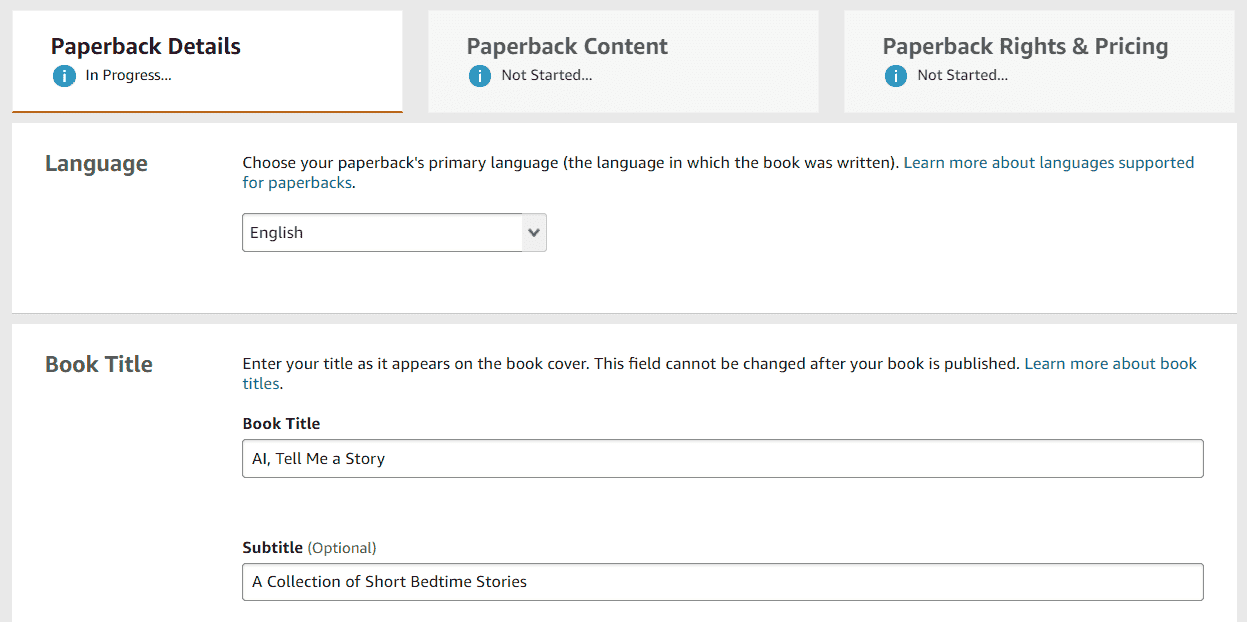
Image courtesy of the author
Note that some fields cannot be edited once the book has been published as per this KDP article.
Paperback Content
Amazon provides the option to generate a free KDP ISBN. This is great if you plan on publishing the print version using KDP only. You can also supply your own ISBN if that meets your requirements better. Compare both options by reading this KDP article.
If you get the free KDP ISBN, click on the Assign me a free KDP ISBN button. This will open a modal where you can click on the Assign ISBN button to generate one.
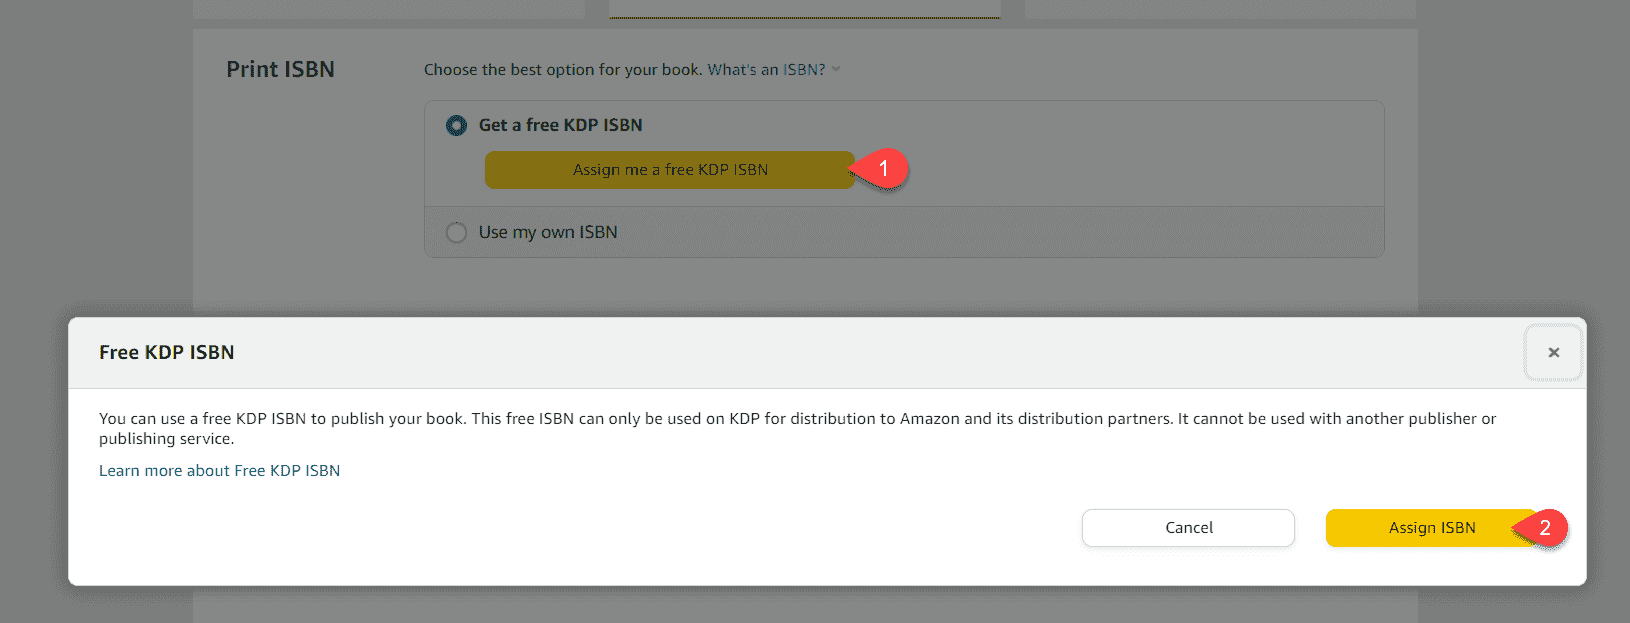
Image courtesy of the author
Publication Date isn't the equivalent pre-order functionality for paperback. If you click into this field, you'll quickly notice that you can't enter a future date.

Image courtesy of the author
Print Options is where you specify the size and paper quality details for your paperback book. You can most definitely research and play around with these settings. For my book, I've kept the defaults — Black & white interior with white paper, a trim size of 6x9 in, no bleed setting for interiors, and a glossy finish for the book cover.
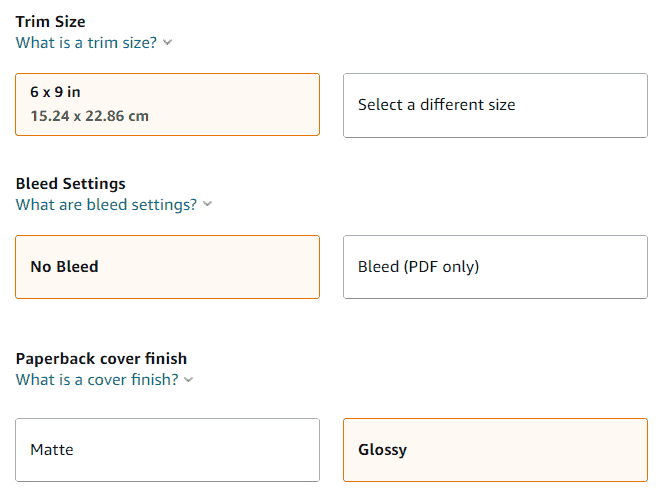
Image courtesy of the author
Next, upload the KPF (Kindle Packaging Format) file as the manuscript and the print-ready PDF of the book cover. Remember to check the Does your cover include a barcode? checkbox so KDP doesn't add a barcode on top of the existing one.
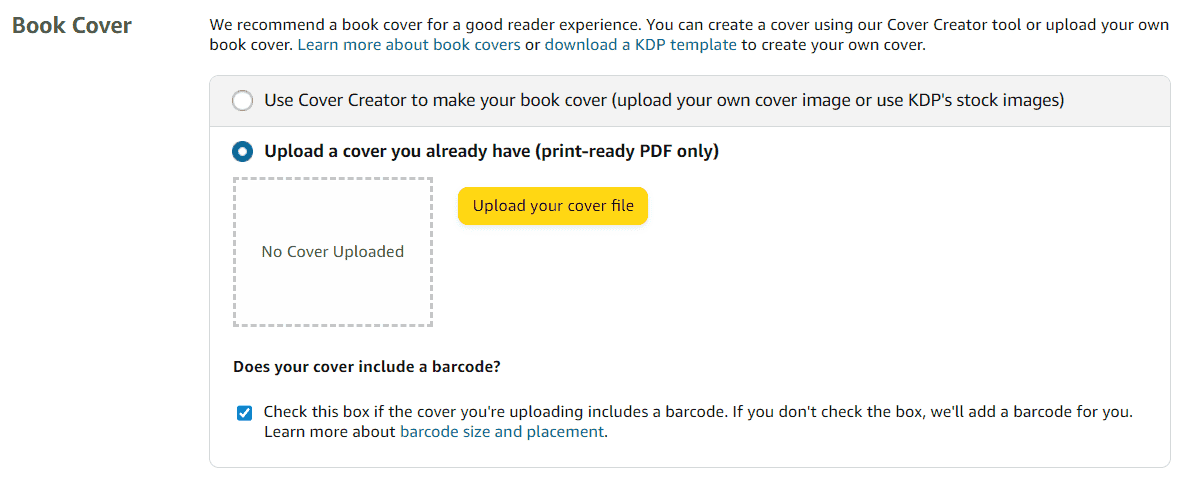
Image courtesy of the author
Once both have been uploaded, click on the Launch Previewer button to view the online print previewer, confirm that your book cover and the contents of your book look all right, and once happy, click on the Approve button to approve the book.
If you've followed the steps in this article, you'll also get an error in this step like I did, shown in the screenshot below. This error is telling me that the book cover size doesn't match what KDP expected based on the total number of pages in our manuscript. Thankfully, there's only one error (that's with the book cover) which we can rectify easily.

Image courtesy of the author
The online print previewer tells us that there are 117 pages in this book while the Word document said there were 61 pages. If we head back to the cover calculator and type in the page count as 117 and click on the Calculate dimensions button, we should see that the full cover width and height match the values in the error message. Download this updated template and repeat the process of creating the book cover with the new dimensions.
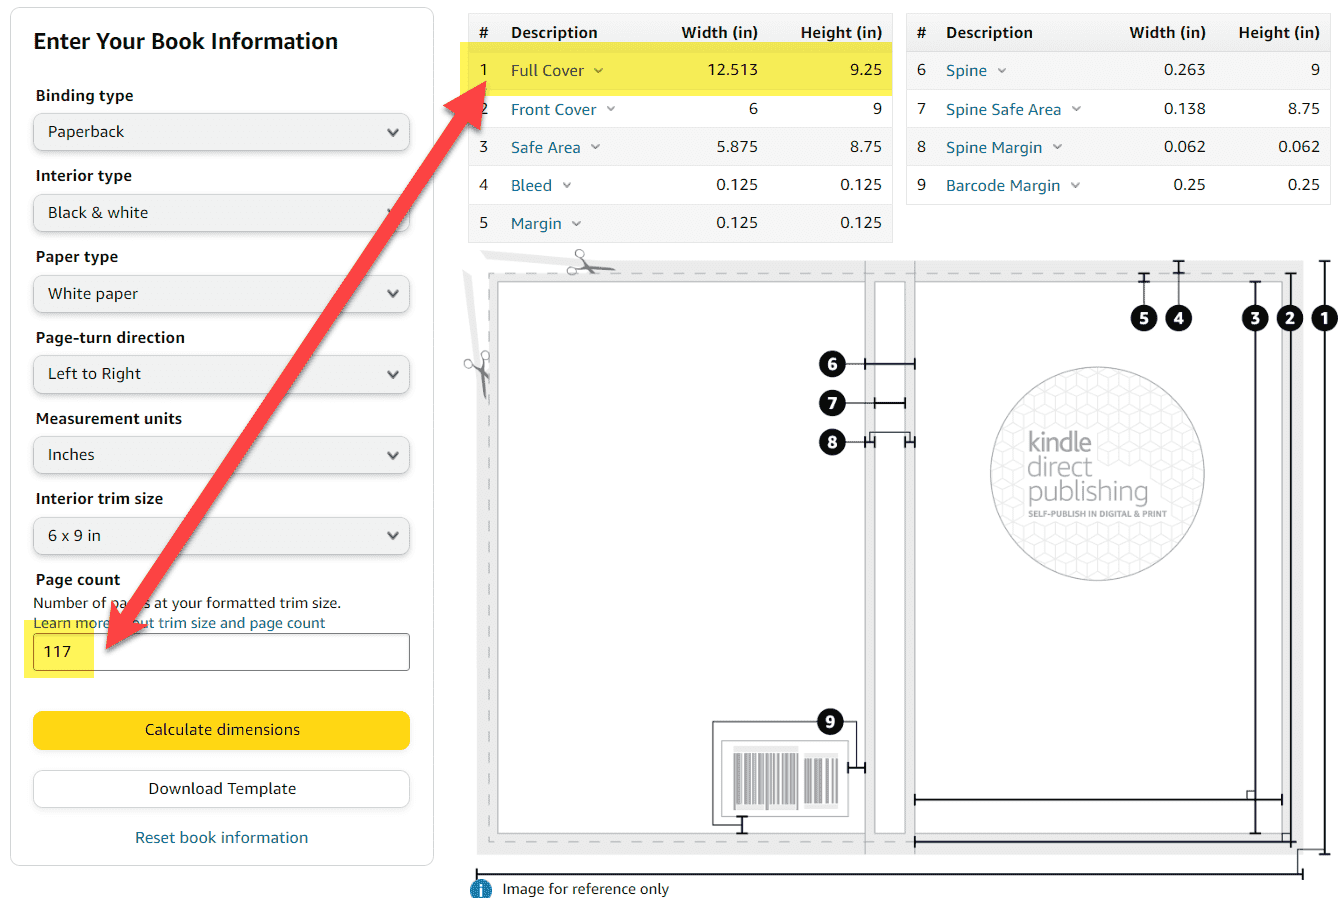
Image courtesy of the author
Now, upload this new book cover to KDP and click on the Launch Previewer button again to open up the online print previewer. This time, there should be no errors. Click on the Approve button to proceed.

Image courtesy of the author
Tip: To avoid reworking the book cover multiple times, just upload the JPG version of the template book cover you download from the cover calculator and then launch the previewer to see if there are any errors. Errors around incorrect dimensions should be picked up even with the template book cover, thus giving you quicker feedback and having to avoid rework.
Alright, back in the Paperback Content section, the Summary section at the bottom should now give you the book's meta information and printing cost. Click on Save and Continue to proceed.
Paperback Rights & Pricing
This page works similarly to that of the eBook rights and pricing section we looked at earlier. An additional difference is in pricing and royalty. Standard sales earn a royalty of 60% and expanded distribution sales earn a royalty of 40%. Expanded distribution is when large book distributors can make your title available to other outlets beyond Amazon.
Another difference is the option to order proof copies and author copies. Proof copies allow you to check that your book looks good in print before going live. Author copies allow you to purchase your book at print cost after it's gone live. More about it is in this KDP article.
Once you're satisfied with all the information you've entered, click on Publish Your Paperback Book button. After a review period, the book should be live on Amazon.
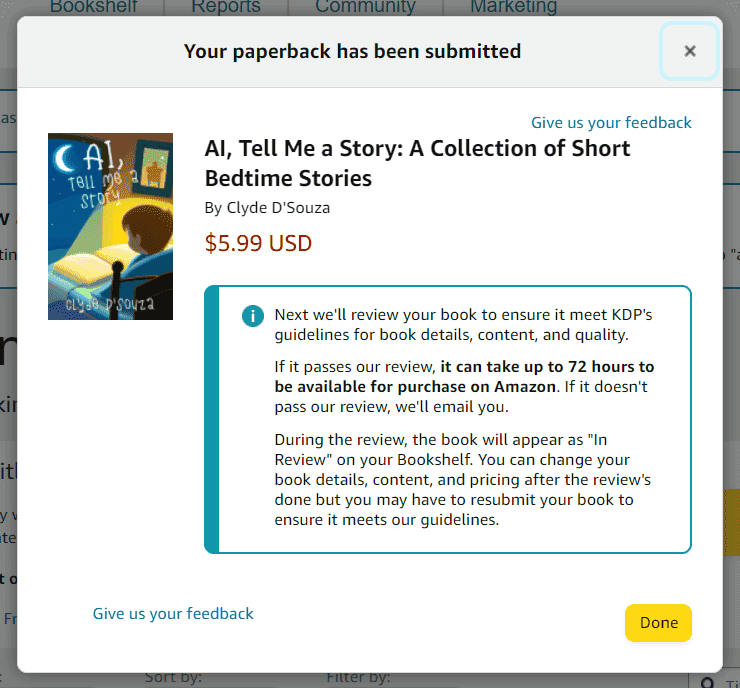
Image courtesy of the author
Conclusion
That was it, you made it! Hope you found this guide useful, though. Here's a quick summary of what we just looked at in part 2 —
- We formatted the manuscript using Kindle Create. This produced the required file which is suitable for both eBook and paperback.
- We looked at a quick summary of what Kindle Direct Publishing is before we jump into the implementation details.
- We started with an eBook in Kindle Direct Publishing, uploaded the manuscript and book cover file, filled up the required details, and finally, published the eBook.
- In a similar fashion, we looked at all the steps required to publish the paperback version of our book using Kindle Direct Publishing.
And if you're looking for part 1, you may find it here.
That's it! Thanks for reading.
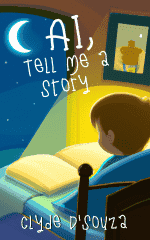
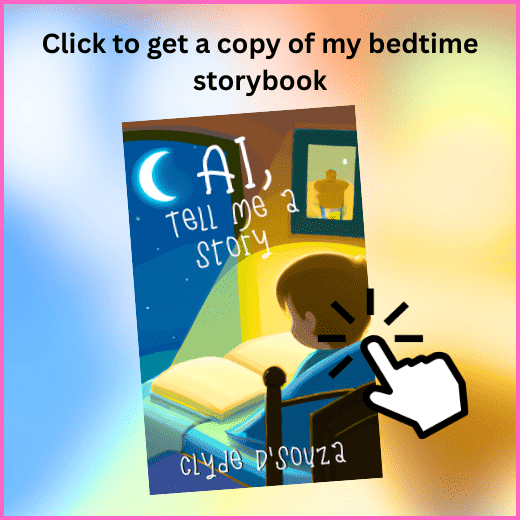
AI, Tell Me a Story: A Collection of Short Bedtime Stories
Looking for the perfect bedtime storybook to ignite your child's imagination and instill important values? Look no further than AI, Tell Me a Story, a collection of fifty captivating short stories, each with a valuable life lesson to teach kids.
Please do consider purchasing the book or buying some merchandise to support my endeavors. Thanks!