- Published on ·
- Reading time 17 min read
ChatGPT and AI: Creating Magical Bedtime Stories for Kids — Part 1
Part 1: A Step-by-Step Guide to Writing, Cover Designing, and Publishing a Children's Storybook with Artificial Intelligence on Your Side
Share this page

Introduction
I recently published a children's bedtime storybook titled AI, Tell Me a Story which was written with the help of OpenAI's ChatGPT. I've been curiously reading about the various ways in which ChatGPT has been enabling people to achieve wonderful things and I've always wanted to give it a try. And what better way to try, than to go into the deep end?
This article aims at taking you on the journey of creating, formatting, and publishing an eBook and a paperback with a special dose of artificial intelligence to give us a helping hand along the way.
A heads up, this is a long read so it has been split into a two-part article! Here's a quick list of what to expect from this comprehensive guide:
- Generating stories using ChtGPT
- Creating a manuscript
- Designing the book cover
- Formatting the manuscript (in part 2)
- Publishing using Kindle Direct Publishing (in part 2)
- Self-publishing the eBook (in part 2)
- Self-publishing the paperback (in part 2)
1. Generating stories using ChatGPT
Alright, first things first. How did I get ChatGPT to write bedtime stories? The answer lies in the prompts. So, first, head over to https://chat.openai.com/chat and sign up with an email address on the site.
Once logged in, this should give you access to the free version of ChatGPT as long as their systems are not being heavily used, in which your usage would be throttled. If you're keen, you can always upgrade to pro for a nominal monthly fee. For this book and for this article, I'll be using the free version.
Now for the prompt, if you simply feed it something along the lines of “write a short children's bedtime story that is around 1500 words and has a good moral at the end,” it should give you a reasonable output. From here onward, you can play around with the prompt to give it more direction as per your preference.
As per the screenshot below, I've included a bit more detail in the prompt. I've given it themes like kindness, bullying, and friendship or given it professions like a firefighter, policeman, or farmer, or given subjects like managing finances, or swimming. Each time it would take my prompts, make its magic and generate a story around it in approximately fifteen seconds, give or take.
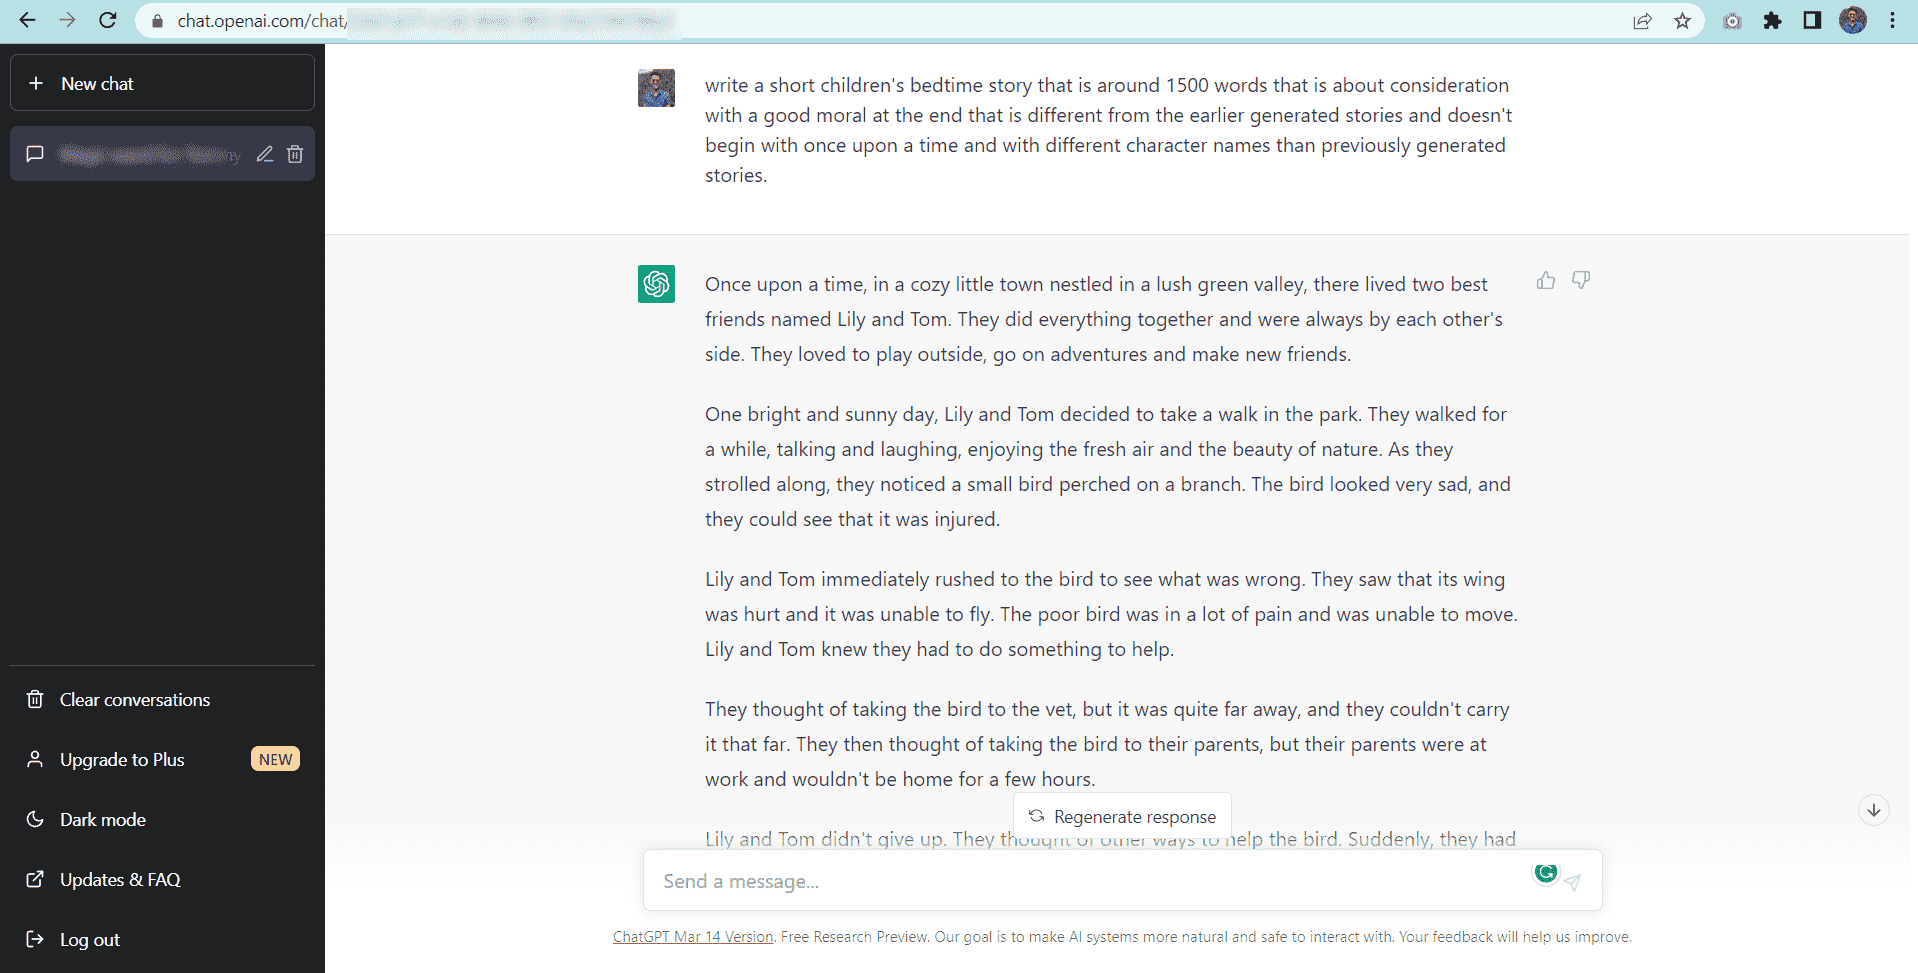
Image courtesy of the author
Considerations
- After generating multiple stories, I observed that it reuses character names. Lily, Sophie, and Tom were its favorites. If you're compiling them into a single piece, it would be highly recommended to skim through the generated stories and replace the repeated names with something fresh.
- When continuously generating stories without much direction around specific themes, the system would produce consecutive stories around the same theme. Therefore, in my prompt, I had to specify it generate something different from the previously generated stories.
- Although I had a word count in my prompt, that wasn't really taken into account. Most of the generated stories were around 500-600 words.
It's important to note that the above considerations may not be applicable when using the pro version but it is certainly observed in the free version. Let me know in the comments whether or not this holds true.
Admin tips
Thought I'd also share some optional tips which may or may not be handy for you.
- Don't rely on the ChatGPT portal to keep a history of all the generated stories. It does keep the chat history but on the rare occasion that the history is wiped out, you'd be left with having to generate stories again. I would copy the generated story across to a Google Doc (or Microsoft Word), which I also found useful to proofread and make minor edits, and also type in related textual content into a single doc that wasn't part of the manuscript.
- Do use different heading styles in your rough Google Doc. This brings them up like bookmarks in the Outline section on the left which makes navigating a large Google Doc very easy. Microsoft Word does something similar, so do check it out.
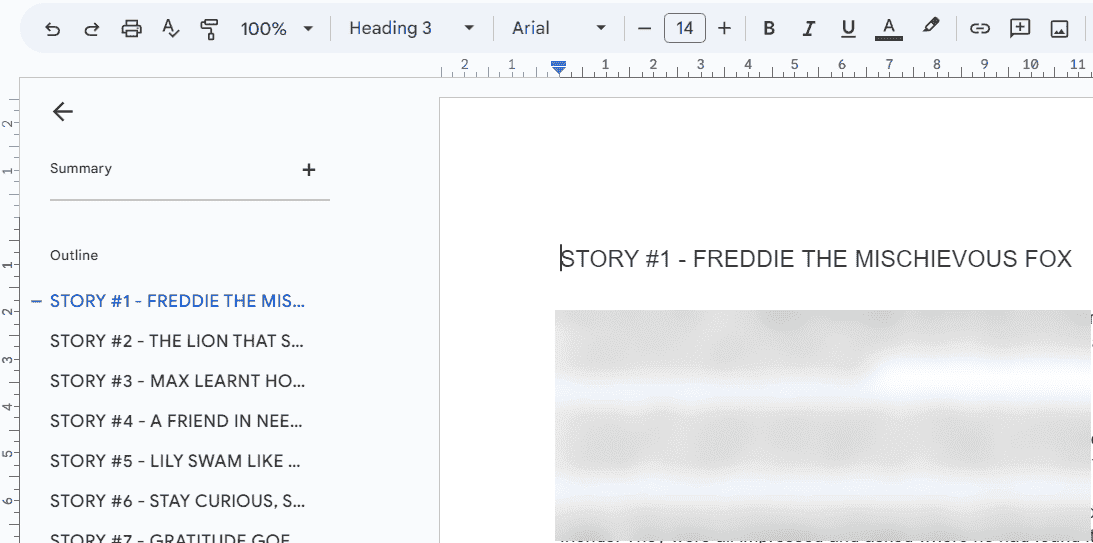
Image courtesy of the author
- After generating the stories and a suitable title for the stories, I copied the meta information of each story into a spreadsheet. I capture the title, the theme the story was based on, and the character names. To that, I added columns like keep, concerns, and order. I jotted some notes in the concerns column if I had a thought after reading a story that I could address later.
- Since I generated more than fifty stories, I had the option to leave some out. I used the keep column to either put a 1 or 0 (Yes/No) against each story depending on whether I wanted to keep it in the final cut or not. I then filtered the spreadsheet to only show the ones I'm keeping.
- Finally, I didn't want stories of similar themes or plots to be read back-to-back. So, I used the order column to assign a number, signifying the order in which they'll appear in the book. I then sorted the spreadsheet based on the order column in ascending order to get the final list of fifty chapters that would make it to the final book. As you can see in the screenshot below, the titles in the first column actually have the original order in which the story was generated. Sorting, conditional formatting, and other basic spreadsheet skills come in very handy in situations like this!
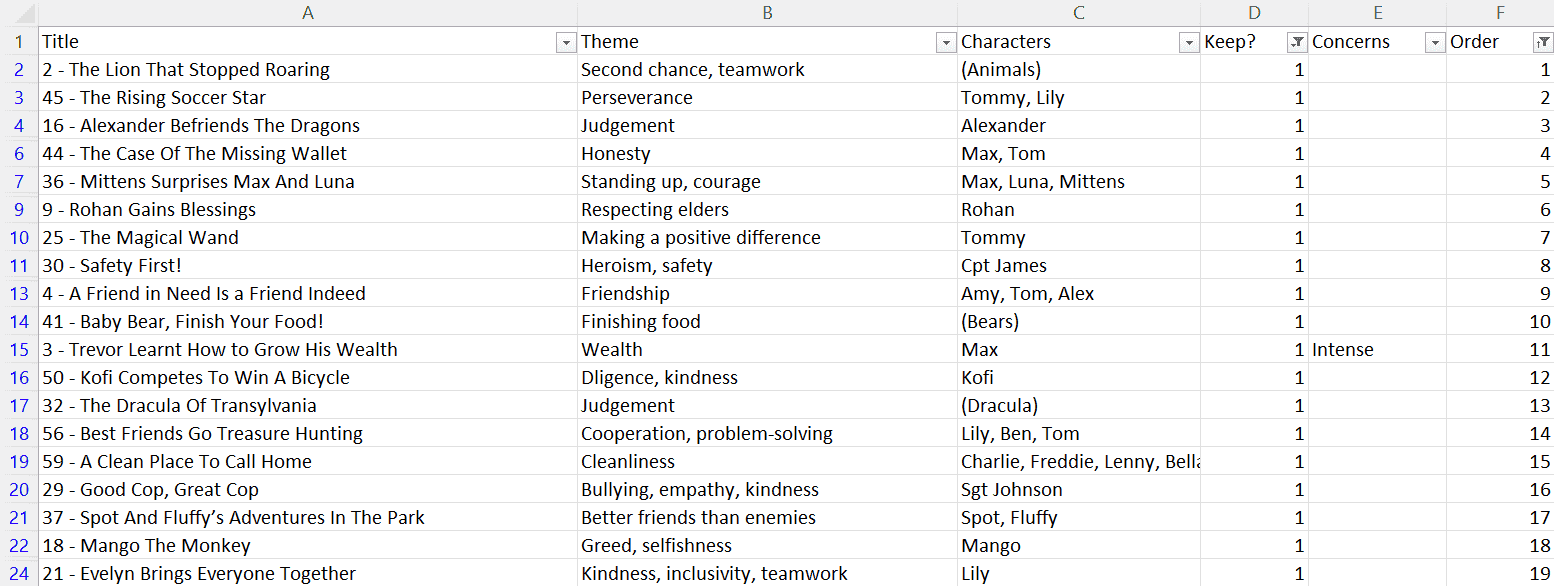
Image courtesy of the author
ChatGPT bonus
Now that you know that ChatGPT can generate stories, why just stop at that? Publishing and releasing a book isn't over at just writing (or generating) stories. You've also got to write the book description for Amazon (or the likes), have a bunch of keywords and hashtags ready, and write up a couple of social media posts for various scenarios like letting your audience know when your book is ready for pre-order, letting them know once your book is live and ready to be purchased, etc.
You can take advantage of ChatGPT to write you (at least) a first draft for all of the above scenarios. All you'd have to do is write a suitable prompt with instructions and let ChatGPT do the rest!
2. Creating a manuscript
We'll create a simple manuscript in Microsoft Word and later format it using Kindle Create.
Title page
This will be the first page of the manuscript and consist of the title of the book, optionally, a subtitle, and the author's name.
Copyright page
Insert a page break at the start of the copyright content so that it moves to a new page. This second page will be a standard copyright page. You can find a template for this page below.
Copyright © <Year> <Author name>
All rights reserved. No part of this book may be reproduced in any form or by any electronic or mechanical means, including emailing, photocopying, recording, or by any information storage and retrieval systems, without written permission from the author, except in the case of a reviewer, who may quote brief passages embodied in critical articles or in a review. Trademarked names may appear throughout this book. Rather than use a trademark symbol with every occurrence of a trademarked name, names are used in an editorial fashion, with no intention of infringement of the respective owner's trademark. The information in this book is distributed on an “as is” basis, without warranty. Although every precaution has been taken in the preparation of this work, neither the author nor the publisher shall have any liability to any person or entity with respect to any loss or damage caused or alleged to be caused directly or indirectly by the information contained in this book.
This is a work of fiction. Names, characters, places, and incidents either are the product of the author's imagination or are used fictitiously, and any resemblance to actual persons, living or dead, events, or locales is entirely coincidental.
<Edition number>
<Publisher information, if any>
<Author website and other meta information>
<Book cover design credits>
Table of contents
Insert a page break for the table of contents. Click on References and then Table of Contents and select a built-in one to add it to the page.
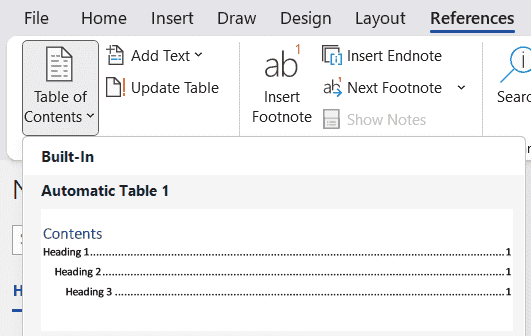
Image courtesy of the author
When you add chapters to the manuscript and/or move any other pages around, you'll need to click on the Update Table of Contents button to either update the page numbers only or update the entire table.
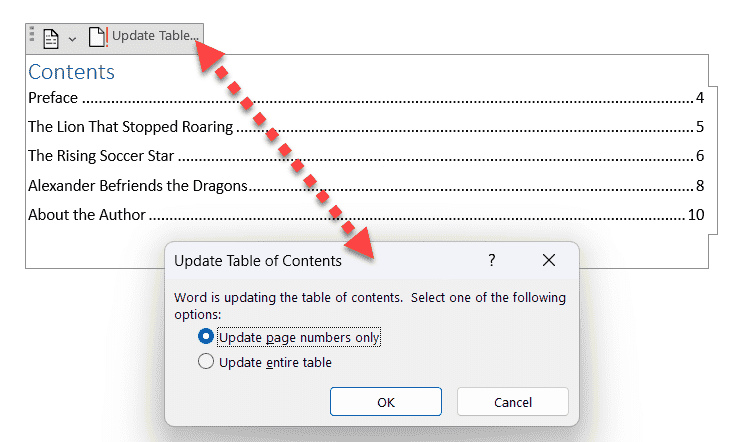
Image courtesy of the author
Preface
If you're planning on including a preface, it'll be placed right after the table of contents. A preface is written by the author and tells readers how and why the book came into being. Insert a page break before the preface title and contents so that it's moved to a new page. Apply the Heading 1 style to the preface title. The contents will be automatically in Normal style.
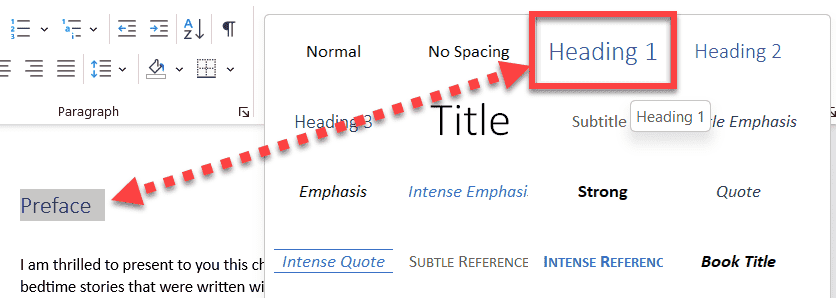
Image courtesy of the author
Chapters
Start each chapter on a new page, so you'll have to insert a page break and then type in the chapter title followed by the chapter contents in the next line. Similar to the preface, chapter titles will be of style Heading 1 and the chapter contents will automatically be of Normal style.
About the author
At the end of your book, include an About the Author section to give a short background of the author. Similar to the preface, About the Author will be of style Heading 1 and the contents will be of Normal style.
Considerations
- We'll be adding a custom title page in Kindle Create later on, but it's a good idea to also add it in your manuscript anyway, in case you're planning to print it out for proofreading or send it out to someone else to proofread.
- The same is the case with the copyright page, table of contents, and preface. Apologies for the duplication in steps!
- We're applying the default Heading 1 Word style to the book and chapter titles so Kindle Create automatically picks it up after an import. The default styles for the titles and body text are pretty basic but we're not worried about it because when formatting using Kindle Create, it will automatically add the required styles to the manuscript and end up looking professional and legible.
- If you're not planning on using Kindle Create to format your manuscript, though, you'd have to spend more time formatting the manuscript using Word itself.
3. Designing the book cover
Microsoft Designer
Microsoft Designer is an AI-powered graphic design app. It can generate images and also variations of designs for items like posters, invitations, and social media posts, just based on a text prompt. Under the hood, Microsoft Designer uses DALL-E 2 to create these AI-generated images.
DALL-E 2 is a computer program created by OpenAI that can generate images from written descriptions. It's like a creative virtual artist that can take text prompts, such as “a two-story pink house with a white picket fence and a red door,” and use artificial intelligence to create original images that match those descriptions.
My book cover needs an illustration and rather than drawing it by hand using Figma, I decided to try out DALL-E 2 using Microsoft Designer. It started out as an experiment to see what it generates and fortunately, after multiple attempts, DALL-E 2 managed to generate an image that I now have on the cover of my book.
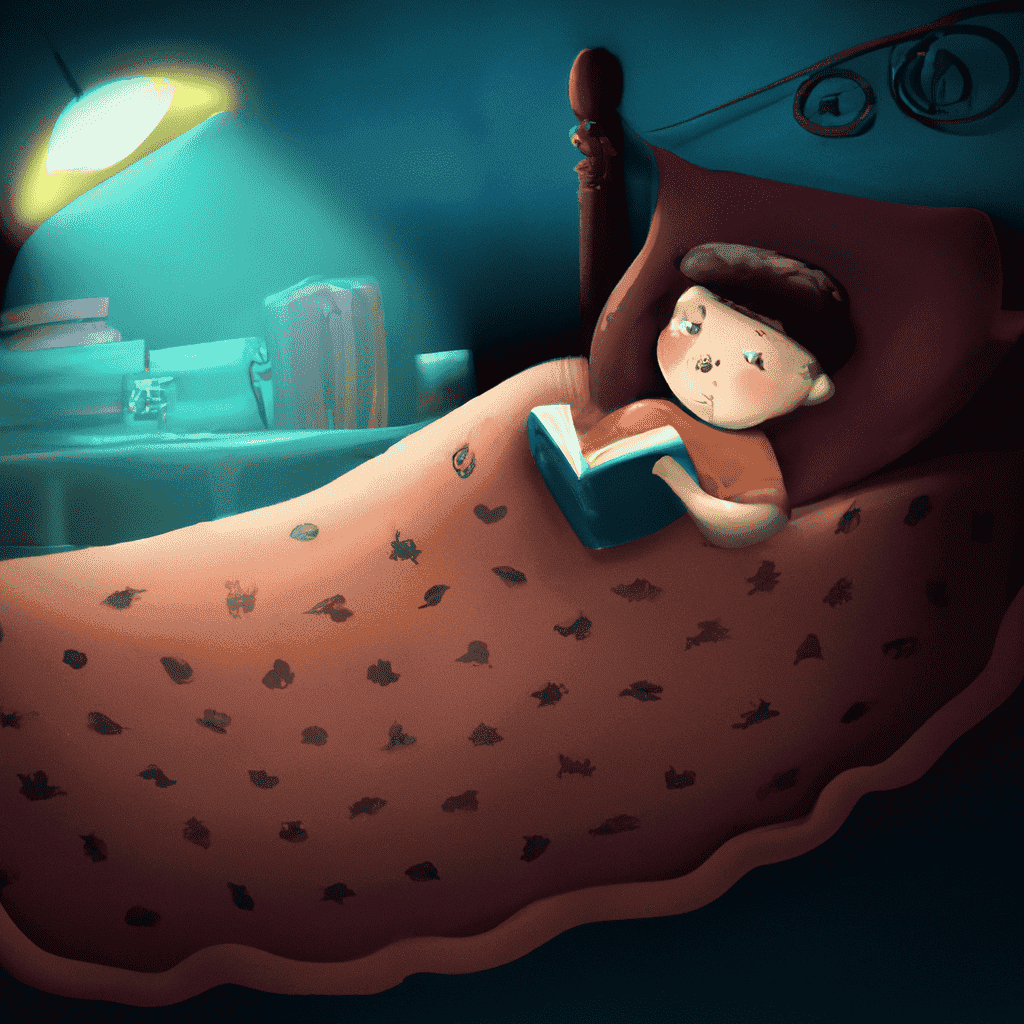
The textual prompt that worked for me was “child reading in his bedroom at night illustration, over the shoulder view.” However, each attempt at generating images produces only three variations, but you can keep trying until you don't find one you like. At times, the system will produce images like the following which don't make sense — children reading the back of the book but it looks like the book is opened normally, or a child whose back is facing the camera but the book is opened and kept on his back.
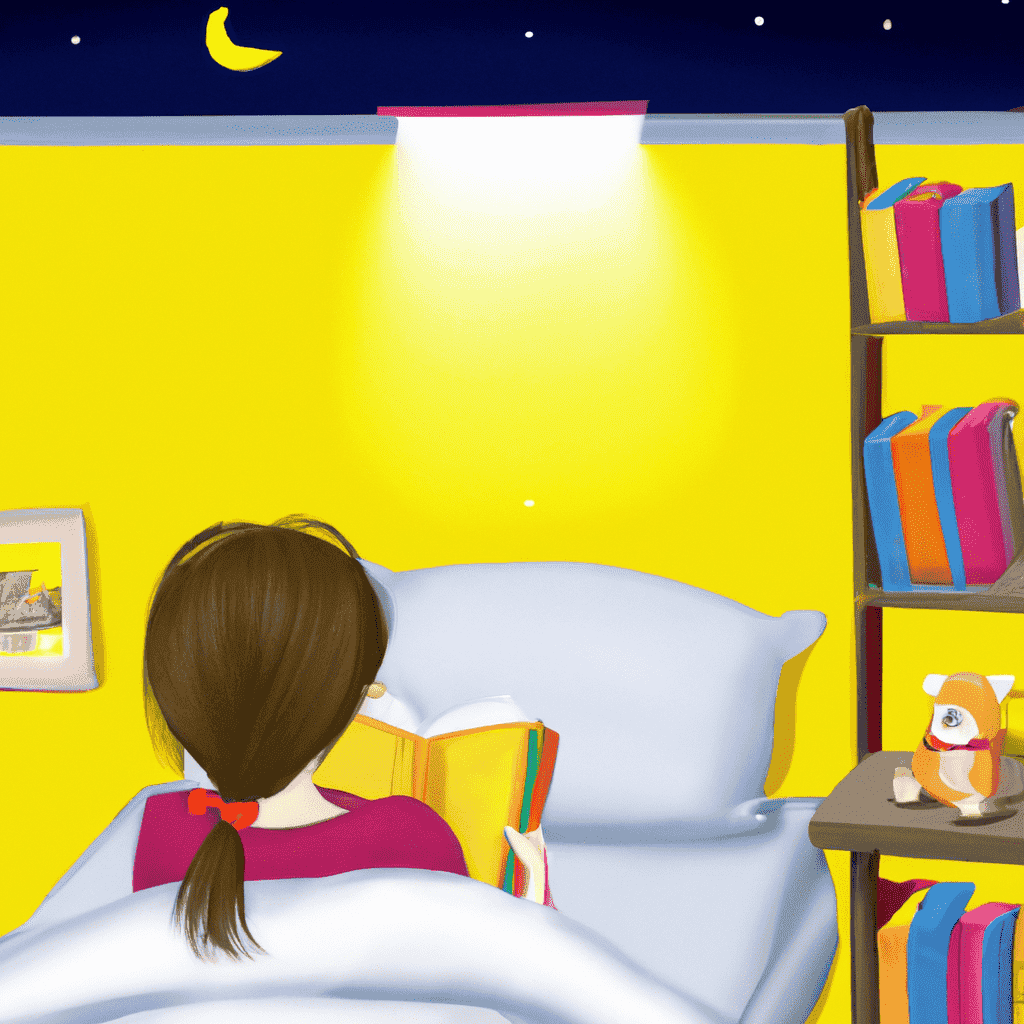
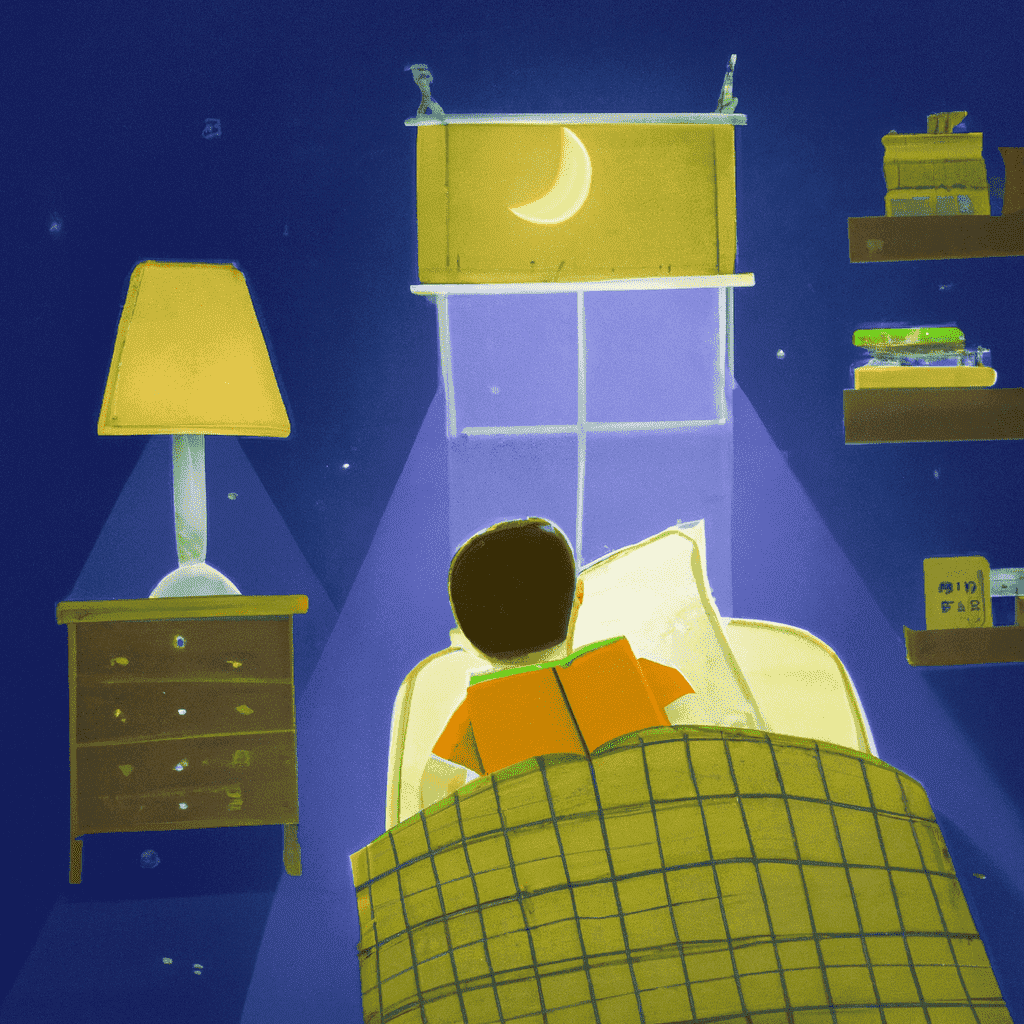
All images courtesy of the author
Below is a screenshot of the set of generated images that included the image I used for the book cover.
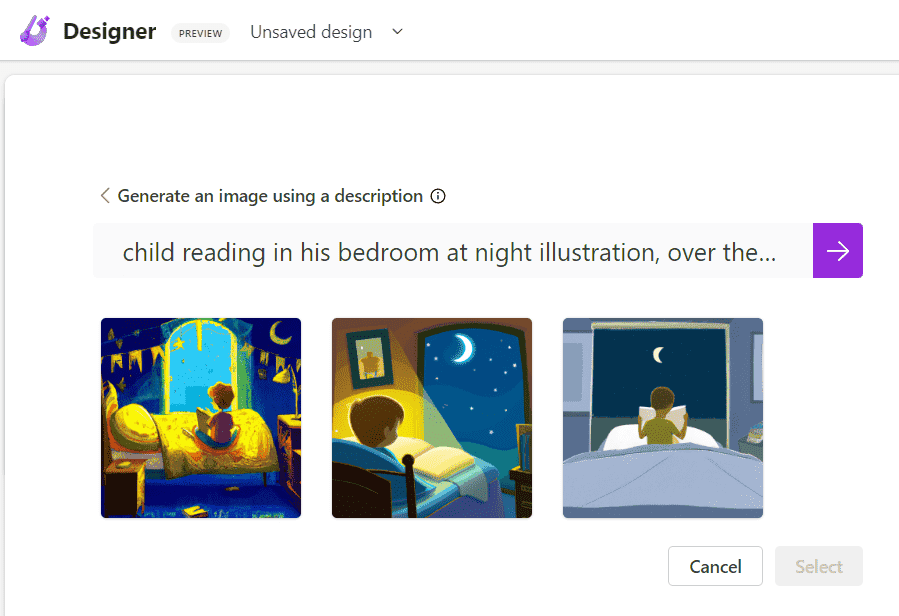
Image courtesy of the author
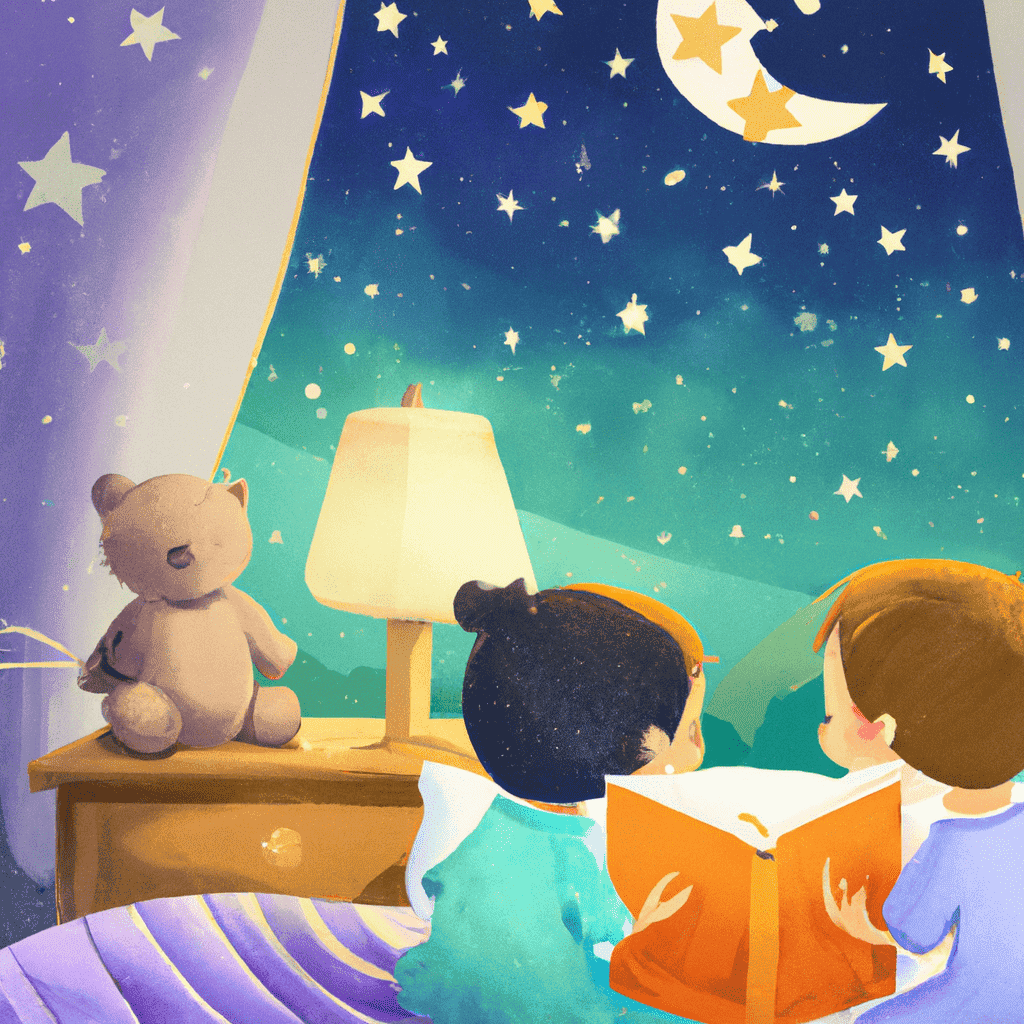
You might wonder that mentioning “over the shoulder view” in the prompt sounds overly specific. The reason is when I didn't include those keywords, it generated images with faces facing the camera, which is no problem, except that these faces didn't quite look friendly. My thoughts are that it's something with how the eyes are generated which made these front-facing pictures creepy, but you can have a look at the examples below and be the judge of that. Eventually, I avoided this whole scenario by using the keywords “over the shoulder view” in the prompt.
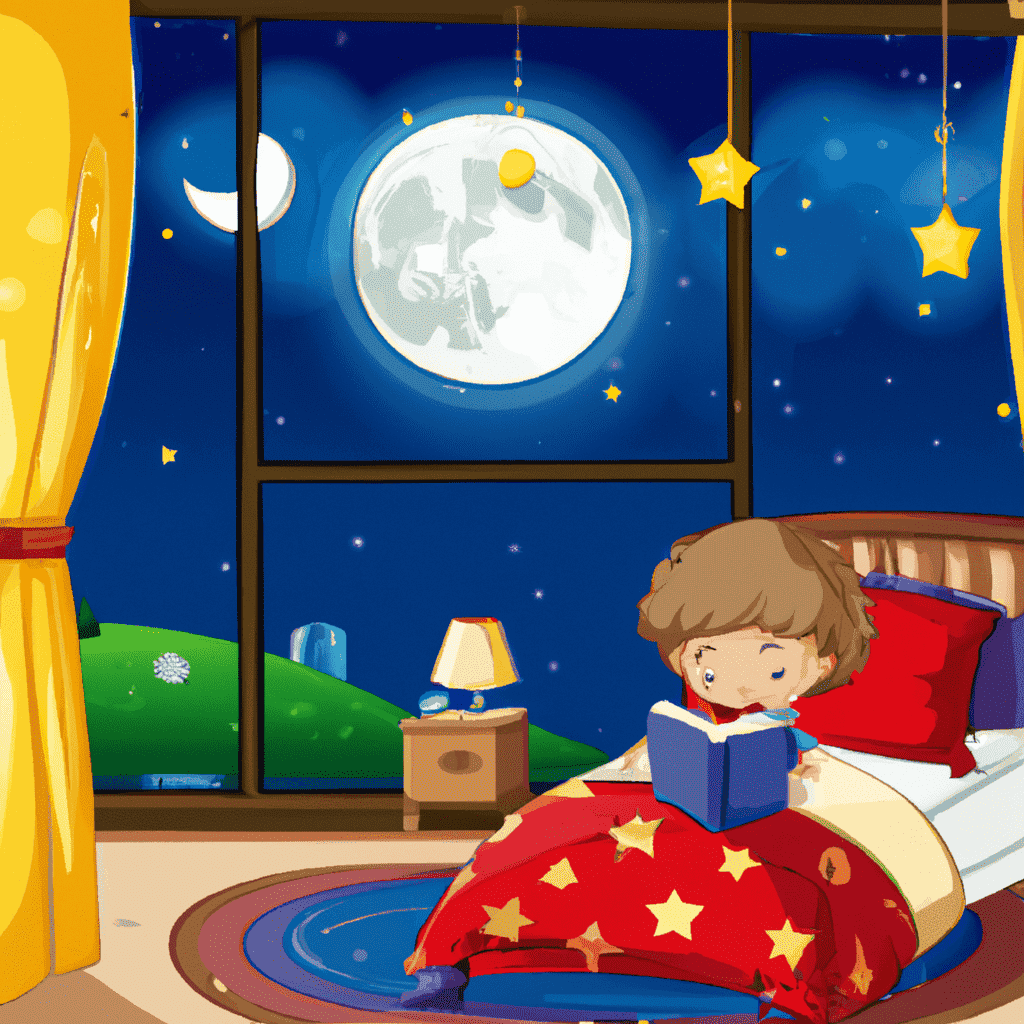
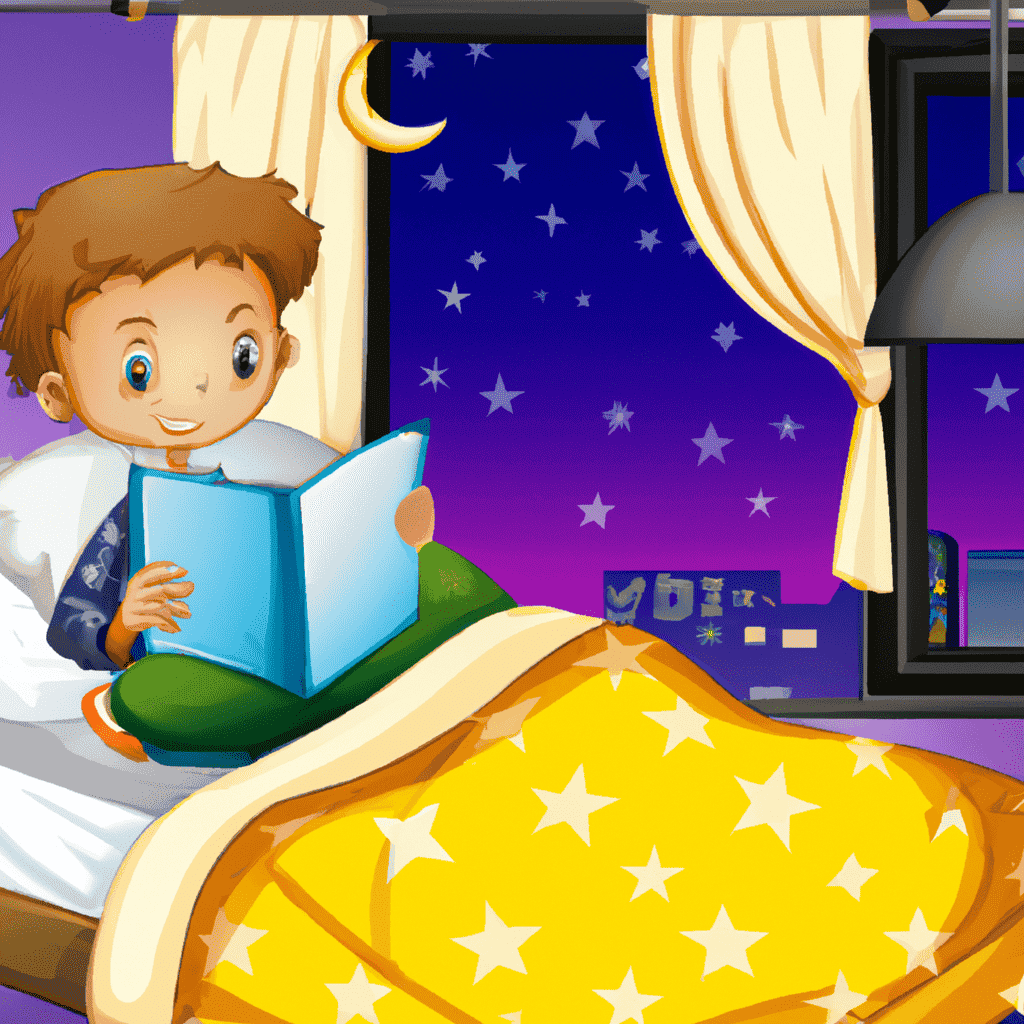
All images courtesy of the author
Canva
We'll use Canva (referral link) to create the book cover for the eBook as well as for the paperback version.
For the eBook, the dimensions are 1600px in width and 2500px in height. Full specifications for an eBook cover can be found here. Click on the Create a design button in Canva, select Custom size and then type in the custom dimensions and then click on Create new design button.
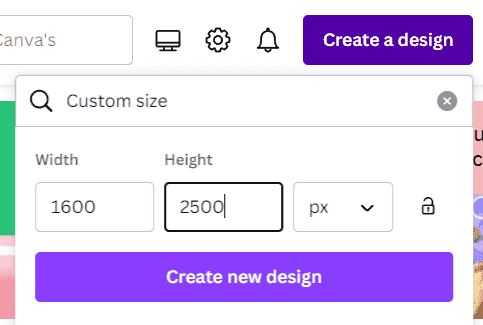
Image courtesy of the author
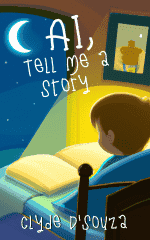
After that, it's about placing the background image that we generated using DALL-E 2 before and then adding the title and author name to the book cover. Download the image in JPG format.
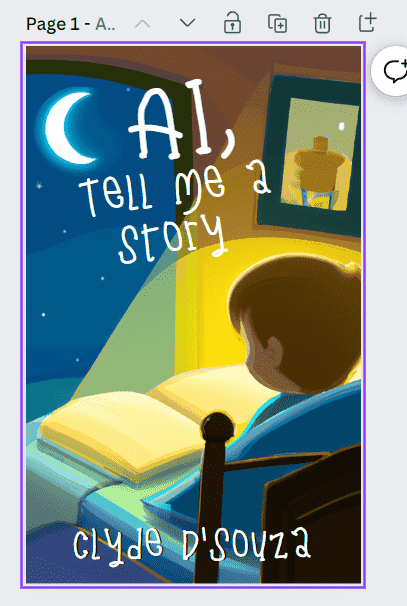
Image courtesy of the author
Tip: Before finalizing your book cover, view it in black and white and see how it looks like. An e-reader would usually display your book in black and white and if the book cover doesn't look attractive on an e-reader, then it might not make the same impression as you might've liked. Easiest way to achieve this is to edit an image and lower the saturation value.
For the paperback, there are slightly more steps to it. Head over to this cover calculator page to enter the book information and download a template. Depending on the specifications of the book, the size of the cover varies. For instance, the greater the number of pages, the thicker the book will be, making the spine of the book relatively thicker as well.
If you click on the Calculate dimensions button, it will give you the width and height of the template you need to enter in Canva. Create a new Canva design using these dimensions.
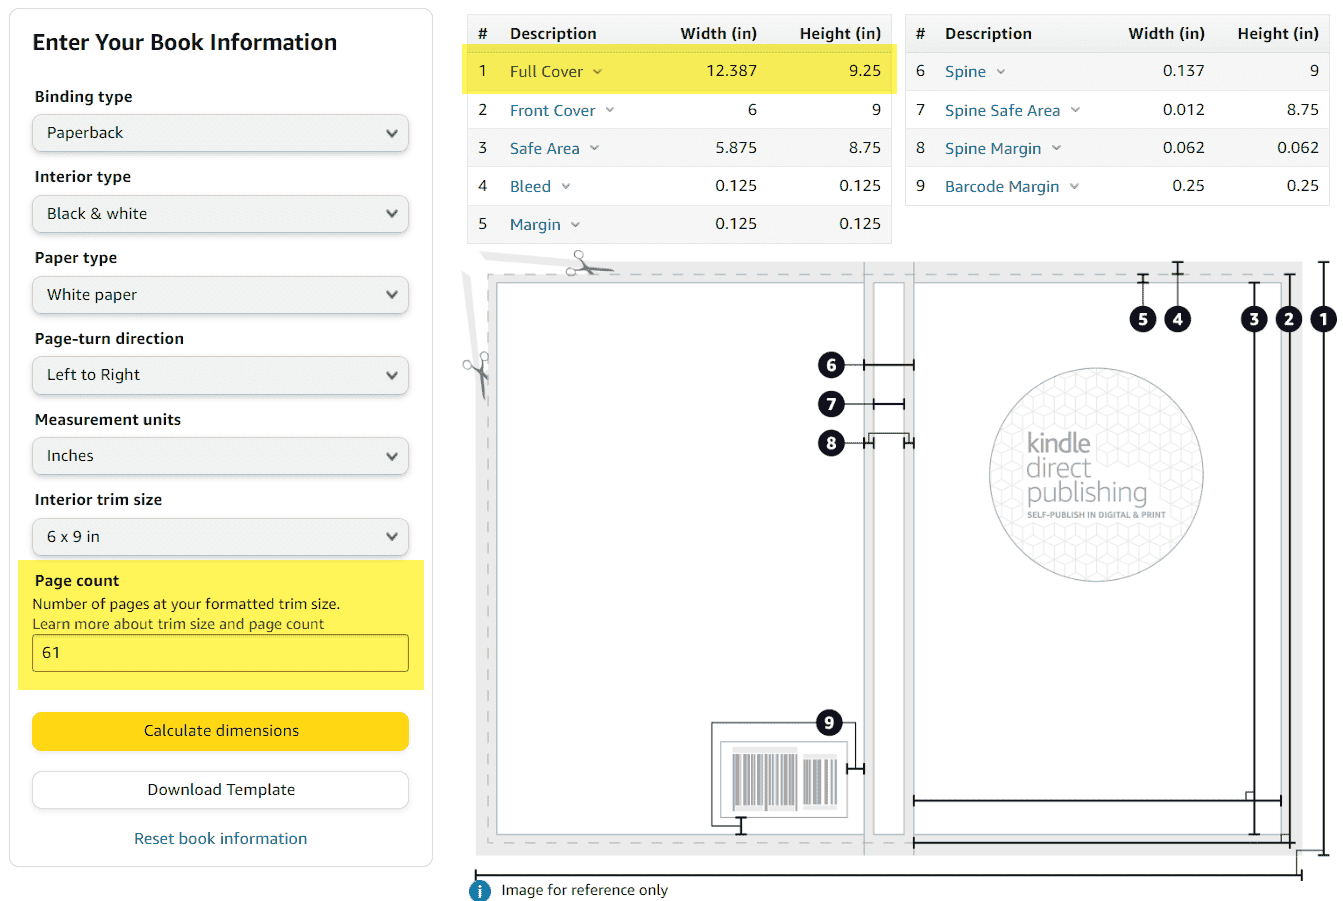
Image courtesy of the author
From the downloaded ZIP file, upload the template image to Canva. Then use this image on page one of the newly created design. I've then added simple shapes over the (1) barcode area, (2) spine area, and (3) the top and bottom margins of the cover page.
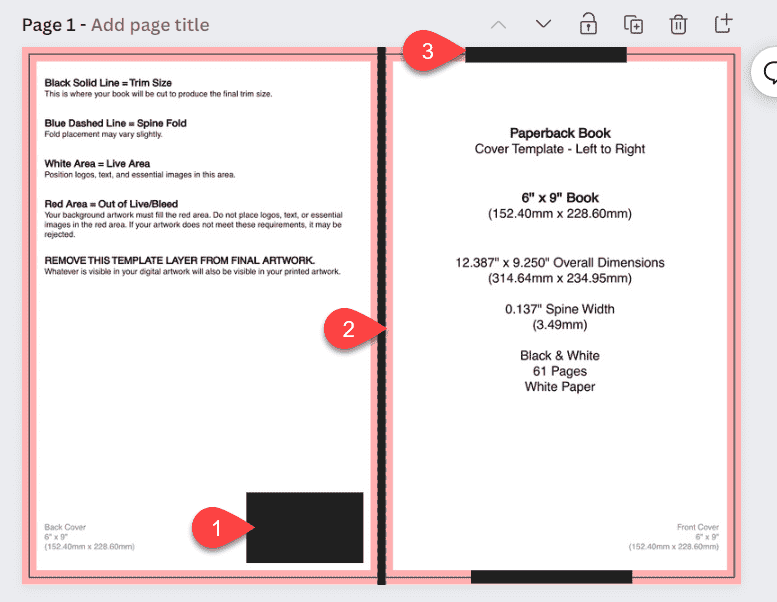
Image courtesy of the author
On another page, I copied these shapes across so I roughly know the areas where my content couldn't go.
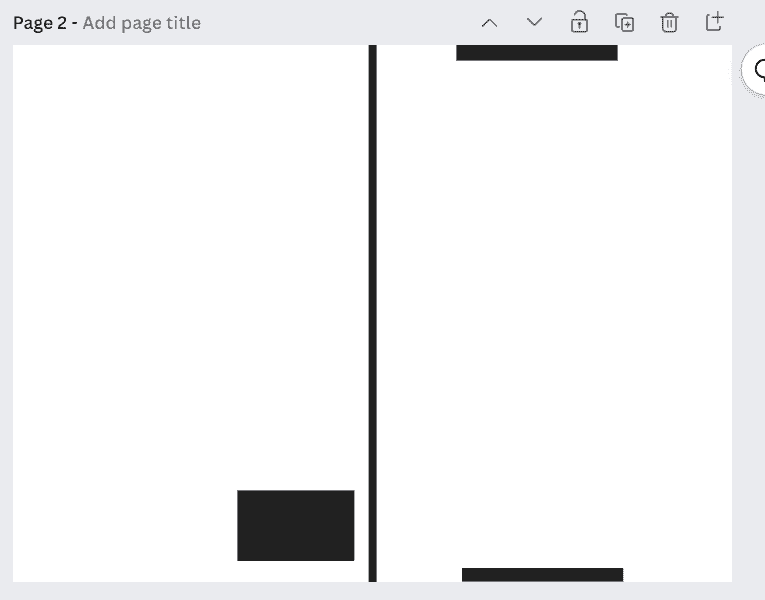
Image courtesy of the author
I then added the background image, title, and author text on the book's front cover. I also added the title, book description, and my website on the back cover. I updated the color of the spine to suit the design of the book cover.
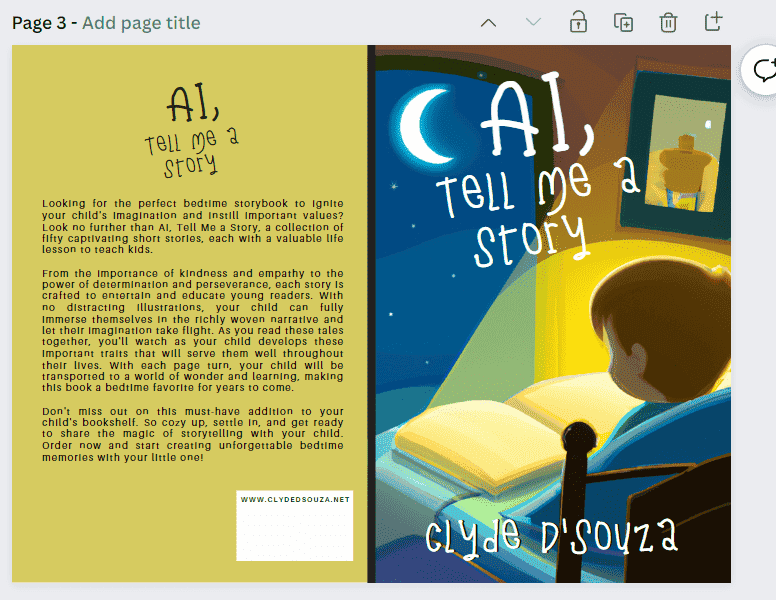
Image courtesy of the author
Finally, to place a barcode of your ISBN, we'd need to generate an SVG version of it and then upload it to Canva. When creating a paperback in Amazon Kindle Direct Publishing, we should be able to generate a free KDP ISBN which we'll cover in part 2 of this guide. So feel free to come back to this step once you've followed along and created a paperback.
Head over to this website and enter the KDP ISBN number in the textbox.
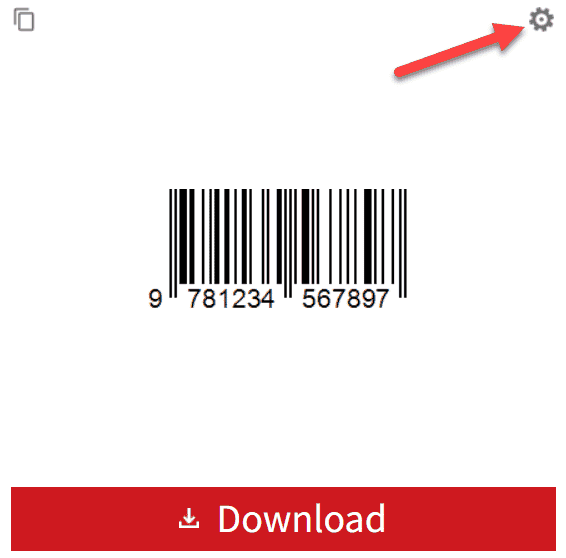
Image courtesy of the author
Then click on settings and update the image resolution to 300 and the image format to SVG. Click on Download once ready.
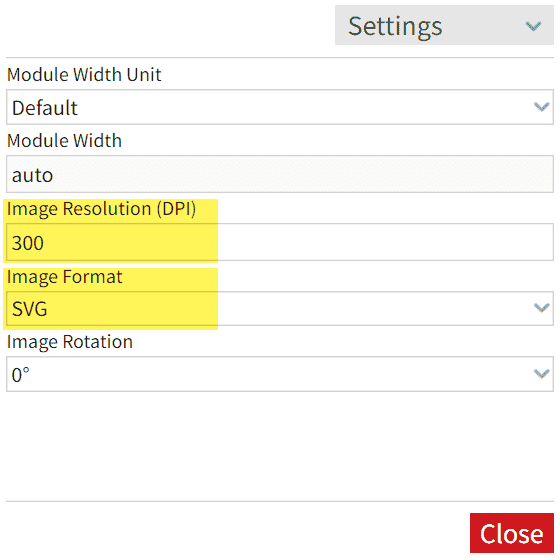
Image courtesy of the author
We'll place this SVG just below the website on the back cover of the book.
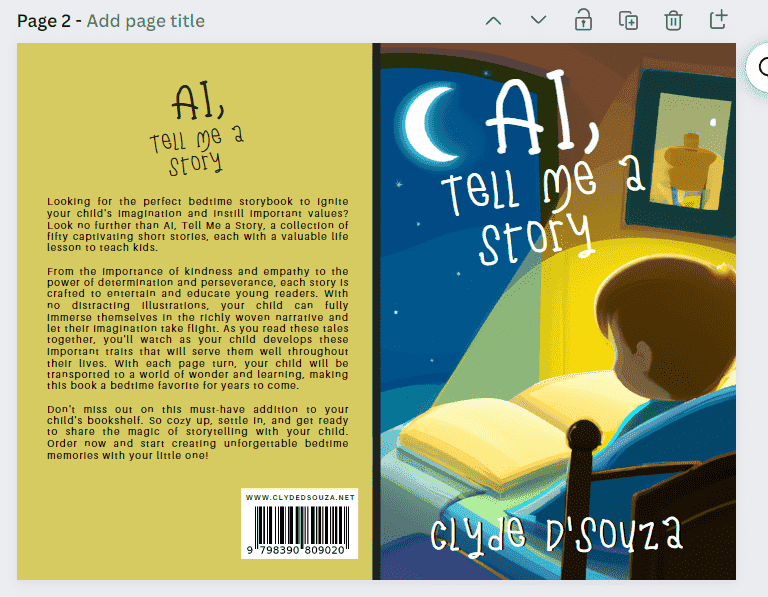
Image courtesy of the author
Download this page in PDF Print format because that's better quality.
Conclusion
Wow, that was already a lot to take in, wasn't it? Hope you found that useful, though. Here's a quick summary of what we just looked at in part 1 —
- We first looked at how to generate stories using OpenAI's ChatGPT. Using this method, we generated fifty short stories that are centered around certain morals.
- Next, we copied the contents into a Word file to create a manuscript. Here we included some front-matter and back-matter information along with the stories.
- We then looked at how to design the book cover for both formats eBook and paperback. We used Microsoft Designer and DALL-E 2 to generate the image used for the book cover and used Canva to put the rest of the book cover together.
In part 2, we take a look at the remaining steps of formatting the manuscript and publishing an eBook and paperback using Kindle Direct Publishing. Continue reading part 2 of this guide here.
That's it! Thanks for reading.
AI, Tell Me a Story: A Collection of Short Bedtime Stories
Looking for the perfect bedtime storybook to ignite your child's imagination and instill important values? Look no further than AI, Tell Me a Story, a collection of fifty captivating short stories, each with a valuable life lesson to teach kids.
Please do consider purchasing the book or buying some merchandise to support my endeavors. Thanks!