- Published on ·
- Reading time 9 min read
Adding a Dash of Automation to my Daily Life
Never miss an invoice or an important email with Microsoft Power Automate
Share this page

Introduction
I've been using Microsoft Power Automate for a while now to keep track of my monthly utility and energy bills, as well as other important communication. This way, I don't forget to pay the bills, I don't forget to respond to important emails, and copies of these emails are stored and organized in Trello; making it easy for me to search through the archives. The image below is a workflow that I designed for my personal situation. This article aims to explain the process of creating this type of organizational framework.
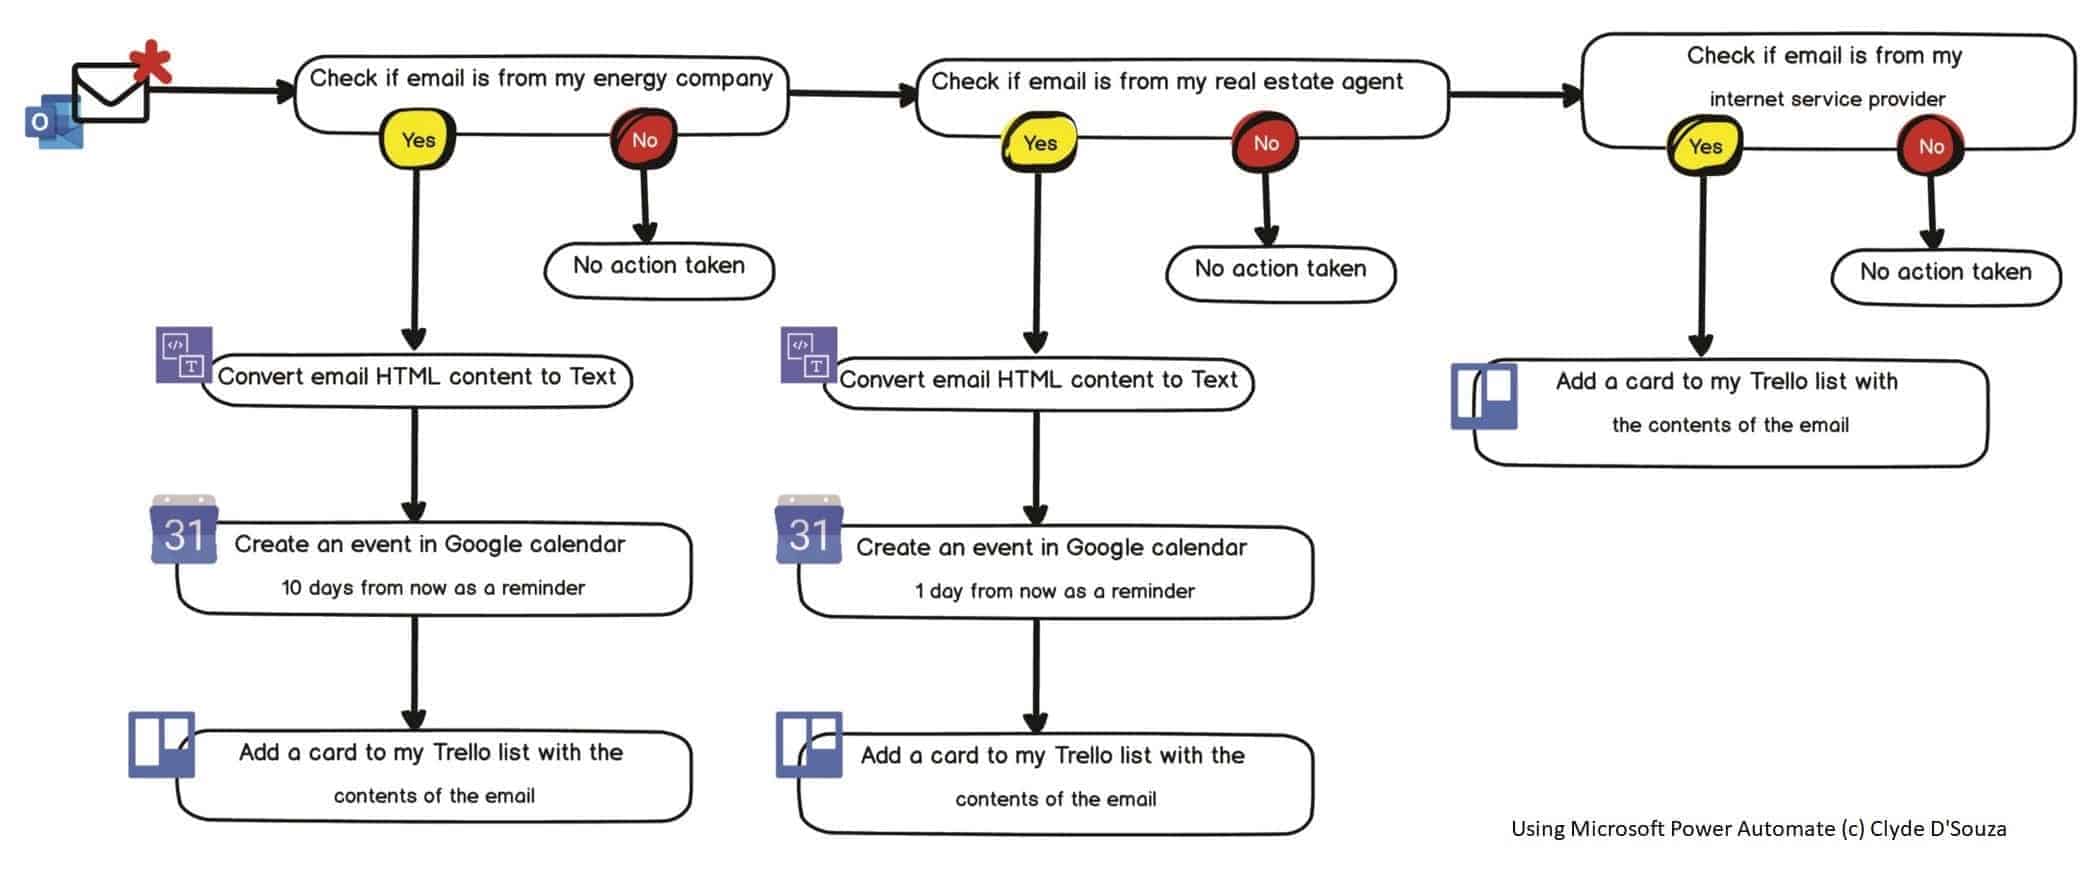
A visual representation of the workflow I use
Microsoft Power Automate
Microsoft Power Automate is a tool that enables you to automate a set of repetitive tasks using a graphical user interface. Automate offers thousands of connectors that you can add to your visual workflow, allowing you to connect different systems together.
Creating a new flow
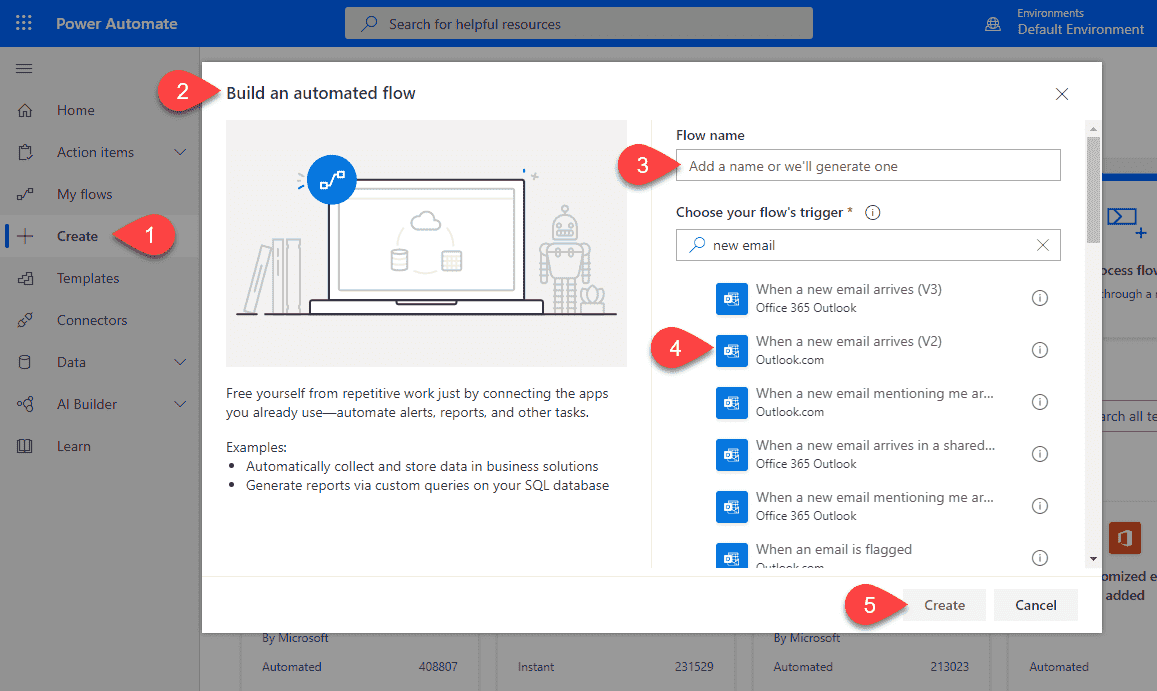
Head over to Microsoft Power Automate, sign in with your Microsoft account and you'll see the Power Automate home page. Click on Create, select Automated flow. From the popup, give your flow a suitable name, and then choose a trigger that triggers your flow. We'll select “When a new email arrives” from Outlook.com. We're not selecting the one offered by Office 365 Outlook because we want to connect a personal Outlook.com email account to this flow. Next, click on Create.
Trigger: When a new email arrives
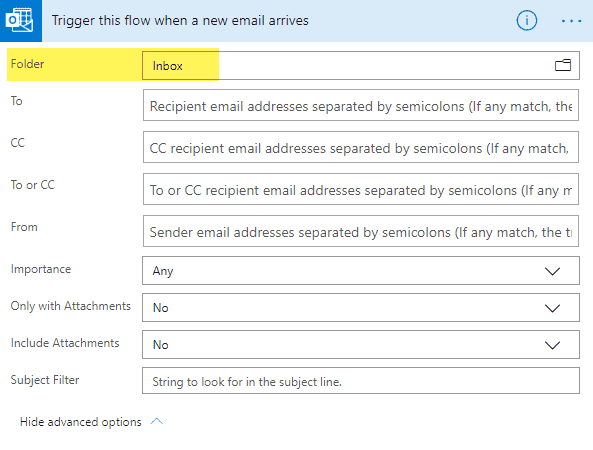
In the previous step, we added a trigger to the flow. Now, we need to configure the trigger. We'll set the Folder to Inbox as new emails will arrive there. You can use the additional fields in this form to filter what emails trigger this flow but, for my use case, I'll only use the Folder field.
Step 1: Reminder to pay the energy bill
The first step is to check whether I've received an invoice from the energy company. I usually get monthly bills from the same email address, so that should be easy. Let's start by adding our first Condition. Click on New step, then from the list of Actions, select Control. Then from the list of controls, select Condition.
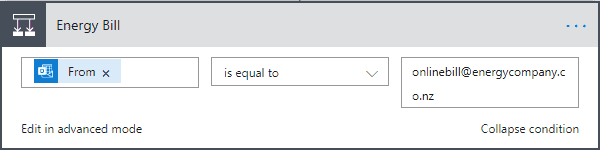
When you click on Choose a value, you'll get a popup with some dynamic content available. This content is available to use courtesy of the previous action — in our case, the trigger when a new email arrives.

We want to check if the email is from a particular email address. So let's add the dynamic content From into the value field. We're going to validate the from address against a fixed email address that we already know, so we'll select the is equal to condition and then add the email address of the energy company on the other side of the condition.
Tip: Click on the three horizontal dots to rename a step into something more meaningful.
A condition can have two outcomes — either it satisfies the condition or it doesn't. If it doesn't satisfy the condition, we'll take no action, and the control will flow ahead. If it does satisfy the condition, we'll do the following:
Convert HTML email to plain text
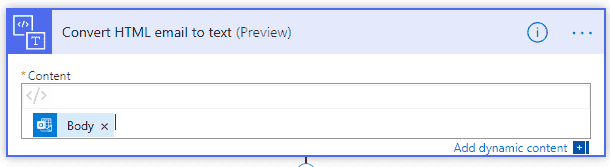
I have received these emails before so I know that the content of these emails is HTML-based. So let's first add an HTML-to-text converter as the first action in the If yes block.
In the Content field, we'll again make use of dynamic content and this time we'll select Body which is the email body contents. This action will automatically convert the HTML contents of the email and will make the plain text version of this email available for the next action.
Create a Google Calendar event
I want to set myself a reminder after about ten days to pay this bill. I've not randomly come up with this number — there's a calculation behind this. My energy company sends me this email 14 days before the bill is due. So, I've set a reminder to pay this bill 10 days from the date I've received it, allowing some buffer time for payments to go through if required.
Let's add a new action Google Calendar and select Create an event action from the list of available actions. You may be asked to authenticate using your Google account and provide the required permissions. The Calendar ID should then show your Gmail address. The start time and end time is when the event starts and ends — more about it right after this picture. For the Title field, I'm going to concatenate some text entered manually, plus the subject of the actual email. For the Description field, I'm going to concatenate some text plus the body of the actual email in plain text that we retrieve from our previous HTML-to-Text conversion.
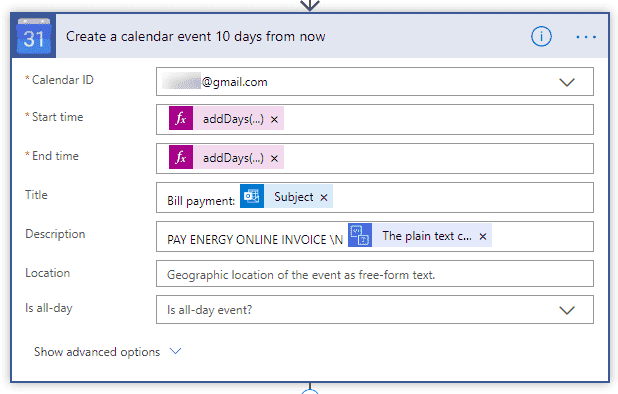
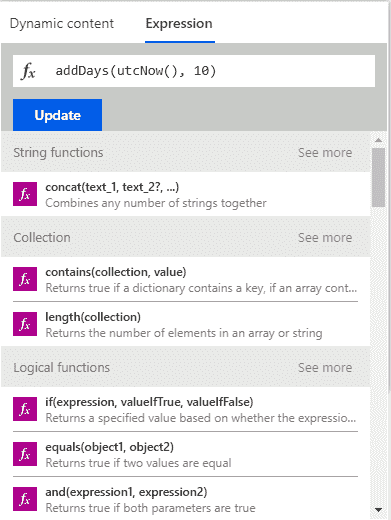
Okay, now what about the start and end time? For both of these fields, I'm going to use Expression. These are handy functions made available to you by Microsoft Power Automate. We're using addDays() which accepts the current date as the first parameter and the number of days to be added as the second parameter. This sets our calendar event to 10 days in the future from the date I received the email.
Create a Trello card
After I've created a reminder for myself to pay this bill, I also want a copy of the email to be copied into Trello where I can easily search all energy bills if I need to. I've created a board called ‘Apartments' and a Trello list in that board called ‘Energy invoices'. I've also created a bunch of labels. If you're following along, create a Trello board and add a list to it along with some labels as per your needs.
Back in Automate, let's add a new action called Trello with a sub action called Create a card. You might be asked to sign in to Trello and automate the required permissions. After you do so, you should be able to see your board in the Board Id field. You should also be able to see the relevant list in the Parent List Id field. I'll set the Card Name to be the email subject line and the email body contents for the Card Description.
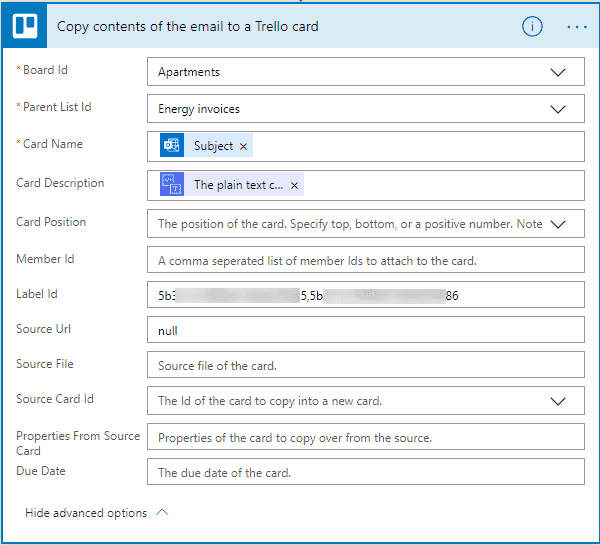
Optional: If you'd like your Trello cards to have labels then you're required to either enter the label ID in this field or — from the dropdown — select the color of the label.
To enter Label Ids, I would need to extract the ID of the label from Trello. To do so, append the word .json to the Trello board URL. For instance, if https://trello.com/b/SHORTID/apartments is the URL, then https://trello.com/b/SHORTID/apartments.json returns a JSON result of the board. At the very end, you should see all the labels you've created along with its IDs. Copy the required label IDs and paste it in here.
Step 2: Reminder to respond to the real estate agency
Next up, I want a similar set up for all emails received from the real estate agency. Let's click on the New step button to add a new step and continue the workflow.
Mostly, I'll be repeating the same process with the following minor changes. I'll need to update the From email address to match the real estate agency's email address. While creating a Google Calendar event, I'll use this Expression addDays(utcNow(), 1) instead. This creates the event one day from the day I received the email as occasionally I might need to respond to them at the earliest opportunity. While storing a copy of the email in Trello, I've created a new list so it doesn't clutter up the energy bill list.
Step 3: Saving a copy of a successful payment towards my internet bill
Finally, I'll need to add another step into this workflow to capture emails from my internet provider. Since my internet provider emails me only to notify if the auto-payment has gone through successfully or not, I only need to store a copy of the plain-text email into Trello. This means that I don't require the HTML-to-text conversion and the Google Calendar task.
Testing the workflow
Since we cannot send a test email from the energy provider, real estate agency, or internet provider, I would suggest the following testing strategy:
- Make a copy of the original flow.
- Edit the copy to update the email address of the step that you want to test to your test email address.
- Then, from your test email address, send a similar email to your email address which is being monitored by the flow. Feel free to forward an older copy of the invoice so you can just use that for your testing.
- The flow should run completely and if everything is done right, it should create all action items configured.
- Once you are satisfied with your test results, feel free to clean up the test data.
Final result
The GIF below illustrates what the final result looks like. The first image is of the flow I've built. The second image is of the Google Calendar event that gets created, and the third image is of the Trello board where a card gets created for each scenario.
Now, this is just one use-case, but imagine what else you can do! If you need inspiration, feel free to browse through their template library.
That's it. Thanks for reading!