- Published on ·
- Reading time 12 min read
Simulate Traffic to an API Using Logic Apps
When your demo application has no real users
Share this page

Introduction
Recently, I was preparing for a presentation on the subject of Azure Application Insights and its integration with a .NET 6 API. This presentation consisted of multiple demos showing various features of Application Insights like transaction search, custom events, application map and dependencies, availability tests and more.
Now to demonstrate all of these features using a demo .NET API that no one is actually using is a bit ineffective as I run into the risk of not being able to demo anything as no logs would be generated. Therefore, I thought it would be a good idea to let the demo application run for weeks before the presentation so that enough logs are generated, simulating as if the application was live and being used.
While in theory, this sounds great, I still have one problem — if no one is actually using this API, how will logs be generated? This article aims at exploring the solution to this question.
Solution
I created multiple API endpoints in my demo API application, which was publicly accessible and hosted in Azure, so when a request was made to that endpoint, it would be able to send the relevant logs to Application Insights and thereby, contribute towards my demo.
For example, I needed enough custom events logged so I created an API endpoint that will only send a specific event to Application Insights once it was triggered. It does nothing else, just that, and that's the whole point — since it was a demo application, I could modify it as I see fit.
[HttpGet("GetCustomEvent")]
public void GetCustomEvent()
{
    _telemetry.TrackEvent("This is a custom event");
    Console.WriteLine("Get custom event");
}
I now needed to create sample traffic to each API endpoint in my demo .NET API, which would eventually create and send logs to Application Insights. While there are many network traffic generating tools out there, I needed to find the right balance of something that's not overly complex to upskill on and set up, is free to use, and can run automatically on a schedule. That's when I found an Azure-based solution called Logic Apps.
Prerequisites
Pardon the interruption. Before we jump into how Logic Apps was used to solve the aforementioned problem, if you want to follow along, then here are a couple of things you'd need to have ready.
- We'll be using Mocki, a fake API tool, in this example. I'd highly recommend using this tool if you're following along since the setup time is absolutely minimum. For the purpose of this article, I only intend to show the workings of a Logic App, so I don't really need the actual Application Insights instance and the demo .NET API. Having said that, if you already have a sample API created and hosted in a publicly accessible location, feel free to use a couple of API endpoints from that application.
- Since we're using Azure Logic Apps, if you don't already have one, please create a free Azure account.
Implementation steps
As mentioned in their documentation, Azure Logic Apps is a cloud-based platform for creating and running automated workflows that integrate your apps, data, services, and systems. A workflow is a series of steps that defines a task or process, and each workflow starts with a single trigger, after which you must add one or more actions.
We'll be taking advantage of this automated workflow feature from Logic Apps to generate our sample API requests. Let's dive into the steps.
Step #1: Creating a Logic App
Log in to Azure, then click on the menu from the top left corner. Next, click on Create a resource, then search for Logic App and click on it. From this screen, click on the Create button.
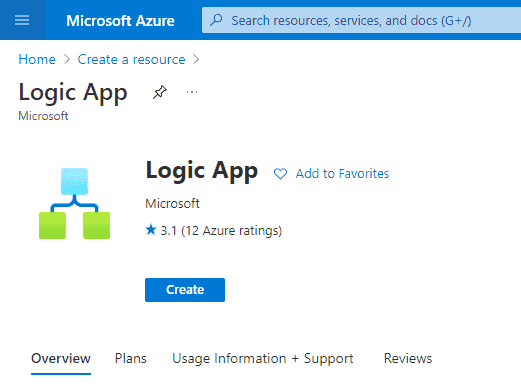
Image courtesy of the author
Select the appropriate Subscription from the dropdown and either select or create a new Resource Group. Then from the next section, select Type as Consumption. Under the consumption plan, you pay for each execution instead of a fixed price per hour. The first 4,000 actions are free, and since our Logic App will fall under this limit, we should be able to run this Logic App essentially for free. Read more about the pricing plans for Logic Apps here.
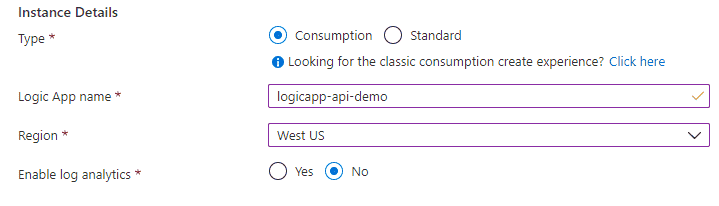
Image courtesy of the author
Give the Logic App a suitable name, choose a region, and for now disable log analytics. Click on the Review + create button, and then from the next panel, click on the Create button.
Step #2: Configuring the trigger
Azure should create a Logic App in the background and after a few minutes, you should be able to click on the resource and navigate into it. Since this is the first time you're visiting this resource and nothing is configured yet, Azure will straightaway show you the Logic Apps Designer view to get you started.
As outlined earlier, we want to automatically have requests fire to our API. This means that our Logic App will need to be triggered automatically and on a schedule. The trigger to select, in this case, would be Recurrence.
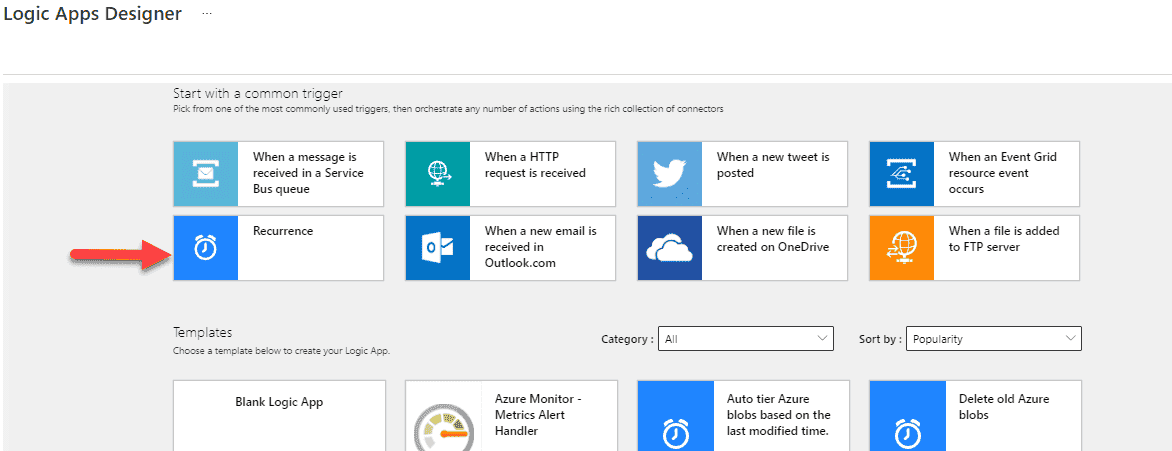
Image courtesy of the author
Let's begin with running the Logic App once daily at 8:01 AM and 8:01 PM. We can always modify this schedule later, should we need to.
If you click on the Recurrence step, you should be able to set Interval as 1, Frequency as Day, and then from the Add new parameter dropdown, check the Start time, At these hours, and At these minutes checkboxes.
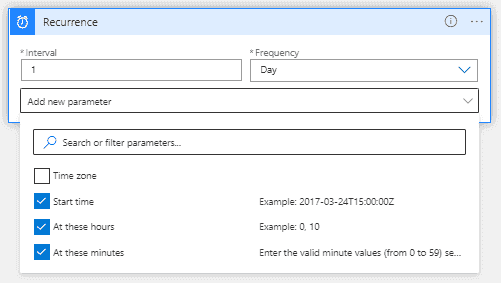
Image courtesy of the author
From the At these hours dropdown, select 8 and 20 (8 PM in 24hr format). Next, from the At these minutes textbox, type 01 which signifies the first minute of the hour. In the Preview pane, you should see this schedule printed in words to confirm your selection. That's all the configuration you'd require for the trigger.
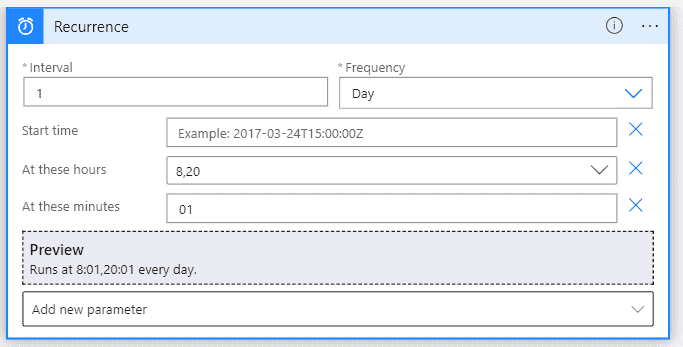
Image courtesy of the author
Step #3: Configuring the first step
Click on the + New step button to add a new step after this Logic App gets triggered. We want to send an API request to our API endpoint, so let's select HTTP from the pool of connectors and actions.
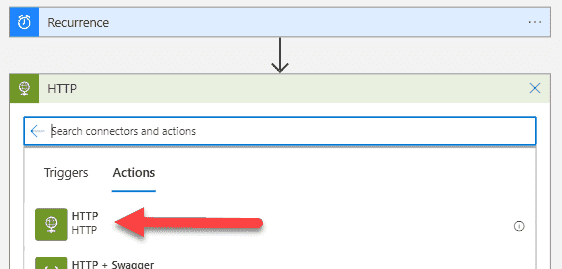
Image courtesy of the author
From the configuration options for HTTP, select the Method as GET and enter the API URL endpoint in the URI field. I've entered the mock API URL that I'm working with for this article, in the screenshot below.
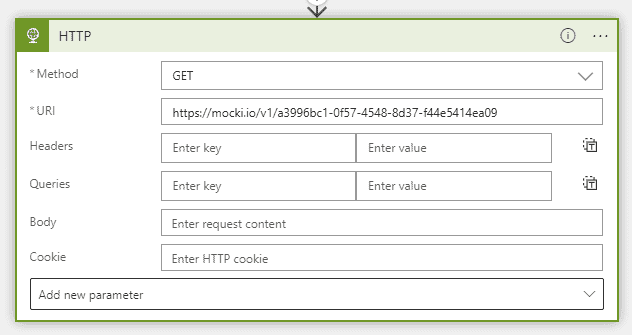
Image courtesy of the author
Don't forget to hit the Save button regularly to save your progress.
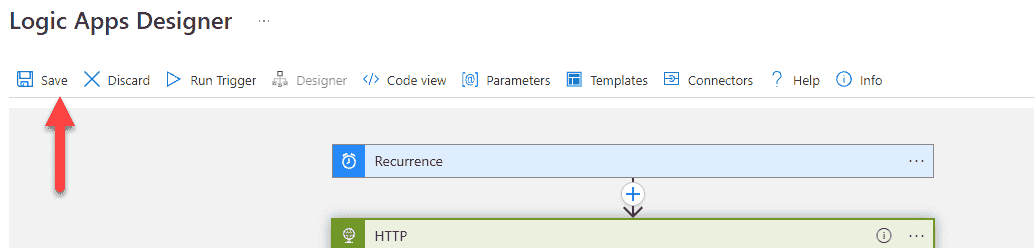
Image courtesy of the author
Step #4: Running a test run
To see if your Logic App is configured correctly, hit the Run Trigger button. This will run the entire workflow right away and is a useful approach to test your Logic App rather than waiting for the actual trigger to kick in.
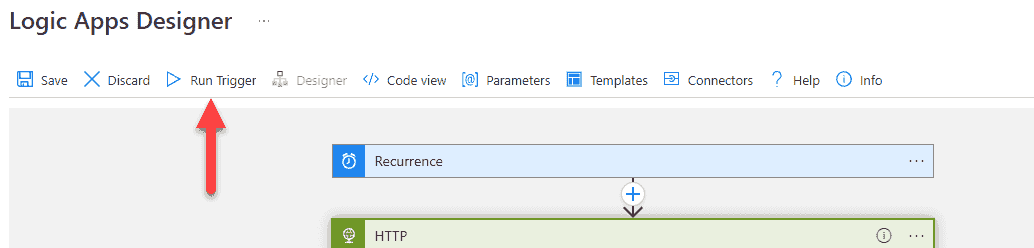
Image courtesy of the author
In a few moments, you should see the designer panel update with green checks appear beside each step. Clicking on the step should provide you with more detail and you should also be able to see the response returned from the API endpoint.
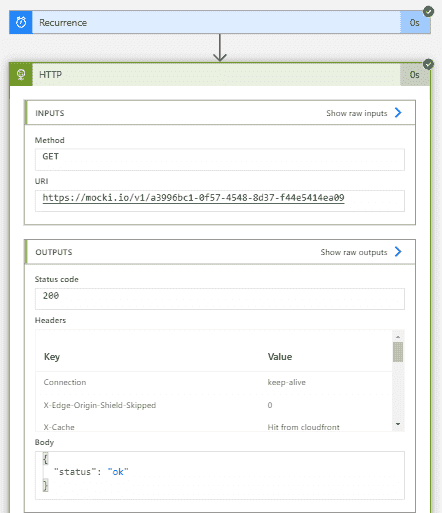
Image courtesy of the author
Step #5: Extending the workflow to ping another URL
As outlined at the beginning of the article, we want to send API requests to multiple API endpoints on a recurring schedule. Let's start by clicking the plus icon after Recurrence. If you click on the + New step, it will create a step after the HTTP step instead, which isn't what we want.
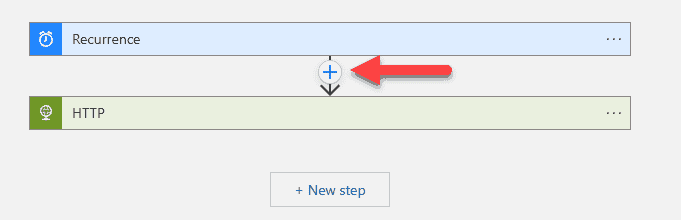
Image courtesy of the author
Now, from the options, select Add a parallel branch. If you click on Add an action, it will add a step in between Recurrence and HTTP, again, which isn't what we want.
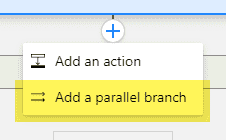
Image courtesy of the author
Select another HTTP action and repeat the same steps to configure this HTTP step as we did earlier, except this time, enter the second API endpoint in the URI field. Finally, it should something like the screenshot below.
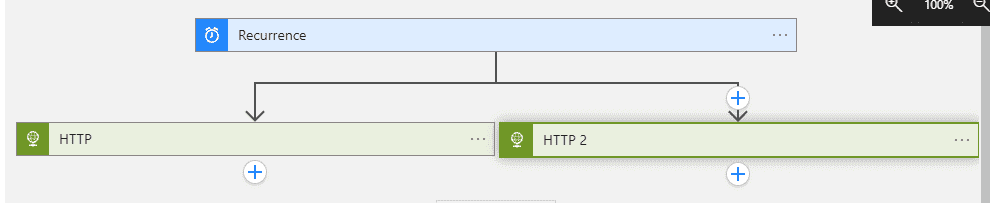
Image courtesy of the author
Save your changes and then test it to ensure it works as expected.
Step #6: Monitoring workflow runs
Click on the Overview menu item from the left panel and then click on Runs history. This will show you a list of items along with the status of each run. If you click on an individual row, you should be able to see more details.
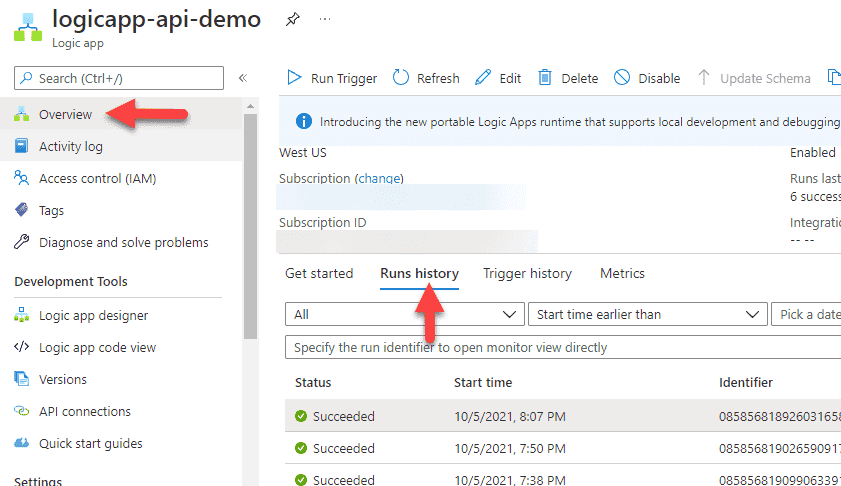
Image courtesy of the author
What will your team appreciate?
Following good naming conventions
If you have a look at the visual designer now, you would see that it's labelled as Recurrence, HTTP, HTTP 2, etc. This is not a good idea because as we increase the steps, it will become very difficult to identify which step targets which API endpoint. Imagine another team member stepping in to update a few steps when you're not around. What you'd want to aim at implementing is naming the steps so it's clear what it's meant to do.
Click on the three dots, and then click on Rename. This will make the label editable, so you should be able to rename it as you see fit.

Image courtesy of the author
Don't forget to save all the changes once done. After I renamed all the steps, my demo Logic App looks like the screenshot below.

Image courtesy of the author
Designer versus code view
By default, you should always see the Designer view. This provides a visual way of editing your Logic App, which makes it nice and easy especially when you're getting started. However, if you need to configure things in bulk, it's a very slow process if you rely solely on the Designer view.
To speed up the process, click on the Code view button to see the code behind the Logic App. If you know the syntax, it's much faster to type it out.
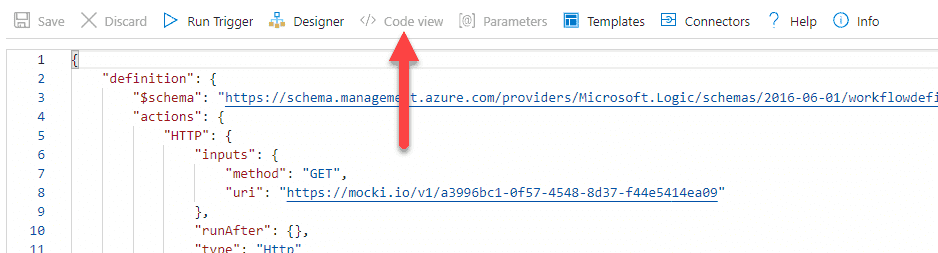
Image courtesy of the author
In our example, we already added two API endpoints from the Designer and now let's say we want to add a few more, we could click on the Code view button and copy a block from the actions object and then simply copy-paste it multiple times. For each code block, update the key for the block, in this example, API_endpoint_NEW and the URI of the API endpoint. Even when in Code view, don't forget to save your changes.
"actions": {
    "API_endpoint_ABC": {
        "inputs": {
            "method": "GET",
            "uri": "https://mocki.io/v1/a3996bc1-0f57-4548-8d37-f44e5414ea09"
        },
        "runAfter": {},
        "type": "Http"
    },
    "API_endpoint_XYZ": {
        "inputs": {
            "method": "GET",
            "uri": "https://mocki.io/v1/d4867d8b-b5d5-4a48-a4ab-79131b5809b8"
        },
        "runAfter": {},
        "type": "Http"
    },
    "API_endpoint_NEW": {
        "inputs": {
            "method": "GET",
            "uri": "https://mocki.io/v1/198de415-a8a0-48eb-8c69-64762ab0e59e"
        },
        "runAfter": {},
        "type": "Http"
    }
},
Parameters
If you think you're going to use the same values every time, consider using parameters. To add a parameter, click on Parameters from the header and then click on Add Parameter.
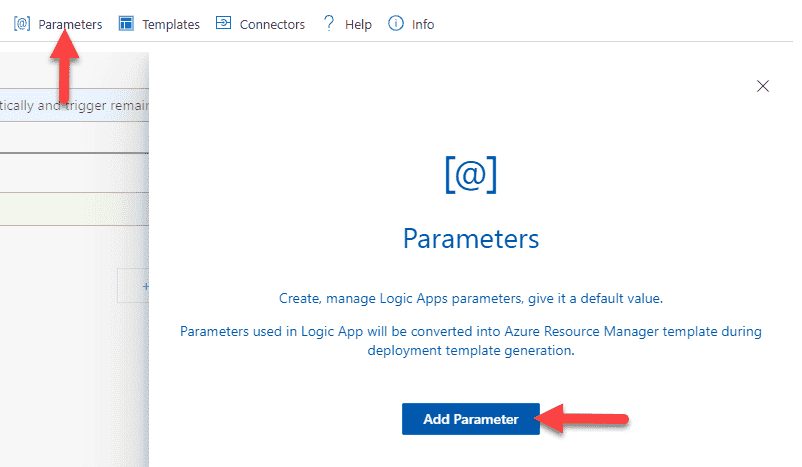
Image courtesy of the author
Enter the name of the parameter and give it a default value — it's called default value because we can change the value for the parameter at runtime. In this example, however, we'll look at only using the default value of the parameter. You don't need to click on Add Parameter again as that's for adding another parameter.
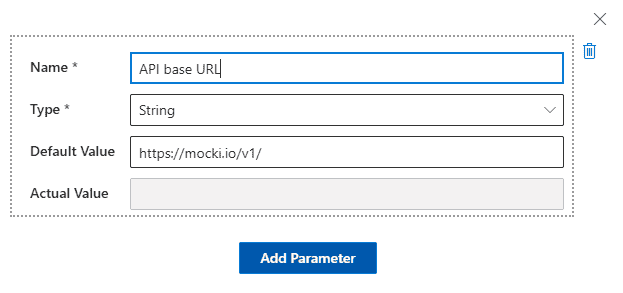
Image courtesy of the author
To use this parameter, click on the HTTP step. Now, let's replace the base URL part with the parameter we just added. If the Dynamic content modal doesn't automatically popup, you can click on the Add dynamic content link to bring this modal and you should then see this parameter in the list.
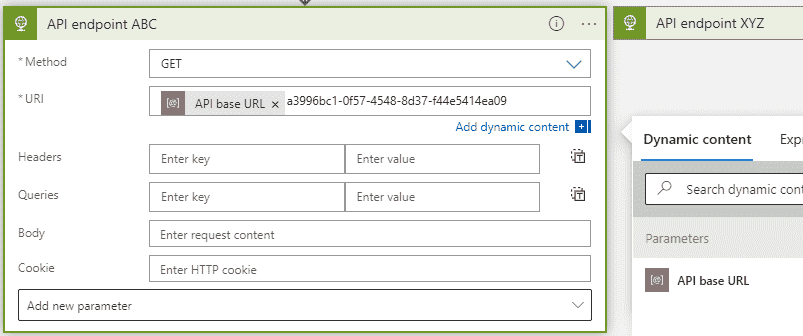
Image courtesy of the author
Save and run the trigger to test — everything should run as-is. If you click on Code view, you should be able to see how the parameter is configured (lines 11-16 in the code snippet below) and how it is used (line 5).
"actions": {
  "API_endpoint_ABC": {
      "inputs": {
          "method": "GET",
          "uri": "@{parameters('API base URL')}a3996bc1-0f57-4548-8d37-f44e5414ea09"
      },
      "runAfter": {},
      "type": "Http"
  }
},
"parameters": {
  "API base URL": {
      "defaultValue": "https://mocki.io/v1/",
      "type": "String"
  }
}
That's it. Thanks for reading!