- Published on ·
- Reading time 5 min read
My Tax Form Has Expired. What Do I Do?
Navigating your way through updating your tax information in Google Play Books Partner Center
Share this page

Problem
I recently logged into my Google Play Books Partner Center account and saw this message pop up. As the message says, my tax form has expired and I needed to update it in their systems — but how? This article outlines the process.

Image courtesy of the author
Disclaimer: This isn't financial or tax advice. Please read all the instructions carefully before submitting your tax information. Being a non-US resident, parts of this form might looks quite different to what you might see if you were a US resident. These steps might change over time and this article might not always reflect the latest.
Solution
Let's start by clicking that Update button from the message on your screen. From the pop-up, let's click on the Add tax info button.
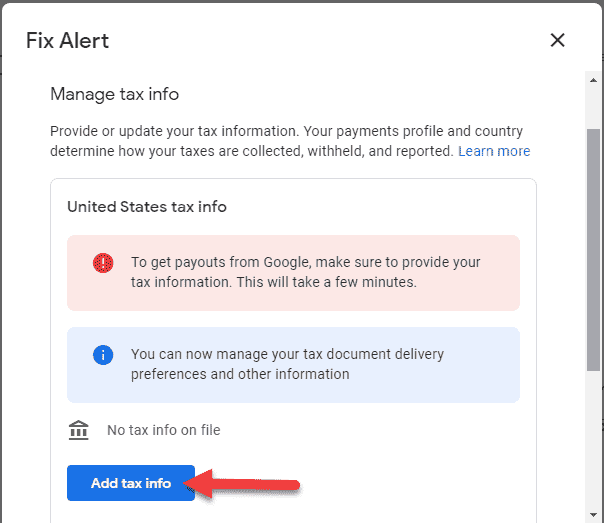
Image courtesy of the author
This action might require you to sign in to your Google account. Once you've successfully signed in, you'll be redirected back to Google.
To begin with, you'll need to specify if you're completing the tax information for an individual account or an entity and if you are a citizen or resident of the US or not.
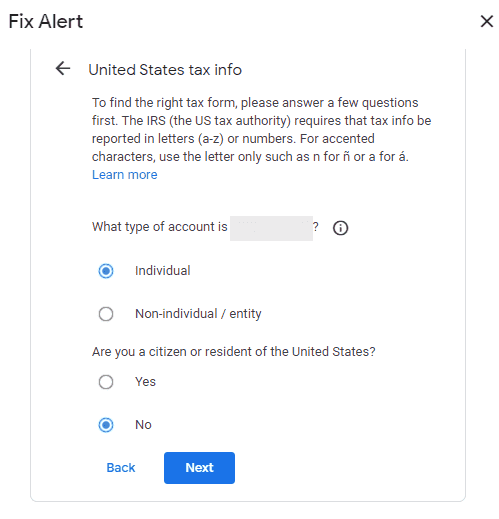
Image courtesy of the author
Based on my previous selection, I'm now asked to select what type of W-8 form I'd need to fill up. Since I'm a non-US based individual, I'd have to select W-8BEN and click Next.
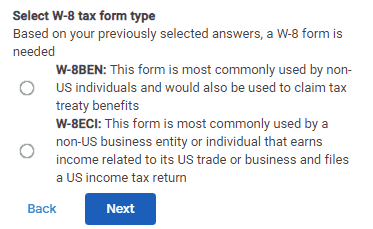
Image courtesy of the author
This now starts a 7-step process.
Step 1: Tax identity
In this section, you'll be writing your name, country of citizenship, and your tax number. If you're based in any other country, you can enter that number here as well.
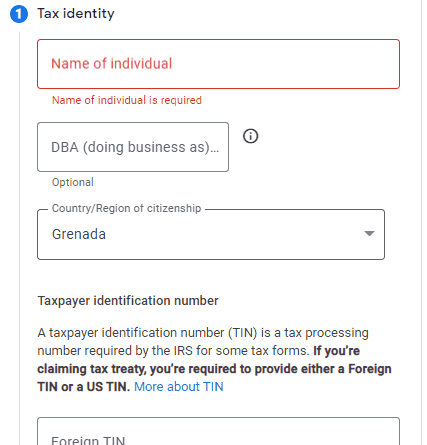
Image courtesy of the author
Step 2: Address
This is an easy section — just need to enter your postal and mailing address here.
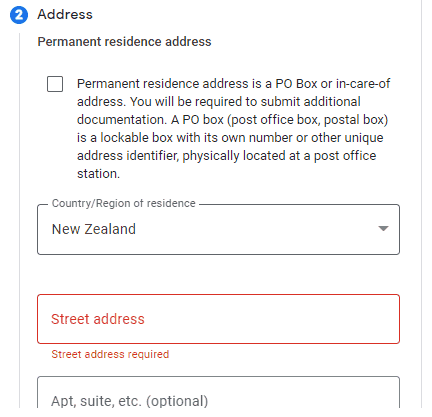
Image courtesy of the author
Step 3: Tax treaty
Based on your country of residence selection, you may be asked to choose if you're claiming a reduced rate of withholding under a particular tax treaty.
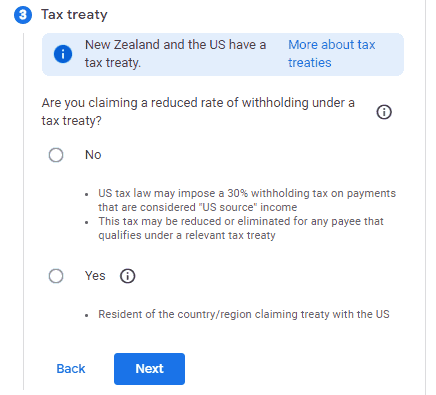
Image courtesy of the author
Since I'm based in New Zealand, I've selected Yes. Then, from the special rates and conditions, I've selected copyright royalties since book sales fall under this option.
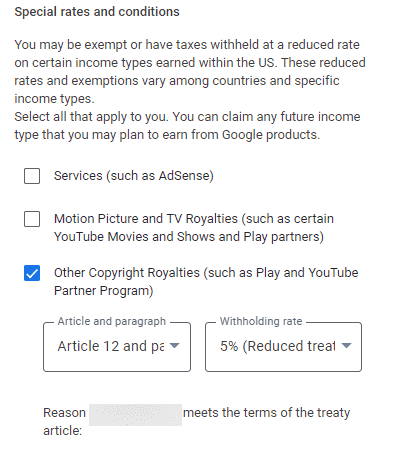
Image courtesy of the author
Google was smart enough to populate the correct values in the Article and paragraph dropdown and the Withholding rate dropdown. But if you're wondering where these values come from or need to confirm them yourself, you can find the tax treaty tables on this page.
Step 4: Document preview
This step is to only confirm that the filled up forms look correct. There are two because I've selected the copyright royalties treaty option. Once you've confirmed, check the box and proceed to the next step.
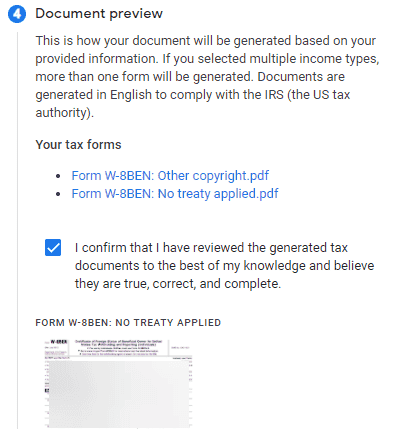
Image courtesy of the author
Step 5: Certification
This step is to confirm that everything entered above is correct to the best of your knowledge. I'd highly recommend reading the text under this section before certifying since incorrect information may lead to consequences.
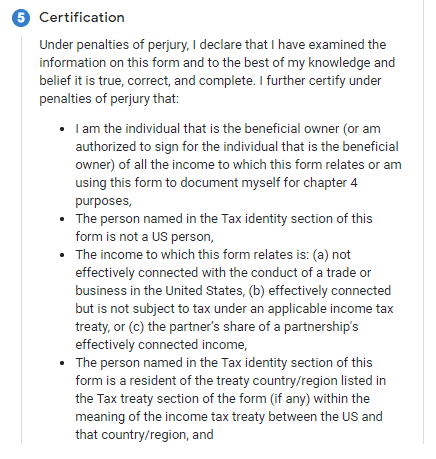
Image courtesy of the author
Once you're satisfied, scroll down to enter your full name and then select one of the options below that text box depending on if you're filling up the form for yourself or on behalf of another person. Click on Next to proceed to the next step.
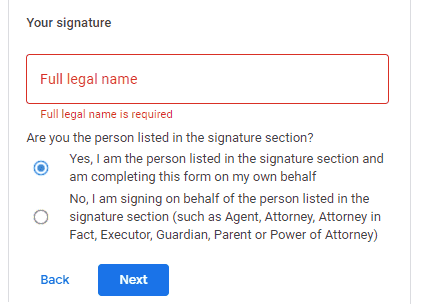
Image courtesy of the author
Step 6: Activities and services performed in US and Affidavit
I've not seen this section the last time I submitted tax information, so they must've added this later. Essentially, the first section is asking if the person or entity filling up the form has performed any work for Google within the US.
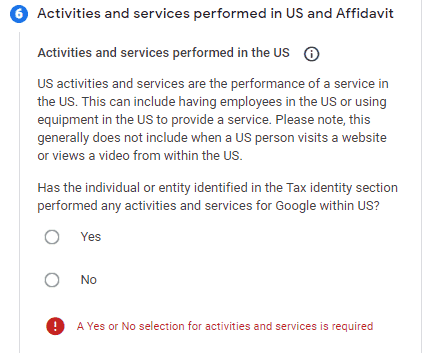
Image courtesy of the author
The second section is asking if we're updating this tax information for a new or existing profile that hasn't received payments or an existing profile that has received payments.

Image courtesy of the author
I've selected the second option and that opened up an optional textbox for me to mention if there were any changes in the form when compared to the last time I submitted this information.
Step 7: Tax reporting
This section is to only set our preference of how we'd like to receive the tax documents. I'd encourage you to go paperless!
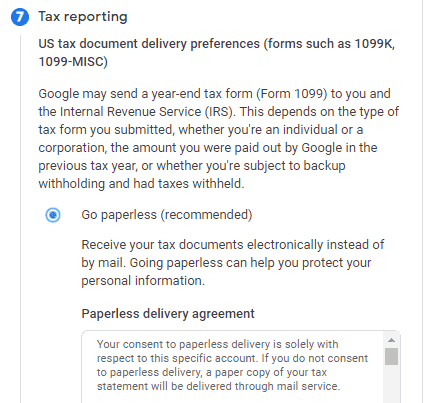
Image courtesy of the author
Confirm and submit
Have a read through all the information you've entered above and ensure it's accurate. Once you're happy with this, click on the Submit button. Once processed, this will pop up a confirmation message on your screen with a status of Approved.

Image courtesy of the author
Congratulations, you've updated your tax information successfully!
That's it. Thanks for reading!