- Published on ·
- Reading time 12 min read
Hassle-Free Build and Deployment Using Cloudflare Pages
Deploy your website on the edge of the internet
Share this page

What is Cloudflare Pages?
So, you're a frontend developer and have built an amazing portfolio website? It works great locally and now you're wanting to show the rest of the world what an amazing site you've built, but you're puzzled with all the various hosting options available? Some are too expensive for hosting a simple website, some are just too complex and some, well, look a bit fishy! Don't worry — allow me to introduce you to Cloudflare Pages.
Cloudflare Pages enables you to deploy your frontend application straight from your GitHub repository. All you need to do is connect Cloudflare Pages with your GitHub repository, configure a few things and then just keep coding while Cloudflare Pages takes care of the build and deployments.
JAMstack-ready
Cloudflare Pages is a JAMstack-ready platform. JAMstack stands for JavaScript API Markup. Cloudflare Pages takes care of your JavaScript-based markup by hosting your frontend website on their edge network. You can also combine this with Cloudflare Workers to utilize the power of serverless computing for your APIs, but that's a topic for another article!
Be it a simple HTML website, a React or Angular-based website or a website generated using a static site generator like Jekyll, Hugo, or Gatsby, Cloudflare Pages supports it all.
Why Cloudflare Pages?
Cloudflare has built an expansive global network of data centers. This allows Cloudflare to provide a CDN service that caches content and enables ultra-fast static and dynamic content delivery using their Argo Smart Routing, authoritative DNS that's the fastest in the market with topline DDoS protection that blocks an average of 57 billion threats per day, a network-as-a-service solution called Cloudflare One that enables enterprises to connect their users, offices and data centers, free SSL that can be enabled with a single click, domain registration service called Cloudflare Registrar, and a lot more.
With so much of the infrastructure and expertise already in place, Cloudflare Pages is a great choice for deploying your static websites on the edge of the internet.
You might now think, “All that sounds great, Clyde, but how do I set this up?” Good question — let's take a look.
First things first
I've created a demo React app and have published my code to this GitHub repository. I've used the command npx create-react-app <directory name> to create this boilerplate app and have only updated this line of code to display the text “Update # x” where x is the number I can keep updating with every commit, only because this is purely for demonstration.
If you're downloading a copy of the code, run the command npm install to install the required node modules and then run the command npm run start to view the app in the browser. To create a production build, you'd have to run the command npm run build which will create a build folder and drop all the required files in there — that's what you'd need if you were deploying this website on a traditional server.
Connecting Cloudflare Pages
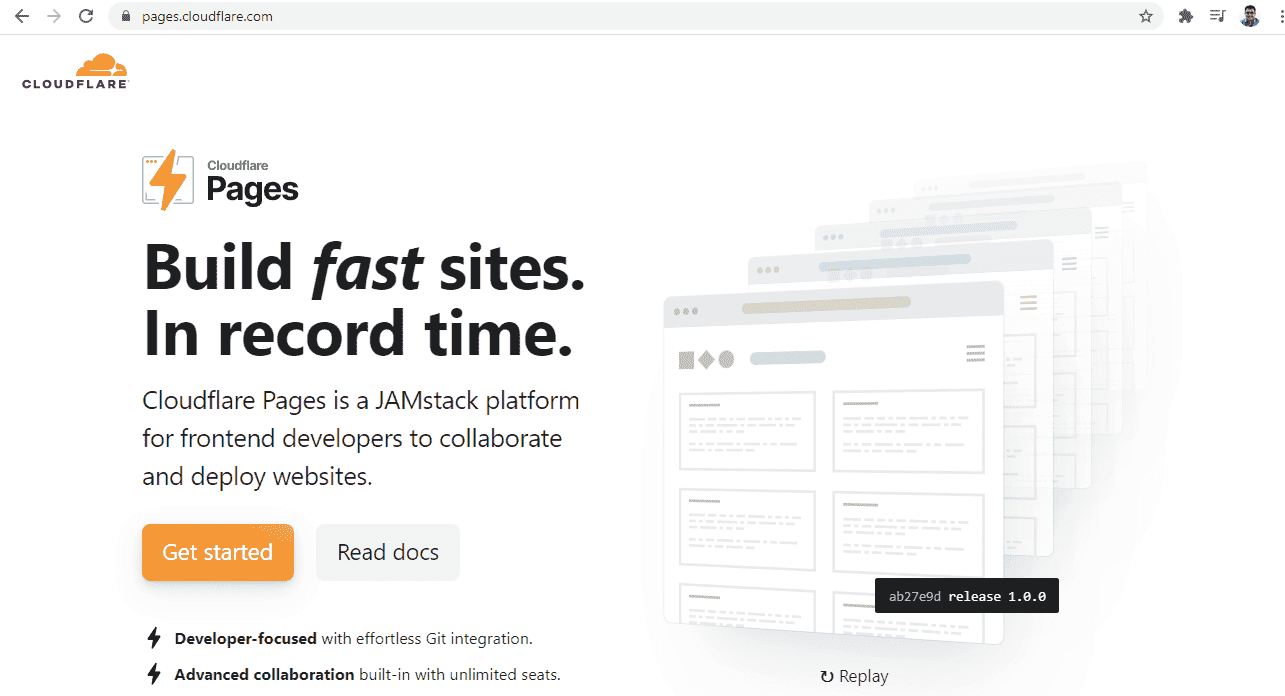
Let's start by heading over to pages.cloudflare.com and click on the Get Started button. You'll need to sign up with Cloudflare if you don't already have an account.
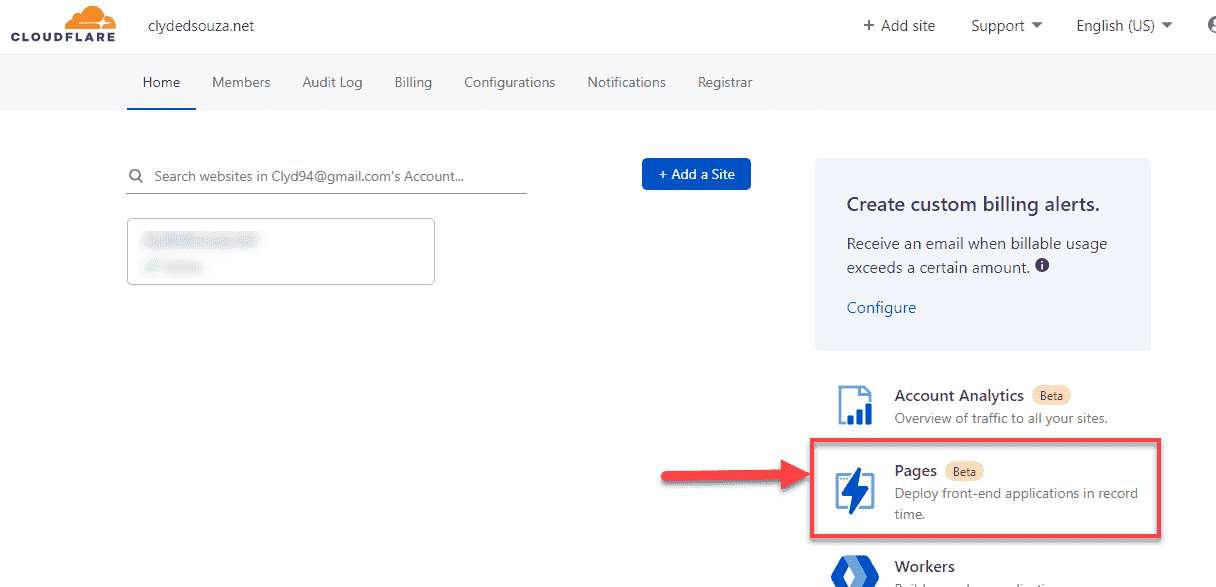
Once you're redirected to the dashboard, find and click on Pages which should be located at the bottom-right of the screen.
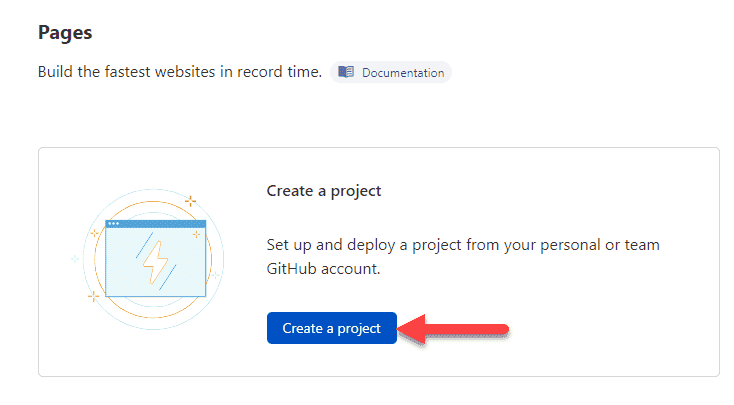
We'll now create a new project by clicking on the Create a project button. Think of this as a virtual container that will host your website settings.
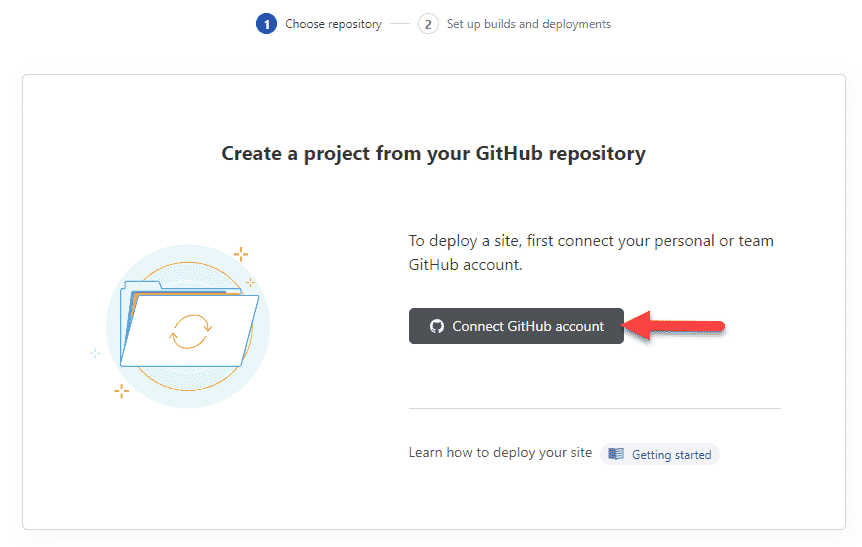
Let's now connect our GitHub repository with this project. Click on the Connect GitHub account button.
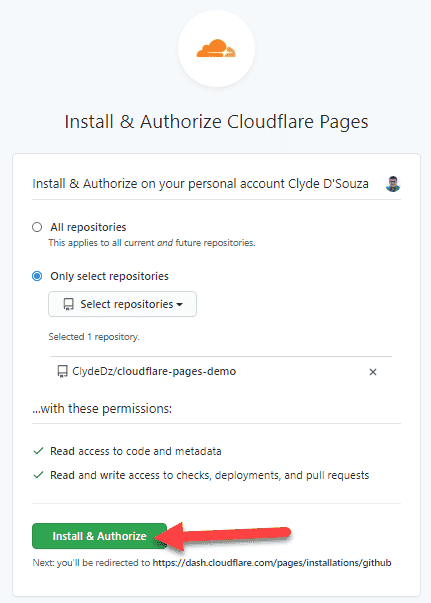
This will redirect you to a page where you'll be able to select the repositories and grant the required permissions. I've specifically selected my demo GitHub repository since I only want to limit the scope of these permissions to one repository. Next, click on the Install & Authorize button.
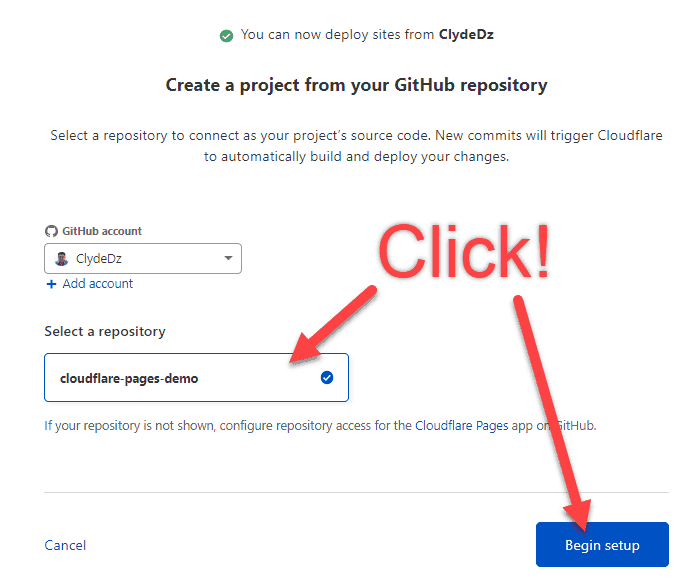
Now, you'll be redirected back to Cloudflare and see your GitHub username in the GitHub account field. If you've selected multiple GitHub repositories during the authorization process earlier, you'll see them in this list here. From this list, you'll need to select a repository and then click on the Begin setup button.
Awesome, we've now connected our GitHub repository with Cloudflare Pages — now let's set things up.
The setup
We now have to set up which branch we need to build, what type of application we're deploying, and how to build it.
The value in the Project name field is what will appear in the URL of your website, that is if you're not using a custom domain. The Production branch is what Cloudflare Pages will watch for changes and deploy to the production environment. It defaults to the main branch but you can choose any other branch if you like.

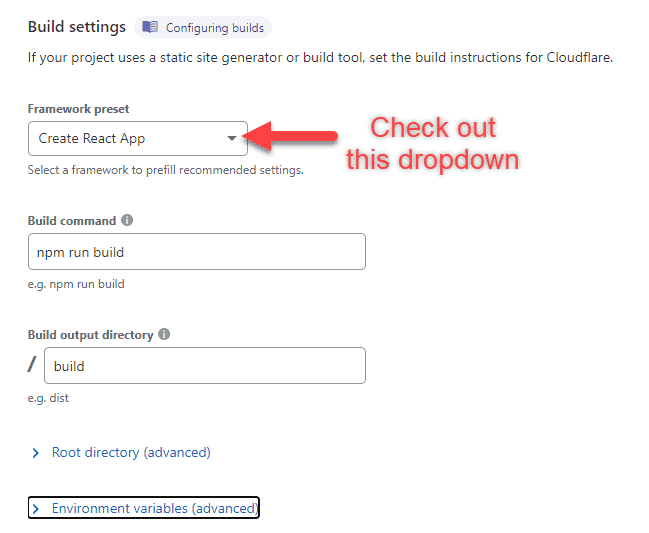
Under the Build settings section, we'll start by selecting the Framework preset. Think of this as a pre-built build setting that instructs Cloudflare Pages how to process your website. We'll select the Create React App option since that's the boilerplate app we used to create the demo app, but if you're using a Jekyll site, for example, you'd need to select that option instead.
After you've made that selection, you'll notice that the Build command and Build output directory fields will get populated with the appropriate settings.
If your source code is in a subdirectory, you would need to set that under the Root directory section.
The Environment variables section allows you to add environment variables. We'll take a look at this later in this document so we'll leave this blank for now.

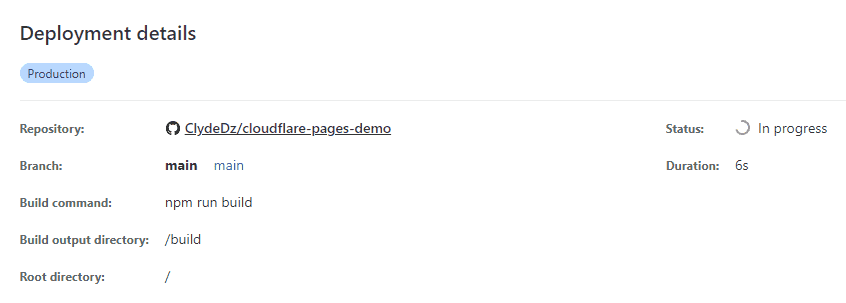
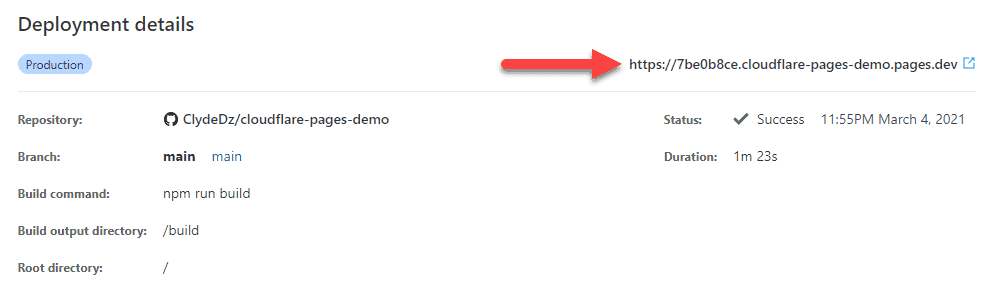
Finally, click on the Save and Deploy button. Immediately, you'll see a screen informing you about the deployment details like this screenshot below:
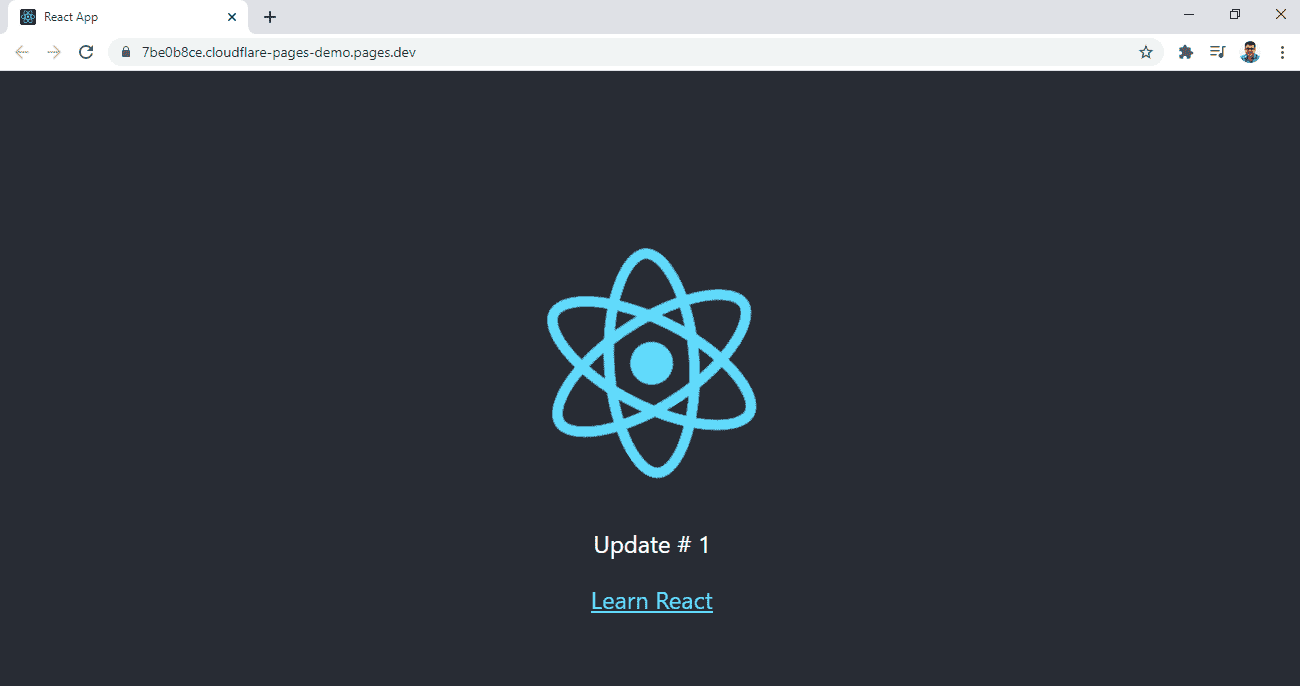
Once the deployment is completed, you'll get a URL that's unique to that specific deployment.
If you click on that link, you'll see the React app deployed and live on the internet!
If you remove the random number from the beginning and retain the rest, like this: cloudflare-pages-demo.pages.dev, for example, that'll be your permanent URL.
Git push!
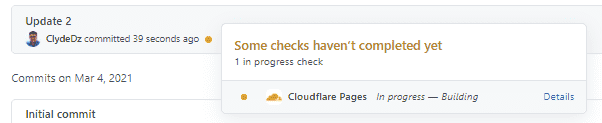
Let's update the text to “Update # 2” and push the changes to the main branch in GitHub. This will automatically trigger a Cloudflare Pages build and if you view the commit history, your latest commit will have an orange dot and will look something like this:
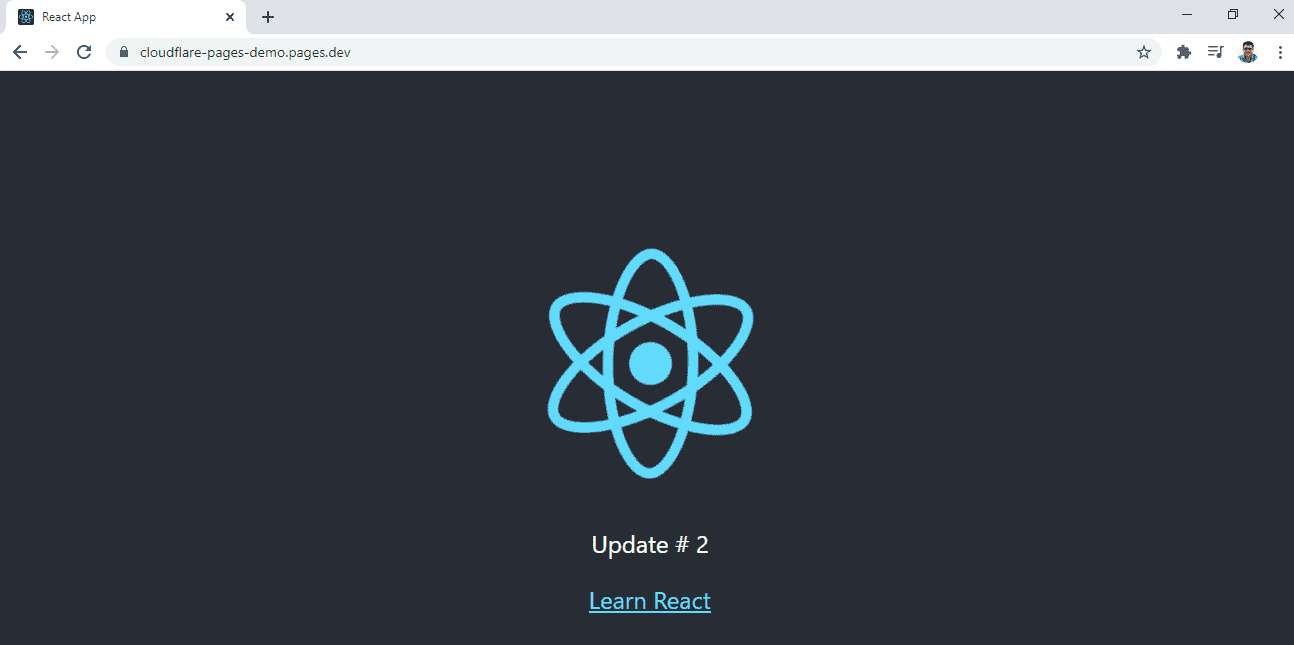
Once the build is successful, that orange dot will change to a green tick indicating everything went well and it will look something like this:

Now, let's head over to the permanent URL of the app cloudflare-pages-demo.pages.dev and confirm that we're seeing the updated text.
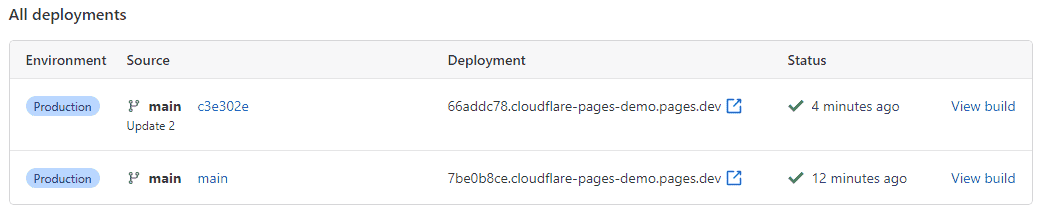
If you head over to the Deployments tab in Cloudflare Pages, you should see a history of all deployments along with their URL's, if you need to revisit them.
Branch deployments
Cloudflare Pages support infinite staging deployments. This means that Cloudflare Pages will deploy every non-production branch with its own unique URL so you can start testing your changes there without affecting production.
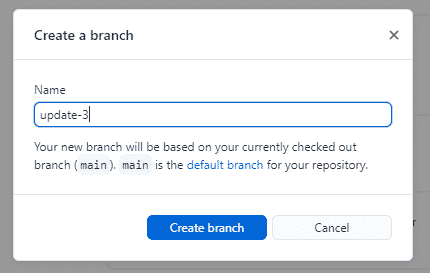
Let's create a new branch. Feel free to name it whatever you like — I've called mine update-3.
Next, we'll update the text to “Update # 3” and publish the branch to GitHub. This will trigger a Cloudflare Pages build and deployment. If you head over to the Deployments tab, you should a new entry in the table. This time, the Environment is set to Preview** and the **Source** has picked up the new branch name.
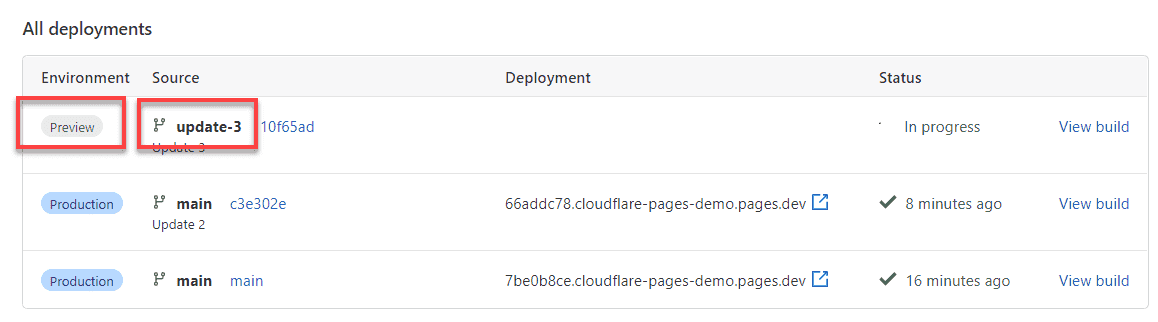
Once the deployment is complete, head over to that URL and confirm that the content has been updated. Now, if you head over to the permanent URL, you can verify that it doesn't show the latest text update, as expected.
Pull request
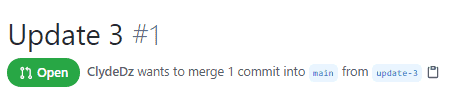
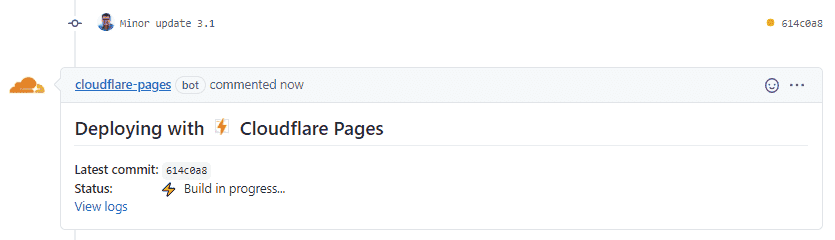
I've gone ahead and updated the text to “Update # 3.1” and have pushed the code changes to branch update-3. I've then opened a pull request in GitHub to merge my changes from update-3 to the main branch.
Once I open this pull request, the Cloudflare Pages bot automatically adds a comment with the build and deployment status just like we saw previously.
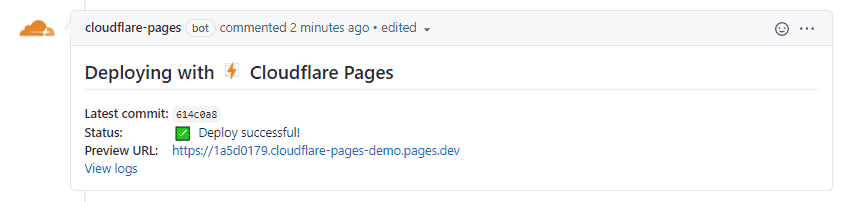
Once complete, it updates the comment to mark the status as successful and adds the preview URL so we can test our changes manually before merging code.
Environment variables
Cloudflare Pages allows you to add two sets of environment variables — one for the production environment and the other for the non-production or preview environment.
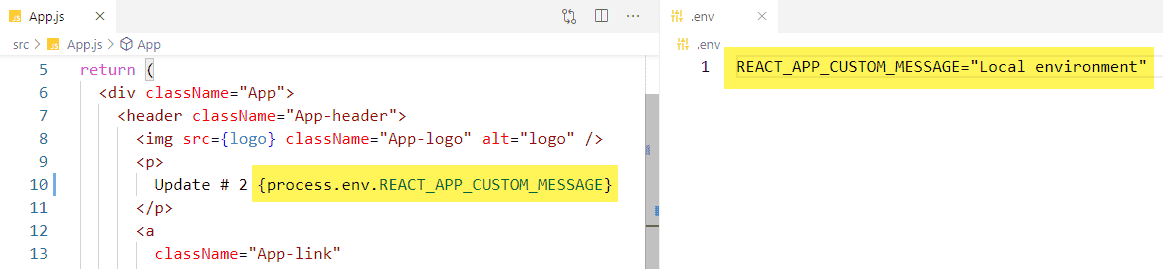
Let's create a new branch, open up the App.js file and append {process.env.REACT_APP_CUSTOM_MESSAGE} to our existing update message. We'll then create a .env file and add an environment variable called REACT_APP_CUSTOM_MESSAGE and give it a suitable message. I've given it the value of “Local environment” so I can troubleshoot which environment variable value is being picked up. Don't push these changes to GitHub yet.
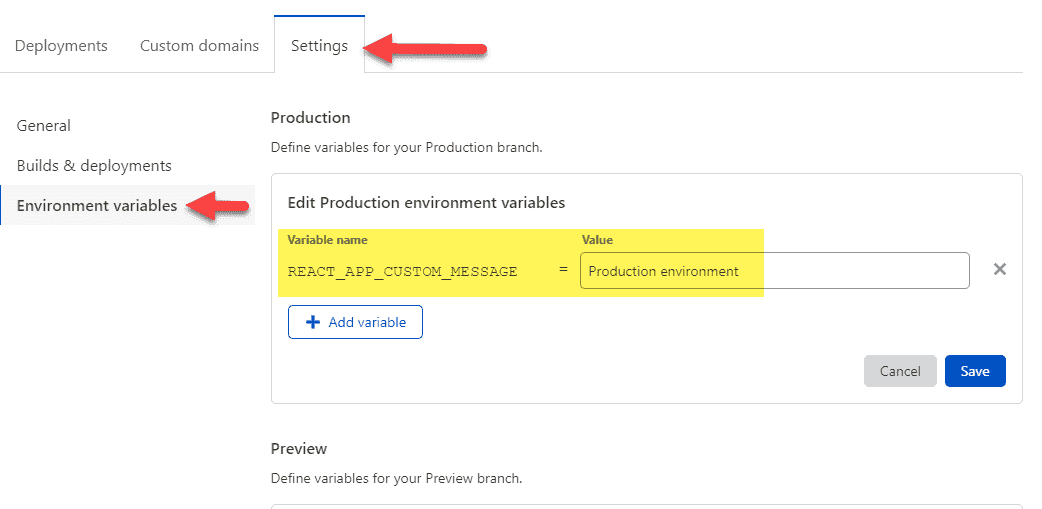
Now let's jump back to Cloudflare Pages and add the variable REACT_APP_CUSTOM_MESSAGE in the Production section with the value “Production environment” and a variable of the same name in the Preview section with the value “Preview environment”. This screen is available if you click on the Settings tab and then click on the Environment variables menu item from the left sidebar.
Now commit your code changes and push the changes to GitHub. If you've got the .gitignore file correctly set up, the .env file will be excluded — and that's okay. Open a pull request and grab the unique URL generated by Cloudflare. Then, merge the code changes to the main branch.
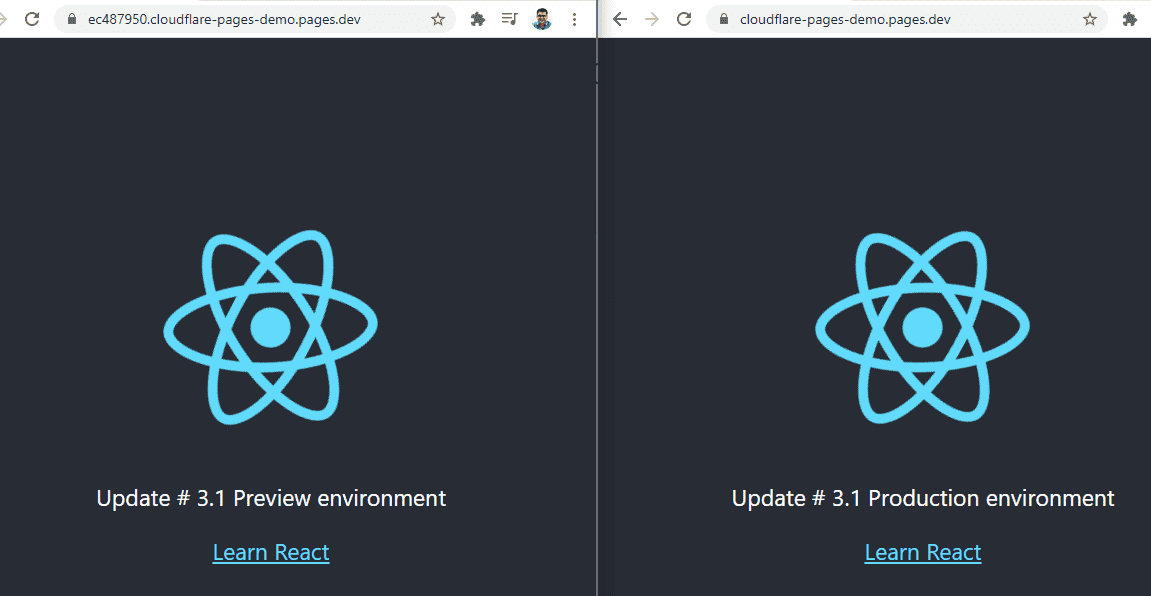
After Cloudflare Pages has completed a fresh deployment, open up the unique URL you saved earlier of the preview environment in one browser tab and the production environment in another browser tab. Notice that the app is correctly picking up the right environment variable value and displaying it.
Summary
Alright, time for a quick recap —
- We started by introducing Cloudflare Pages and made a case for why choose Cloudflare Pages.
- We then briefly touched upon the demo React app we'll be using for this article and where to find it.
- Next up, we looked at how to connect Cloudflare Pages with our GitHub repository and right after that, we looked at setting things up in Cloudflare Pages so Cloudflare Pages knows which branch to build and how to build it. You can either choose one of the preset build configurations or manually type this in. After saving your changes, it immediately started a deployment and we witnessed version 1.0 of our demo app go live on the internet.
- We made a minor update to our code and pushed the changes to the main branch which then triggered a build and deployment in Cloudflare Pages making our change live within minutes.
- Since you probably won't be (and shouldn't be) pushing changes directly into the main branch, we looked at what branch deployments and pull request deployments look like in Cloudflare Pages. Cloudflare Pages provides infinite staging environments which means all your non-production branches and pull requests get built and deployed to a preview environment so you can test your changes with the peace of mind of not breaking production.
- Towards the end, we added an environment variable into our code and an environment variable of the same name in the production and preview environments in Cloudflare Pages. This allowed us to demonstrate different values being populated for the same environment variable depending on which environment you were running the application in. In a real-life scenario, your app would rely a lot on environment variables so understanding this concept is a great win.
That's it. Thanks for reading!