- Published on ·
- Reading time 9 min read
Getting the Best of Static Sites
Migrating to Jekyll, adding a CMS layer and other power-ups
Share this page

Introduction
I was using a WordPress website for Light & Spark NPO's online presence. It was hosted on Azure and met our requirements well. However, certain factors forced me to reconsider this design and move to a static site. This article outlines the reasoning behind the move, working with a static site and other integrations.
Pros and cons, shall we?
Let's first look at what worked well and what didn't with the WordPress setup.
Pros
- I was able to customize a free theme to match Light & Spark NPO's branding.
- WordPress' intuitiveness made it very easy to train my team members to use.
- Heaps of plugins available for pretty much everything under the sun.
- Azure's Basic Service Plan (B1 instance) handled our website traffic well.
- I was able to configure Azure CDN to serve images from Azure blob storage and configure the WordPress media library to connect to the blob storage directly using a plugin.
- Because Azure doesn't know what SMTP server to use, I used SendGrid as my SMTP server instead.
Cons
- A major drawback was how much this setup was costing me. With most of my money going towards the App Service Plan, it used to cost me roughly NZD 48 every month. Since Light & Spark NPO didn't have a constant revenue stream to cover these costs, it made no sense to continue using this setup beyond a point.
- Very easily one can have too many WordPress plugins installed which causes the site to render slow and may even make the site susceptible to security vulnerabilities.
The shift to static sites
The goal was, therefore, to look at something lightweight and potentially free. With this in mind, I looked at static sites. Static sites serve pre-built files on each request as opposed to traditional dynamic sites like WordPress which generate files on each request.
I had briefly worked with Jekyll in the past, so I ended up investigating further and found it a suitable candidate. After some searching and experimentation, I found Beautiful Jekyll — a simple Jekyll theme by Dean Attali — which I was able to modify to match Light & Spark NPO's branding. This theme has a lot of customization options and if you know what you're doing, you can tweak a bunch of things like editing and adding new templates, settings, etc.
I also choose to host the website using GitHub pages, and get rid of the custom domain and stay content with the free domain offered by GitHub — lightandsparknpo.github.io. All the code was source controlled on Light and Spark's GitHub repository.
One of the things I added to the code base was a widget to show all team members on any page — this meant I stored a list of team members (somewhere), I designed how the widget must look like, in this case, a simple repeater that looped thru all the team members from the list, and then on any page I wanted, I was able to write a line of code to include this widget.
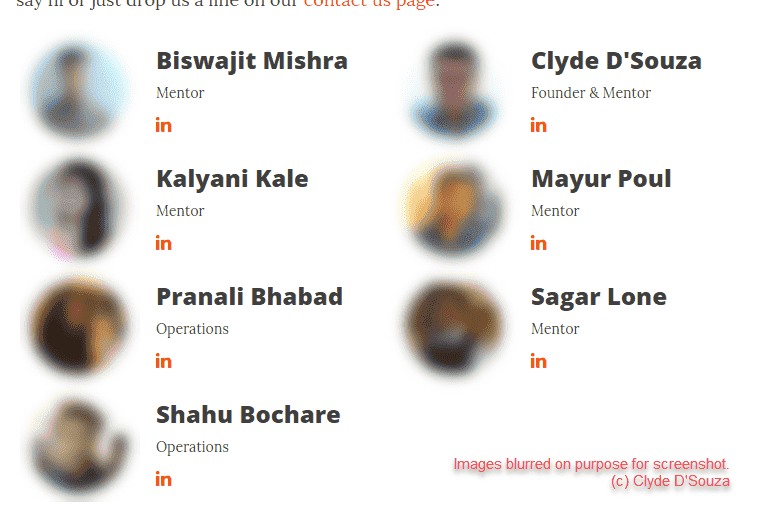
Image showing the 'Team' widget in action
I did this by using Jekyll Collections. I defined my collection in the _config.yml file. In a custom folder for this collection called _teams, I created a markdown file for each team member which allowed me to store key information about my team members using front matter. I then created a partial view to control how this widget is displayed. Finally, all I needed to do was to include this widget in my page layout and boom, I had my widget rendered!
I also used _posts to store event information and loop thru all of them on the events page. _posts usually comes baked-in with most Jekyll themes.
Fancy a CMS?

All of the content pages in this Jekyll site are Markdown-based content. This meant if anyone from my team wanted to edit anything, they'd have to edit the Markdown file (which means they need to know the syntax of Markdown) and then they'd have to commit their changes so that GitHub builds a new version of my website (which means they'd need to know a little about Git and GitHub).
I wanted to make the editing experience a whole lot easier, and after some research, I stumbled upon Forestry.io — it is a static CMS that hooks into your Git repository. That meant I could add/update content using Forestry's WYSIWYG editor and Forestry would commit my changes to the repository every time I saved it.
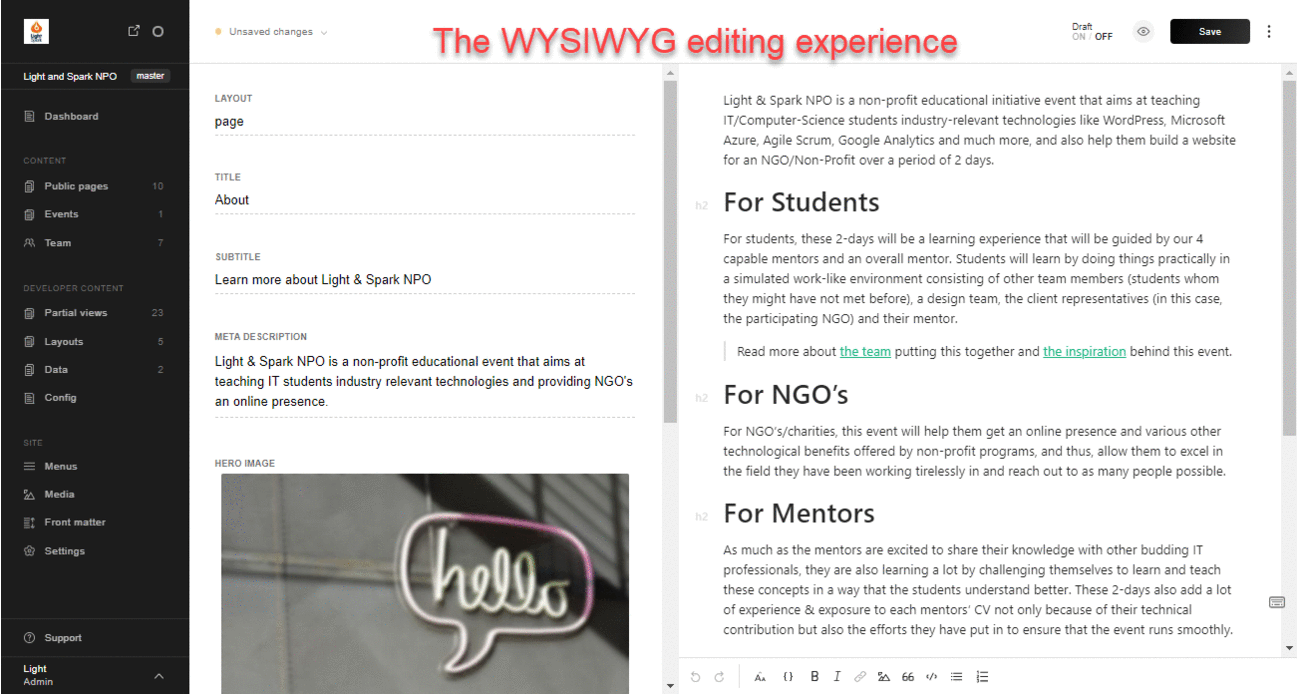
GIF showing various screens of the Forestry.io CMS portal
In most cases, when editing the content of a page in Forestry.io, the left section of the screen is where you'd fill up the front matter for that page (front matter templates can be created for each page type), and the right section of the screen is the content in WYSIWYG editing-style.
The purpose of this article is to only give you an insight of what is possible, but to be honest, I think I should write a separate article explaining everything about Forestry.io in much more detail. For now, I'm going to leave you with a link to their documentation page.
Other power-ups

Contact us drama
I still needed a contact us form for the website and since I was using a static site, I wondered how was I supposed to achieve this. Then I came across Formspree from Jekyll's official resources list.
It was super simple to set up. I included some HTML in my website that built a contact us form (Formspree provides a basic example, don't worry). This HTML contained a form action to post the form data to a Formspree endpoint. Next, I configured the destination email address in Formspree to tell it where to email all the form submissions. And that's pretty much it — I had a working contact us form on my website, and each form submission would get emailed to the email address I configured.
In addition to the above, I would also recommend setting the ‘Restrict to Domain' option to your website URL (in my case: lightandsparknpo.github.io) and enabling reCAPTCHA too — both of which can be found from the settings tab in Formspree.
Um, shared mailbox?
Now, since the form submissions were going to a GMail address, if multiple members from my team wanted to monitor and reply back to inquiries, I would need to share the mailbox with all of them. This approach wasn't ideal, so I started looking for alternatives. That's when I came across Freshdesk.
Essentially, Freshdesk is a ticket management system. Add your team members to the system, optionally assign them groups, and then any one of them can pick up a ticket (customer query/complaint/anything!) when it arrives and respond. Everything is transparent, so all the other team members can see who a ticket has been assigned to, and if there are any unassigned tickets that need someone's attention. You can also set up SLA's so that each type of ticket (usually decided by its priority) is picked up and resolved within a pre-decided number of hours.
With Freshdesk, you can also create a new ticket via email. So I configured Formspree to send my contact us form submissions to my Freshdesk support email address. This meant every time someone made an inquiry via the contact us page, a new ticket would automatically get created in Freshdesk. And replying to that ticket would directly email the person straight to his/her inbox!
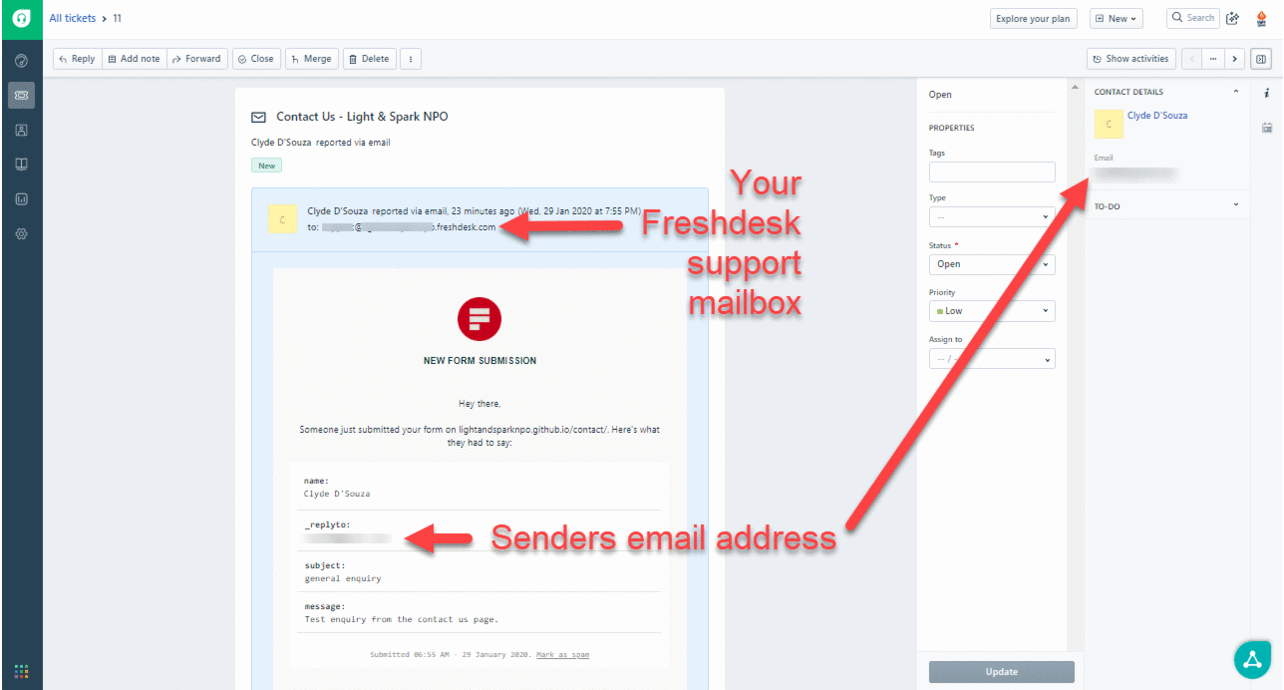
GIF showing what Freshdesk portal looks like when a ticket is viewed and when the ‘Reply' button is clicked.
May I help you?
I was really fascinated with implementing a live chat system like Intercom. While configuring Freshdesk, I found out about another Fresh; prefixed product called Freshchat.
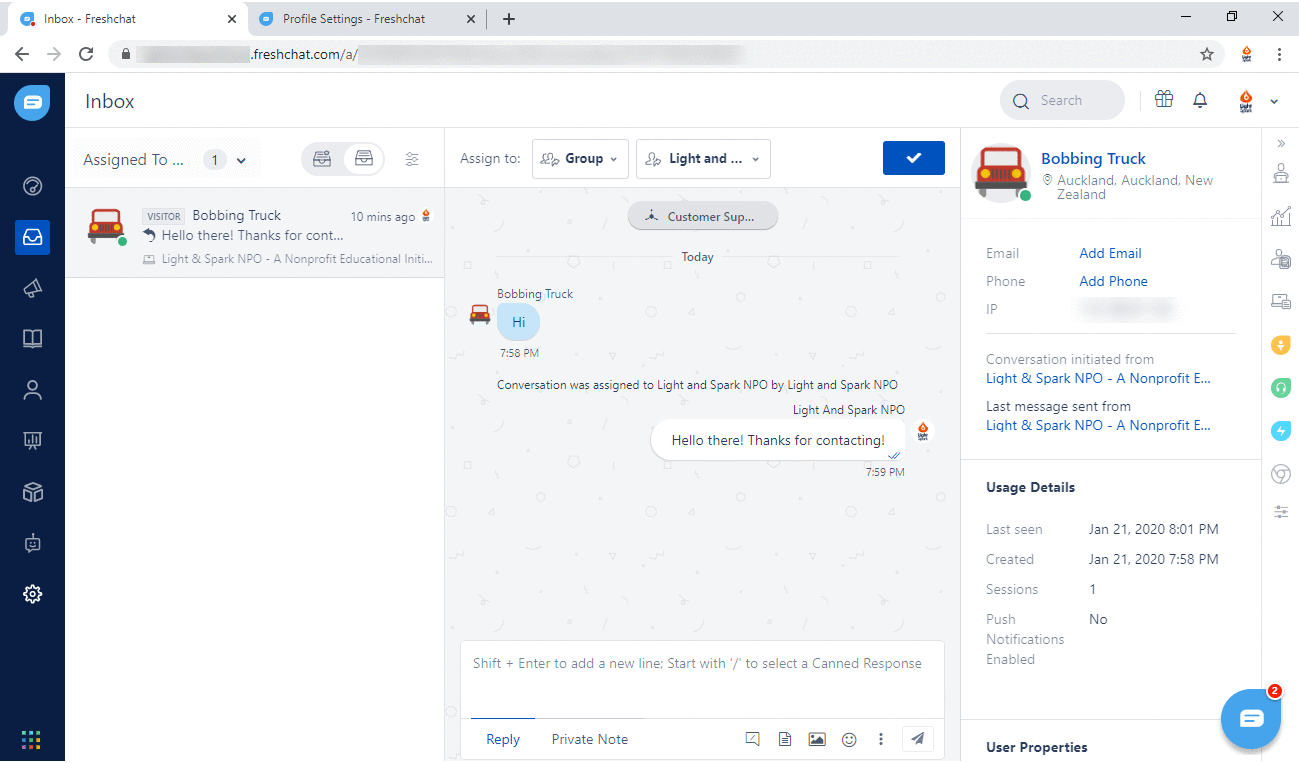
GIF showing the Freshchat dashboard with an active conversation and the profile settings page where you can customize how your avatar would like to the user chatting with you.
Set up was pretty easy — complete your profile, add team members to the Freshchat portal, add Freshchat's script to your website (like I did here) — and just like that you've added a live chat functionality to your site.

GIF showing what the live chat looks like
If you want to go one step ahead, you can even connect Freshdesk and Freshchat together so you can create a new ticket directly from Freshchat.
Summary
Alright, time for a quick recap —
- I moved Light & Spark NPO's website from WordPress to Jekyll because it was just costing me too much.
- I used and customized the Beautiful Jekyll theme and added a 'Team' widget to the website.
- Instead of making all the updates to the Jekyll website through GitHub, I used a Git-based CMS called Forestry.
- I added a contact us form to this static site using Formspree.
- Instead of using a shared mailbox to keep a track of all the inquiries received via the contact us page, I used Freshdesk — a ticket management tool. Formspree sends the form submission via email to Freshdesk where a new ticket is created.
- And finally, I added a live chat system using Freshchat and wrote about how easy it was to integrate this functionality into a static site.
That's it! Thanks for reading.
Light & Spark NPO is a non-profit educational initiative. We executed a 2-day event in Mumbai where we taught web development to 36 computer science students and produced a website that we gifted to a local non-profit organization. Read more about the event here.