- Published on ·
- Reading time 12 min read
Emoji Badges, Anyone?
Developing your own VS Code Snippet Extension
Share this page
Introduction
Okay, I must admit that I love the idea of using icons and badges wherever possible. It adds colour to the otherwise monotonous page and immediately grabs your attention. Of course, you'd still want to use it in moderation, just like with anything else.
A build pipeline status badge generated by Azure DevOps
Code maintainability status badge generated by Code Climate
While many services provide you with an option to generate a badge (like the examples above), you can also customise and build your own badge using this tool. How awesome is that?
Welcome, Emoji Badges
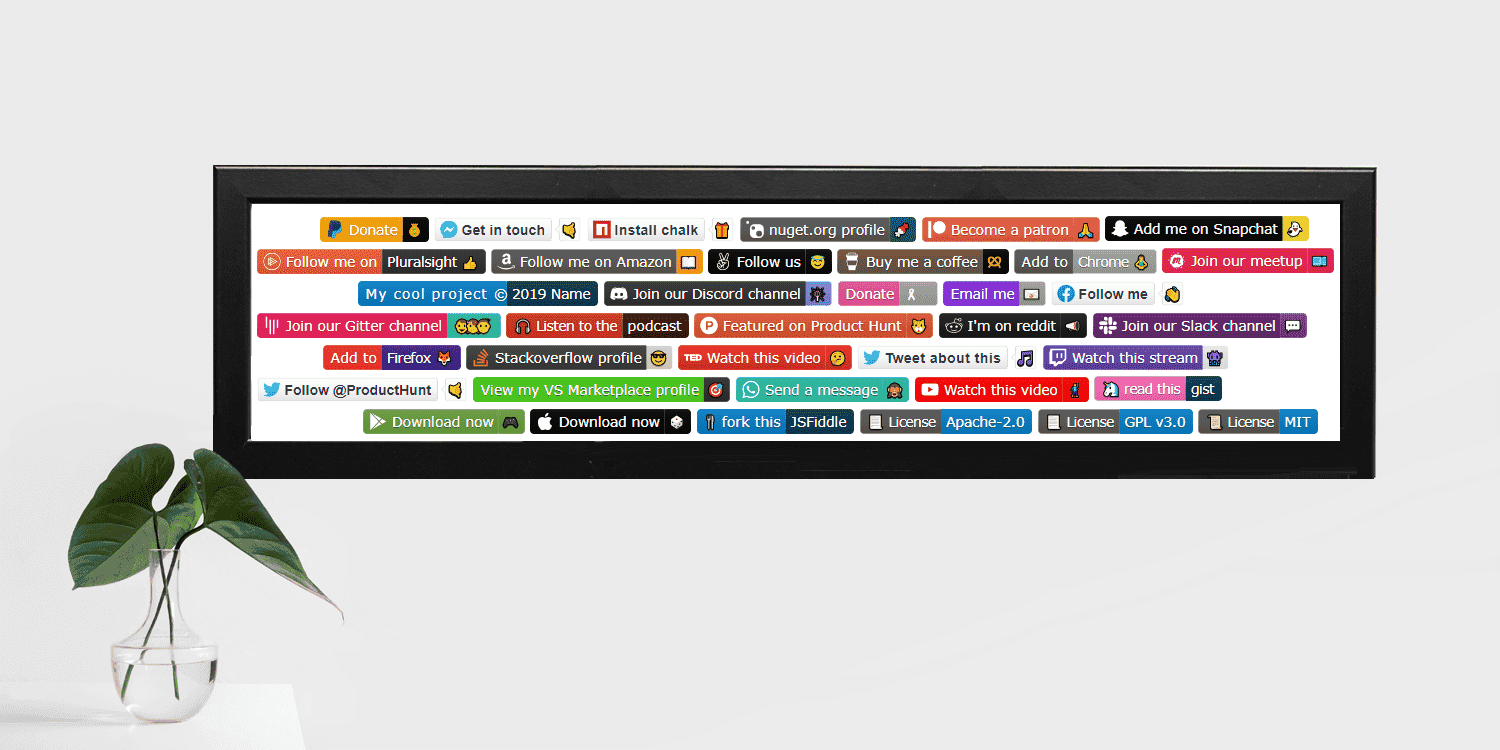
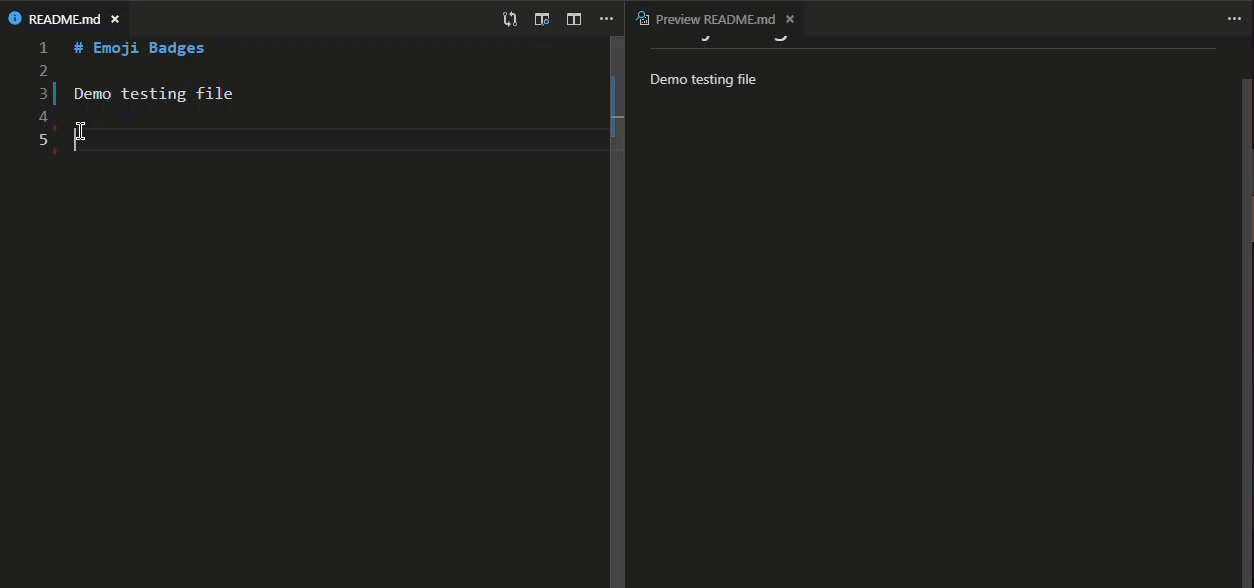
I thought — wouldn't it be a good idea to create a Visual Studio Code extension that allows you to add emoji badges to your markdown file? Here's a GIF to show this in working:
Emoji Badges in working
This VS Code extension is available from the Visual Studio Marketplace. The list of available badges can be found here. Once installed, in a markdown file, you would start by typing the prefix and a list of available badges should appear in the menu.
Now, how do you go about making this? Let's take a look.
Prerequisites
- Download Visual Studio Code.
- Install Node.js and NPM package manager. The Node.js installer will also install NPM. Verify installation: type
node -vin the command prompt and you should get the Node.js version. Similarly, test the NPM installation using the commandnpm -v. - Install vsce (short for Visual Studio Code Extensions) via NPM. vsce is a command-line tool for packaging, publishing and managing VS Code extensions. Use the command
npm install -g vsce. Verify by running the commandvsce -V. - Create a Visual Studio Marketplace publisher profile — steps outlined in the next section.
Creating a publisher profile
If you don't already have a Visual Studio Marketplace publisher profile, head over to https://marketplace.visualstudio.com/ and click on Sign in to sign-in with your Outlook/Microsoft email address. After that, click on Publish extensions link, as per screenshot below.

Complete the details in the Create Publisher screen and you've successfully created your publisher profile. Make a note of the unique publisher ID — we'd require that later.
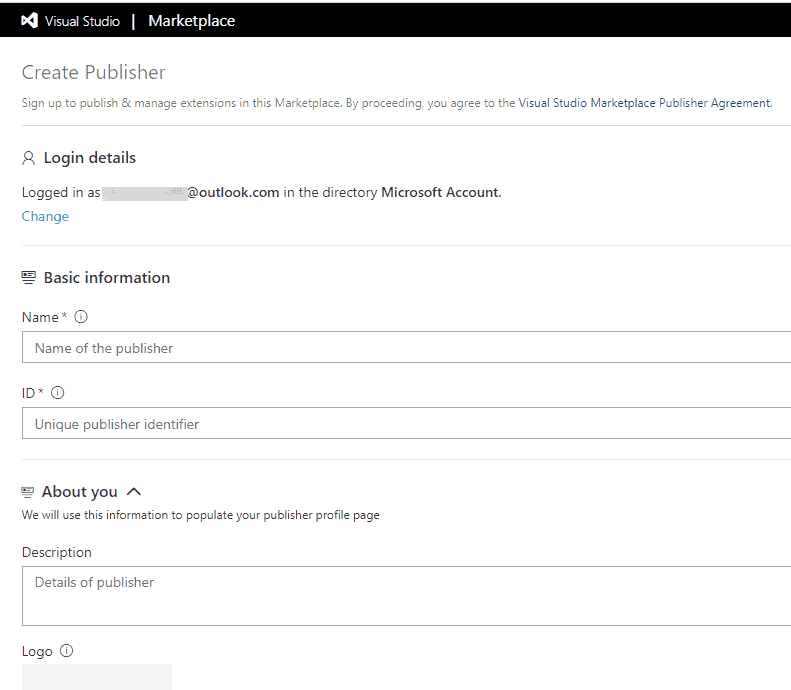
Note: The details you enter in the above screen will show up on your publisher profile page. Click this link to see what my Visual Studio Marketplace publisher profile looks like.
Source code and extension
Before we dive into the implementation steps, let me leave you with a link to my Code extension that you can use as a reference while you're learning. Feel free to fork the repository and work from there, if that's easier. Click here to view (and maybe also install?) my VS Code extension — Emoji Badges — on the Visual Studio Marketplace.
Structuring your code
Let's add these files and folder to your directory.
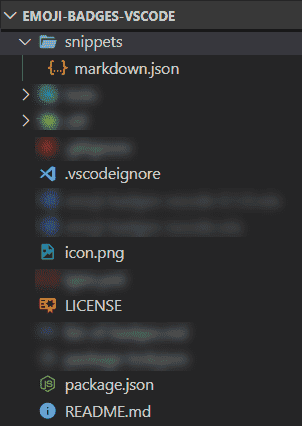
Basic directory structure of a VS Code extension. I've blurred out the files and folders that's not required for a simple extension — I've used them for custom requirements.
- LICENSE — Depending on how you choose to license your extension, add the appropriate license file to your repository. Visit this website to choose between various license types.
- README.md— Description of what your Code extension does. Generally, a README file might only contain what the repository is for, but in this case, the contents of the README file will appear on the Code extension page.
- .vscodeignore— When packaging our Code extension, we might not want to include all the files from our repository. This file tells the 'packager' what files to exclude during this process.
- package.json — If you've used an NPM package before, you would be familiar with this file. In this case, this file contains some additional meta data about the extension — also called the ‘extension manifest'. More about this later in this article.
- markdown.json in the snippets folder — This file is a collection of snippets that follow the same pattern. More about this later in this article.
- Icon.png — An icon for this extension in PNG format. The official guide says the icon must be a minimum of 128x128 pixels (or 256x256 for Retina screens) but I've seen many extensions with a larger icon size as well. The icon size I've used for my Code extenion is 1024x1024 pixels. 😅
- Other files— I've also added a
.gitignorefile that tells GitHub what files to exclude from check-in. I have alist-of-badges.mdfile with a full list of available badges. Ademosfolder for capturing various demo snippets in action. Animagesfolder to store the demo GIF's captured. Atestsfolder to write some basic unit tests. And finally, autilfolder that has some JavaScript code to automatically update thelist-of-badges.mdfile.
Let's elaborate on a few files.
Package.json
A VS Code extension needs to have a package.json file present in the root directory of the extension's directory structure. This file contains fields that give the marketplace more information about the VS Code extension. For example, setting the title, description and icon path in the package.json file will help the marketplace display the correct title, description and extension icon on the extensions page.
The package.json file contains quite a few fields — some self-explanatory and some not so much — and I'm not intending to cover all of them in this article. So, I'll explain a few not-so-self-explanatory ones (or some that require a special mention) here and for the rest, I trust you will read the fabulous Code docs. You can also check out my version of the package.json file here to see what I've used and how its reflected on my extension's marketplace page.
Publisher
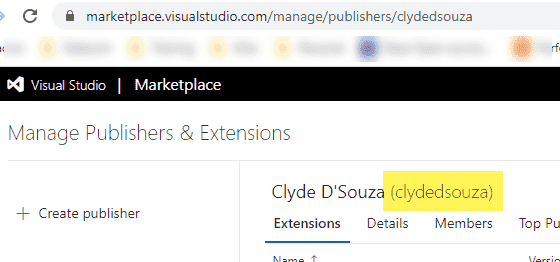
You can get your publisher name from your publisher profile page URL. So, if the URL is https://marketplace.visualstudio.com/publishers/johnsmith, your publisher name/ID is johnsmith.
You can also navigate to the manage publisher page and get the publisher name from there, as highlighted in the image below.
Contributes
The contributes field describes the functionality that this extension provides — basically what type of extension you're developing. It could be snippets, themes, menus, commands or anything from this list.
"contributes": {
		"snippets": [
			{
				"language": "markdown",
				"path": "./snippets/markdown.json"
			}
		]
},
In this case, we're creating an extension to add snippets which will be available for markdown files only. The relative file path to the JSON file that contains a list of snippets is mentioned right below the supported language. The snippet file is named markdown.json since that is the language identifier. A list of available language identifiers can be found here and you can only add snippets for languages that's in this list.
Engines
This value indicates the VS Code version this extension is compatible with. A prefix of ^ indicates that this extension is compatible with the version specified and all higher versions of VS Code.
{
  "engines": {
    "vscode": "^1.28.0"
  }
}
markdown.json
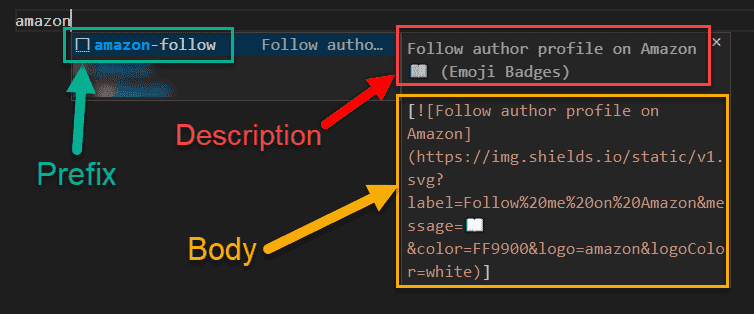
As you might have observed, this file is a collection of snippets that follow the same pattern. For example:
"amazon-follow": {
"prefix": "amazon-follow",
"body": [
"[](https://www.amazon.com/Michelle-Obama/e/B07B436TLF) "
],
"description": "Follow author profile on Amazon 📖"
},
Now, very quickly —
- “amazon-follow” is the title of the snippet.
- “prefix” is the trigger that helps Code decide which snippets it must show in IntelliSense. For example, in this case, if you start typing “amazon” Code will show the above snippet in IntelliSense.
- “body” is the contents of your custom snippet. On selecting this snippet, the contents of “body” will be pasted into your file. In this case, I've populated each snippet with a custom badge that contains an emoji.
- And finally, the optional “description” contains the message that will be displayed in IntelliSense.
Get creative — create as many snippets in this file as you like.
Testing the extension

GIF source
Debugging using Code
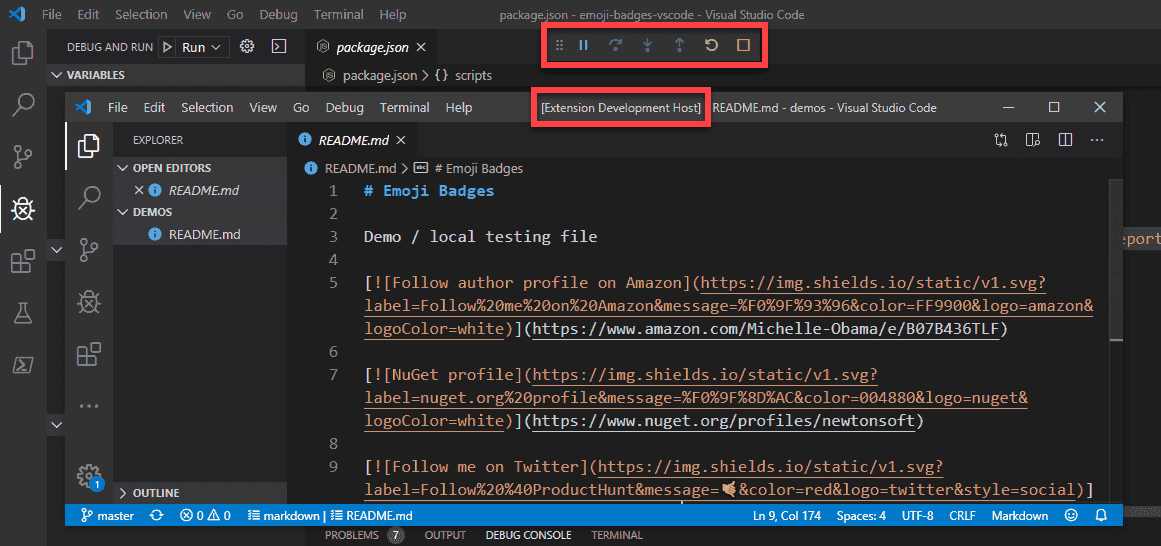
Click the Debug → Start Debugging option to run a new instance of VS Code in debug mode with your extension already installed. I can now open up a markdown file and try adding some snippets that'll create the emoji badges, as per screenshot below.
Unit tests
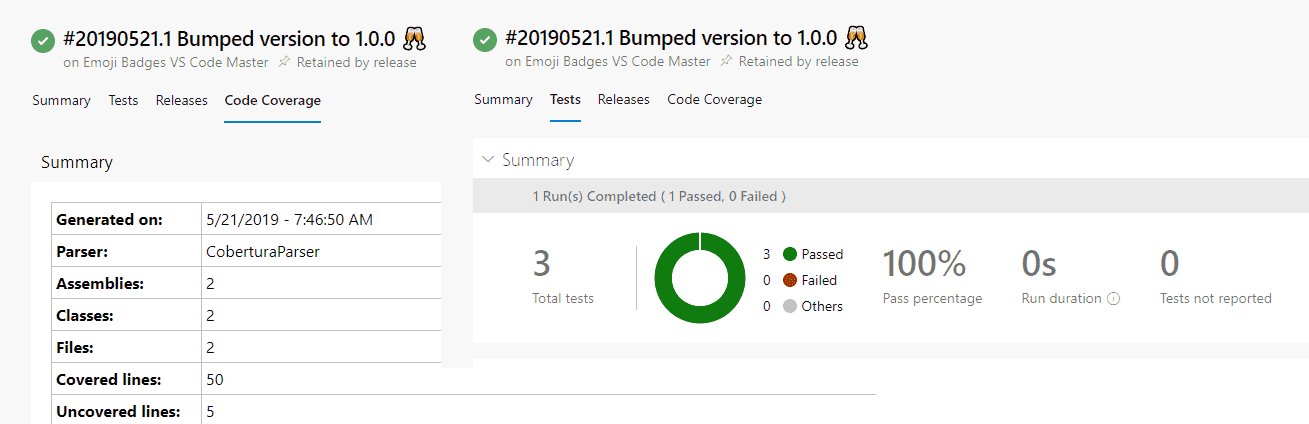
I briefly mentioned that I've written some unit tests inside the tests folder. These tests will check if my snippet file exists, if all snippets are unique, and if the snippet JSON file is named after the language identifier specified.
I've used Istanbul's command line interface nyc to generate a cobertura coverage report and Mocha JUnit reporter to generate a JUnit XML report. Both, the cobertura report and JUnit XML report get injected into my Azure DevOps pipeline (I'll cover setting up an Azure DevOps pipeline for a Visual Studio Extension in another article).
I've configured the npm test script in my package.json file to execute the full test suite as follows and confirm all is good.
“test”: “nyc --reporter=cobertura mocha tests/test.js --reporter mocha-junit-reporter --timeout 10000 --exit”
Publishing your extension

GIF source
Creating a personal access token
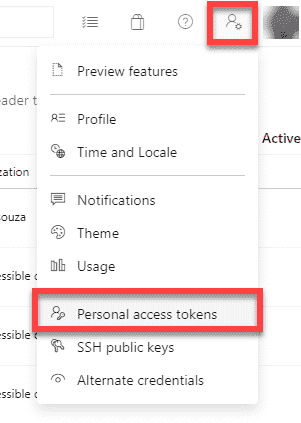
First, make sure you have an Azure DevOps organisation. If you don't have one, create one by following this article. Now, head over to your Azure DevOps organisation → click on the User settings icon → from the dropdown, select Personal access tokens.
Click on New Token → Fill up a suitable name so you know what this token is used for → from the Organisation dropdown, select All accessible organisation → and set a suitable Expiration for this token.
From the Scopes section, click on the Show all scopes link that should be just above the create & cancel button. This will update the list of scopes. Search for Marketplace and check all the boxes under Marketplace.
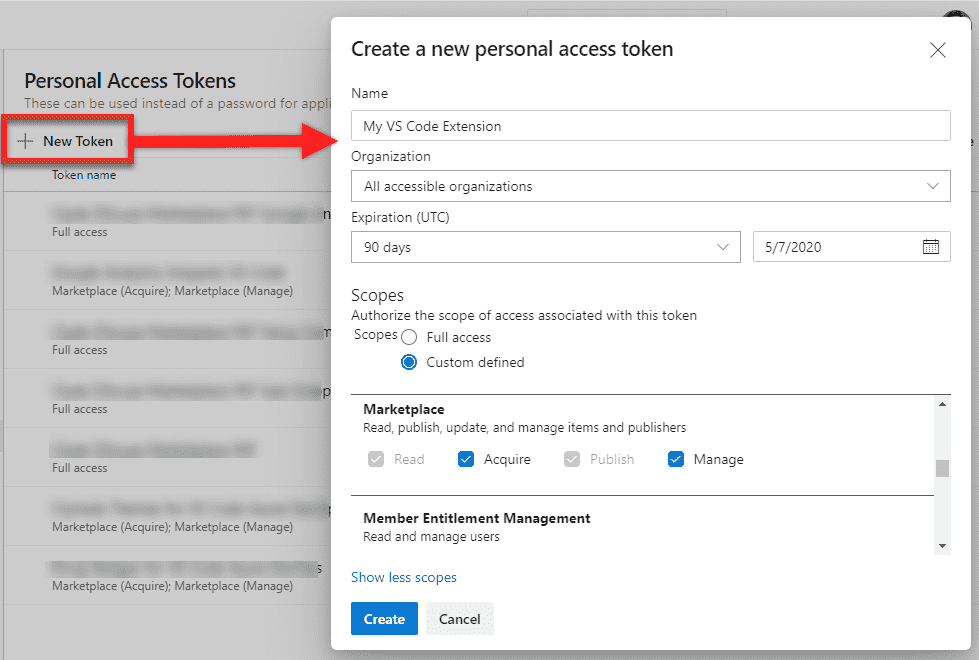
Copy the personal access token. We'll require it for the steps below.
Packaging the VS Code extension
We'll now use the vsce CLI to package our code into a VS extension, i.e., a .vsix file. Think of a VSIX file like a ZIP file that contains our extension's code and a manifest file containing metadata about your extension.
I'm using VS Code's integrated terminal but you can the Command Prompt as well.
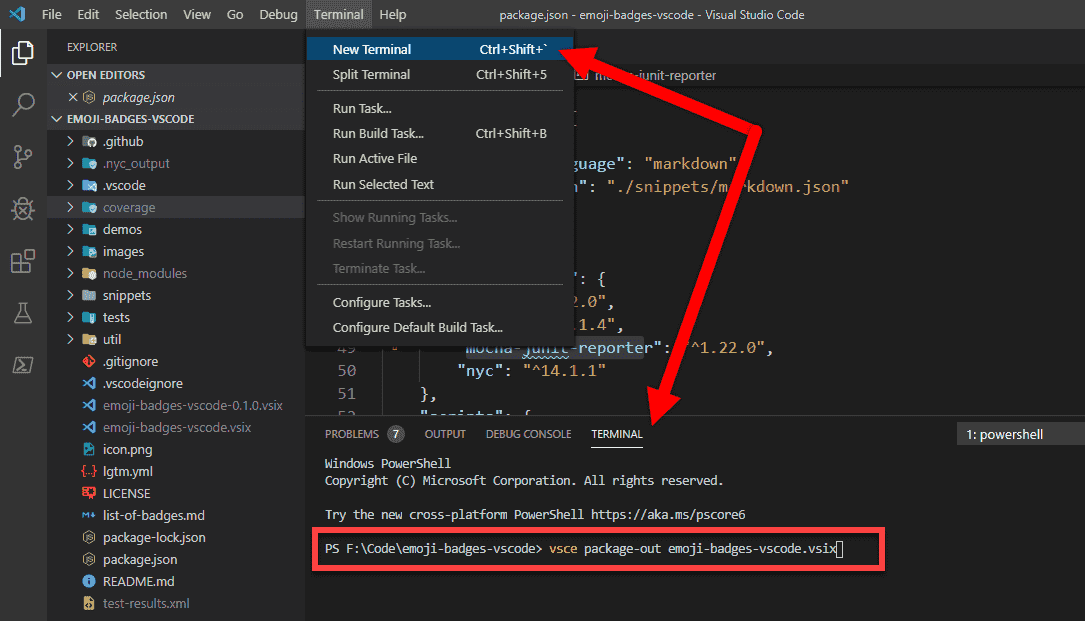
To create your VS Code extension, we'll run the following command at the source code's root directory, i.e., where the package.json file exists. Replace <Extension-Name> with the name of your extension.
vsce package --out <Extension-Name>.vsix
You'll immediately notice a .vsix file created in the directory.
Deploying the VS Code extension
We're going to continue using the vsce CLI to deploy our VS Code extension to the Visual Studio Marketplace. We'll run the command highlighted below and replace <PAT> with the personal access token generated from the step above and <Extension-Name> with the name of your extension.
vsce publish -p <PAT> --packagePath <Extension-Name>.vsix
You should see the status of the deploy command you just ran in the terminal window. Once successful, we'll head to the next step.
Confirm extension is published
Head over to the manage publishers page to see your extension listed there. Confirm that the extension is public. You can also view the extension by clicking the 3-dots → View Extension link from the context menu to confirm all the details on the extension page is correct before sharing it with your network.

Click here to view my VS Code extension — Emoji Badges — on the Visual Studio Marketplace.
Summary
Alright, time for a quick recap —
- I started off with giving some context to this article and we then looked at what the Emoji Badges VS Code extension looks like.
- We looked at a short prerequisites list which essentially needed you to install the required tools and create a publisher profile on the Visual Studio Marketplace. I also shared the link of my GitHub repository that contains the full source code for my Code extension.
- Next, we looked at what files and folders we'd require to add to our directory followed by a short explanation for each file.
- I then elaborated on the
package.jsonandmarkdown.jsonfiles. Thepackage.jsoncontains the publisher name, compatible VS Code versions, contributes section and many other fields. Themarkdown.jsonfile contains all the snippets for the language we're writing our Code extension for (in this case: markdown). - I wrote about testing the Code extension using VS Code and writing some basic unit tests.
- Towards the end, we looked at the steps required to publish this extension. We created a personal access token from Azure DevOps and saved it for later.
- We then ran the
vsce packagecommand to package the Code extension. That is, converting our source code into a.vsixfile. - And lastly, we looked at publishing this
.vsixfile to the Visual Studio Marketplace using thevsce publishcommand, and then confirming that extension's marketplace page has the correct details by visiting the manage publishers page.
That's it! Thanks for reading