- Published on ·
- Reading time 8 min read
Deploying a Site to Netlify with Azure DevOps
A three-stage process to automating a release pipeline
Share this page
Introduction
I recently deployed a static website to Netlify from the Azure DevOps release pipeline. Although my source code was in a Git repository, I couldn't connect my repository to Netlify straight away as Netlify only supports GitHub, GitLab, and BitBucket at the moment. Instead, I had to take another route which I will expand upon here. In this article, I've recreated the scenario and have highlighted the approach I took to solve the problem at hand.
Assumptions
For the sake of brevity, let's assume a few things:
- You're familiar with Azure DevOps.
- We have a build pipeline set up that runs every time code is checked into the master branch and creates a deployment package — a ZIP file with the website contents — as the output of this build pipeline.
- We've created a release pipeline with a new stage called Netlify. This stage currently has one task in it that extracts the contents of the ZIP file from the build artifact and copies the website contents into this
$(System.DefaultWorkingDirectory)/outputfolder. The output folder has only one folder in it calledsrcwhich contains the source code of the website that is ready to be deployed.
Solution
Let's break this guide down into 3 stages:
- Stage 1: Adding Netlify to the release pipeline
- Stage 2: Fetching the site ID and personal access token from Netlify
- Stage 3: Adding the finishing touch
Stick around for a cool bonus section at the end of this article!
Stage 1: Adding Netlify to the release pipeline
Let's click on the + icon to add a new task, and search for Netlify. You should see this task from the Marketplace by Aliencube. Click on the “install” button to install this extension.

In the background, the tasks in this extension run Netlify-CLI commands so if you prefer to run commands yourself then you don't need to install this extension. However, if you like a user interface, then this extension is for you. For those interested, I'll write down what commands are being used for each step below.
After you've installed this extension, the first task that you need to add is Install Netlify CLI. You don't need to update anything in this task. However, if you'd like to change the display name, feel free to do so.
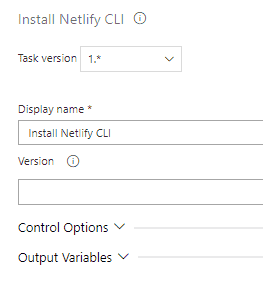
In the background, this task runs the following command. Basically, it installs the Netlify-CLI utility on the agent.
C:\windows\system32\cmd.exe /D /S /C ""C:\Program Files\nodejs\npm.cmd" install -g netlify-cli"
Finally, add the Deploy Website task from this extension. You will need a few details here so please bear with me.
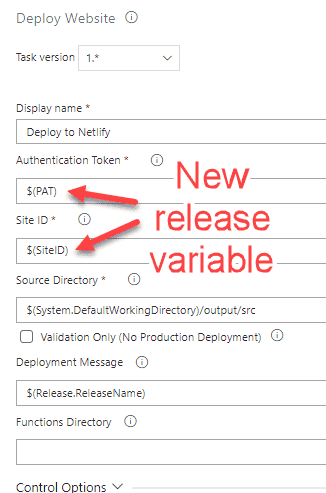
For the Authentication Token, create a new release variable. I've called this PAT (standing for “Personal Access Token”). We'll get this value from Netlify later but you can leave the value empty for now. I'd recommend that you change this variable type to secret by clicking on the padlock icon. Next, you will create another variable for the Site ID. We'll get this value from Netlify as well, so leave this value empty for now.
For the source directory, we'll enter the folder $(System.DefaultWorkingDirectory)/output/src that our Extract Files task extracts the files into. Finally (and optionally), I've used a pre-defined release variable for the deployment message. When I look at the deployment history in Netlify, I want to see the release name in there so that it's easy to map out the two if needed. This task executes the following command in the background. Learn about the deploy command here.
[command]C:\windows\system32\cmd.exe /D /S /C "C:\npm\prefix\netlify.cmd deploy "--auth=***" "--site=3b79518b-49ec-4ab1-a13a-4b55a0cb29d6" "--dir=D:\a\r1\a\output\src" --prod "--message=Release-7" "--functions=D:\a\r1\a" --json"
Stage 2: Fetching the site ID and personal access token from Netlify
In this section, we'll focus on Netlify and get some important information from the Netlify portal in order to enable us to deploy our website to Netlify.
Creating an empty site in Netlify
If you don't have an account with Netlify already then head over to Netlify and create a free account. Your dashboard page might look something like the screenshot below if you've never used Netlify before.
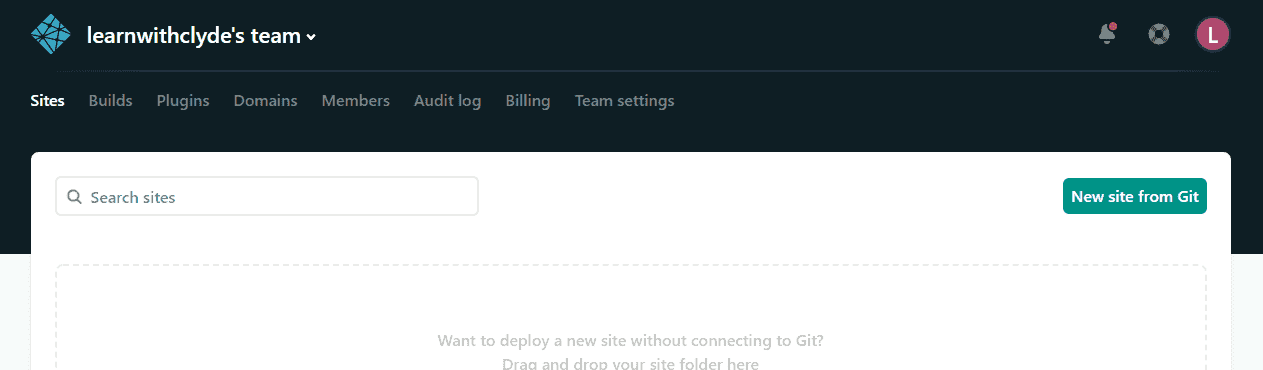
If you click on the “New site from Git” button, you'll notice that we have only three options available — GitHub, GitLab, and BitBucket — and that there is no other option to create an empty site. So we're going to have to use the command line.
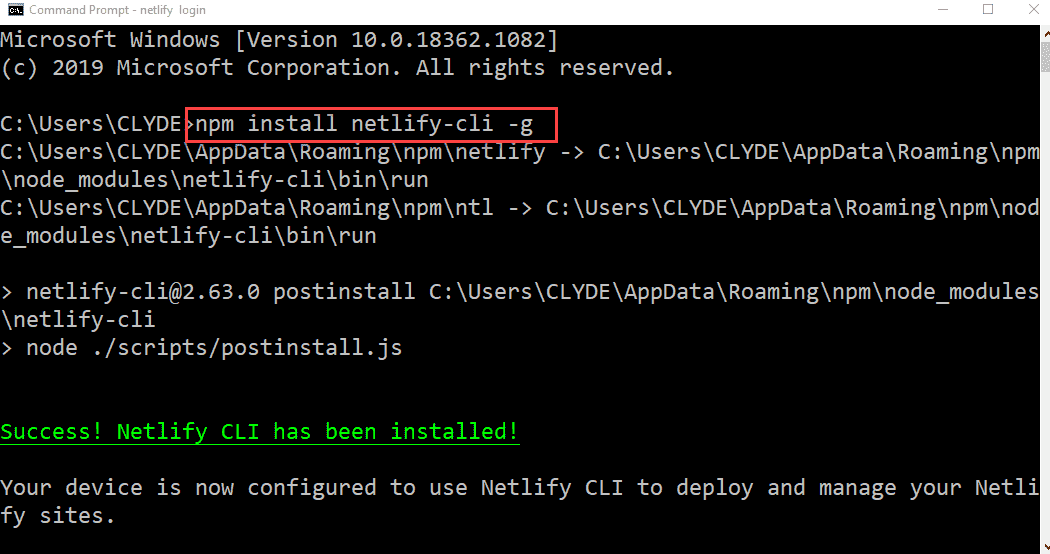
Installing Netlify-CLI
Netlify-CLI provides the user with different commands to be able to interact with their Netlify account. To install Netlify-CLI on your PC, open up a command prompt and type in npm install netlify-cli -g.
Next, we'll log in to our Netlify account via the CLI. Type in the command netlify login.
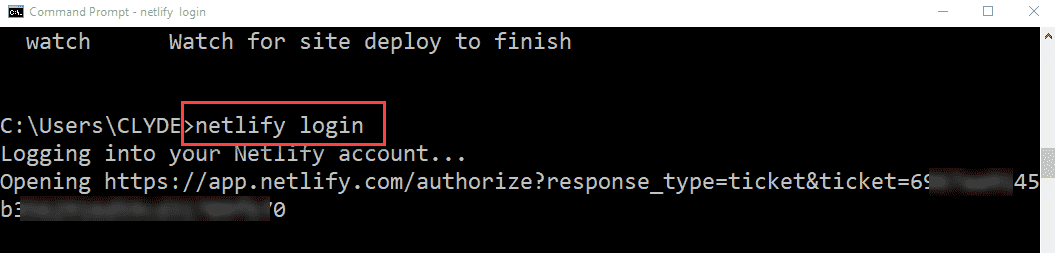
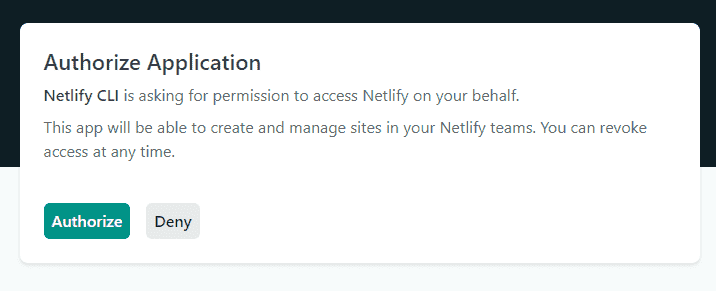
This will open up a browser window with an Authorize Application prompt. Click on Authorize to allow the CLI to access your account. You can always revoke this access in the future if needed by visiting the Authorized application page in Netlify settings.
Now that you're logged in, you'll be able to create an empty site in Netlify. To create a site, type the following command netlify sites:create --name <NAME OF THE WEBSITE>. Replace <NAME OF THE WEBSITE> with the actual name you'd like to give this site. It will ask you which team you'd like this site to exist in. In this example, I belong to only one team so I selected that and hit enter. Learn more about this command here.
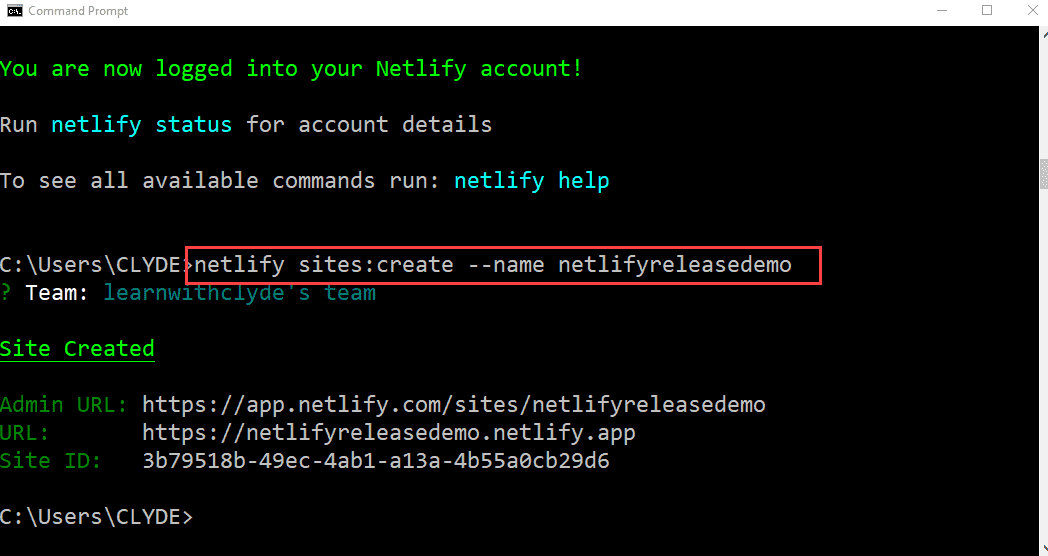
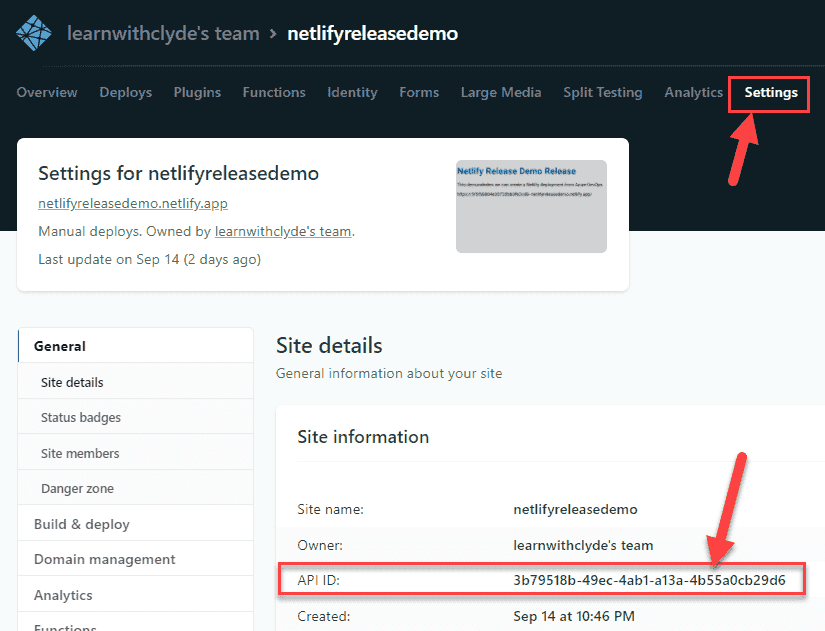
Please make a note of the site ID from the response of this command. Don't worry if you can't copy the site ID from the command prompt as you can also retrieve the site ID by heading over to the Settings tab of your site in Netlify. Under Site information, you should see a field called API ID with a numeric value — that's your site ID.
Fetching the personal access token
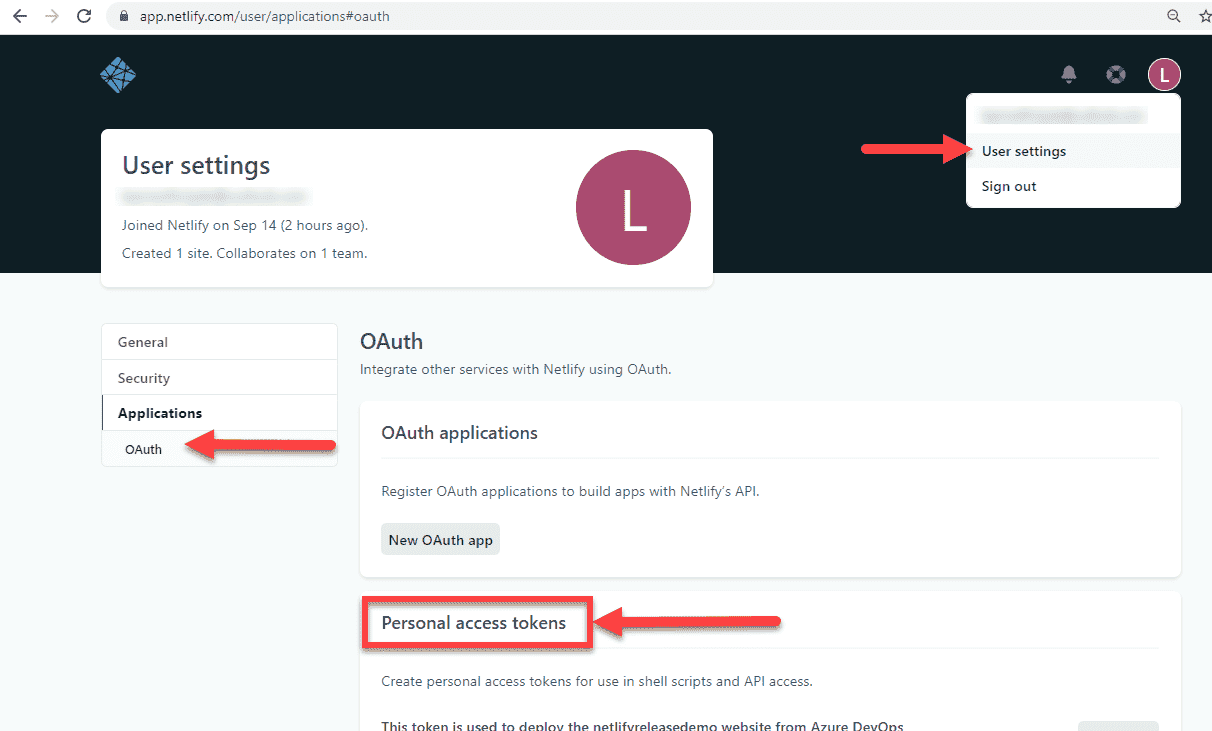
Alright, next up we require a personal access token. In Netlify, click on your user avatar on the top right of the screen and select User settings. Then, from the Applications tab, select OAuth and then from the Personal access tokens section click on “New access token”.
Enter a suitable description for this token so that you know where this token is going to be used and then click on Generate token. Copy the generated token and save it along with your site ID you copied previously.
Stage 3: The finishing touch
Onto the final step. Now we need to update our release variable in Azure DevOps with the values we just obtained and then execute a release to see everything in action.
Adding the site ID and personal access token to the release variable
Now let's head back to the release variables in Azure DevOps. Here, we'll populate the contents of the SiteID variable with the site ID value that we captured earlier. We'll do the same for the PAT variable. Your release variables should look something like this:

Give it a go!
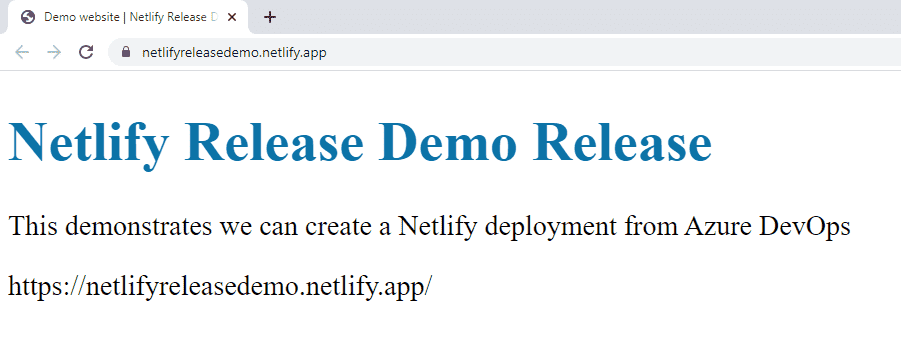
Now, create a new release and watch the magic happen. This is what my demo website looks like once deployed:
If you'd like to check out the resources I used in this demo, here are the links:
Bonus section
If you're using this as a test environment, you certainly wouldn't want search engines to crawl the website. To keep your website out of search results, you can dynamically inject a <meta> tag into your website using Netlify's snippet injection feature.
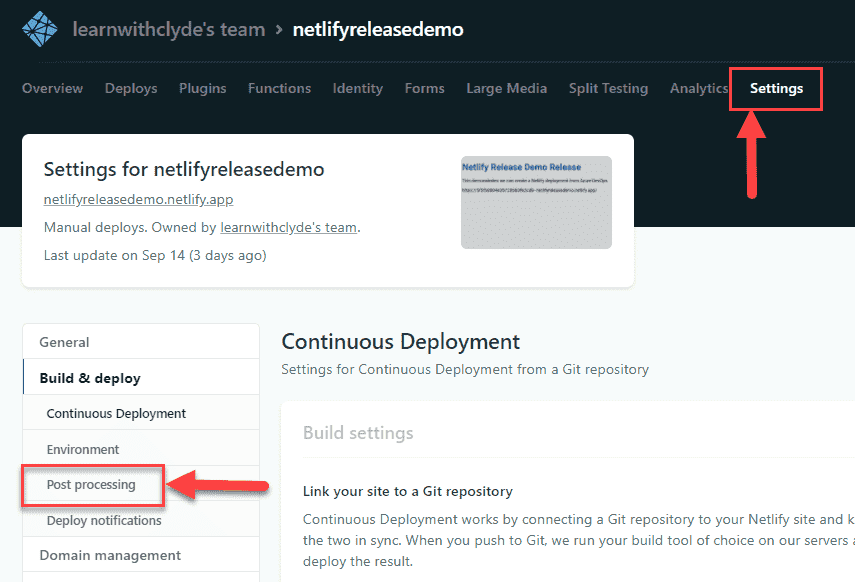
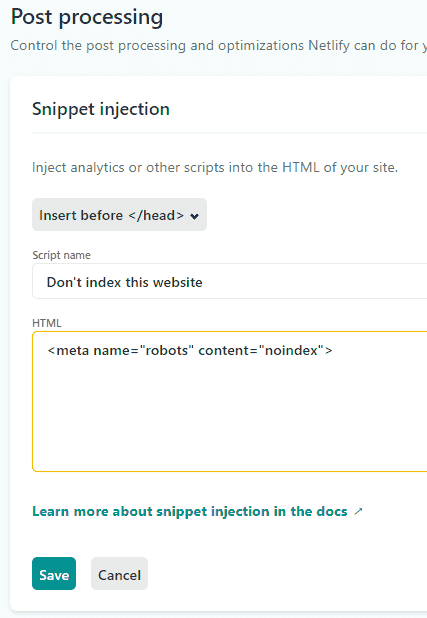
To inject code into your website, head over to Netlify and click on Settings. Then, from the Build & deploy menu item, select Post-processing.
From the Snippet injection section, click on the Add snippet button. From the dropdown, select Insert before </head>. Give the script a suitable name and then in the HTML textbox, enter the code <meta name="robots" content="noindex">. Click on save to preserve these changes.
Reload your website, view the source code and you should see this <meta> tag automatically injected into the website.
Conclusion
As with many aspects of development and coding, deploying a site isn't always as straightforward as it seems. Often times developers must deal with the eccentricities of various platforms, languages, software, etc., and find workarounds to achieve our desired results. While time-consuming, these problem-solving processes are ultimately a big part of what helps us build our skillsets and become better at what we do. I hope this article has been informative, please leave any questions or feedback in the comments.
That's it! Thanks for reading.