- Published on ·
- Reading time 13 min read
Build a Mobile App in under 2 Hours
Rapid application development using OutSystems
Share this page

Introduction
Let's say product X costs $3.99 for 295g and product Y costs $8.99 for 591g, do you know which one is actually cheaper? Now, if I tell you that 100g of product X costs $1.35 and 100g of product Y costs $1.52, wouldn't that make it much easier to decide which one is cheaper?
To calculate the price per 100g, you would require this formula (100 / Quantity) * Price. The problem is, every time you are in a supermarket, you can't be recalling the formula and calculating the price of products in your head (unless you're super fast in Math). Hence, I wanted to build an app that makes this easier.
However, this time I didn't want to take the regular approach to writing some code and developing a web app that's responsive. I wanted to look at something new. Something that I haven't explored already. I was researching what approach I could take to develop a mobile app (and possibly something that's cross platform) and that's when I came across OutSystems.
In this article we'll look at how I built an app in under 2 hours using OutSystems.

GIF showing OutSystems IDE taken from www.outsystems.com
Low-code platform for development
Wait, what now? Low-code?
OutSystems claims to be “the most complete low-code platform for building enterprise solutions that drive real business value.” But first, let's understand what is a low-code platform.
- Visual development (drag-and-drop) approach to application development — One of the key features of a low-code platform is the fact that it enables you to drag and drop components onto your screen, configure a few things, and just like that you have fully functional components in your app without writing any code. To provide you with this visual development, most platforms either require you to download an IDE or use a cloud-based software.
- Easy to learn — Most low-code platforms aim to make their graphical user interface intuitive and easy for developers to learn. Low-code platforms also tend to invest in a lot of training videos explaining how to use the software they've built. And if you're one of they're paid subscribers, they might also offer technical support.
- Accelerates development time — Because developers aren't hand-writing a lot of code and because the IDE they're now using is easy to learn and use, a lot of the traditional delivery timeline can be reduced. If the low-code platform also produces cross-platform apps, then imagine how much time you're saving by not having to develop apps for all these different platforms or learn a new cross-platform coding language.
- Wide range of contributors — Since there's not much code involved, a low-code platform encourages even non-developers to contribute to the application development. This removes the constraint of having to rely on highly skilled developers to do their job alone.
- Less training and deployment time— OK, I'm sure you've figured this point out by now — I trust you. I'll cover the deployment part for you: Low-code platforms focus on making the deployment process hassle free and as intuitive as possible.
Building the app
Create a free account with OutSystems
First, let's head to www.outsystems.com and sign-up for a free account. You'll be asked to choose a URL for your cloud environment and set a password.
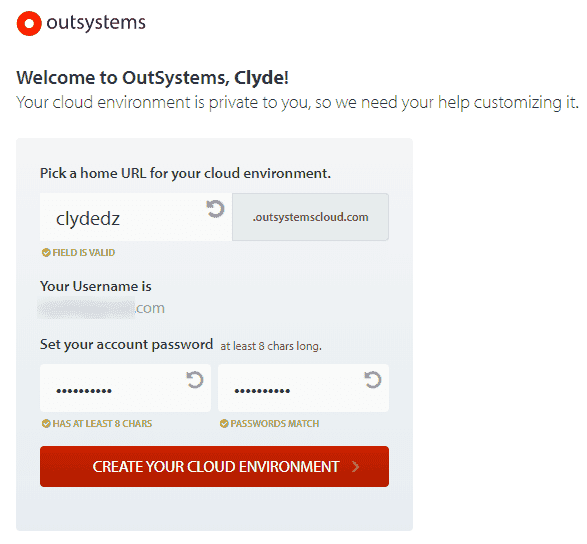
Once you proceed ahead, you will see a link to download the IDE which you definitely want to do. In case you missed that step, you can download it from here. Visit the OutSystems home page to know when your cloud environment is ready to use.
Creating an app
Open up the IDE, sign-in to your cloud environment and you should immediately see the New Application button. Clicking on that opens a popup where you choose the type of app you're going to build. We'll select Phone App and hit next. In the next screen, we'll give the app a suitable name, optionally a description, the color scheme and the app's icon — these details can be edited anytime in the future, so don't stress about it too much!
We'll create our fist Phone App module. Give it a suitable and hit the Create Module button. Double-click on that to open the module and start building the app.
Adding a Screen
Now that we've created a module, let's start by adding a Screen. Follow these steps:
- Click on MainFlow from the right panel. The MainFlow section hosts all the screens in your mobile app.
- Drag a Screen from the left panel into the center.
- Select an Empty template and give it a suitable name. I've named it Calculator for this demo.
- Click Create Screen.

Adding UI elements
We want to get the user to input the quantity of the product he/she is buying and the price the product is listed at. So we'll need a couple of text-boxes and a label to display the calculation result. Let's do the following:
- Double-click the Calculator screen from the right panel.
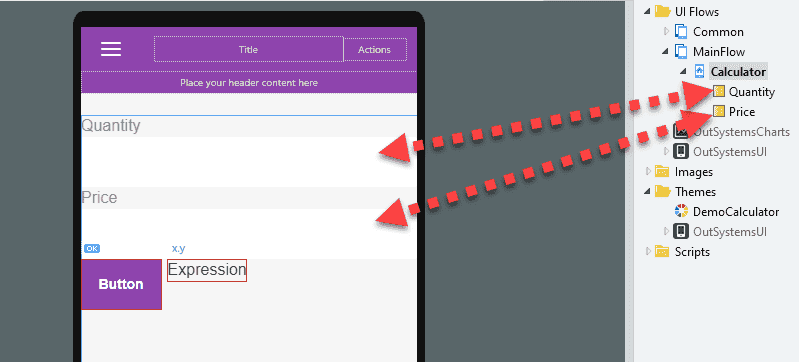
- Add a Label from the left panel into the mobile screen that's visible in the center. Update the label's text to “Quantity”.
- Add an Input field from the left panel into the mobile screen and associate a new Local Variable with it. Let's call this variable Quantity.
- Similarly, let's add another Label for “Price” and another Input field associated with a new Variable called Price.
- Finally, a Button to calculate the price per 100 g of the product, and an Expression field to display the output.
Your screen should look something like the picture below (barring the arrows, of course). Both the input boxes are associated with a variable. This means, the values typed into these boxes can be retrieved by calling these variables.
But wait, what are these errors?
Resolving errors
You would've noticed a red border around the Button and Expression field. This indicates that these fields are not configured correctly and causing an error. Let's resolve them, shall we?
The Expression field needs to be associated with a value. Let's create a new Local Variable called Total, set the Data Type to Decimal. We'll then click the Expression field and set the Value to the Total variable.
Now for the button — let's first click the text and rename it to “Calculate”. Now click the button itself, and from the bottom right properties, scroll down to the On Click event. You'll notice a red border indicating an error.
Let's click the dropdown and add a New Client Action. This will be our calculate method.
Update Client Action
- Let's click on the newly created Client Action. This should open a simple start-end workflow in the center screen.
- Drag the Assign operation from the left panel into the workflow. Let's name this operation to “Calculate”.
- Now, from the bottom right properties, under Assignments section, let's set the Variable to Total.
- And for the Value, let's open up the Expression Editor. In there, paste the formula
(100 / Quantity) * Price. Here, Quantity and Price reference the local variables we created earlier. The outcome of the formula will automatically be assigned to the Total variable since we assigned that in step #3.
Publishing the app
OutSystems offers a 1-Click Publish feature to make the process of deploying changes super smooth. Once you're ready, click the circular “1” button to initiate a publish. In the background, OutSystems will upload the new version to its backend, compile the code, and finally, deploy the new version of the app to the live environment.
You can then click on the arrow icon (on the same button) to open it in the browser and see it live in action.
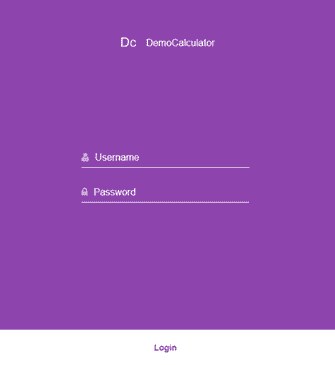
Wait, what's this login?
After being redirected to the browser, you'll see a login screen. You can enter your OutSystems username and password to login. But what if you wanted anonymous access your app?
Don't worry, there's a solution…
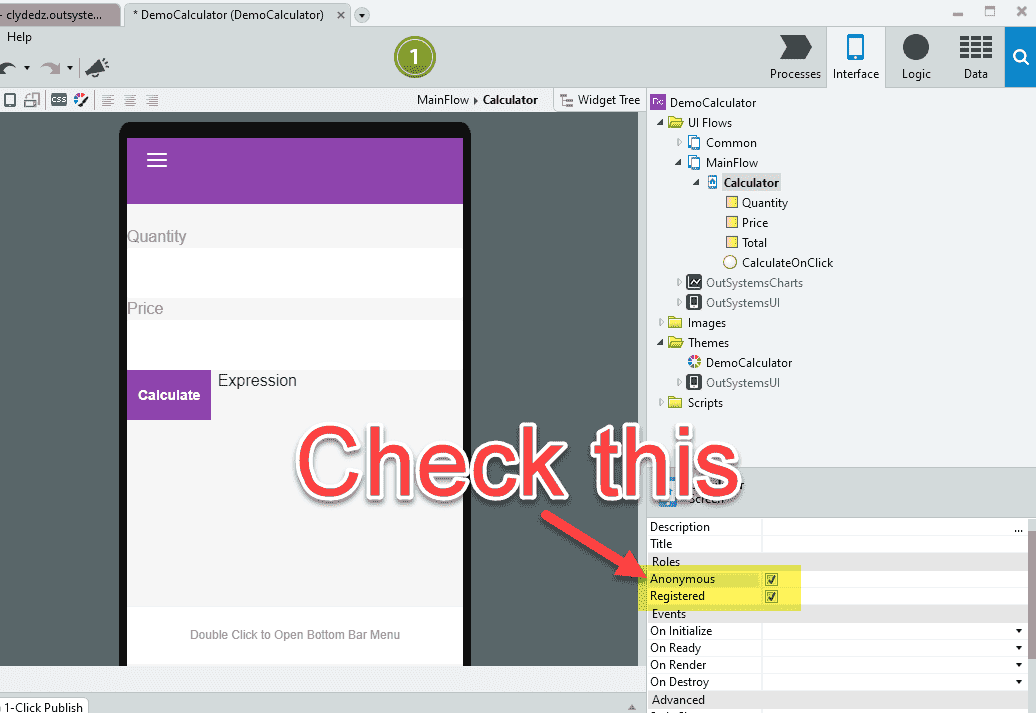
Let's head back to the OutSystems Service Studio. Click the Calculator screen under MainFlow in the right panel. From the properties box, check the Anonymous box. This will remove the login screen from your app. Republish the app using the 1-Click Publish method for the changes to take effect.
Now when you view the app in the browser, you'll see a loading screen and then dive straight into your app. Enter the quantity, price and hit the Calculate button — the price per 100 g is shown besides the button.
Exporting into a native app
You can export this app into a native Android or iOS app from the OutSystems Service Studio. Here's how you would do that:
- Click the Native Platforms tab.
- Click Generate Android app.
- From the configuration options, select Debug build type (note: for production apps, you would select Release).
- You can leave the App identifier as is.
- Click the Generate App button. After a while, you'll get a QR code and a link. If you open the link in a browser, you'll get a download page, and clicking the Get for Android button will start a download of the
.apkfile.
I've downloaded the .apk file and have installed it on my mobile. Here's a quick video of how it works.
Download my demo
Since I'm on the free version of OutSystems, my development environment goes to sleep every few days and therefore, I cannot share the OutSystems download page as that wouldn't work. However, I have uploaded the apps to GitHub and have linked them below. Note, both Android apps have been exported using a debug build.
- Demo Calculator app demonstrated in this article
- Fred — The original app developed using OutSystems
Bonus section
While the example above is pretty simple, how does the app handle floating point precision results? In this case, not very well. You may want to have only two decimal points in the final cost.
Good news! There's a solution to that. Let's take a look.
- Let's go back to OutSystems Service Studio and click on the Calculator screen under MainFlow from the right panel.
- We'll then click on the Expression field added to our app that displays the final result.
- From the properties, we'll click on the dropdown and select Expression Editor.
- This will open a popup. Replace Total with
FormatCurrency(Total, “$”, 2, “.”, “,”) + “ /100g”.
FormatCurrency is a built-in function offered by OutSystems. It builds a text output from the parameters provided. In this example, it will prefix the output text that it gets from the Total variable with a “$” symbol. It displays a decimal point using a period (.) and thousands, if any, will be separated by a comma (,). The third parameter (in this case: 2) specifies the number of decimal digit after the decimal point. The output of FormatCurrency is concatenated with a “ /100g” to give the final result. More such functions can be found on their technical documentation page.
After republishing the app, we now have our desired result.
Summary
Alright, time for a quick recap —
- We started off with a problem statement and why I decided to build an app. We then looked into some theory of what a low-code platform actually is.
- The best way to learn something is to just do it. So, we created an account with OutSystems, created our cloud environment, installed the IDE and set ourselves up for the learning journey ahead.
- We then created a new application and gave it a suitable name and color scheme. In this application, we created a Phone App module and added our first screen called Calculator.
- In that Screen, we added some UI elements like a couple of Input fields, couple of Labels, a Button to trigger the calculation and an Expression field to display the results. We linked the Input fields and Expression field to local variables.
- We also created a Client Action that handles the On Click event, i.e., we defined something to do when a user clicks the button. The formula we added in the Expression Editor calculates the price of the product per 100 g.
- Now that we've built our app, we want to publish it. To do so, we used the 1-Click Publish button. However, on publishing the app, we were greeted with a login screen instead of heading straight into our app.
- Since we want the application to be used anonymously, we looked at how to enable this setting in the OutSystems Service Studio and then republished the app for this change to take effect.
- The application is published and accessible from the browser. But what if we wanted it to be used on a mobile device as a native app? Well, there's a solution to that too. We looked at exporting our application as a native Android app, and how you would go about downloading the app. You can also export it as an iOS app, but we didn't look at that in this article — go give that a try and let me know your experience in the comments below.
- In the downloads section, I posted a link to this demo app and a link to the full version of the app that I had originally made.
- Bonus section: here we looked at how you would format the output value to add a prefix of “$” and handle floating point precision.
That's it! Thanks for reading.