- Published on ·
- Reading time 16 min read
Publishing a Sketchbook on Amazon Using Kindle Direct Publishing (KDP)
Demystifying the process of creating low-content and no-content books
Share this page
Introduction
I've recently completed publishing over 50 low-content and no-content paperback books on Amazon and thought it would be the perfect time to pause and reflect on the journey so far. I also wanted to document the process of creating and publishing a book. I'm hoping you'll find this useful!
No-content and low-content books
Like no content at all? Yes, pretty much.
Unlike a regular storybook, no-content books have no written content at all. Examples of books in this category would be sketchbooks, colouring books, and ruled and bullet journals.
As you might have guessed, low-content books contain very little written content in it. Examples of books in this category would be a daily schedule planner, writing prompt journals, sketchbooks, colouring books, ruled and bullet journals, and crossword and sudoku puzzle books.
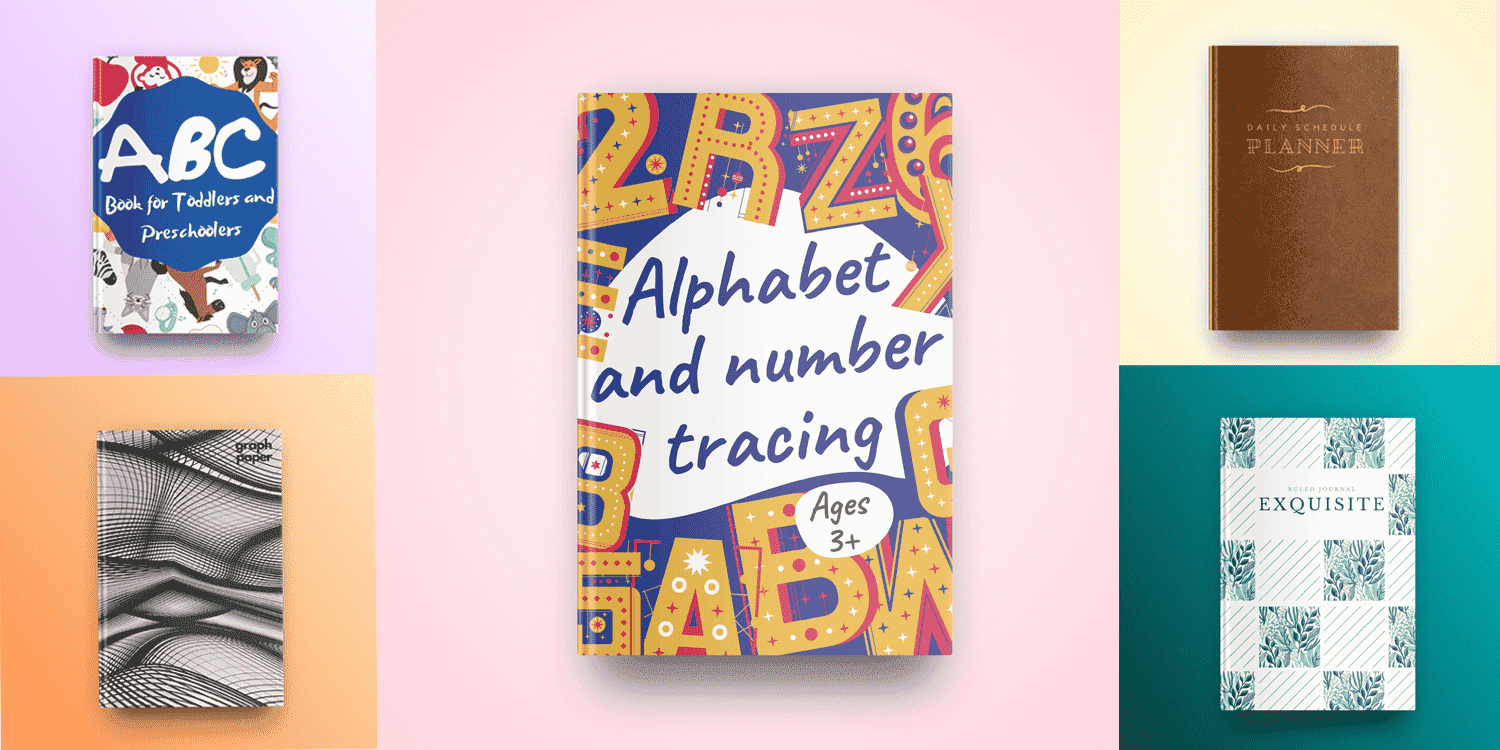
Examples of books I've published on Amazon: ABC book for toddlers and preschoolers, Graph paper book, Daily schedule planner, Alphabet and number tracing activity book, Your kindness is contagious — bullet journal, Exquisite — ruled journal, Colour me! colouring book for kids, The ultimate sudoku book for kids, Deep in space sketchbook.
Getting started
With Kindle Direct Publishing (KDP) you can publish eBooks and paperbacks for free. You earn a percentage on the sale of each book as royalty. KDP prints your book on-demand so you have no upfront costs and don't have to manage inventory.
To get started, you need to sign in to KDP using your Amazon account. Once you create an account with KDP, you'll need to enter your account information like your author name and publisher information, payment details to receive payments and provide your tax information. You can read more about the initial account creation steps here.
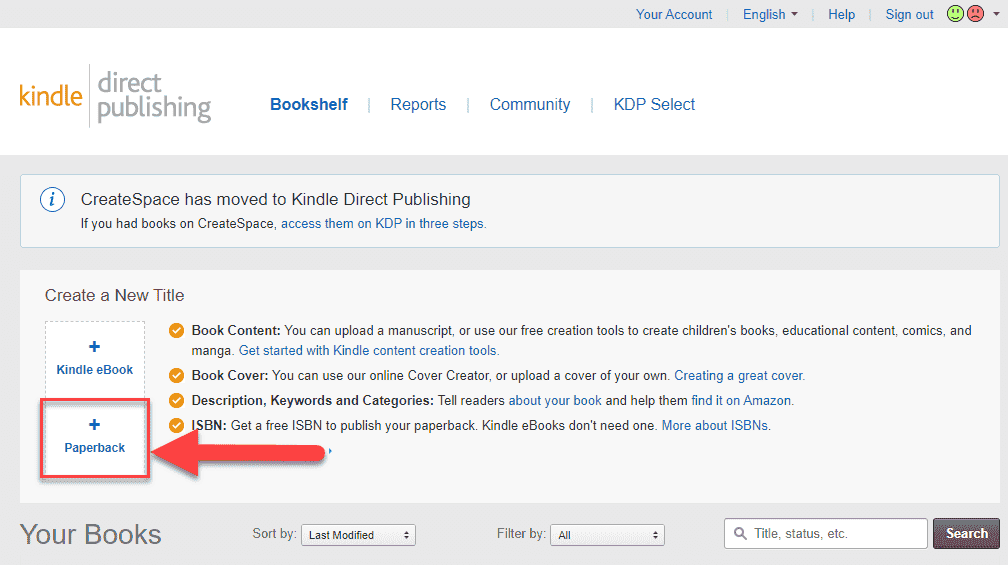
Once you complete the initial account setup, you should see your bookshelf. In this article, we'll look at creating a paperback. So, let's click on the paperback option.
Overview of the process
Broadly classified into three categories, we start by entering the general details of the book like its title, description, author information, etc. Then we move onto the actual contents of the book where we upload the manuscript — which, in this example, would pretty much be blank pages — and the book cover. Finally, we decide the pricing and where the book would be distributed.

3-step process to publishing a paperback book on Amazon using KDP.
Okay, that doesn't sound terrifying at all, right? It really isn't. Let's continue.
#1 Paperback details
Language
The language in which the book was written. KDP supports a lot of languages but does have a few exceptions. For instance, Japanese is only supported in an eBook format while Hebrew is a paperback only option. While uploading your manuscript (which we'll look at later), KDP only supports a PDF file if the language your book is written in is Hebrew or Yiddish.
A no-content/low-content book can have some text and if it's not in English, then I'd definitely advise reviewing the list before proceeding ahead.
Book title
The book title you're entering here must appear either on the front cover or on the spine of the book.
Anyway, for this book I'll keep the title simple and fun — “An Egg and Cheese Sketchbook.” Good, no?
Subtitle, edition and series
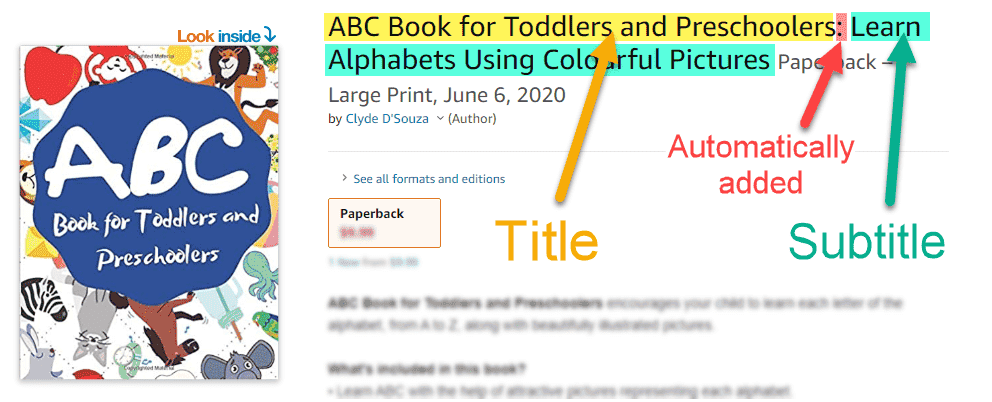
The subtitle, edition and series are totally optional, so feel free to skip this section if you don't intend to write one. If you do enter the subtitle, it's appended to the title of the book in the format — Book title: Book subtitle.
The edition and series are really if you plan on writing a trilogy, for example. You could then bundle all books in your series into a box set (full requirements can be found here).
For this sketchbook, I've written this subtitle — “Notebook for Drawing, Sketching, Doodling, Writing or Painting, 100 Pages, 8.5x11in.”
Author
This would be the name of the primary author or contributor to the book.
Contributors
Optionally, you can also include additional authors and/or contributors in this section.
Oh, did I mention that once your paperback is published, you cannot edit the book title, subtitle, author, contributors, edition and many other fields? No? Sorry! Here's the full list, by the way, before I forget.
Description
While the editor provided by KDP isn't a rich text editor, you can actually include some HTML tags in your description to format how the description looks like. I usually prefer using an online tool (or this one) to write and format the book description before pasting it in the editor provided.
Now, what do you actually write in the book description? I would highly recommend researching similar books on Amazon to see what they've put in the description to get a general idea of what you need to cover. Then write something up on those lines, include what's interesting in your book, why someone must buy this book, and end with a call to action.
Publishing rights
If you hold the copyrights to publish the book, then select the “I own the copyright and I hold necessary publishing rights” option. For this sketchbook, that's what I've selected. If your work is a public domain work, then you would have to select the other option which might also limit the regions you can publish this book in.
Keywords
Keywords are one of the factors that help people find your book on Amazon. So, it's important to add relevant keywords that your target audience might use to search for your book. I'm no expert at keywords, so I'll advise reading this KDP article as a good starting point.
Categories
Much like a physical bookstore, you would need to decide a maximum of 2 categories that your book best fits in.
If the font in your book is over 16 points, then you can check the large print box. We'll leave that unchecked for now.
Adult content
If the book contains any material that's not suitable for children under 18 years old then you would have to check the Yes box. As you would imagine, we're going to select No.
#2 Paperback content
Print ISBN
International Standard Book Number (ISBN) is used to identify any book that's publicly available. Each part of the 13-digit number is used to represent something unique. More information can be found here.
You can use a free KDP ISBN to publish your book. This free ISBN can only be used on KDP for distribution to Amazon and its distribution partners. It cannot be used with another publisher or publishing service. Read the full terms here. Click on Assign me a free KDP ISBN to get your ISBN.

To generate and download a custom barcode, head over to this website. Enter your ISBN number and click refresh to update the barcode. Click on settings, change the resolution to 300dpi (this increases the quality of the downloaded file) and download file type as PNG (by default it's GIF). Click on the download button and save it for later.
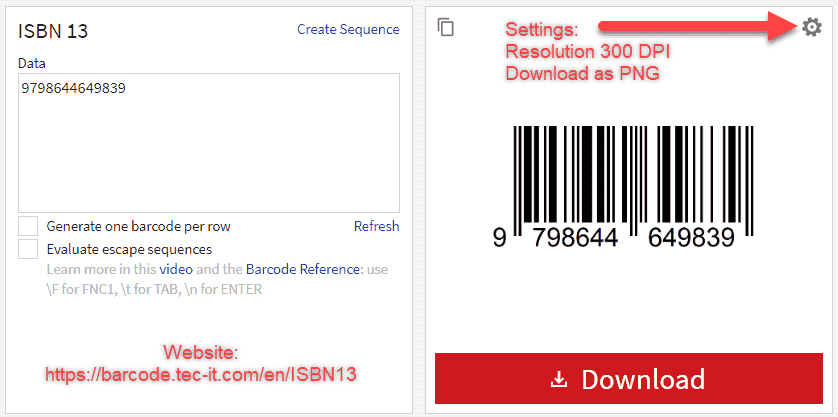
Tip: You can also let Amazon generate a barcode for you and automatically place it in the right place on your book cover. Feel free to try out both approaches and settle on the one that works for you the best. I prefer generating one using the above tool so I can upload the barcode to Canva and design the complete cover using Canva.
Publication date
The date entered here is when the book will go live. This is useful if you want to create books in advance but only go live after your big book launch. I've left this blank.
Print options
Your choices in this section will affect the final print price of your book.
Interior & paper type — Black & white interiors with cream or white paper costs the same. Colour interior costs more.
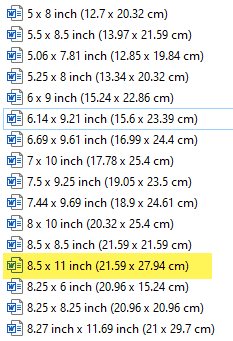
Trim size — This is the size of your book. You would make this selection based on what type of book you are creating. Since we are creating a sketchbook, I've selected 8.5x11in.
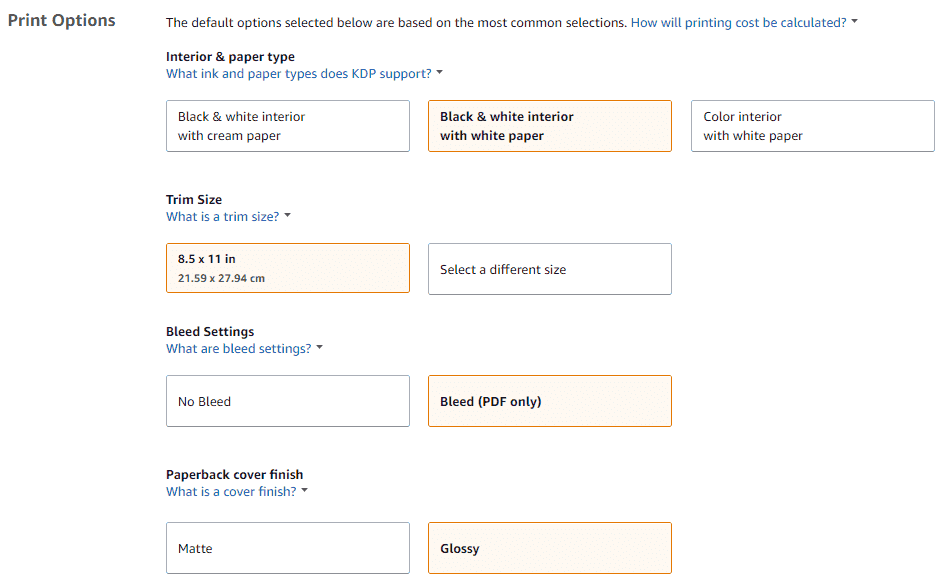
Bleed settings — If you select No Bleed as the Bleed setting then all the contents should be within the safety margins (dotted lines). If you choose Bleed then all the contents must bleed outside the safety margins and extend till the end of the page on all sides without any white space.
Paperback cover finish — Glossy finish is shiny while the Matte finish has a minimal sheen and a subtle, polished look. This setting doesn't affect the final price.
Manuscript
We'll start by downloading a KDP template from this page. Unzipping the file, you should see many Word files. These files are preset with the page size, and margins for your manuscript.
For the usual storybooks, that preset should be just fine. For low content books, however, I found that I need to adjust the margins a bit.
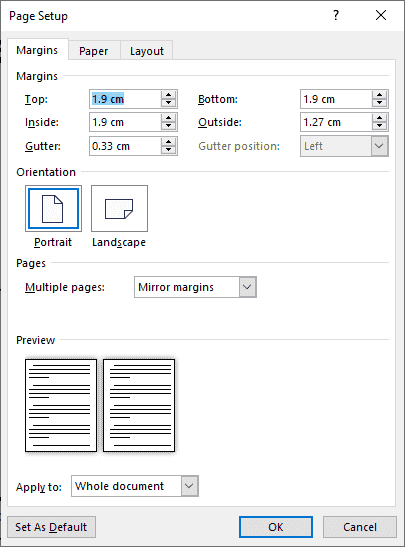
The first page of your manuscript, the copyright page, is optional. If you do add it, at the very least it would contain the book title and the copyright notice.
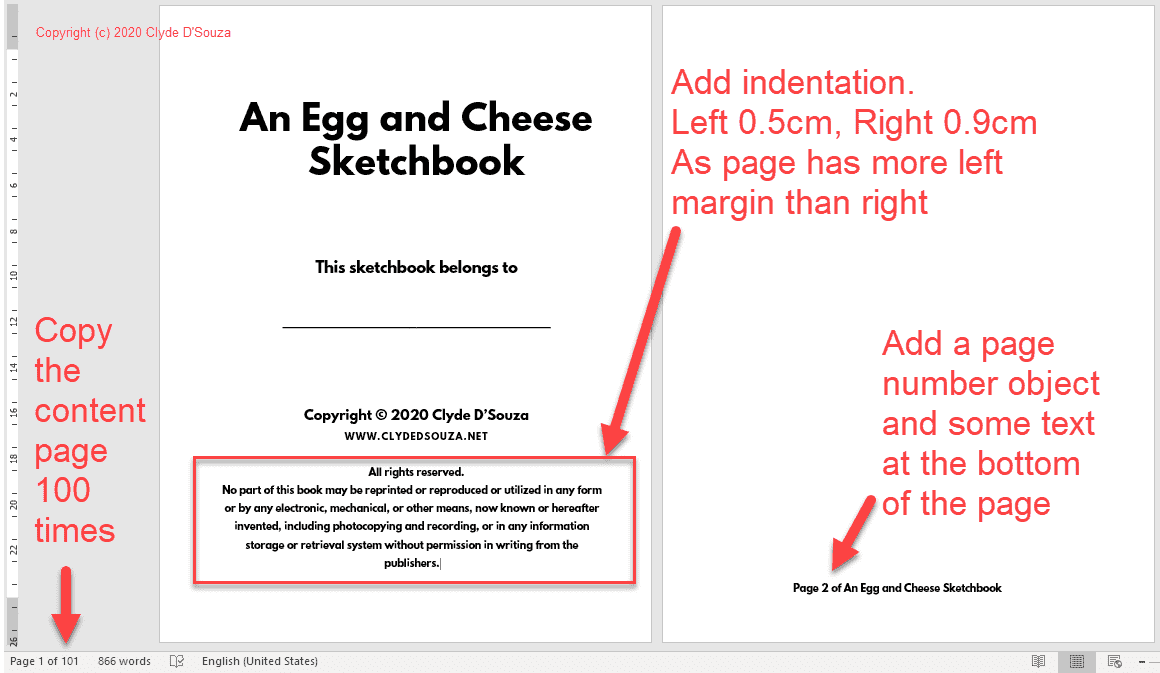
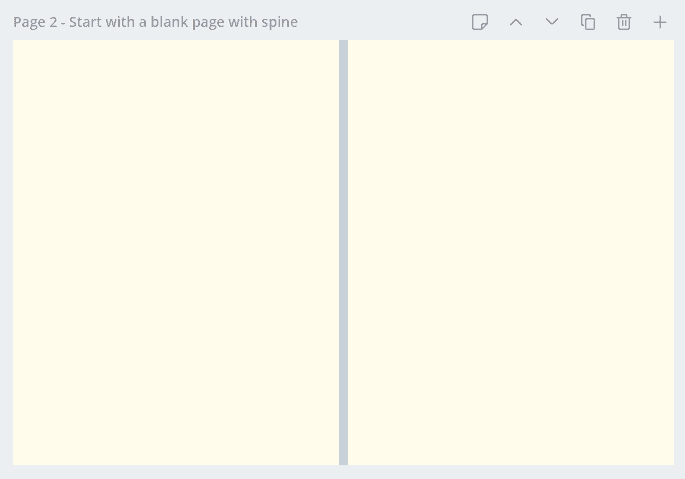
Since this is a sketchbook, we'll need to keep the page contents empty. Now, KDP doesn't allow completely blank pages in your manuscript and will show you an error message if you try to upload one. To work around that, for sketchbooks, it is recommended to either add minimal elements like a border or some text so that KDP doesn't detect the page as completely blank. For this sketchbook, I've added a text to the footer of the page — I've added the page number to the footer and have kept the text size really small.
If you're designing other types of books like a planner, ruled or dot journal, you shouldn't have an issue. Feel free to check out some free templates here.
Book cover
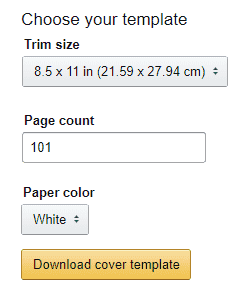
Let's start by downloading a template file for the book cover. The template file contains guidelines outlining where your content should be placed and where the unsafe margins are that might get trimmed off during the printing process. While it's obvious that the trim size, i.e., the size of your book, will produce different template files, it's worth noting that the page count and paper colour also makes a significant difference. Both, the page count and the paper colour affect the width of the spine. Head over to this KDP page to download the file.
In the ZIP file that you download, you'll have a PDF and a PNG file. Open the PDF file in Adobe Acrobat Reader and bring up the document properties (Menu → File → Properties). Make a note of the page size, as highlighted in the picture below.
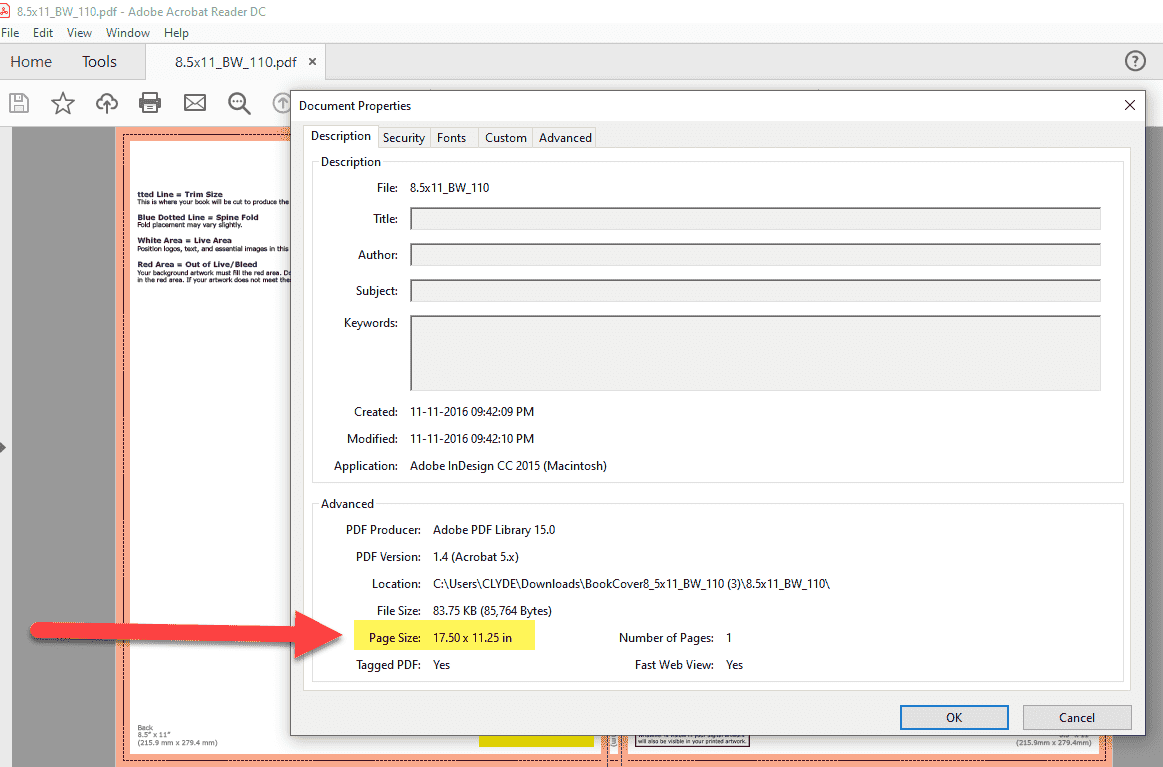
I like putting together the cover using Canva. But feel free to try out any other software/tools if you'd like. Once you've signed in to Canva, click on create a new design and supply the custom dimensions. Paste in the height and width that you made a note of earlier into the custom dimensions textbox and don't forget to change the unit of measure to inches. For this example, it was 17.50in width x 11.25in height.
Now, you have a blank canvas in front of you. Let's start by uploading the cover template to Canva. I do this so I can make full use of the guidelines provided in the template and arrange the elements in my book cover accordingly. Ideally, you want to keep all the main elements inside the margin.
Tip: Save the cover template as a JPG image from the original PNG format. This reduces the file size considerably and makes it easier to upload it to Canva.
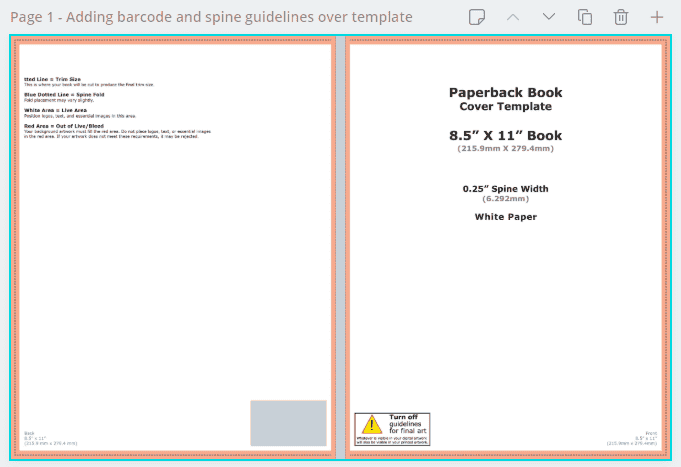
Step 1: Adding barcode and spine guidelines over the template
I've also added a grey rectangle Canva element on top of the spine and barcode area. I then create a new page, copy those grey elements onto the blank page, and just like that, I have some important areas highlighted. I can do the same process to check if my content is going into the margins.
Step 2: In a new page, copy the spine guideline element across.
Now, go crazy with your imagination and design your book cover. This is what I've designed for my sketchbook. Notice, I've coloured the spine red to match with the rest of the design.
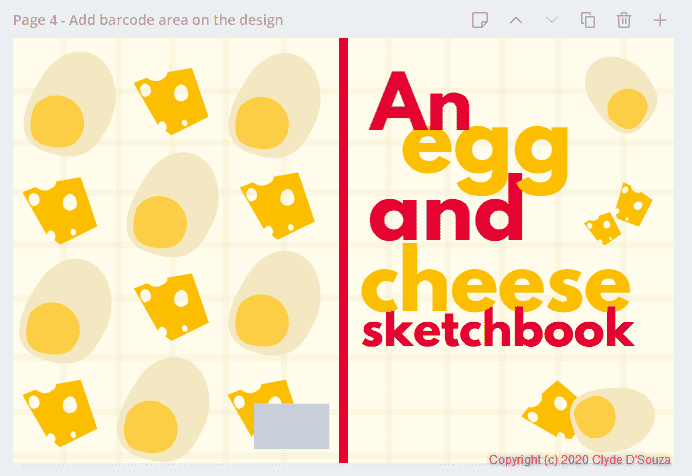
Step 3: Design your cover, then add the barcode guideline element.
Earlier, you would have downloaded your barcode file. Upload that image into Canva and then paste it inside the barcode box. I've updated the barcode box from grey to white and have also added a text element above the barcode image. The text is of a standard format — ‘ISBN: XXXXXXXXXXXXX'.
I've also added another white box and inside that, I've typed in the URL to my website.

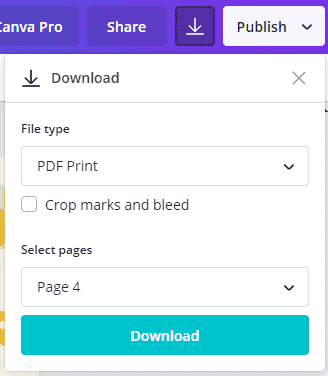
Once we're ready with our cover image, let's download it. Remember to download the file as a PDF Print file type instead of a regular PDF. This is useful when your file is being used for printing.
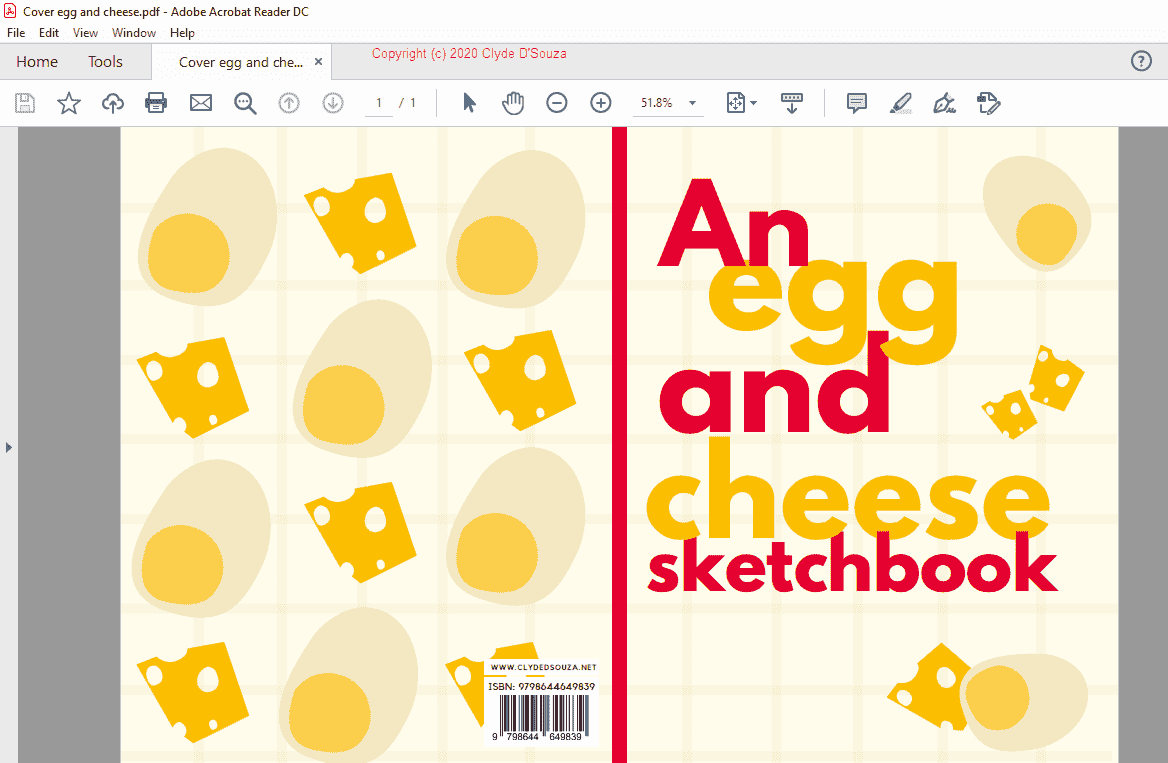
This is what my final downloaded PDF looks like.
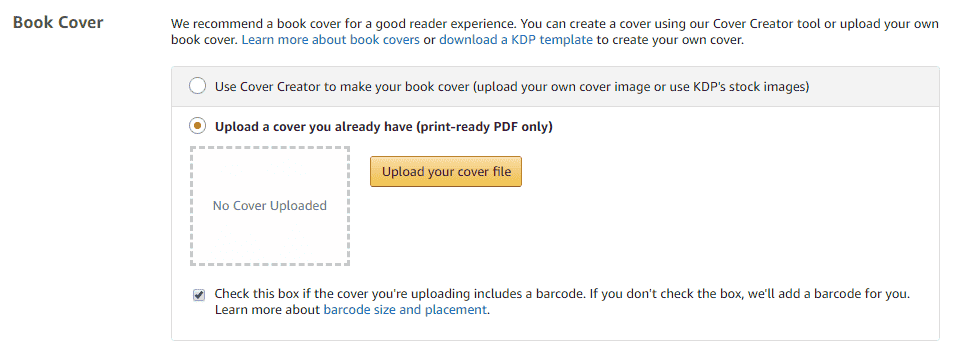
Back to the KDP portal, head over to the Book Cover section and click on Upload your cover file. Remember to also check the box that acknowledges the fact that your book cover contains the barcode and you don't need Amazon to automatically apply a barcode for you.
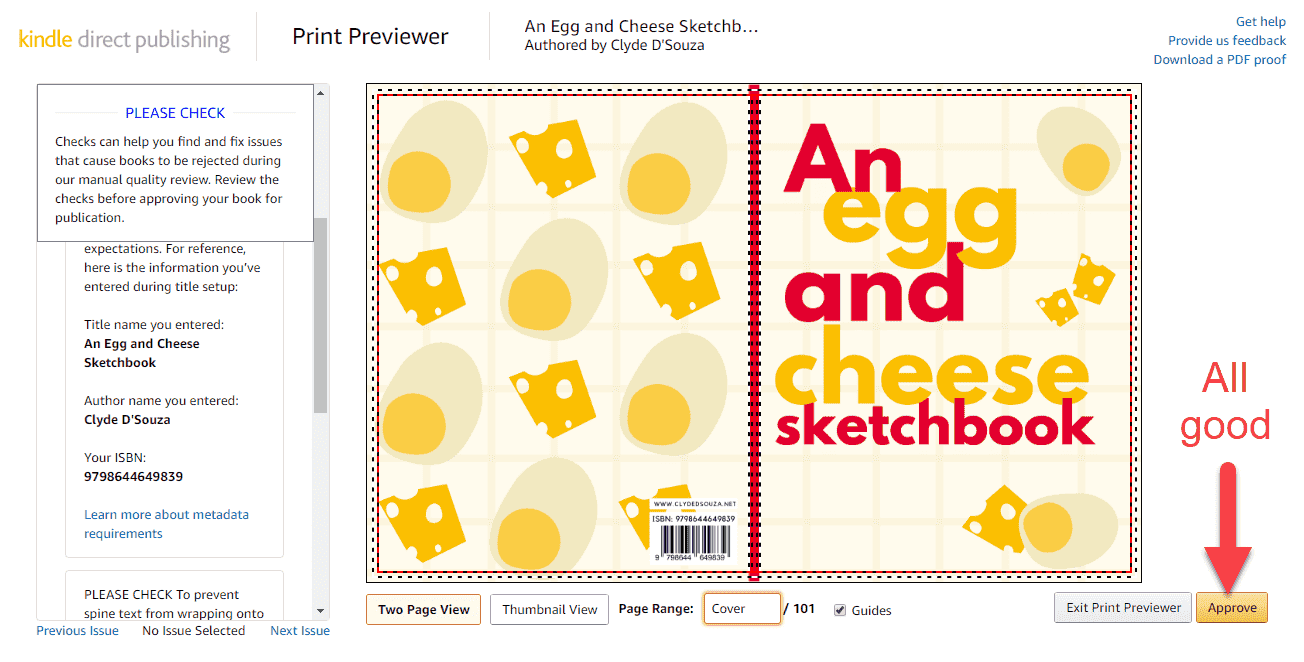
Book preview
Click the Launch previewer button to see what you're book might look like. The previewer also tells you if you have any formatting errors, like content overflowing outside the margin, for example. Review the meta information of the book and the contents of it. Click on Approve once you confirm it's all good.
Summary
Once you approve the book, you should see the summary of the book and the printing cost.
Now, let's proceed to the third section.
#3 Paperback rights & pricing
Territories
If you have the rights to distribute this book worldwide, then you would select that option or otherwise, you would have to individually select the territories you can distribute this book in. Read more about it in this KDP article.
Pricing and royalty
Here you can select your primary marketplace and set the list price of your book for that marketplace. The price for other 7 marketplaces is automatically calculated, but you have the option to edit the prices and even sell at totally different prices in all 8 marketplaces if you'd like. You can also change your primary marketplace.

For every sale, you get a percentage as royalty. The calculation for this (paperback books) is:
Royalty = 60% of list price - printing cost
Therefore, if the list price you entered is $12 and the printing cost that Amazon estimates is $3, then you would earn a royalty of $4.20 on every single sale.
Expanded distribution
Expanded distribution allows your book to be distributed to bookstores and other platforms to widen the reach of your book. Note, it does have a different royalty percentage. Unfortunately, low content books don't qualify for expanded distribution as mentioned here.
Publish
Finally, once you're happy with the date you've entered, click on the publish button. It may take up to 72 hours for your book to be available as it would have to be reviewed by Amazon.
Proof copies
You can order proof copies of your book which include a “Not for Resale” watermark on the cover and a unique barcode but no ISBN. You can purchase these copies at print cost, plus the additional shipping and taxes.
Author copies
Once your paperback is live, you can order author copies of your book. This is what people purchasing your book from the Amazon store would get. Author copies are also available to purchase at print cost, plus the additional shipping and taxes.
Proof v/s author copies: Proof copy is to physically check what the final copy might look like before it's live, but not really for external distribution. Author copies can be distributed to everyone else. For example, an author might want to distribute signed books to a few people on a book tour.
What's next?
After you click the publish button, your book will sit in the 'In Review' status for a while. Upon review, if everything looks good, it will proceed to 'Live' status. Read more about the statuses here.
Once the status is 'Live', you can share the link with your friends and family. Usually, it takes a few days for the Look Inside feature to be enabled on your book. Please check the timelines here.
Conclusion
Unlike a regular storybook, the amount of time and effort that goes behind each book is relatively very low. If you're using Canva to design the book cover and using free templates for the interiors, then the cost of producing a book is $0. To top it all, it's a great experience to learn how-to and go through the process of publishing a book, and definitely, a great feeling to see your books on the Amazon store. I would definitely recommend you to try creating either a low-content or a no-content book on Amazon.
That's it! Thanks for reading.