- Published on ·
- Reading time 4 min read
Manual Approval in GitHub Actions
Learn how to only deploy when someone has approved it
Share this page

The problem
If you've used GitHub Actions before or are wetting your feet in this technology now, you might wonder how to ensure that a deployment will only go through if it's been manually approved. Now this might be something that your organisation requires you to add, or just might be something that you're curious about. Either way, let's take a look at how to solve this problem in this article.
The set up
Let's say we have this simple GitHub Actions workflow file. It has two jobs: build and deploy. Both the jobs just print a console message. The entire workflow is triggered manually. As you might've noted, the workflow is intentionally kept simple for this article, but you can imagine that in a real-life scenario, you'd have many more steps in each job, and potentially multiple jobs as well. In a real-life scenario, you might also have different triggers for the workflow, like one triggered only when a change is pushed to the main branch, for example.
When I run this workflow, it executes the build and deploy jobs and marks them with green checkmarks. Needless to say, the deploy job doesn't wait for any approvals, which is what we expect, and strive to change with this guide.
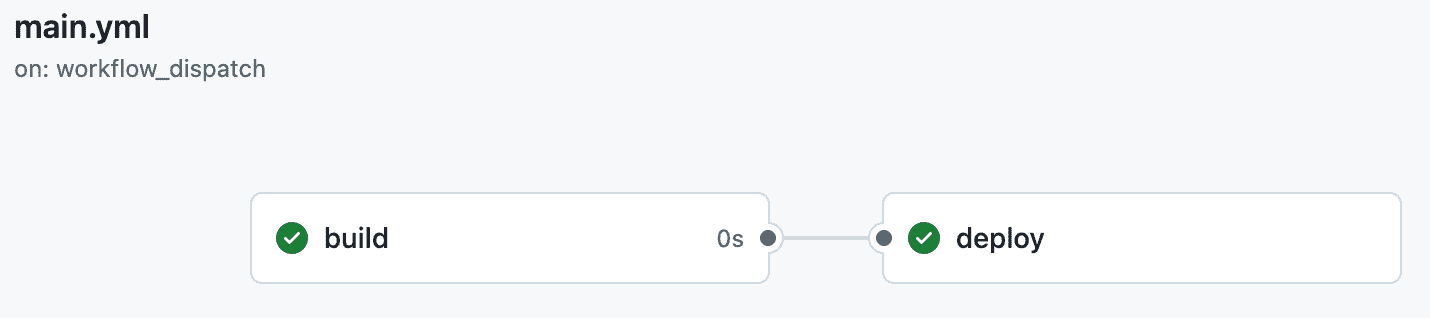
Image courtesy of the author
Since we've also set the environment for the deployment job as production, we also see this environment showing up on the Deployments page of the GitHub repository.
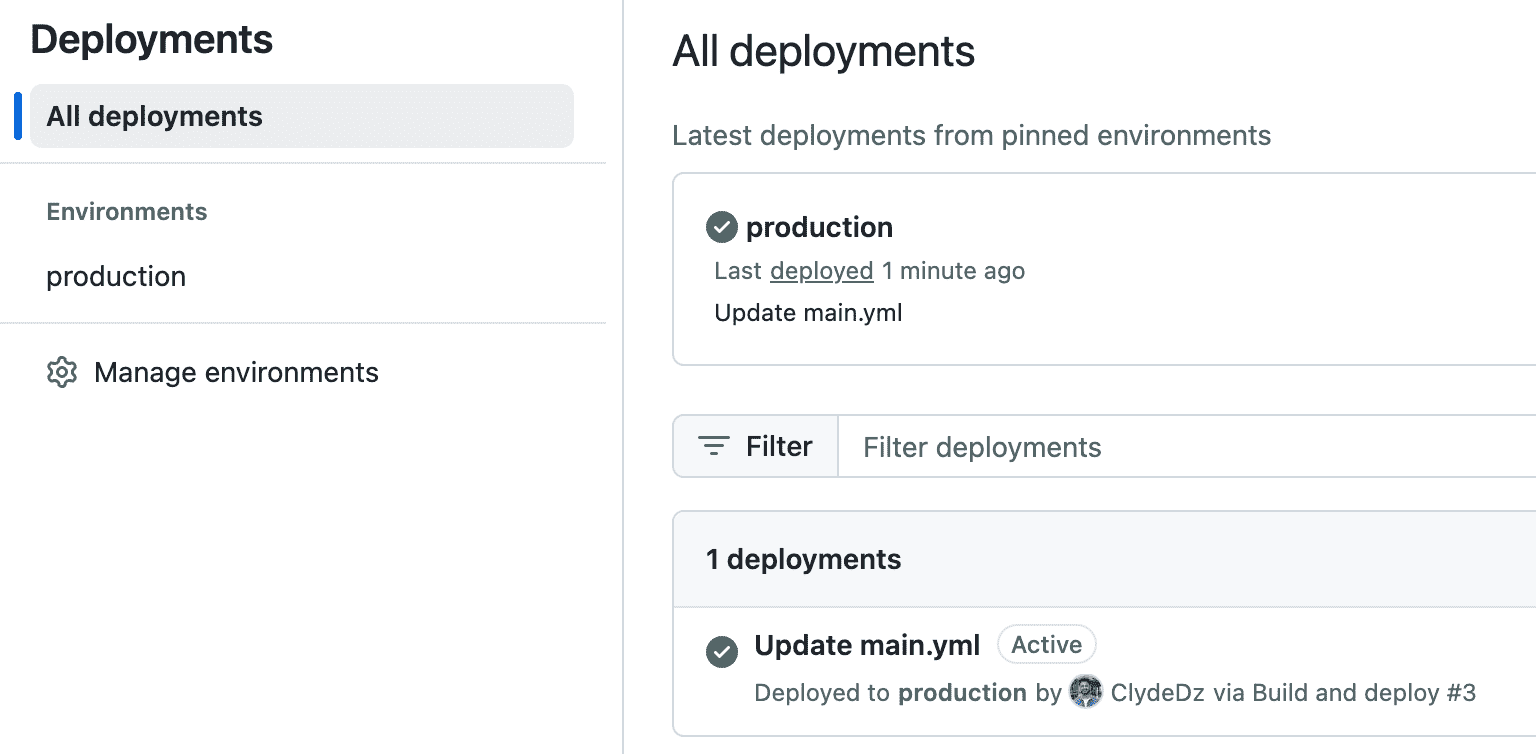
Image courtesy of the author
The solution
Interestingly enough, the solution doesn't involve you modifying the GitHub Actions workflow file further. Instead, you'd need to head over to Settings and then click on Environments. From that page, you can click the environment you want to add this restriction to. For this article, we'll be clicking on production as that's the environment I have.
Now, what you'd want to do, is check the Required reviewers setting and add the required teams or individual people who would approve deployments to that environment. As you might note from the screenshot below, I've added myself.
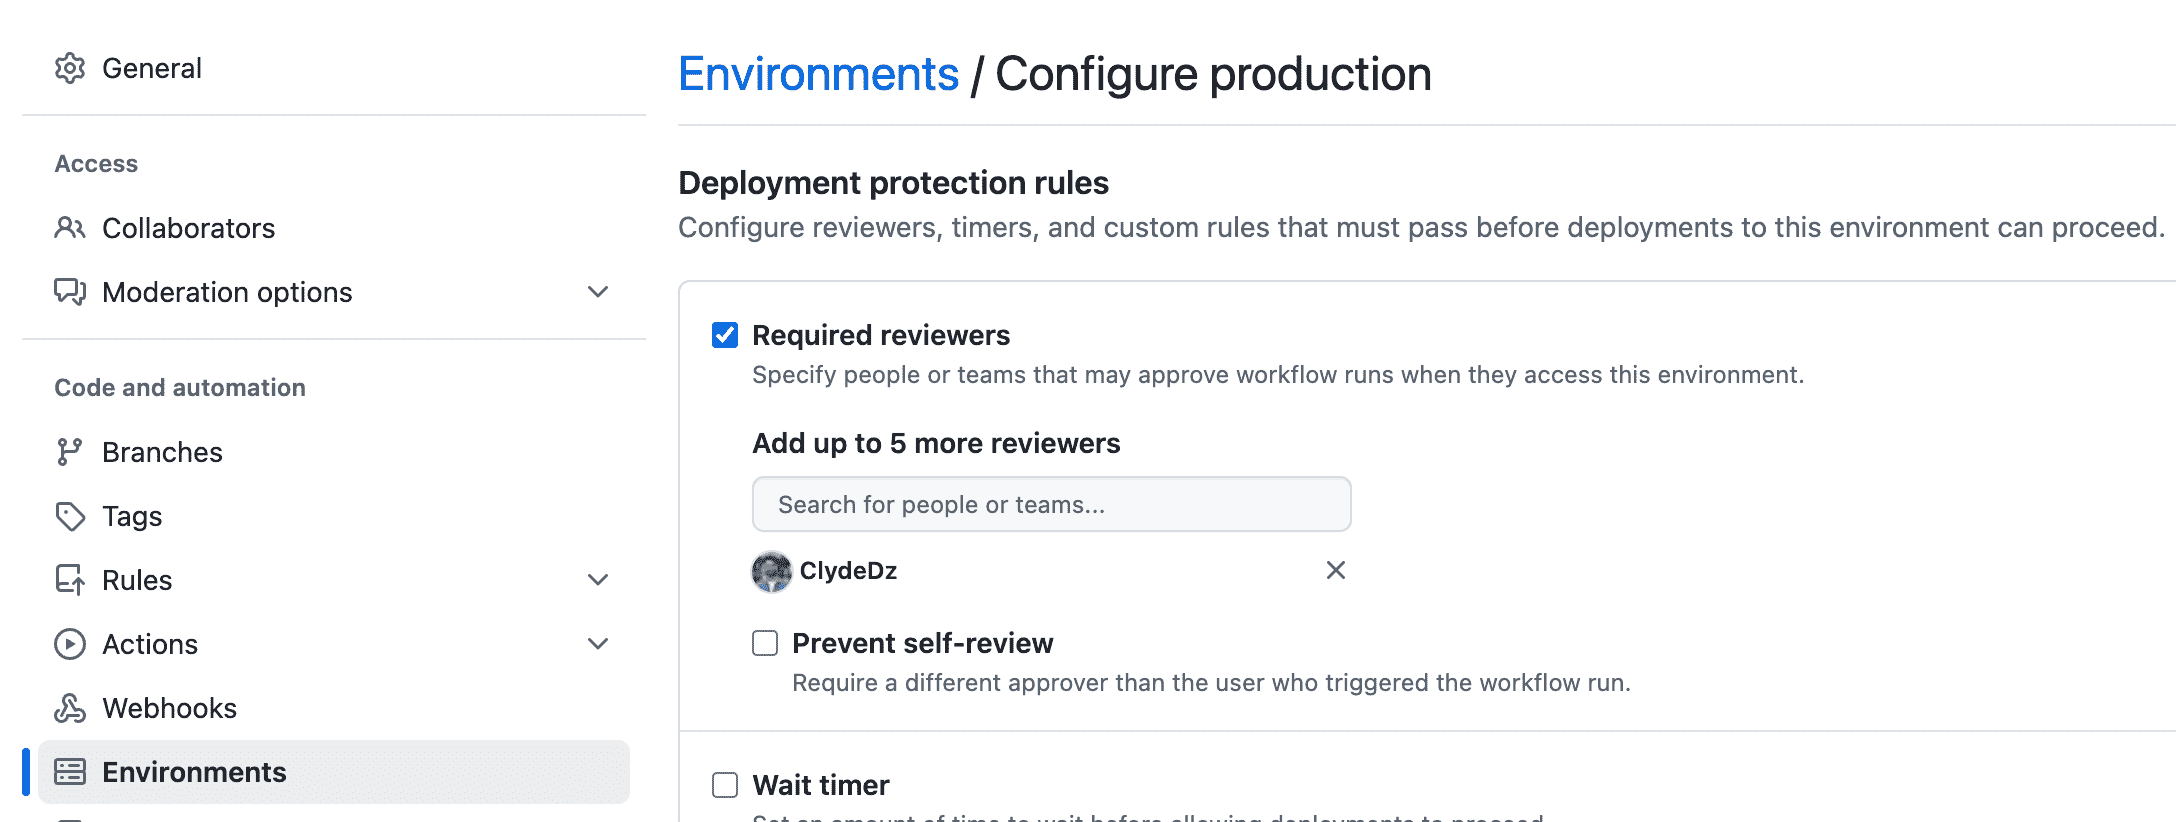
Image courtesy of the author
After you've done that, don't forget to click on the Save protection rules button to save your changes.
Now, when we run the GitHub Action, you'll see that the deploy job hasn't been automatically processed yet. Instead, we see a message production waiting for review and the Deployment protection rules section below also lets us know that we're waiting for approvals. The yellow banner is visible only to approvers because they need to review the deployment and either approve or decline it.
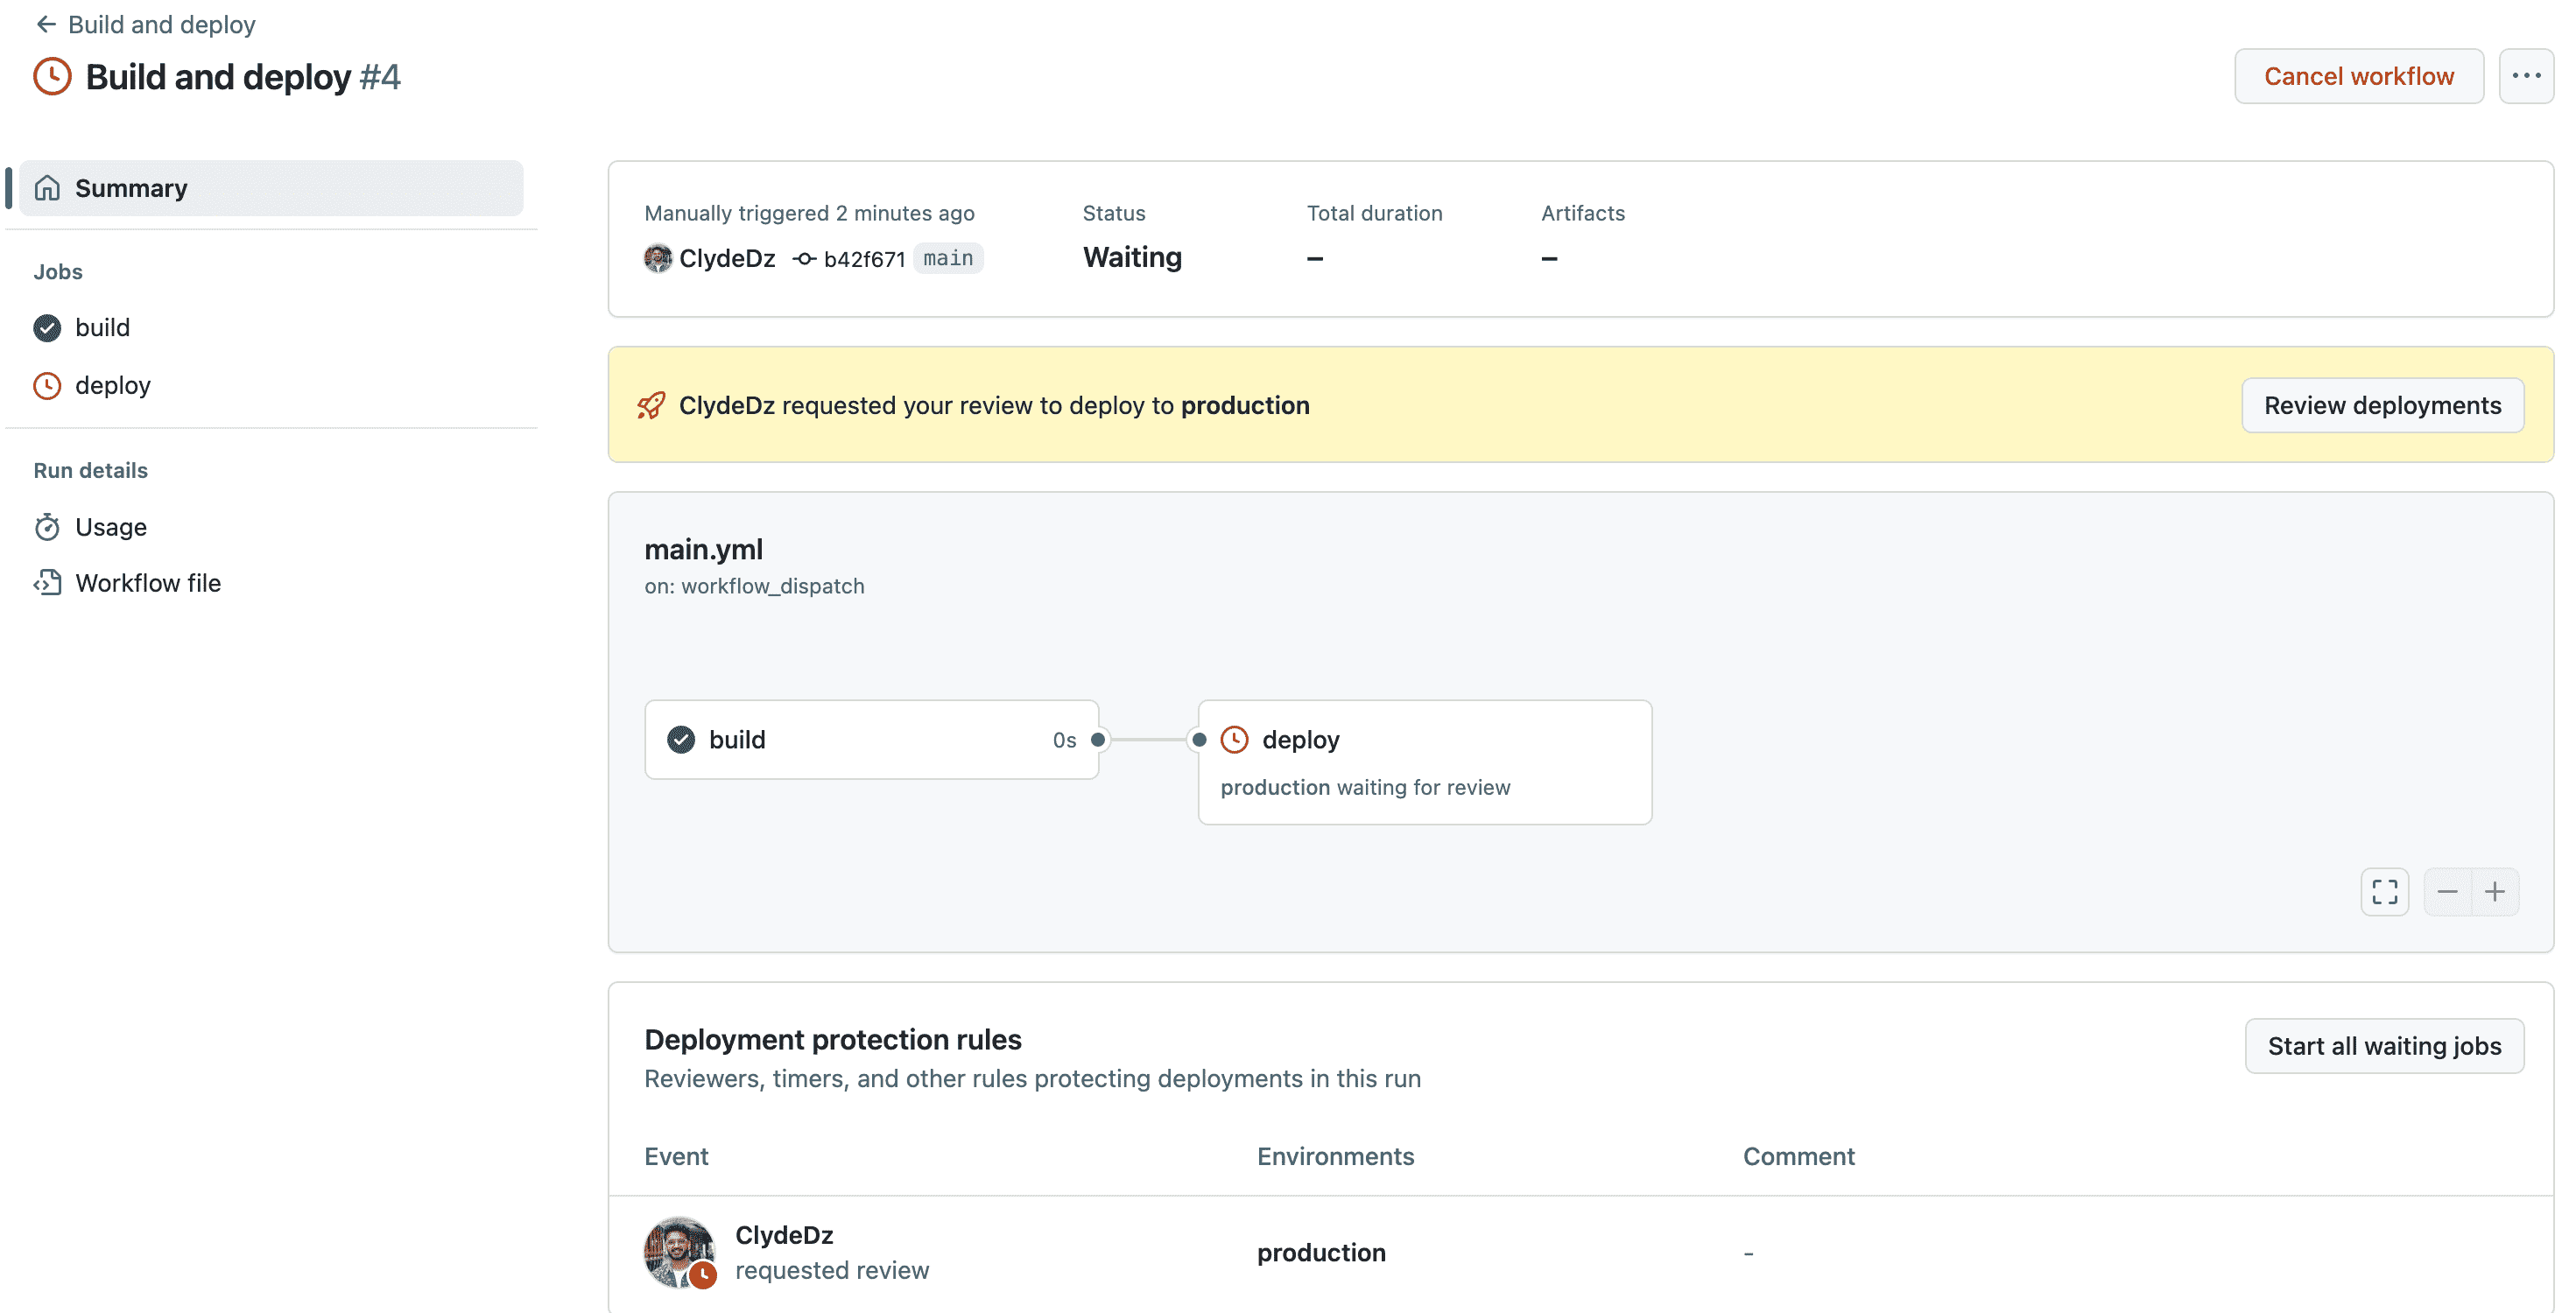
Image courtesy of the author
If I click on the deploy job, I see the same message in the console.
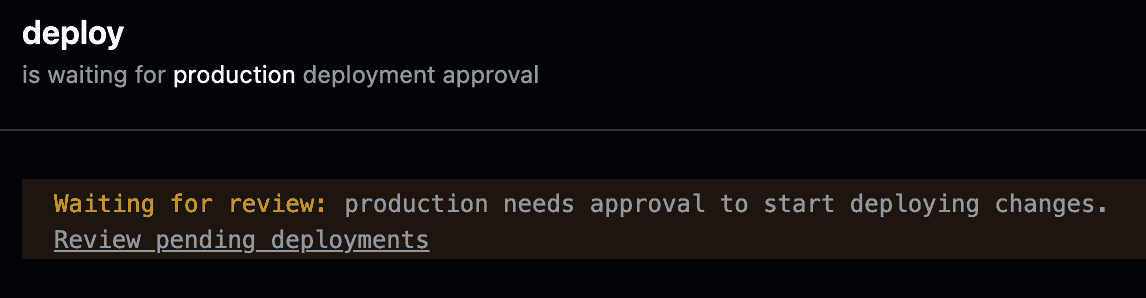
Image courtesy of the author
If I, as the approver, click on the Review deployments button from the yellow banner from the previous screenshot or the Review pending deployments link from the console message as shown in the screenshot above, I'll get this dialogue, as pictured below, that lets me check the environments I want to approve and also allows me to add a comment. I can then either click the Approve and deploy button to let this pass through or click the Reject button to decline this deployment.
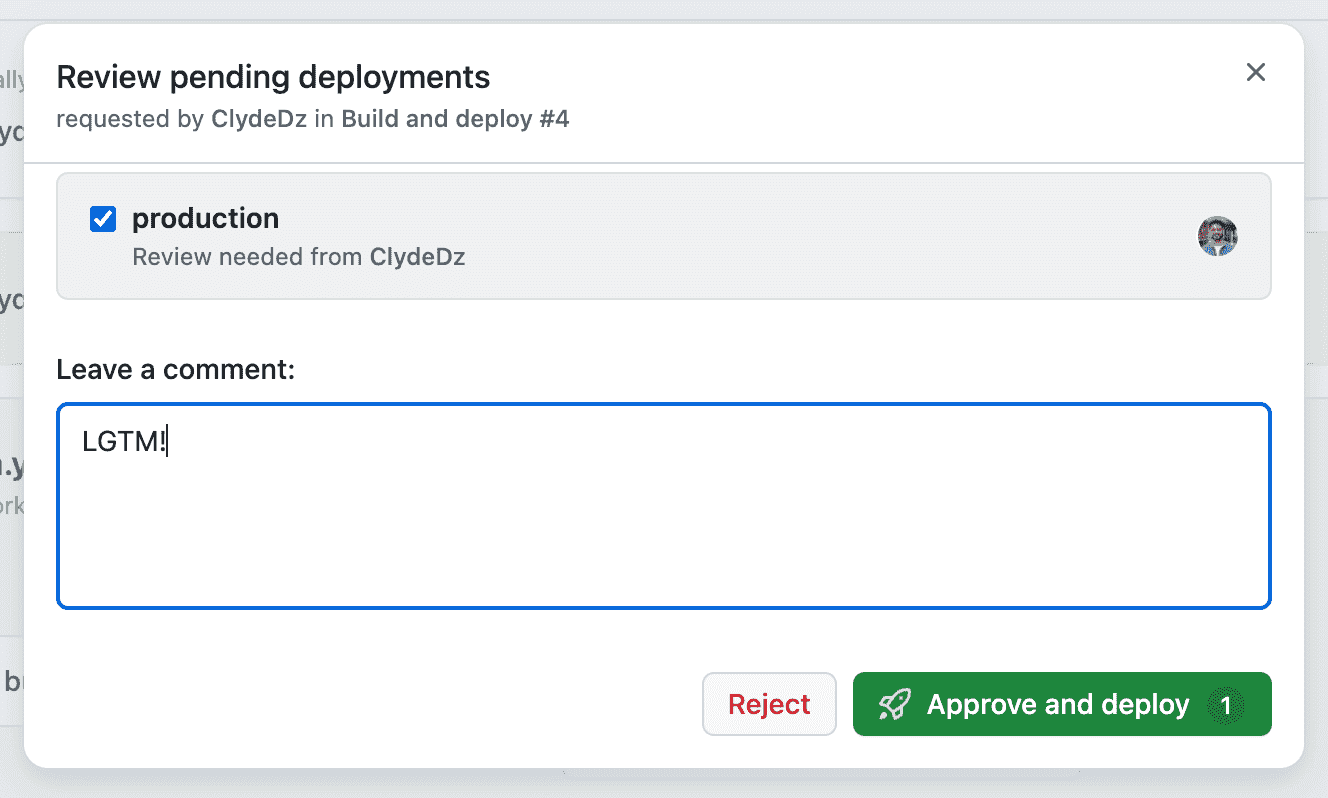
Image courtesy of the author
Back in the Summary page, the Deployment protection rules section will get updated with the approver and their comment.
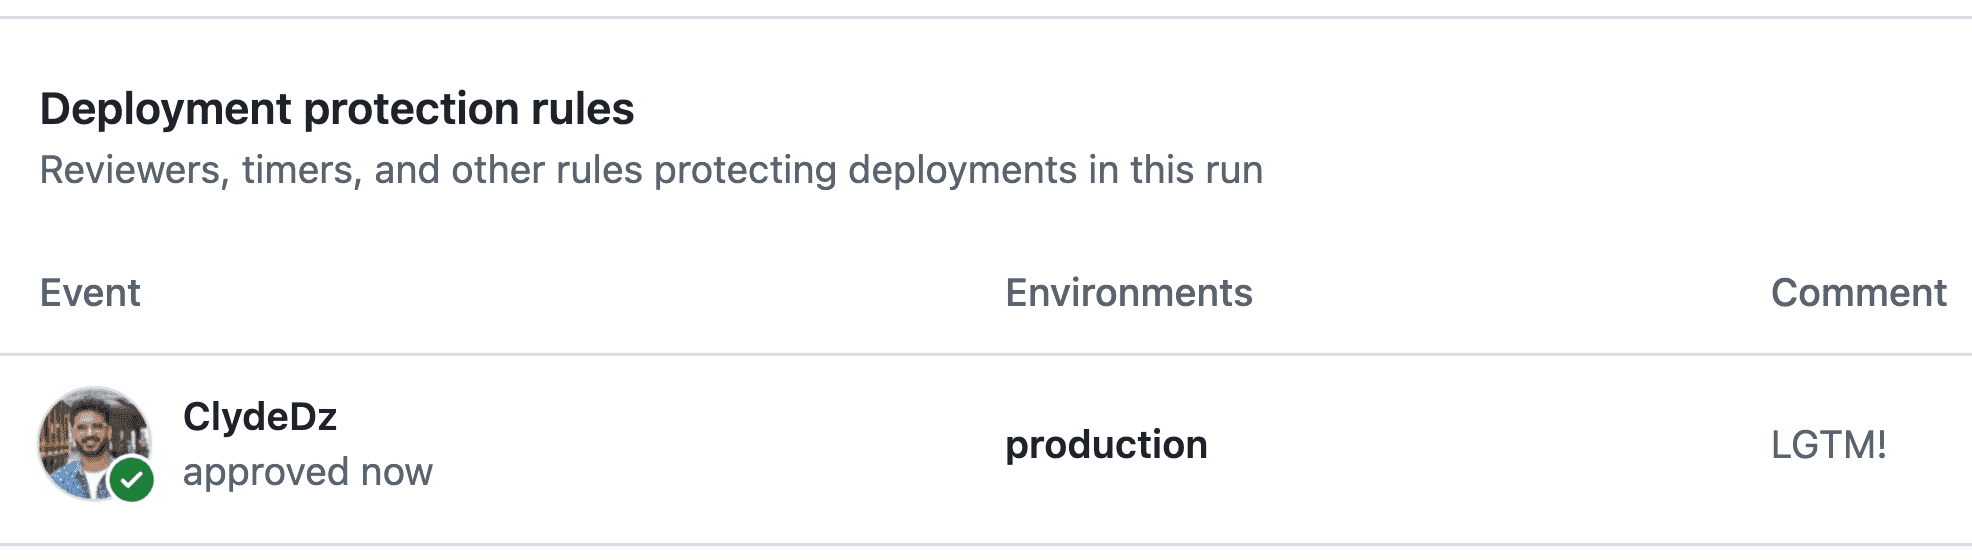
Image courtesy of the author
An important note is that adding multiple people and teams to the Required reviewers list doesn't mean that approval is required from ALL the members. In reality, it's either ONE of the reviewers from this list that can approve the deployment and it will be accepted.
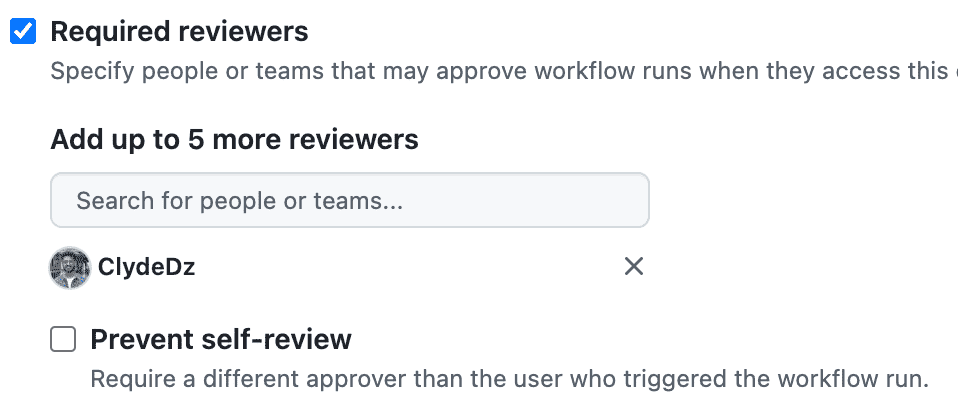
Image courtesy of the author
You can also consider checking the Prevent self-review setting so that the person triggering the workflow can't approve the deployment. This might be useful if you want to be extra cautious or your organisation requires you to do so.
You may refer to this GitHub repository which hosts the GitHub workflow file used in this article, although you might not be able to see the settings applied, you may still be able to browse to the Actions tab and see the summary pages for the actions yourself.
That's it! Thanks for reading.