- Published on ·
- Reading time 13 min read
Creating a Short URL Service Using Cloudflare Workers
Deploy serverless code instantly across the globe
Share this page

Introduction
Have you ever used a short URL service like bitly or something similar and wondered how it works? Better yet, would you like to create one for yourself? If you've answered yes to both these questions, then you're in the right place. In this article, we'll look at creating a short URL service using Cloudflare Workers.
What are Cloudflare Workers?
Cloudflare Workers allows you to deploy serverless code to Cloudflare's edge network which means that your code will be available instantly from anywhere across the globe. You don't have to worry about scaling it and the cost to run your code is super cheap. Cloudflare Workers comes with a global, low-latency key-value data store called Workers KV. In this article, we'll be using Workers KV along with Cloudflare Workers.
Step #1: Sign up for Cloudflare
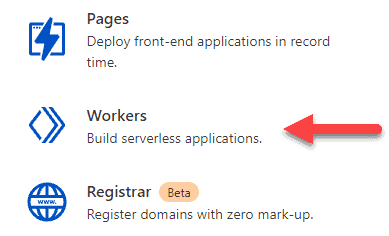
Visit cloudflare.com and sign up for a free account. Once you've verified your email address and gotten access to your dashboard, you may see a message to add a site — you don't need to add a site, just skip to the dashboard page and click on Workers.
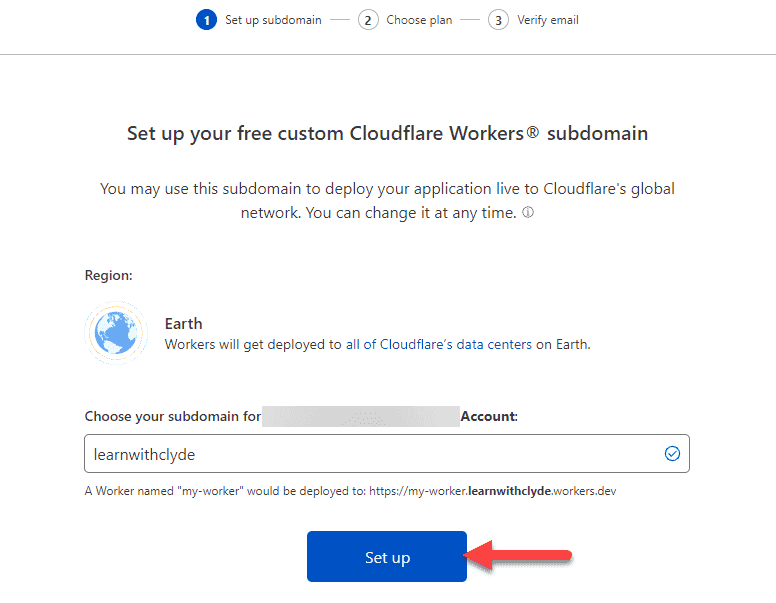
Since this is your first time using Cloudflare Workers, you'll be asked to set up a subdomain. This subdomain name is unique to you and will identify all Workers deployed to your account. Enter a suitable subdomain and then click on Set up to proceed to the next step.
In the next step, we'll continue with the free plan since we're going to use this for learning purposes only. In the final step, verify your email and then you're good to go.
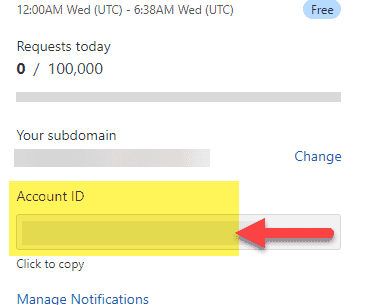
From the Workers dashboard page, you won't see any Workers listed because we haven't created any. For now, just copy the Account ID which should be visible in the right panel.
Step #2: Set up your development environment
We'll be using the Wrangler CLI for various development tasks, so if you haven't already, please install the CLI tool on your local machine by following this official Cloudflare guide.
Login to your Cloudflare account using the Wrangler CLI tool using the command wrangler login. It's recommended to open up a command prompt with administrator privileges.
This should open Cloudflare in the browser and you might require to authorize Wrangler. Cloudflare will show a message when it's alright to close the page. Back in the console, you should see a message telling you that everything was successfully configured.
Step #3: Generate some code
In a local folder, run the command wrangler generate shorturl https://github.com/cloudflare/worker-template to generate some code based on a template from Cloudflare's GitHub repository.
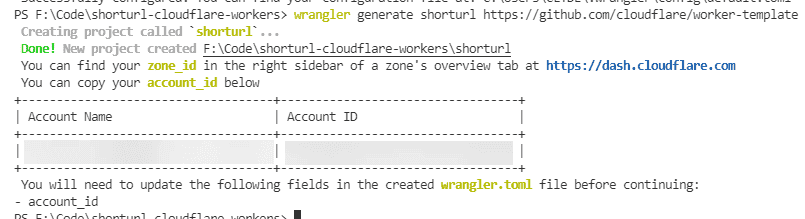
As instructed in the console output, we need to update the wrangler.toml file and add the account ID to that. As per this comment, it's ok to commit the wrangler.toml file to source control. The information contained in this file is not sensitive.
name = "WORKER_NAME"
type = "javascript"
account_id = "YOUR ACCOUNT ID"
Finally, if you run the command wrangler dev, you should see the following output.
Step #4: Get a short URL and redirect
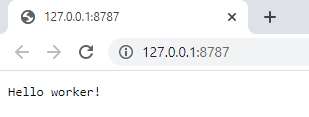
In the index.js file, replace the handleRequest() method with the code snippet below. We're fetching the entire request URL from the object received, then getting the pathname from that, and then simply redirecting the user to example.com with the same pathname suffixed. For example, heading over to our development Worker URL 127.0.0.1:8787/abc will redirect the user to https://example.com/abc. If no pathname is supplied, then a simple text message is printed in the browser. Give this a test using the command wrangler dev.
const base = 'https://example.com'
const statusCode = 301

async function handleRequest(request) {
  const url = new URL(request.url)
  const { pathname } = url
  const destinationURL = base + pathname

  if (pathname === '/') {
    return new Response('Hello worker!', {
      headers: { 'content-type': 'text/plain' },
    })
  }

  return Response.redirect(destinationURL, statusCode)
}
Step #5 Map the path with a static set
The next step is to make it slightly more dynamic and in line with how the final storage would look like. We've added the getRedirectURL() method that simply gets the redirect URL based on the key supplied. In the handleRequest() method, we've modified a line to use the getRedirectURL() method.
const urls = {
  google: 'https://www.google.com',
  facebook: 'https://www.facebook.com',
}

function getRedirectURL(pathname) {
  return urls[pathname] || '/'
}

async function handleRequest(request) {
  // Same as before

  const redirectURL = getRedirectURL(pathname.replace(/^\//, ''))
  if (redirectURL === '/') {
    return new Response('Not a valid identifier', {
      headers: { 'content-type': 'text/plain' },
    })
  }

  return Response.redirect(redirectURL, statusCode)
}
So far we've got a static list of short URLs and their redirects. Now it's time to make it dynamic.
Step #6: Setting up KV storage
Rather than storing a static list of the keys and the corresponding websites it redirects to, we'll be using Cloudflare's KV storage.
Let's start by running the command wrangler kv:namespace create “SHORTURLS” where SHORTURLS is the name I used for my KV namespace. This commands prints a message in the console that instructs to add the KV configuration to the wrangler.toml file.

Step #7: Seeding the KV storage
To quickly test our application out, let's use the following command to add one record into the database.
wrangler kv:key put --binding=<BINDING NAME> “<KEY>” “<URL>"
In the repository I'm working on, I've updated the command to wrangler kv:key put --binding=SHORTURLS “twitter” “https://twitter.com/clydedz". If all goes well, you should immediately see a success message.
Now, if you try to run the command wrangler dev you should see an error message that might look something like this:
Error: In order to preview a worker with KV namespaces, you must designate a preview_id in your configuration file for each KV namespace
you'd like to preview.

After reading this useful GitHub answer, it became clear that all we needed was a preview environment. When we created the namespace earlier, it was associated with your production environment. So, when you test it out using wrangler dev, it doesn't let you manipulate your production KV storage from your development environment.
Step #8: Setting up a preview KV environment
To fix this, we'll need to repeat the KV creation steps exactly as before, but this time we'll add the argument --preview indicating that we need a preview, i.e. development instance created.

Because we entered the same KV namespace name, notice how the primary id is still the same original one, and in addition to that, we've been assigned a preview_id.
If you try to run the application now, the Worker will work but heading over to /twitter will not redirect you to the Twitter URL. The reason for this is that we've only seeded our production environment of the KV namespace. Now that we're connecting to preview, we'll also need to seed this preview namespace with a test record. I'm going to run the following command as we did before, but this time I'm going to add the --preview argument.
wrangler kv:key put --binding=SHORTURLS “twitter” “https://twitter.com/clydedz" --preview.
Step #9: Retrieve values from KV storage
We'll now update the getRedirectURL() method to use our KV namespace to get the value instead of a local static collection. Note, we've writtenSHORTURLS.get() to match our binding name which is named SHORTURLS. So, if your binding name was XYZ, then you'd update this code to XYZ.get(). I've also updated this method to be asynchronous.
async function getRedirectURL(pathname) {
  let value = await SHORTURLS.get(pathname)
  return value || '/'
}
Finally, let's run the application locally to test it out. As you can see in the GIF below, it now works as expected.
Step #10: Automating deployments
We wouldn't want to manually deploy our Cloudflare Worker every time we make changes now, would we? For automated deployments, we'll take a look at GitHub Actions since my repository is already source controlled in GitHub.
GitHub workflow file
A GitHub workflow file is a YAML file that allows you to configure your build and deploy pipeline via code. I'll explain what we've used for this project, but if you're keen to read more about GitHub workflow, please check out their official documentation here.
Let's start by adding the below code snippet to a file called build-deploy.yml and store this file in the .github/workflows/ folder.
name: Deploy Cloudflare Worker

on:
  push:
    branches:
      - main

jobs:
  deploy:
    runs-on: ubuntu-latest
    name: Deploy shorturl worker
    steps:
      - uses: actions/checkout@v2
      - name: Publish
        uses: cloudflare/wrangler-[email protected]
        with:
          apiToken: ${{ secrets.CF_API_TOKEN }}
          workingDirectory: 'shorturl'
We start by giving it a nice descriptive name using the name keyword. Then, using the on keyword, we're configuring this pipeline to run every time code is pushed to the main branch.
In the last section of this file, we're using the jobs keyword to define a job which is nothing but a batch of steps that will be executed. The keyword deploy is just an identifier for this job and could've been named anything else, too. The keyword steps contains the individual steps that will make the deployment happen.
We're using a GitHub Action from the marketplace called actions/checkout to check out the code from our Git repository. Next, we're using cloudflare/wrangler-action provided by Cloudflare to deploy our Worker to Cloudflare. Instead of hardcoding the API token, which is required for this step to authenticate against our Cloudflare account, we're using the GitHub secret variable called CF_API_TOKEN. The prefix secrets and the curly braces around it just a syntax for accessing GitHub secrets. Don't worry, we'll look at adding this secret in the next step.
We're using the workingDirectory keyword to set the working directory of our Cloudflare Worker to a subdirectory (relative to the root directory) because the code for our Worker isn't in the root directory, which is usually the default setting — more on this decision below.
Cloudflare token
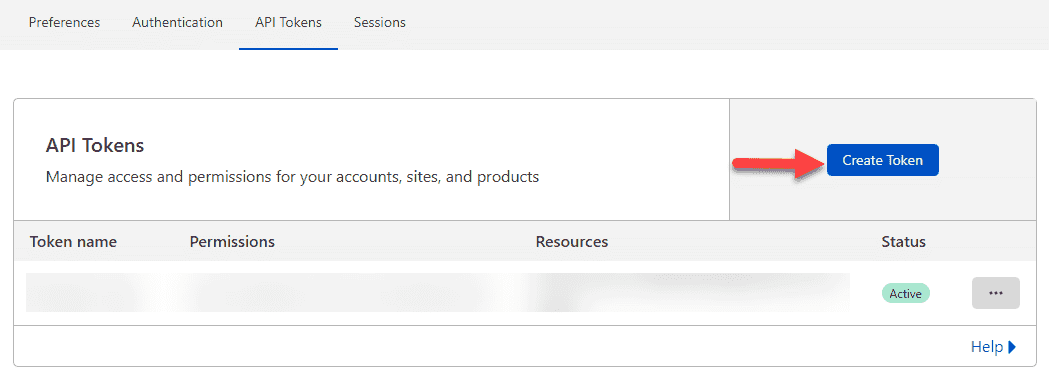
Navigate to the API Tokens page in Cloudflare and then click on the Create Token button.
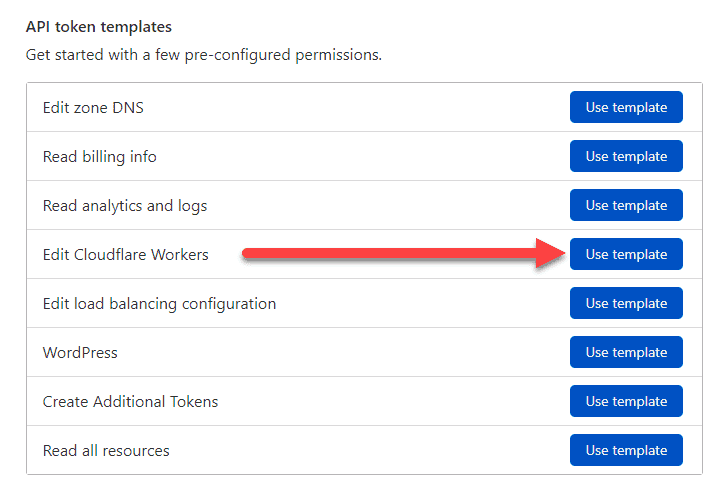
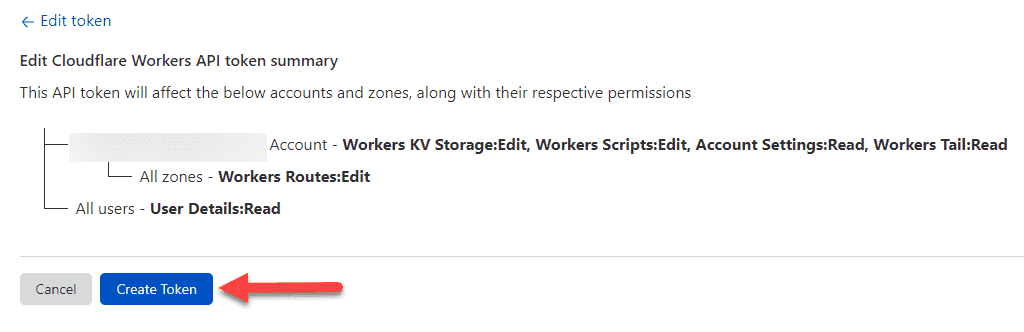
From the API token templates page, we'll click on the Use template button beside the Edit Cloudflare Workers line item.
On the next page, from the Account resources and Zone resources dropdowns, select your account (the email address should show up in these dropdowns) from the dropdown. If you are a user of multiple Cloudflare accounts, you'll need to be careful to select the right account.
Continue to the summary, then click on the Create Token button. Copy the token and save it securely.
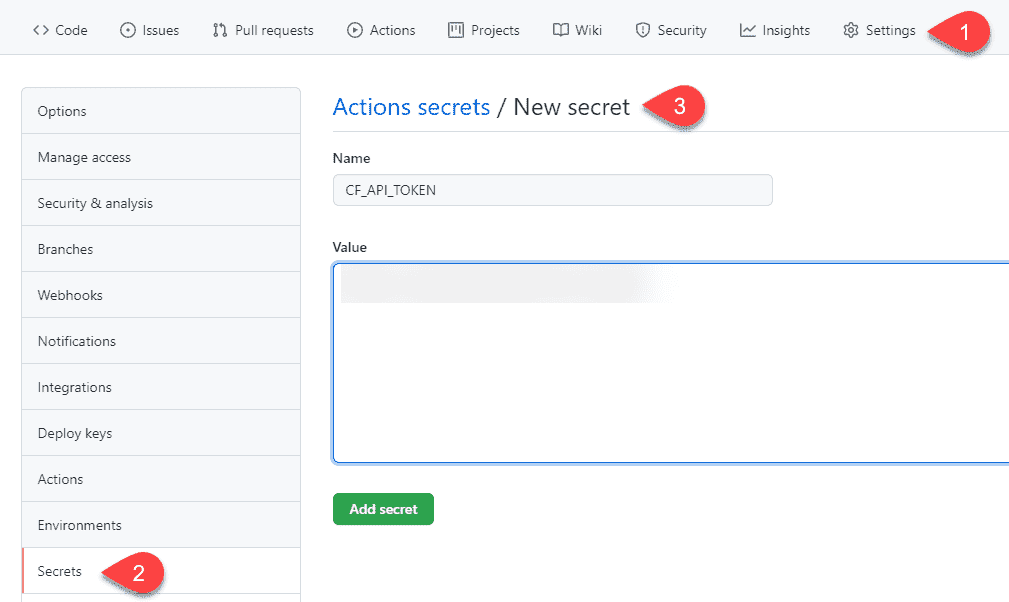
Add secret in GitHub
Since we've used the variable CF_API_TOKEN in the Workflow file, let's add a secret of the same name in GitHub. Click on Settings, then click on Secrets and then New secret. Type the secret variable name CF_API_TOKEN and in the Value field, enter the Cloudflare API token we generated earlier. Click on Add secret button to save these changes.
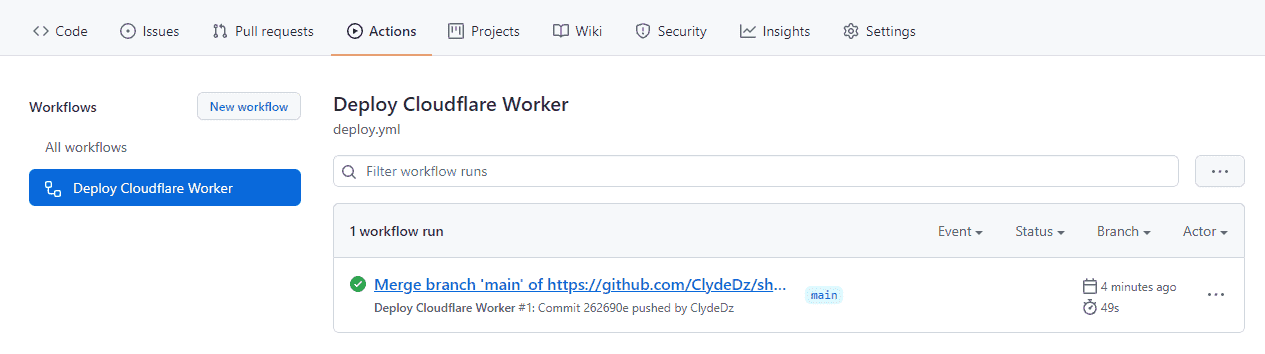
Step #11: Final checks
Now that we've got all the items in place, don't forget to commit and push the changes to your Workflow file. If everything has been set up well, you should see a successful run in the Actions tab in GitHub.
Now, if you head over to the Workers page in your Cloudflare account, you should see the Worker you just deployed pop up on the screen.
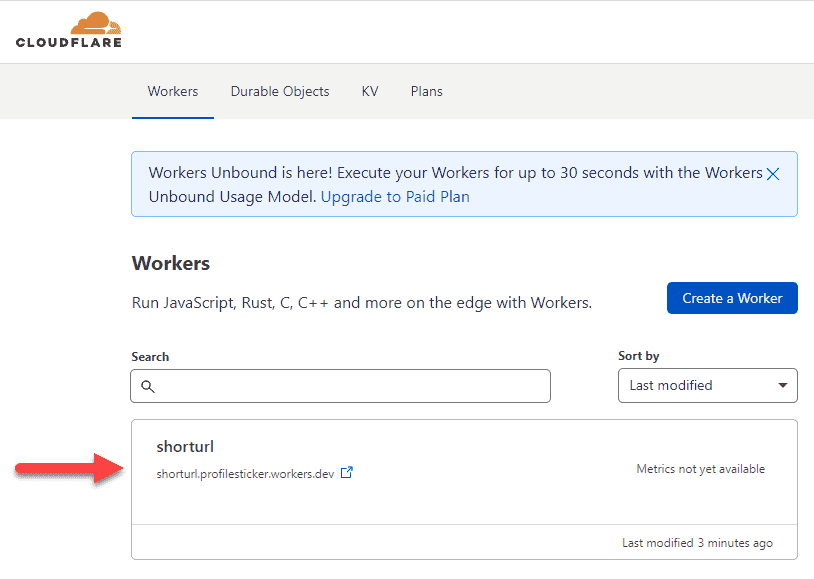
Head over to the Worker URL and test if the URL redirection works. We can still test the <URL of your Worker>/twitter short URL since we seeded that data earlier.
What's next?
Unit testing
We didn't look at writing unit tests and setting up test coverage for brevity. However, in a real-life solution, you'd want to consider unit testing your code and also include the required steps in your CI/CD pipeline.
Adding more Workers
In the article above, we only looked at a Worker that redirects us to the destination URL after we supply it with a short URL. If you're trying to create a full-fledged short URL service, you'd also want to create one that allows us to create a new short URL mapping that will act as the backend, and potentially a microservice that will help post analytics for every hit on the short URL and also fetch these analytics back.
Handdrawn diagram created by the author
Source controlling multiple Workers
You don't have to create different Git repositories to host each Cloudflare Worker. You can create a monorepo for all your Workers and have subfolders with contents for each Worker. This works great if you're sharing code between different workers, so you don't end up repeating it.
Handdrawn diagram created by the author
Bundling into a single JavaScript file
We've also written all our JavaScript code in a single file which isn't ideal. Out of the box, we cannot import another JavaScript file into our Worker's index.js file. To get around this, we can decouple the source code from the final generated Worker JavaScript file. What I mean by that is (also illustrated above), we maintain our source code for a Worker in a folder called src, for example, and then run a process like webpack to bundle and generate a single JavaScript file into a destination folder, let's call this dist. The contents of this destination folder are what we can then publish to Cloudflare.
Custom domain
If you're building a full-fledge solution, you may also be looking at setting up a custom domain name for your Workers — this is indeed possible and your final solution might look something like the diagram below, using bit.ly as the domain name for reference.

Handdrawn diagram created by the author
Source code
If you'd like to see the full source code for this project, it's available on GitHub. In the same repository, you'll also find a PowerShell script that contains all the commands we've used above.
That's it. Thanks for reading.